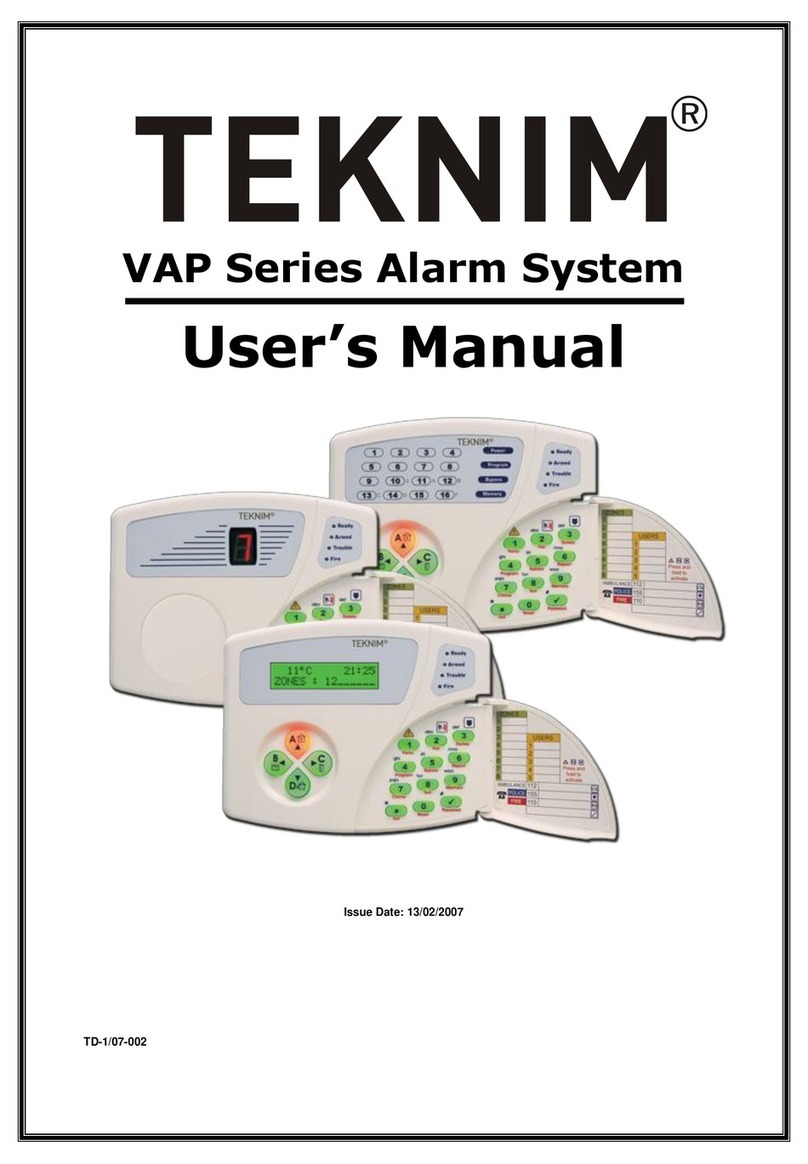
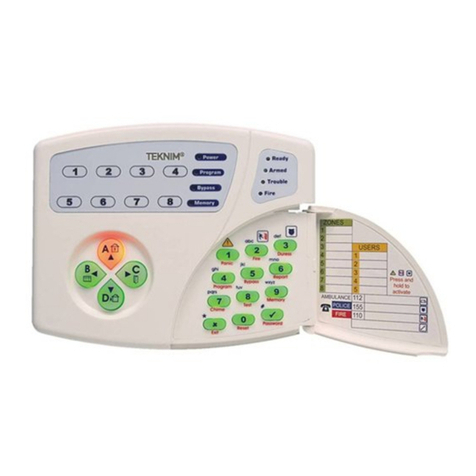
Teknim PARS Series User manual

PARS SERIES
Alarm Panels
V1.1
Release Date: 20.09.2019
TEKNİM PARS SERIES INTRUDER ALARM CONTROL PANELS
USER MANUAL

TEKNİM PARS SERIES ALARM SYSTEM USER MANUAL 1
IMPORTANT WARNINGS
Read this manual carefully before operating the devices and save them for later use. Observe all
warnings and cautions in this manual. Follow all operating instructions, respectively.
Keep devices away from water and moisture.
Install the unit on a solid surface to avoid damaging the device and / or the environment because
the device is not installed securely.
ENVIRONMENTAL CONDITIONS:
Do not operate the system in extremely hot and cold conditions except under the following
conditions.
Temperature : Between -20°C and +70°C
Humidity : 0… %90rH
POWER:
Only use the device with the voltage specified in this manual. If you are not sure about the supply
voltage of the device, please contact your dealer or the manufacturer.
GROUNDING AND POLISHING:
Make sure that the grounding is working properly before power up the device. Make sure the supply
voltage is properly connected.
POWER CABLE PROTECTION:
Protect the power cable from crushing and breaking.
POWER LINE:
Use a separate line from the power line of devices such as lighting lamps or power circuits and keep
them away from other devices.
OVERLOAD:
To avoid risk of electric shock or fire, do not connect extension cords and sockets to devices that
may consume high power.
LIQUID:
To avoid the risk of fire and electric shock, do not allow any liquid or other objects to short-circuit
the device.
SERVICE:
Do not attempt to repair the device by yourself, you may be exposed to electric shock if you open
the device box.
In the event of any failure, contact your dealer or authorized service provider. Technical intervention
to the device must only be performed by qualified service personnel.

TEKNİM PARS SERIES ALARM SYSTEM USER MANUAL 2
FAILURE CONDITIONS REQUIRING SERVICE:
If you face with any malfunction or in the following cases, contact your authorized service.
✓When the power cord or plug is damaged,
✓When any liquid flows into the device or any object falls in it,
✓When exposed to water or rain,
✓If the device has been dropped or the enclosure has been damaged,
✓If there is a noticeable change in performance,
✓If the device does not operate normally according to the operating instructions it may cause
other malfunctions.
SAPRE PARTS:
Make sure the service technician is using genuine or equivalent parts to avoid the risk of fire, electric
shock, or other malfunction if the repair is to be performed by replacing parts.
SECURITY CHECK:
Request a service from your dealer to check that the system is working properly and safely.
GENERAL
Thank you for choosing the new TSP series alarm system. TSP Series Alarm Panels are developed to
provide you with reliable protection and automation control. Read this manual carefully before using
the device and carefully listen to the instructions. Keep the user's manual in a safe place for future use.
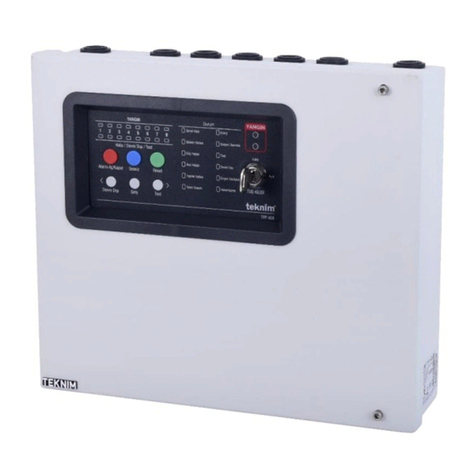
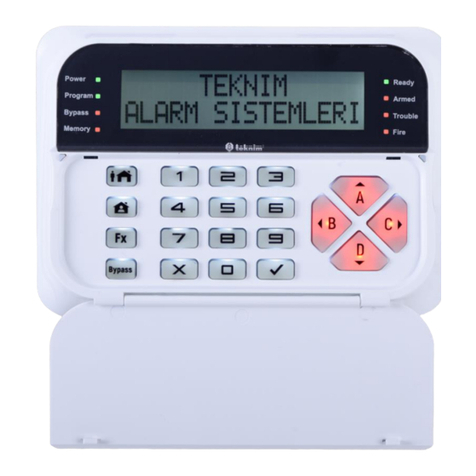
Your system contains a control panel (TSP-5314 –TSP5324 –TSP-5208), a Keypad (TSK-5710 –TSK-
5718) detectors, sensors, sirens etc.
In the panel box; The main control board of the system, transformer, fuse and dry battery are
available. Do not allow any person to open the box and interfere with the system, except your installer
company. All keypads let you check the system's functions and view the current status of the system.
SYSTEM INFORMATION
User Types and Authorities
TSP Series Alarm Systems have 5 user groups. These are;
1. Master User: Master user can arm and disarm the system and can change; date-time, user
phone numbers, user codes and user authorities.
2. Standard User: Can arm and disarm the system.
3. Guess User: Can arm and disarm the system in a certain time period or can me select as one-
time use.
4. Engineering Code: It is the password used by the authorized dealer who installs your system
by entering the Engineering program and making the settings of your system. It is not possible to
arm / disarm your system or access user passwords with engineering password.
5. Duress Code: This password is used for situations where threatened people are required to disarm
the system. It will disarm the system, but the information that the system is disarmed under threat is
still will be delivered to Alarm Receiving Center.

TEKNİM PARS SERIES ALARM SYSTEM USER MANUAL 3
System Capabilities
Your system is not only a simple alarm system, but also an automation system that can perform
basic on / off functions. It is possible to control your electrical devices using the programmable output
(PGM).
For Example;
✓Your garage door may close automatically when you armed the system.
✓Your garden irrigation system can be activated at a predetermined time.
✓In the event of a fire alarm, your alarm system can be activated automatically by the fire
extinguishing system.
✓You can switch between On/Off your heating system.
Please contact with your authorized installer for the necessary settings to enable and use such
applications.
Operation of the System
The meaning of the audible and visual warnings related to the operation of your alarm system is as
follows.
Audio Signals;
When you perform an operation on the system via keypad, you will hear a sound (beep) which means
confirmation or rejection.
Confirmation Tone: Keypad will emit two short "beep" sounds, which means confirmation, in
any successful operation or when the system is in a new mode.
Reject Sound: Keypad will emit a long "beep" sound when it is in an incorrect operation or when
the system has changed to the previous mode.
Visual Signals;
LED and LCD keypads have status notification lights to indicate the current status of the system or
any information. What these notification lights mean is described in “Keypads” chapter.
The LCD Keypad can also display all information about the system in writing.

TEKNİM PARS SERIES ALARM SYSTEM USER MANUAL 4
KEYPAD
TSK-5710 LCD KEYPAD
TSK-5718 LED KEYPAD
Status Notification
LED Indicators
Status Notification
LED Indicators
Partition and
Arrow Keys
Shortcut Function
Keys
Numeric Keys and
Ok-Cancel Keys
Status Notification
LED Indicators
Status Notification
LED Indicators
Partition and
Arrow Keys
Shortcut Function
Keys
Numeric Keys and
Ok-Cancel Keys
2x16 LCD Screen
LED Screen

TEKNİM PARS SERIES ALARM SYSTEM USER MANUAL 5
Status Notification LED Indicators
Status LED indicators provide information on the current status of the system. Status LED indicators
are as follows:
Power: Indicates whether there is energy in the Alarm Panel. If it is on steady; there is energy, if it is
not lit; there is no energy, if it is blink; low battery.
Program: Indicates that the alarm panel in the programming menu.
Bypass: Indicates that the system (Zone) has been temporarily canceled.
Memory: If this notification is lit, a fault or alarm condition has occurred in the system and should
check the memory.
Ready: Indicates that all zones are normal, and the alarm system is ready to arm.
Armed: Indicates that the system is armed.
Trouble: Indicates an error condition in the system. The error can be seen from the relevant menu.
Fire: Indicates when fire alarm occurred in the system.
Shortcut Function Keys
Away Arm: Used to arm whole system without enter any user code. Disarming
process can only be done with user code.
Stay Arm: Used to arm only exterior sensors when you will be in the home while
arming. Interior sensors will be not work so you can be free in the house.
Function: Used to run secondary tasks on the numeric keys. For example, to enter the
Engineering program, you need to press FX key and after [4].
Bypass: Used to temporarily cancel any zone.
Partitions and Arrow
Usage as Partition Keys: Your alarm system can be divided into 4 different
partitions and each partition can be armed and disarmed separately. You
can quickly arm the related partition with its shortcut key. To arm any
partition press and hold partition key until you hear a short “bip” sound.
You can also choose multiple partition and enter user code to arm or
disarm.
Use as Arrow Keys: You can use these keys as direction keys when the
alarm panel is in programming mode or while navigating through any
menu.
Away
Home
Function
Bypass

TEKNİM PARS SERIES ALARM SYSTEM USER MANUAL 6
Numeric Keys
Numeric Keys: Keys are used to enter values for all keypad operations.
Each key has a secondary function. In addition, the letter groups defined on
these keys are used for giving Zone names to shown on the LCD keypad.
Secondary Functions: To run secondary functions defined on the keys,
press and hold the related key until you hear the beep sound.
1: Panic Alarm - 2: Fire Alarm - 3: Medical Alarm - 4: Enter Programming
5: Bypass - 6: Reports - 7: Chime - 8: Test - 9: Memory - 0: Reset
Ok and Cancel Keys
To confirm any operation press key and to avoid press key.
SYSTEM USAGE
Arm - Disarm
Make sure that all the windows and doors are closed and no movement in the place before arming
the system. Enter your four-digit code while “Ready” LED is lit on the keypad. Keypad will give you exit
delay time by warning with intermittent sound and after that system will be armed.
When you enter to armed place, you will hear warning sound during entrance delay, before this time
period ended enter your four-digit code to disarm the system. If the code has not been entered at the
end of the entry time, your alarm system will be activated, and the system gives Intruder Alarm. To
stop all the sirens and disarm the system enter your four-digit code.
Stay –Away Arm
You can arm your alarm system in two different types, as when you completely leave the place or
when you stay inside the place. In order to be able to move inside in the place, the motion sensors must
be de-activated by configure them as “Stay Zone Feature”. In this way, only the exterior sensor such as
doors and windows sensors will operate when the alarm system armed, but the motion sensors will
be automatically disabled.
To arm system as “Stay” press and hold the Stay key Until you hear exit delay warning
sound. There is no need to enter any user code to arm with shortcut keys.
To completely are the system, you can press and hold the Away key until you hear exit
delay warning sound. There is no need to enter any user code to arm with shortcut keys.
P.S.: Arming as Away means Arming the whole system.
Home
Away

TEKNİM PARS SERIES ALARM SYSTEM USER MANUAL 7
Arm and Disarm With Key Fob
To use this feature, you need the remote-control kit which is optional.
Partition Arm - Disarm
Teknim Pars Series Alarm systems are capable to arm –disarm as partial. For example; if you have
different sections in your workplace such as office, warehouse, production etc., you can arm and
disarm these sections separately. Before using partition arm- disarm feature, all zones should be
configured to defined partition which they will be in used.
Teknim Pars Series Alarm Systems supports 4 different Partition. To control these partitions, you
can use partition keys as shown in below.
•To arm any partition, press the related partition key.
•When the partition key start to blink red light, enter your four-digit code,
•After entering your code, keypad will wait for you to make your choice. If
you want to arm the partition press “1”, if you want to disarm the partition
press “0”.
•If you arm - disarm the system by directly entering code without using
partition keys, all partitions will be armed –disarmed.
Remote Control By Phone
You can control your alarm system by calling with your phone. There are two ways to control your
system by call.
When there is an alarm occur in your system, control pane will start to dial registered phone
numbers and when you answer the phone you will hear a siren sound. During this call, after you answer
it press [*] key and siren sound on the phone will silent and this will inform the control panel that you
received the alarm call.
You can enter your four-digit code and press [#]. If the code is correct you will hear three short
warning sound tone that confirms your code is correct.
To disarm your system press [00] [#], to arm your system again press [01] [#]. You will be hear three
short tone after all your process which means the operation is correct and succeed. If there is a wrong
operation, you will be hearing short reject sound.
1 –Arm: To arm your system, press the shown button.
2 –Disarm: To disarm the system, press the shown button.
3 –Panic: To create panic alarm, press the shown button. Panic alarm
information will be delivered to Alarm Receiving Center.

TEKNİM PARS SERIES ALARM SYSTEM USER MANUAL 8
You can also call your alarm system anytime by phone to check system status and control. To do
that; call the number which is connected to control panel and wait for the control panel answers your
call after defined ring time (factory default is 5). You will be hearing short tones after control panel
answers.
Press [*] when the system answers your call to start process. The short tones will silent after
pressing [*]. Enter your four-digit code and press [#]. You will be hearing three short sound which
confirms your code is correct.
Key
Process
0#
To Disarm the System
1#
To Arm the System
2#
To Open PGM
3#
To Close PGM
4#
To Check the Alarm Status (Single Signal: Disarmed, Triple Signal: Armed)
5#
To Check the PGM Status (Single Signal: PGM OFF, Triple Signal: PGM ON)
Control the System By Mobile Application
Teknim Mobile Application is a cloud-based service that allows users to control their new
generation Teknim Alarm panels through the internet. Within the cloud service, users can check and
control unlimited numbers of control panels under their cloud account.
Users can connect to the alarm panels at any time and perform the following operations;
•Arm and Disarm the system
• View Event History
• PGM Control (On-Off)
• Bypass
• Change the Names of Users, Partitions and Zones
• Share the System with Another User
• Push Notification
Teknim mobile application is suitable for use on mobile phones and tablets with IOS and Android
operating system. Applications for both operating systems can be downloaded from the App Store or
Google Play Market.
Important: Teknim Mobile Application can only be used with new generation Teknim Pars Series
Alarm Panels. Alarm Panels which compatible with mobile application are;
✓TSP-5324
✓TSP-5314 (Requires TXM-5272 GSM/GPRS)
✓TSP-5208 (Requires TXM-5272 GSM/GPRS)
P.S: The Alarm Panel must be connected to the Internet in order to use the mobile application.
Internet (GPRS) must be defined on SIM card.
Download the App
To download the app to mobile devices which using Android and IOS operating system, type Teknim
in the Google Play Store or App Store and download the app.
Creating a Cloud Account
Before you start using the application for the first time, you need to create a Cloud Account and
activate an alarm panel for that account. For this;

TEKNİM PARS SERIES ALARM SYSTEM USER MANUAL 9
2. Fill in the required
fields and select
“Scanner Barcode” Scan
the QR Code on the
Control panel with
mobile device camera
1. Open the application
and select “Register”.
3. Once the required
information has been
filled, select “Save”
4. An activation
code will be sent
by the system to
the given mobile
phone number.
5. Enter the
activation code to
required field to
proceed.
6. After selecting
“Save”, the Alarm
Panel will register
under your cloud
account.
7. After the registration
process, an activation link
will be sent to your e-mail
address.
8. The mail account will be activated by clicking the activation link sent by Cloud. The password which will be required
for logging into the cloud account will be sent within this e-mail. Now the user can enter the system with either a mobile
phone number or e-mail address and password.
P.S: The password sent by Cloud can be changed in the application.
The first screen is “Device Control” which you can arm and disarm the system.
The buttons and functions on this screen are as follows;
•Stay: Used for Stay Arm of the system.
•Disarm: Used for disarm the system.
•Arm: Used for fully arm the system.
•Partition Buttons: Used for arm and disarm the defined partitions. Multiple
partitions can be select.
•Panic Button: Allows the user to create manual Panic Alarms.

TEKNİM PARS SERIES ALARM SYSTEM USER MANUAL 10
Bypass
You can use the Bypass to temporarily cancel any of the detectors connected to your alarm system.
Bypass on LCD Keypad; Press “Bypass” on keypad and enter your four-digit code. Enter the zone
numbers (01-02-03 etc. can be select multiple zones) after “Select Zones” indicates on LCD screen
and press ok. Keypad will show “Bypass Exist” on the screen with zone numbers. You can exit
from bypass menu by pressing exit key. Bypass indicator LED will light red to show there is a
bypassed zone in the system.
Bypass on LED Keypad; Press “Bypass” on keypad and enter your four-digit code when Memory
and Ready LEDs are blinking. Enter the zone numbers (01-02-03 etc. can be select multiple zones)
and press ok. Bypassed zones LEDs will light permanently. To exit bypass menu press, exit key.
Bypass Indicator LED will light red to show there is a bypassed zone in the system.
P.S.: Bypass is a one-time process. All zones will return normal after disarming the system.
USER CODES
Changing Master Code
Master code factory default is “1234” and it can be change as follow;
Press and Hold →Enter Old Code XXXX →New Code XXXX →Repeat New Code XXXX
e.:To set master code 9876; [Press and Hold ] [1234] [9876] [9876]
P.S.: Changing Master code process is the same with LCD and LED Keypad.
Create / Delete User Code
As a factory default, there is no user code defined in the system. You should enter the “Master
Menu”with “Master Code” to create a user code. You can create totally 10 users and 1 Duress code.
To enter Master Menu with Master Code;
Press [Fx] [4]
Enter your four-digit master code (Factory Default is: “1234”)
For LED Keypad;
[07] [01] →[1. User Code XXXX] →[ ]
For LCD Keypad;
[Basic Settings ] →[User Codes ] →[01-User Code XXXX] →[ ]
e.:To set 1. User code as 1111; [07] [1] [1111] [ ]
To set 2. User code as 2222; [07] [2] [2222] [ ]
Duress Code
11th code in the system is Duress Code. This code should be uses only when user is under any threat.
Duress code is also capable to arm or disarm the system as any other code but when the system
disarmed with Duress code, a signal delivered to Central Monitoring System which informs the
operator that the user is in danger.

TEKNİM PARS SERIES ALARM SYSTEM USER MANUAL 11
TIME AND DATE SETTINGS
Set Time
To set time, you should enter the Master Menu by entering the Master code as follow;
Press [Fx] [4]
Enter your four-digit Master Code (Factory Default: “1234”)
For LED Keypad;
[01] [01] →[Hour and Minutes SS: DD] →[ ]
For LCD Keypad;
[Basic Settings ] →[Time/Date Settings ] →[SS: DD] →[ ]
e.:To set time as 09:05; [01] [01] [09] [05] [ ]
Set Date
To set time, you should enter the Master Menu by entering the Master code as follow;
Press [Fx] [4]
Enter your four-digit Master Code (Factory Default: “1234”)
For LED Keypad;
[01] [02] →[Enter Date DD: MM: YY] →[ ]
For LCD Keypad;
[Basic Settings ] →[Time / Date Settings ] →[DD: MM: YY] →[ ]
e.:To set the date as 10.11.2019; [01] [02] [10] [11] [19] [ ]
TESTS
You can test some basic functions of the system through Keypad by following steps;
For LCD Keypad;
Press [Fx] [8] and enter your four-digit user code. Chose following options which you want to test
when you are in the Test mode.
1- CMS Test: Chose CMS number to test.
2- Private Test Call: Choose the user phone number to test.
3- Siren Test: Choose the siren number to test.
4- PGM Test: Chose the PGM to test.
5- PGM Control: Choose the PGM to Control.
For LED Keypad;
Press [Fx] [8] and enter your four-digit user code. Program LED will be lit, and Ready LED will blink
when you are in test mode. You can use following combinations for tests.
CMS 1 Test: [1][1] CMS 2 Test: [1][2] Phone 1 Test: [2][1] Phone 2 Test: [2][2]
Siren Test: [3][1] PGM Test: [4][1] PGM Control: [5][1]

TEKNİM PARS SERIES ALARM SYSTEM USER MANUAL 12
EVENT HISTORY
The system can store 255 event history including time –date and event codes. You can access event
history as follow;
To access Event History press [Fx] [9] and enter your four-digit user code.
LCD Keypad Event History;
XXX- OO
DD MM YY HH MM P AB
XXX: Event Number –OO: Event Type - DD: Day - MM:Month - YY: Year –HH:Hour –MM:Minute –
P: Partition –AB: Zone / User Number
LED Keypad Event History;
The event memory is indicated by LED notifications that are lit with the sequence. You can follow
the example of the LED lighting sequence below;
Above indication means; There has been an Intruder Alarm in the 1. Partition and 2. Zone at
12.05.2019 - 09:05.
P.S.: There is no [0] and [9] indication on LED Keypad, therefore [Bypass] means [0] and [Memory]
means [9] during Event History.
Event History Code Table
P.S.: There is no [0] and [9] indication on LED Keypad, therefore [Bypass] means [0] and [Memory]
means [9] during Event History.
No
Event Type
No
Event Type
No
Event Type
No
Event Type
01
Intruder Alarm
14
PSTN Fault
33
Intruder Rest.
47
Battery Fault Rest.
02
Panic Alarm
15
Battery Fault
34
Panic Restored
51
Bypass Restored
03
Fire Alarm
18
Disarmed
35
Fire Restored
61
Special Alarm Rest.
04
Duress
19
Bypass
36
Duress Rest.
63
24 Hour Alarm Rest
05
Tamper Alarm
20
Enter Program
37
Tamper Rest.
06
Medical Alarm
21
Exit Program
38
Medical Rest.
07
Dis. Under Threat
24
Manual Report
41
Zone Fault Rest.
09
Zone Fault
29
Spec. Zone Alarm
42
Main Restored
10
Main Fault
30
Factory Reset
45
Battery Full
13
Battery Low
31
24 Hour Alarm
46
PSTN Restored
Event
Type
Day –Month - Year
Hour
Minute
Partition
Zone /
User No
0-1
1-2-0-5-1-9
0-9-0-5
1
0-2

TEKNİM PARS SERIES ALARM SYSTEM USER MANUAL 13
FAULT REPORTS
When there is a fault occur in the system, “Trouble” LED will light on the Keypad. To indicate the
fault in the system, you can perform the following steps;
For LCD Keypad;
Press [Fx] [6] and enter your four-digit user code. Use the arrow keys (A, D) until 6- Troubles and
press OK. All fault notifications related to the system will be displayed on the LCD screen
respectively. Trouble display returns to the beginning after all troubles are displayed.
For LED Keypad;
Press [Fx] [6] and enter your four-digit user code. Use the arrow keys (A, D) until 6- Troubles and
press OK. All fault notifications related to the system will be displayed on the LED screen
respectively. After a trouble indication, all digits are illuminated and the corresponding error code for
the next trouble indication is illuminated in 2-digit order. Trouble display returns to the beginning
after all troubles are displayed.
e.:If [Bypass] then [2] LED is lit in the keypad notifications; it means that the system is Battery Low.
P.S.: [Bypass] is replaced by [0] and [Memory] is replaced by [9] since [0] and [9] are not visible on the
LED keypad.
Meaning of Error Notification Codes for LED Keypad;
Error Code
Definition
Error Code
Definition
01
Main Fault
09
Reserved
02
Battery Low
10
Keypad Com Error
03
Wrong Time / Date
11
GSM/GPRS Module Error
04
No PSTN Line
12
PSTN Module Error
05
Zone Fault
13
Ethernet Module Error
06
Battery Fault
14
SIM Card Fault
07
Tamper
15
GSM Communication Error
08
Reserved
16
GPRS Communication Error

TEKNİM PARS SERIES ALARM SYSTEM USER MANUAL 14
REFERANCE TABLE
Please keep the manual in a safe place so that you can fill in the following table information and
use it later.
User Codes:
No
Username
Code
1
2
3
4
5
6
7
8
9
10
Section / Zones:
No
Protected Area
Sensor Type
No
Protected Area
Sensor Type
1
9
2
10
3
11
4
12
5
13
6
14
7
15
8
16

TEKNİM PARS SERIES ALARM SYSTEM USER MANUAL 15
MANUFACTURER
Bilgi Elektronik Sanayi ve Ticaret A.Ş.
Dudullu Organize Sanayi Bölgesi 1. Cadde İsmet Tarman İş Merkezi No: 1 Kat: 2 No: 32
Ümraniye / İstanbul
Phone: +90 216 455 88 46 Fax: +90 216 455 99 06
Other manuals for PARS Series
2
Table of contents
Other Teknim Security System manuals

Teknim
Teknim VAP416 User manual

Teknim
Teknim VAS-741B Instruction Manual

Teknim
Teknim VAP Series User manual

Teknim
Teknim VAS 740 F User manual

Teknim
Teknim TFS-1193R User manual

Teknim
Teknim PARS Series User manual

Teknim
Teknim TFM-1190 User manual

Teknim
Teknim TFB-3165 Series User manual

Teknim
Teknim TFP-40 Series User manual

Teknim
Teknim TFB-3165 User manual