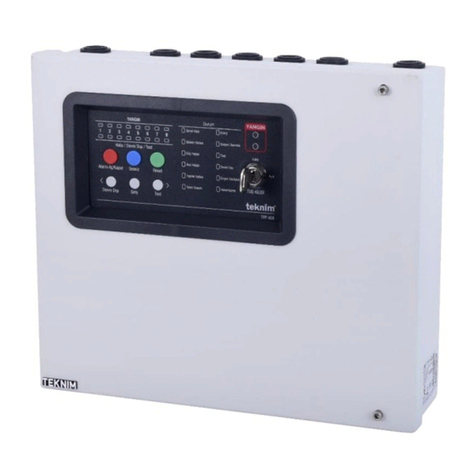
Teknim VAP416 User manual

VAP416
INSTALLATION & OPERATION
MANUAL
Issue Date: 08/07/2013
TD-1/07-004

VAP416 Installation & Operation Manual
TD-1/07-004
2 / 81
TABLE OF CONTENT
SAFETY PRECAUTIONS........................................................................................... 5
INTRODUCTION FOR THIS GUIDE.......................................................................... 6
1. INTRODUCTION.................................................................................................... 7
2. FEATURES ............................................................................................................ 8
3. MOUNTING............................................................................................................ 9
3.1. GENERAL........................................................................................................ 9
3.2. SIREN CONNECTION................................................................................... 10
3.3. DETECTOR CONNECTION .......................................................................... 10
3.4 SAMPLE CONNECTIONS.............................................................................. 11
3.4.1 Zone Doubling...................................................................................................................... 13
3.5. KEYPAD CONNECTION ............................................................................... 14
3.6. PHONE LINE CONNECTION ........................................................................ 15
3.7. THE CONNECTIONS OF THE PGM OUTPUTS (PGM1,2,3)........................ 15
3.8. POWER CONNECTION ................................................................................ 15
4. HOW TO USE KEYPAD....................................................................................... 16
4.1. VPC104 KEYPAD.......................................................................................... 17
4.1.1 Usage................................................................................................................................... 17
4.1.2 Keypad Address................................................................................................................... 18
4.1.3 Meanings and functions of Lights........................................................................................ 18
4.1.4 Monitoring Event Log........................................................................................................... 19
4.1.5 Reporting ............................................................................................................................. 19
4.1.6 Troubles............................................................................................................................... 19
4.1.7 Trouble Codes ..................................................................................................................... 20
4.2. VPC108/VPC016/VPC116/VPC132 KEYPAD ............................................... 21
4.2.1 Usage................................................................................................................................... 21
4.2.2 Keypad Address................................................................................................................... 22
4.2.3 Partition Buttons................................................................................................................... 22
4.2.4 Meanings and Functions of the LEDs.................................................................................. 22
4.2.5 Monitoring Event Log........................................................................................................... 23
4.2.6 Keypad Customizing............................................................................................................ 23
4.2.6.1 Chime Settings............................................................................................................. 23
4.2.6.2. Illumination of Button According to Zone .................................................................... 23
4.2.6.3. Emergency Buttons..................................................................................................... 24
4.2.6.4. Sound Settings............................................................................................................ 24
4.2.6.5. Trouble Warning Sounds............................................................................................. 24
4.2.7 Reporting ............................................................................................................................. 24
4.2.8 Trouble Codes ..................................................................................................................... 25
4.2.9 Error Codes.......................................................................................................................... 25
4.3. VPC301 KEYPAD.......................................................................................... 26
4.3.1 Usage................................................................................................................................... 26
4.3.2 Keypad Address................................................................................................................... 26
4.3.3 Partition Buttons................................................................................................................... 27
4.3.4 Meanings and Functions of the LEDs.................................................................................. 27
4.3.5 Monitoring Event Log........................................................................................................... 27
4.3.6 Keypad Customizing............................................................................................................ 27
4.3.6.1. Chime Settings............................................................................................................ 28
4.3.6.2. Illumination of Button According to Zone .................................................................... 28
4.3.6.3. Emergency Buttons..................................................................................................... 28
4.3.6.4. Sound Settings............................................................................................................ 28
4.3.6.5. Trouble Warning Sounds............................................................................................. 29
4.3.6.6. Language Selection..................................................................................................... 29
4.3.6.7. Thermometer setting ................................................................................................... 29
4.3.7 Reporting ............................................................................................................................. 29
4.3.8 Error Codes.......................................................................................................................... 30
5. SMART PARTITION TECHNOLOGY (SPT)......................................................... 30

VAP416 Installation & Operation Manual
TD-1/07-004
3 / 81
5.1 RUNNING OF THE PANEL AT THE SPT MODE........................................... 30
6. SIMPLE/QUICK PROGRAMMING ....................................................................... 31
6.1 SIMPLE PROGRAMMING.............................................................................. 31
6.1.1 Entering installer program.................................................................................................... 31
6.1.2 Entering Master Program..................................................................................................... 33
6.1.3 Changing Assigned Codes .................................................................................................. 34
6.1.4 Tests .................................................................................................................................... 34
7. THE PROGRAMMING.......................................................................................... 35
7.1 ENTERING/EXITTING FROM THE PROGRAMS........................................... 36
7.2. CHANGING THE CODES.............................................................................. 36
8. THE PROGRAMMING DETAILS.......................................................................... 36
8.1. MAIN CONFIGURATIONS............................................................................. 37
8.1.1. Time/Date Settings ............................................................................................................. 37
8.1.2. Entry Delays........................................................................................................................ 37
8.1.3. Exit Delays.......................................................................................................................... 38
8.1.4. Central Monitoring Station Account Numbers .................................................................... 39
8.1.5. Central Monitoring Station Phone Numbers....................................................................... 39
8.1.6. User Telephone Numbers................................................................................................... 40
8.1.7. To Set / Make User Codes ................................................................................................. 41
8.1.7.1. To Set/Make Guest Code............................................................................................ 41
8.1.7.2. To Set/Make Duress Code.......................................................................................... 42
8.1.7.3. To Set/Make PC Access Code.................................................................................... 42
8.2 PANEL SETTINGS ......................................................................................... 42
8.2.1. Panel Main Settings............................................................................................................ 42
8.2.1.1. Panel Managing........................................................................................................... 42
8.2.1.2. Output Types............................................................................................................... 43
8.2.1.3. Automatic Bypassed Partitions.................................................................................... 44
8.2.1.4. Reset Type.................................................................................................................. 44
8.2.1.5. Reset Enable / Disable................................................................................................ 44
8.2.1.6. AC Fail Call Delay ....................................................................................................... 45
8.2.1.7. Double Hit or Cross Zone Timer.................................................................................. 45
8.2.2. Siren Settings...................................................................................................................... 45
8.2.2.1 Siren Partitions ............................................................................................................. 45
8.2.2.2 Siren Cut off Time......................................................................................................... 46
8.2.3. Automatic Arm/Disarm Settings.......................................................................................... 46
8.2.3.1 Automatic Arm Partitions.............................................................................................. 46
8.2.3.2 Automatic Disarm Partitions......................................................................................... 47
8.2.3.3 Automatic Arm Partitions on No Activity....................................................................... 48
8.2.4. PGM.................................................................................................................................... 49
8.2.4.1 PGM Settings ............................................................................................................... 50
8.2.4.2 Timer Settings .............................................................................................................. 51
8.2.5. Remote Controlling............................................................................................................. 52
8.2.6. KEY Arm/Disarm Settings................................................................................................... 54
8.3 ZONE SETTINGS........................................................................................... 55
8.3.1. Zone Wiring......................................................................................................................... 55
8.3.2. Assign A Zone To A Partitions............................................................................................ 55
8.3.3. Zone Type........................................................................................................................... 56
8.3.4. Zone Extra Settings ............................................................................................................ 57
8.3.5. Zone Trigger Delay............................................................................................................. 58
8.4. KEYPAD SETTINGS...................................................................................... 59
8.4.1. Keypad Permissions........................................................................................................... 59
8.4.2. Assign a Keypad Partitions................................................................................................. 59
8.5. USER SETTINGS.......................................................................................... 60
8.5.1. Start Time ........................................................................................................................... 60
8.5.1.1 User Start Time ............................................................................................................ 60
8.5.1.2 Guest Start Time .......................................................................................................... 61
8.5.2. Finish Time ......................................................................................................................... 61
8.5.2.1 User Finish Time .......................................................................................................... 61

VAP416 Installation & Operation Manual
TD-1/07-004
4 / 81
8.5.2.2 Guest Finish Time ........................................................................................................ 61
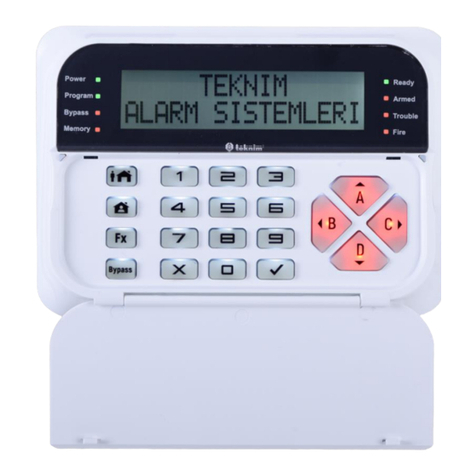
8.5.3. Days.................................................................................................................................... 61
8.5.3.1 User Days..................................................................................................................... 62
8.5.3.2 Guest Days................................................................................................................... 62
8.5.4. Partitions............................................................................................................................. 62
8.5.4.1 User Partitions.............................................................................................................. 62
8.5.4.2 Guest Partitions............................................................................................................ 63
8.5.5. Keypads.............................................................................................................................. 63
8.5.5.1 User Keypads............................................................................................................... 63
8.5.5.2 Guest Keypads............................................................................................................. 63
8.5.6. Limitations........................................................................................................................... 64
8.5.6.1 User Limitations............................................................................................................ 64
8.5.6.2 Guest Limitations.......................................................................................................... 64
8.6. COMMINICATOR & DIALER SETTINGS ...................................................... 65
8.6.1. General Features................................................................................................................ 65
8.6.2. Dial Attempt ........................................................................................................................ 66
8.6.3. Central Monitoring Station Answer Wait Time.................................................................... 66
8.6.4. Periodic Test Report Range ............................................................................................... 66
8.6.5. First Test Report Time........................................................................................................ 66
8.6.6. Interval Between Calls........................................................................................................ 67
8.6.7. Central Monitoring Station Communication Format............................................................ 67
8.7. EVENTS......................................................................................................... 68
8.7.1. Directing of events.............................................................................................................. 68
8.7.1.1 Directing Central Monitor Station ................................................................................. 68
8.7.1.2 Directing of User Phone ............................................................................................... 68
8.7.2. Sending Events................................................................................................................... 69
8.7.3. Event Codes ....................................................................................................................... 70
8.7.4. Reading Events................................................................................................................... 71
8.8. OPTIONAL MODULES.................................................................................. 73
8.8.1. RF Remote Control Module................................................................................................ 73
8.8.2. Supervisory Interval............................................................................................................ 73
8.8.3. Zone Expansion Module..................................................................................................... 74
8.9 PROGRAMMING ADDRESSES..................................................................... 74
9. LOADING FACTORY DEFAULTS........................................................................ 80
9.1. Changing The Codes To The Factory Settings ..................................................................... 80
9.2. Restoring Panel Settings To Factory Defaults....................................................................... 81

VAP416 Installation & Operation Manual
TD-1/07-004
5 / 81
SAFETY PRECAUTIONS
Read this guide carefully before operating device and keep this guide for later
reference. Follow all operating and safety instructions in this guide.
Keep away devices from dust and moisture.
Locate to the straight place in order not to damage device.
Use device together with metal box.
This device does not need the ventilating.
OPERATING CONDITIONS:
Don't operate device beyond following values.
Temperature : Between 0C and +65C
Humidity : %95 in +40C
MOVING and TRANSPORTATION:
The device must be kept according to the impact and liquid. The transportation and
moving which are not suitable to the user guide, are not in guarantee.
HUMAN and ENVIRONMENT HEALTH:
The device does not consist of any harmful chemical and biological materials.
POWER SUPPLY:
Use device only with voltage mentioned in guide. If you are not sure about supply
voltage you will connect, contact with your vendor.
GROUNDING:
Before connecting power supply, control if grounding works properly.
SUPPLY CABLE PROTECTION:
Protect the supply cable against breaking and crushing.
POWER LINE:
Supply the device with the line which is different from high current line.
OVER LOAD:
Do not over load the cables.
OBJECT AND LIQUID ENTRY:
Never push any kind of objects or liquid into this unit as they may short-out parts that
could result in a fire or electrical shock.
DON'T DO ACTIONS ON YOUR OWN:
Never try to fix the device on your own, otherwise, it is possible to come under
electrical shock when you opened the device's cover. During any failure, please
contact with your supplier or authorized dealer. Only, qualified authorized dealer's
stuff can interfere the device if there is any problem. Please clean the device with a
dry cotton. Do not use any chemicals.
SECURITY CONTROL:
To control if your device operates in healthy and convenient conditions, demand
service from your vendor..
CONDITIONS NEED SERVICE:
Contact with your vendor on the following conditions.
If power cable or plug is damaged,
If any kind of objects drops into unit,

VAP416 Installation & Operation Manual
TD-1/07-004
6 / 81
If unit is exposed to water or rain,
If unit is dropped or cover is damaged,
If you realize that device doesn't work properly,
If unit doesn’t operate properly in operating conditions,
SPARE PART:
If parts of device are changed to repair, ensure that technician uses original parts
against electrical shock, fire, etc.
INTRODUCTION FOR THIS GUIDE
*Teknim Elektronik reserves the right to change information on the manuals at any time without notice.
There are the rules for installing VAP416 which the customers need, in this guide.
These rules are explained as below:
<23 0x>: Indicates an address (starts with 23 0). 'x' is a one digit number.
<23 xx>: Indicates an address (starting with 23). 'xx' is a two digit number.
<06 01...06 03>: Indicates a consecutive address group. <06 01>, <06 02>, <06
03> etc.
<10 02 2.Option>: Indicates option(2) of an address(10 02).
<code>#: Indicates that key must be firstly pressed, secondly user or master
code must be entered and finally # key must be pressed on the telephone
keypad.
<Enter 13 01 "8">: Indicates that an address (13 01) must be entered (8).
<10 02 2.Option " Turn on">: Indicates that the necessary option(2) must be
selected by "Turn on" operation (or must not be selected by "Turn off" operation)
in an address(10 02).
<10 01 1 and 4.Option "Turn off">: Indicates that the necessary options(1, 4) must
be selected by "Turn on" operation (or must not be selected by "Turn off"
operation) in an address(10 01).
<21 01...21 08 1..4.Option "Turn on">: Indicates that the necessary options(1, 2,
3, 4) must be selected by "Turn on" operation (or must not be selected by "Turn
off" operation) in a consecutive address group (from 21 01 up to 21 08).
Press (long) to "8-Test" key: Indicates that the related key(8) must be pressed on
the keypad and must be kept pressing until the long "beep" sound come and must
be released after this sound.

VAP416 Installation & Operation Manual
TD-1/07-004
7 / 81
1. INTRODUCTION
VAP416 is 16+16 zone alarm panel that meets desires. It has simple usage also lets
technician to configure user needs simply.
Simple Mounting
Panel is mounted wall by three holes.
Panel case has cable holes to pass cables through Panel PCB.
Functions of terminals are written on PCB. Connect cables to proper place.
Connect telephone lines.
Connect Battery and AC Power.
Simple Maintenance
Device monitors troubles instantly.
Test feature provides simple maintenance.
All events are kept in memory.
Battery doesn’t need maintenance.
Simple Programming
Programming addresses is grouped by feature.
Installer can configure panel, only by setting user passwords, dialer numbers and
activating dialer.
All settings can be configured or can be downloaded to computer, by using PC
software and connection cable.
All adjustments can be transferred from panel to computer or from computer to
panel.
Simple Usage
Simply arm/disarm panel by entering code.
Smart Partition Technology provides quick arming.
Arm/Disarm by Remote Controller.
Arm/Disarm by Telephone.
Arm/Disarm by PC.
Arm/Disarm by Key.
Automatic Arm/Disarm feature by timers.
Arm by inactivity.
Simple Automation
PGM outputs can be activated by timers.
PGM outputs can be activated by assigned zones or partitions.
PGM outputs can be used as ARM (PGM is activated when selected partitions are
armed) or SRN output.
PGM outputs can be activated on fire or can be used to reset fire detectors.
PGM outputs can be controlled by Telephone.
PGM outputs can be controlled by PC.
PGM outputs can be controlled by Keypad.
Simple Management
Time limit can be assigned to users.
Users can arm specific partitions.
User keypads can be selected.

VAP416 Installation & Operation Manual
TD-1/07-004
8 / 81
2. FEATURES
Inputs
Programmable 16+16 zone,
NC, NO, 1-EOL Resistor, 2-EOL Resistor , None-end of line resistor zones,
Double zone.
Different zone types(Door, Window, Tamper, Fire etc.)
Additional features assigned zones(Follower zone, end zone, silent zone etc.)
Enter/Exit delays for each partition
Zones can be programmed for arming by key
Sabotage switch on Panel and Keypad
Siren
Outdoor or Indoor sirens can be connected
Adjustable cutoff time
Keypad
Can be used with 4 Keypads(max)
Addressable Keypads
LED or LCD Keypads can be used together
Programmable backlight
Displays event logs
Displays Ready, Armed, Trouble, Fire status
Shortcut buttons like Test, Report, and Memory
Only displays zones assigned to Keypads
Chime option
Outputs
Programmable outputs (NC, NO)
Siren Output; SRN (NC, NO, cutoff time)
General Features
Master, Installer, Guest, Duress, PC Remote control and 29 user codes
Real time clock
256 event logs
8 user phone numbers
Communicator supports 2 Central Monitoring Stations (Contact ID, SIA)
Each Central Monitoring Station has 2 phone numbers
Manual and Automatic Bypass
Smart Partition Technology
PC connection and software
4 Timers
Types of Arming/Disarming Panel
Arm with single button
Arm/Disarm specific partitions
Automatic Arm/Disarm panel in the specific time,
Arm by inactivity
Arm/Disarm by key
Arm/Disarm with remote controller(Remote control module must be connected to
Panel)
Arm/Disarm by telephone and PC
Alarm Types
Siren Alarm: Siren alarms, panel dials user and Central Monitoring Station.
Silent Alarm: Siren doesn't alarm, panel dials user and Central Monitoring Station.

VAP416 Installation & Operation Manual
TD-1/07-004
9 / 81
Electrical & Mechanical Features
230V AC Voltage
Fuse AC Voltage(200 mA)
Power supply for external units with electronic fuses
Fused and short-circuit protected 12V power outputs (12V 1A siren output, 1A
AUX and keypad output).
Current limited battery charge circuit
2 x 12V 7Ah batteries can be connected
PGM1,2,3 output current: 300mA max. Total current output of PGM1,2,3: 500mA
max.
SRN output current: 500mA max
Metal box dimensions: 310mm(width) x 302mm (Length) x 83mm (Height)
Weight( ± 2 gram) : 2780 gram / 3100 gram ( Packaged)
Optional Modules
Voice recording module,
Voice message module (includes 8
messages),
Remote Control module,
4-Zone expansion module,
Relay module,
USB PC link module,
RS232 PC link module,
X10 module,
Network module,
3. MOUNTING
!!! WARNING !!!: Don’t connect power to panel without finishing wiring.
3.1. GENERAL
Drill necessary holes on the wall and then mount panel case to wall by using proper
holes. Metal cover of panel constitute of body and cover. Cover is opened by
removing two screws. Detectors, siren, and telephone line are connected to Panel by
using proper cables. (It is recommended to you use wire screened cable or silver
foiled LIYCY cable and ground the mains voltage) Before connecting supply voltage,
make sure that all connections are made correctly. Also it is recommended to
connect keypad cable foil to panel GND and keypad GND. For the mains voltage
connection, 3x0.75 mm² standard cable may be used. Descriptions of panel terminals
are in the following picture.

VAP416 Installation & Operation Manual
TD-1/07-004
10 / 81
3.2. SIREN CONNECTION
Siren connection is made by 12V,SRN,GND terminals. 12V and GND is supply
voltage of Siren. Trigger output of Siren is SRN. Siren output can be programmed as
NO ,NC.
!!! WARNING !!!
When 2 sirens are
connected to panel, one
of sirens should be on
SCB mode to increase
current consumption.
3.3. DETECTOR CONNECTION
Detector alarm outputs are NC or NO. One of 2 wire output is connected to
Z1,Z2,...,Z16 input the other is connected COM. Supply voltage of detectors is
provided by AUX output. Z1, Z2,...,Z16 can be programmed as NO,NC, single end of
line resistor or double end of line resistor. Following picture shows example of PIR
detector and magnetic contact connection by using none end of line resistor
connection
VAP
Z COM Z87
Z COM Z65
Z COM Z43
Z COM Z21
GND
32 1
PGM
SRN
12V
AUX
+12V-16V AC
Tr
St
GND
12V
TamperIN
TamperOUT

VAP416 Installation & Operation Manual
TD-1/07-004
11 / 81
When single end of line resistor is used, any break in detector cable can be noticed.
When double end of line resistor is used, any break in detector cable and also short
circuit can be noticed. It is recommended to use double end of line resistor. 2.7kΩ
resistor that supplied with panel can be used for end of line connection. These
resistors should be connected to detector sides. It is wrong to connect the resistors
inside the panel as functional. If more than one detector contacts are wanted to be
serially connected, end of line resistor connection can't be made, none-resistor
connection should be made. Following picture shows end of line resistor connection
with tamper and without tamper.
3.4 SAMPLE CONNECTIONS
Connection with end of line resistor
VAP
Z COM Z87
Z COM Z65
Z COM Z43
Z COM Z21
GND
32 1
PGM
SRN
12V
AUX
+12V-
16V AC
Alarm
GND
12V
Tamper
VAP
Z COM Z87
Z COM Z65
Z COM Z43
Z COM Z21
GND
32 1
PGM
SRN
12V
AUX
+12V-
16V AC
Alarm
GND
12V
Tamper
2.7K?

VAP416 Installation & Operation Manual
TD-1/07-004
12 / 81
Connection with end of line resistor (with tamper)
Connection with double end of line resistor
2.7 KΩ (Red, Purple, Red)
Connection with double end of line resistor (with tamper)
VAP
Z COM Z87
Z COM Z65
Z COM Z43
Z COM Z21
GND
32 1
PGM
SRN
12V
AUX
+12V-
16V AC
Alarm
GND
12V
Tamper
2.7K?
VAP
Z COM Z87
Z COM Z65
Z COM Z43
Z COM Z21
GND
32 1
PGM
SRN
12V
AUX
+12V-
16V AC
Alarm
GND
12V
Tamper
2.7K?
2.7K?
VAP
Z COM Z87
Z COM Z65
Z COM Z43
Z COM Z21
GND
32 1
PGM
SRN
12V
AUX
+12V-
16V AC
Alarm
GND
12V
Tamper
2.7K?
2.7K?

VAP416 Installation & Operation Manual
TD-1/07-004
13 / 81
3.4.1 Zone Doubling
The zone number can be increased by using this connection. If 1kΩ and 2kΩ
resistors are connected to Z1,Z2,....,Z16 zone and the zones are programmed
correctly, each zone can be used like 2 zones. So, the zones (Z1,Z2,...Z16 and
Z17,Z18,...Z32) will be doubled. You can reach to 32 zones by using 16 zones. You
can program all zones as NC or NO. There are the samples of the connections with
tamper and without tamper below. Please see the "Zone Wiring (Page 55)" part for
program features.
!!! WARNING !!!
Zone doubled can not used with the expanded zone module.
Doubled Zone Connection
Used Resistors
2 KΩ (Red, Black, Red)
1 KΩ (Brown, Black, Red)
VAP
Z COM Z87
Z COM Z65
Z COM Z43
Z COM Z21
GND
32 1
PGM
SRN
12V
AUX
+12V-
16V AC
Alarm
GND
12V
Tamper
Alarm
GND
12V
Tamper
1 K?
2K? 1 K?

VAP416 Installation & Operation Manual
TD-1/07-004
14 / 81
Doubled Zone Connection With Tamper
!!! WARNING !!!
If the tamper connections for single line end resistor, double line end resistor or zone
doubled are done as below, when the panel is armed, if the tamper is open, alarm is
on. If the panel is not armed, the zone error is seen.
3.5. KEYPAD CONNECTION
The keypad can be connected to the panel with 12V DT, CK, GND. If the connection
is wrong, keypad indicates the fault. The blendaj of the cable must be connected
GND of the panel and keypad. 4 keypad connections can be done for VAP416. The
address of the keypads must be adjusted firstly. (See the part of learning keypad
address and adjustment) Also the keypads which are connected must be active. (See
the part of the adjustments of the keypads)
!!! WARNING !!!
1. While connecting and changing the keypad, 12V to keypad must be off and DT
and CK must not be short circuit to 12V.
2. The cable must be 100m and shorter
GNDCKDT12V BSYK
Used Resistors
2 KΩ (Red, Black, Red)
1 KΩ (Brown, Black, Red)
VAP
Z COM Z87
Z COM Z65
Z COM Z43
Z COM Z21
GND
32 1
PGM
SRN
12V
AUX
+12V-
16V AC
Alarm
GND
12V
Tamper
Alarm
GND
12V
Tamper
2K? 1 K? 1 K?

VAP416 Installation & Operation Manual
TD-1/07-004
15 / 81
3.6. PHONE LINE CONNECTION
The connection of the phone line can be done with LINE
socket. You can connect line or outline. If the line is cut,
the error occurs. When the panel detect the line, the error
disappears. Do not connect any other parallel device to
the line of LINE. If there is a phone line, the phone line
must be connect firstly to LINE, then the line must be
connect from PHONE to other devices. The connection
diagram is as below.
!!! WARNING !!!
Please do not connect the alarm panel to ADSL lines, if it
does not need. If you want to connect the panel to ADSL
line, you must use a filter.
3.7. THE CONNECTIONS OF THE PGM OUTPUTS (PGM1,2,3)
There are 3 PGM outputs of VAP416. These outputs can be used for any
applications. You can see the information of the programming in the part of
programming adjustments..
!!! WARNING !!!
You can use the relay which its
current is lower than the current of
PGM output. (PGM1,2,3 maximum
300mA)
Note
You can achieve 4 PGM or 8 PGM
outputs by using PGM module. See
the TRM904 user guide.
3.8. POWER CONNECTION
The 3x0,75 mm² cable can be used for network connection. The connection must be
done suitable to the label which is in the panel. After this connection, LED on the
board is on. You can connect 2 battery. The cables for he batteries are connected on
the board. Please connect the cables correctly to the batteries. When the voltage of
the batteries, the energy saving mode is activated. At this mode, the lighting of the
keypad decreases. There is a fuse near the network socket. If the fuse is breakdown,
you can change it.
PHONE LINE

VAP416 Installation & Operation Manual
TD-1/07-004
16 / 81
!!! ATTENTION !!!
The grounding must be correctly.
4. HOW TO USE KEYPAD
Keypad helps users to monitor current status of alarm panel by its LEDs and LCD
display (in VPC301 model), to program and control it by its silicon keys. Max. 2
keypads to VAP3XX model alarm panels and max. 4 keypads to VAP4XX model
alarm panels can be connected.
Buttons
Button
Main Function
Secondary Function
1
"1"
Panic.
2
"2"
Fire.
3
"3"
Duress.
4
"4"
Program - To enter programming
mode.
5
"5"
Bypass.
6
"6"
Report.
7
"7"
Chime - To open/close chime
function.
8
"8"
Test.
9
"9"
Memory - To display event log.
0
"0"
Reset - To disarm fire alarm.
"Cancel"
Exit.
OK
Password - To change code.
Note: In order to control second functions of the buttons which are written under the
buttons in red, press and hold related button until hearing long "bip" sound.
Meanings of keypad sounds
Keypad warns you with a sound during any operation.
Sound
Meaning
Single Long "beep"
Error
Two Short "beep"
Operation confirmed
Periodic short "beep"
Enter/Exit delay
Periodic long "beep"
Alarm
Continuous Long "beep"
Fire alarm (or walking test warning)
Entering in a address, displaying and changing setting
Each address consists of 4 digit numbers and includes one or more system
parameter. You need to enter in the related address in order to change system
setting or monitor current status. if you have authorization for that address, when you
enter in the address you will see current status. If not, you will hear a warning "beep"
Battery

VAP416 Installation & Operation Manual
TD-1/07-004
17 / 81
Only master user (default master code: 1234) and installer (default installer code:
9999) can enter in the addresses.
a) Entering in an address
(1.step) press (program) button until you hear long beep sound.
(2.step) press buttons in turn in order. (code entered)
(3.step) press buttons in turn in order. (entered in the
address <01 02>)
b) Exiting from an address
press (Exit) button.
c) Exiting from program
press (Exit) button until you hear long beep sound.
4.1. VPC104 KEYPAD
VPC104
4.1.1 Usage
VPC 104 is a keypad with 7 segment LED display. 7 segment LED display and
buttons help you to monitor, control and program alarm panel. When you make any
operation using buttons and enter (ok) button, if the operation is correct, you will
hear two short "beep" sounds and see "o" on the display. If the operation is not
correct, you will hear long single "beep" sound and see "h" with a number which
shows error type. While entering code, each number can be seen an edge of "o"
letter. When you complete entering code (4 digits), this letter is completed. Troubles
can be seen on the display with "t" and a number which shows trouble type. Alarms
can be seen on the display with "A" and a number which shows the zone which have
last alarm. By passed zones can be seen in the display with "b" and a number which
shows bypasses zone. If an invalid address is entered, "h1" is seen on the display.
To see meanings of the errors please look at error codes section.
Chime feature can be enabled/disabled by pressing "Chime" button long. When
this feature is enabled, "c" letter is seen on the display. This feature is used only with
Zone 1. Chime sound can not be hearted when other zones are opened.

VAP416 Installation & Operation Manual
TD-1/07-004
18 / 81
When you enter "Password" button long, you see "E" letter on the display and
panel waits you to enter your old code. When you enter your old code, you see "Y"
letter on the display and panel waits you to enter your new code. When you enter 4
digits new code, you see "Y" letter again and panel waits you to enter your new code
again. When you enter your new code again, if the operation is correct, you see "o"
letter. If not, you see "h" letter and hear error beep.
While you are in program mode, when you enter 4 digits number, you enter in related
address and display shows you a letter which is type of related data. If you enter
wrong number or you want to exit after seeing current status of the address, press
button. If you want to change current setting of the address and exit from this
address, you have to enter related numbers and press button.
In program mode;
Lightning "P" letter means panel waits entered an address.
Lightning "." means you are in program mode.
While monitoring current settings in any address, a letter and then, a value of the
setting can be seen on the display.
Type
Letter
Meaning (Shown/Entered)
Number
"n"
The value is a number
One Selection
"r"
Value is a number from 1 to 8 and only one of them
can be selected
Multiple Selection
"u"
Value is a number from 1 to 8 and some of them can
be selected
While entering multiple selection, in order to cancel all selections you need to enter
To change value in the address, enter related data and press . Then, you will
hear two short beep sounds and see "o" letter on the display and automatically exit
from related address.
4.1.2 Keypad Address
Default keypad address is 1 and this address can not be changed.
4.1.3 Meanings and functions of Lights
Status LEDs shows current status of the system. Meanings of the
LEDs;
Ready: The system is ready to arm,
Armed: The system is armed,
Trouble: There is an error,
Fire: There is a fire alarm,
7 segment LED display helps you to see any movement on the zones or to determine
any error in the system.

VAP416 Installation & Operation Manual
TD-1/07-004
19 / 81
4.1.4 Monitoring Event Log
"H" letter is seen on the display to show event log memory as follows;
H CC-DD.MM.YY-HH.MM-A-B
CC: Two digits event code, DD: Day, MM: Month, YY: Year,
HH: Hour, MM: Minute, A,B: A and B parameters
While monitoring event lof memory you can see next event by pressing button
and previous event by pressing button. Other buttons reset and re-start
monitoring event log memory. To monitor any event in the event log memory, you
need to press button, enter related event number (from 0 to 255) and press
button again. To exit from event log memory press (exit) button
4.1.5 Reporting
Any information about panel’s various status can be monitored by pressing following
buttons.
Buttons
Meanings
(long)
Armed zones ("A" and zone number(s))
(long)
Last alarm zone ("A" and zone number)
(long)
Active PGMs
(long)
Keypad address
(long)
Bypassed zones ("b" and zone number(s))
(long)
Troubles (look at trouble codes table)
4.1.6 Troubles
If only "C" letter is lightning on the display, there is no communication between alarm
panel and keypad. If any trouble occurs, "Trouble" LED lights and it turns trouble
mode automatically. In order to see meanings of the troubles, look at following table.
Trouble
Meaning
t1
Power loss or mains failure.
t2
Low battery.
t3
Time and date must be entered (Set time and date)
t4
Telephone line failure
t5
Zone failure
t6
Battery failure.
t9
Zone 1 open-circuit
t10
Zone 1 short-circuit
t11
Zone 2 open-circuit
t12
Zone 2 short-circuit
t13
Zone 3 open-circuit
t14
Zone 3 short-circuit
t15
Zone 4 open-circuit
t16
Zone 4 short-circuit
t17
Zone 5 open-circuit
t18
Zone 5 short-circuit
t19
Zone 6 open-circuit
t20
Zone 6 short-circuit
t21
Zone 7 open-circuit
t22
Zone 7 short-circuit

VAP416 Installation & Operation Manual
TD-1/07-004
20 / 81
t23
Zone 8 open-circuit
t24
Zone 8 short-circuit
C
There is no communication between keypad and panel
4.1.7 Trouble Codes
Code
Type of Trouble
Description
h1
Invalid address
Invalid address has been entered
h2
Invalid data
Entered data is invalid
h3
No permission
Your permissions are limited
h4
Panel can not be armed
There is an opened zone
h5
Panel is already armed
The partitions you try to arm are already armed
h6
Invalid Code
Invalid code has been entered
h7
Out of limit
Entered value is out of limit. For example; if you
enter a value over than 23 for the time
h8
Type of data is wrong
Length of data that you have entered is wrong.
For example; if you enter 2 digits instead of 4
digits
h9
Feature is closed
Feature you have tried to use is closed
h10
Invalid function
The function you are trying to use is invalid
h11
Invalid parameter
The parameter you are trying to use is invalid.
Example: If you try to test 3.Central Station,
keypad displays this trouble
h12
Out of time limit
If user is trying to use keypad out of his/her time
limit, keypad displays this trouble
h13
Not allowed in this
keypad
User is not allowed in this keypad
h14
Invalid setting
The setting you have made is invalid
h15
Unknown trouble
Trouble is not known
Table of contents
Other Teknim Security System manuals

Teknim
Teknim TFB-1166 User manual

Teknim
Teknim VAS-741B Instruction Manual

Teknim
Teknim VAS 740 F User manual

Teknim
Teknim PARS Series User manual

Teknim
Teknim TFP-40 Series User manual

Teknim
Teknim TFB-3165 User manual

Teknim
Teknim TFM-1190 User manual

Teknim
Teknim PARS Series Assembly instructions

Teknim
Teknim VAP Series User manual

Teknim
Teknim TFS-1193R User manual