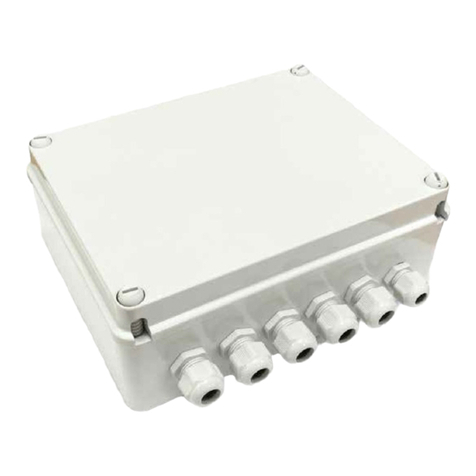
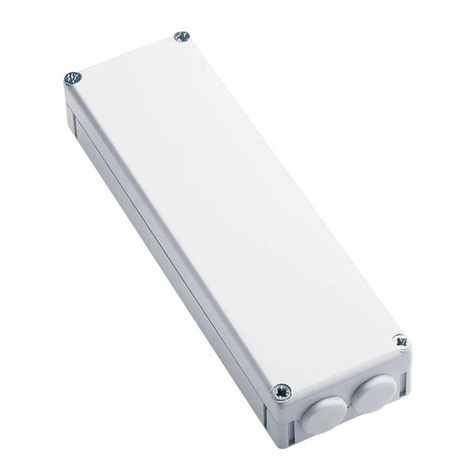
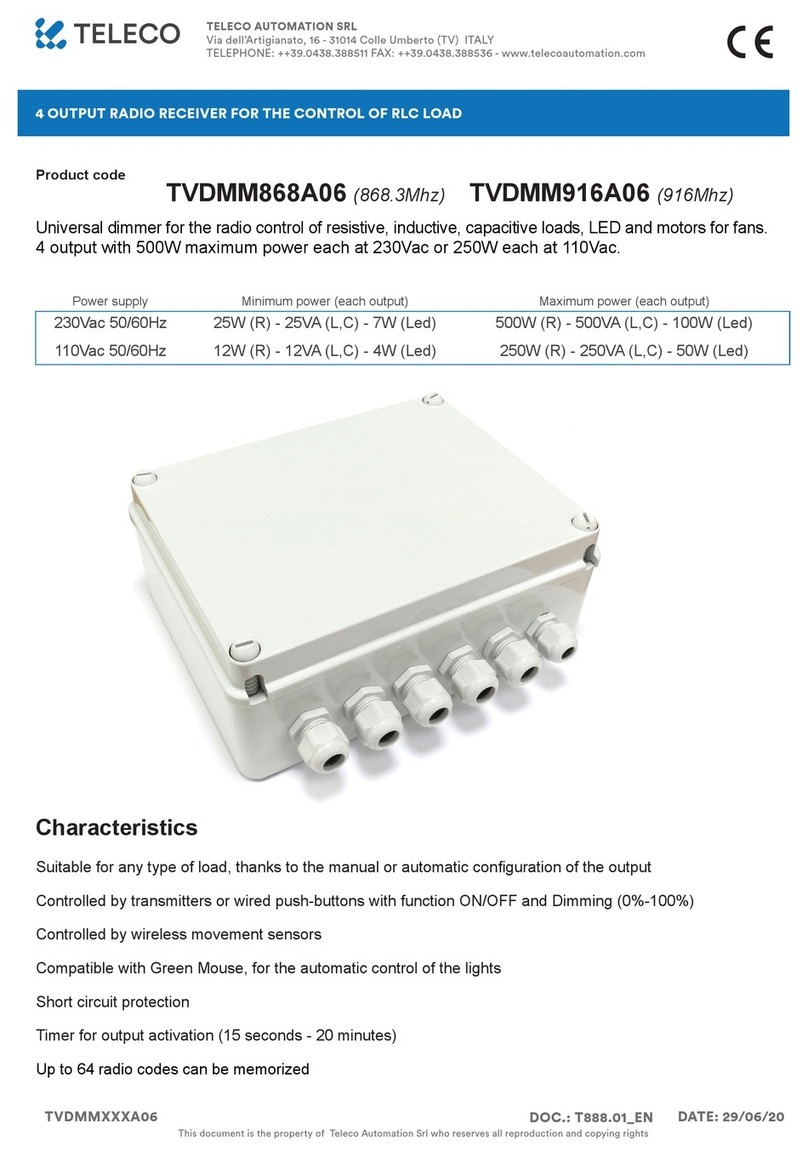
manuals.online logo
Brands
  1. Home
  2. •
  3. Brands
  4. •
  5. Teleco
  6. •
  7. Receiver
  8. •
  9. Teleco TVSTRD868BST24M User manual

Teleco TVSTRD868BST24M User manual

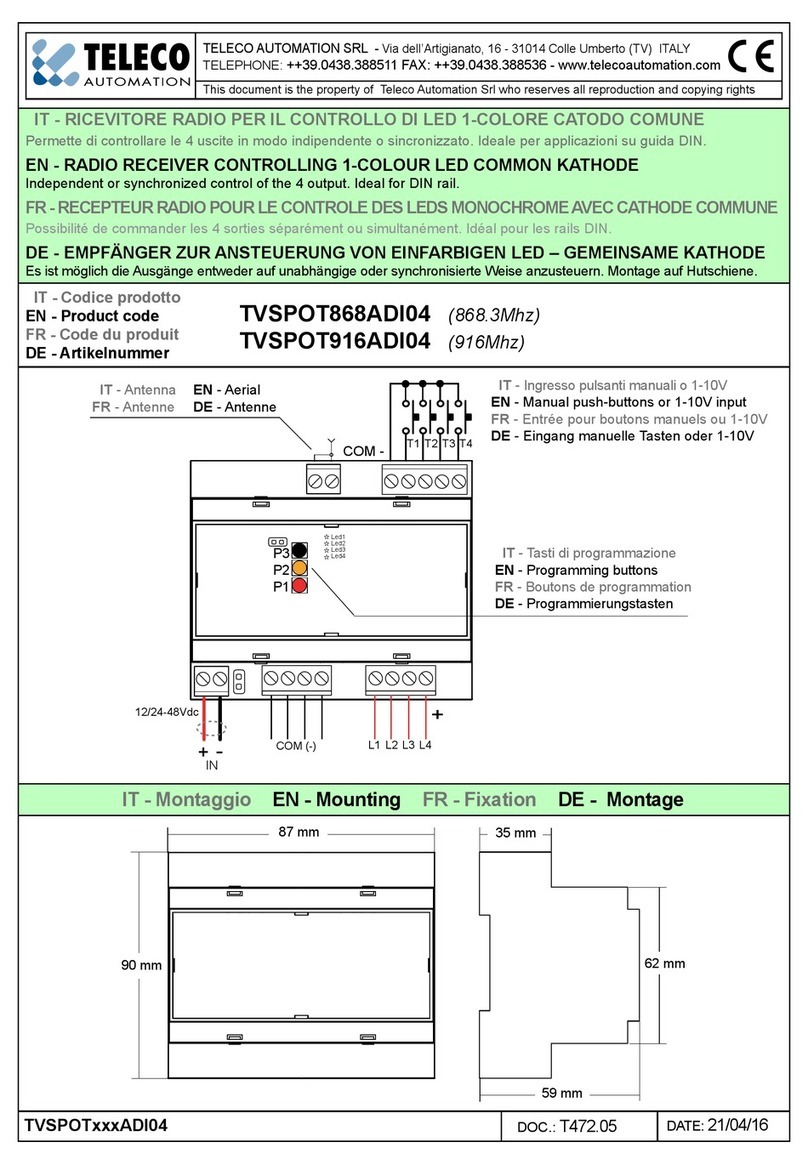
IT - RICEVITORE RADIO PER IL CONTROLLO DI STRIP LED 1-COLORE ANODO COMUNE
EN  RADIO RECEIVER CONTROLLING 1COLOUR LED STRIPS COMMON ANODE
FR - RECEPTEUR RADIO POUR LE CONTROLE DES LEDS MONOCHROME AVEC ANODE COMMUNE
DE  EMPFÄNGER ZUR ANSTEUERUNG VON EINFARBIGEN LED STRIPES  GEMEINSAME ANODE
IT - Codice prodotto
EN - Product code
FR - Code du produit
DE - Artikelnummer
IT - MONTAGGIO EN  MOUNTING FR - FIXATION DE  MONTAGE
165 mm
IT - Foro per il fissaggio con vite (sotto lo sportello)
EN - Hole for fixing with screw (under the cover)
FR - Trou pour fixation avec vis (sous le couvercle)
DE - Loch für die Montage mit Schraube (unter dem Deckel)
IT - Montaggio su superficie piana
EN - Flat surface mounting
FR - Fixation sur surface plate
DE - Montage auf ebene Oberfläche
70 mm
185 mm
IT - Foro per il fissaggio con vite (sotto lo sportello)
EN - Hole for fixing with screw (under the cover)
FR - Trou pour fixation avec vis (sous le couvercle)
DE - Loch für die Montage mit Schraube (unter dem Deckel)
IT - Montaggio su superficie piana
EN - Flat surface mounting
FR - Fixation sur surface plate
DE - Montage auf ebene Oberfläche
74 mm (50 mm)
56 mm
151 mm
47 mm
40 mm
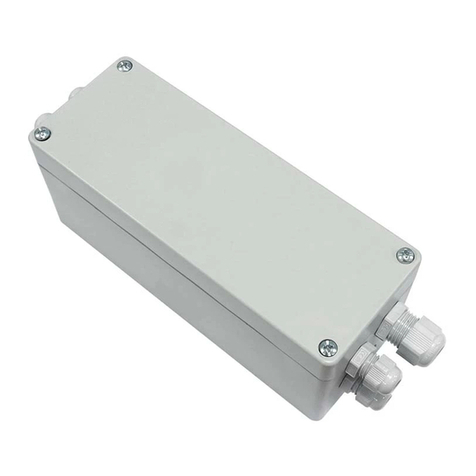
TVSTRD868BST24M Master 3x4A, Box IP54 (868.3Mhz)
TVSTRD916BST24M Master 3x4A, Box IP54 (916Mhz)
LINE 230V~
LED 12 - 24V
TELECO AUTOMATION SRL
Via dell’Artigianato, 16 - 31014 Colle Umberto (TV) ITALY
TELEPHONE: ++39.0438.388511 FAX: ++39.0438.388536 - www.telecoautomation.com
This document is the property of Teleco Automation Srl who reserves all reproduction and copying rights
DOC.: T630.05_A
TVSTRDXXXBST24M DATE:09/05/18
2
IT - COLLEGAMENTI EN  WIRINGS FR - CONNEXIONS DE  ANSCHLÜSSE
ON/OFF
(EIN/AUS)
DIMMER
ꜛ ꜜ
Breve pressione = ON/OFF
Premuto = Dimmer
Short press = ON/OFF
Keep pressed = Dimmer
Pression courte = ON/OFF
Continue = Dimmer
Kurzer Druck = EIN/AUS
Gedrückt halten = Dimmer
IT -
EN -
FR -
DE -
IT - Attenzione: l’alimentazione
fornita al ricevitore deve corrispondere
al voltaggio del carico!
EN - Attention: the power supply
connected to the receiver must
correspond to the voltage of the load!
FR - Attention: l’alimentation fournie
au récepteur doit correspondre à la
tension de la charge!
DE - Achtung: Die Stromversorgung
des Empfängers muss mit der
Spannung der Last übereinstimmen!
IT - Per vericare il collegamento dei led premere P1
EN - To test the led wiring, press P1
FR - Pour vérier la connexion des LEDs appuyer sur P1
DE - Um den Anschluss der LEDs zu überprüfen drücken Sie P1
IT - Attenzione: non invertire la polarità dei led!
EN - Attention: do not invert the polarity of the led!
FR - Attention: ne pas inverser la polarité des leds!
DE - Achtung: Polung der LEDs nicht invertieren!
< 1s > 1s
2x2.5mm
P1
Led 1
P1
P2
P3 Led 2
Led 3
Led 4
9
10
11
12
13
14
12-24V IN
1
2
3
4
5
6
+
-L
N
-
...
+
-
LINE
IN ~
24V
3
IT - MEMORIZZAZIONE CODICI RADIO EN  RADIO CODES MEMORIZATION
FR - MÉMORISATION DES CODES RADIO DE  EINLERNUNG SENDEKANÄLE
1.1
1.2
IT - TIPO DI MEMORIZZAZIONE
EN - TYPE OF MEMORIZATION
FR - TYPE DE MÉMORISATION
DE - EINLERNUNGSART
IT - 7canali
EN - 7channels
FR - 7canaux
DE - 7Kanäle
*
x1
IT - Premere il tasto del
trasmettitore relativo al
codice da memorizzare.
EN - Press the button
of the transmitter
relative to the code to
memorize.
FR - Appuyer sur le
bouton de l’émetteur
concernant le code à
mémoriser.
DE - Drücken Sie die
Sendertaste die auf
den zu speichernden
Code bezogen ist.
IT - 1 tasto:
EN - 1 button:
FR - 1 bouton:
DE - 1 Taste:
*
x2
IT - 1 tasto con funzione ON
EN - 1 button with function ON
FR - 1 bouton avec fonction ON
DE - 1 Taste mit Funktion EIN
*
x3
IT - 1 tasto con funzione OFF
EN - 1 button with function OFF
FR - 1 bouton avec fonction OFF
DE - 1 Taste mit Funktion AUS
*
x4
IT - 3canali
EN - 3channels
FR - 3canaux
DE - 3Kanäle
*
x5
GREEN MOUSE *
x6
...
tenere premuto
keep it pressed
maintenir appuyé
gedrückt halten
suono continuo
continuous sound
son continu
Dauerton
suono intermittente
intermittent sound
son intermittent
intermittierender Ton
OFF
(AUS)
100%
75%
50%
Min.
DIM +
DIM -
CH1
CH2
CH3
CH4
CH5
CH6
CH7
ON/OFF
(EIN/AUS)
DIM +
DIM -
CH5
CH6
CH7
ON/OFF
(EIN/AUS)
< 1 s
DIMMER
ꜛ ꜜ
> 1 s
P2
*IT - Il buzzer emette un bip ad ogni pressione. EN - The buzzer will make a beep each press. FR - L’avertisseur sonore émet un bip à chaque appui. DE - Das Gerät quittiert jeden Druck mit einem Ton.
4
1.1
1.3 IT - CANCELLAZIONE CODICI RADIO EN  RADIO CODES DELETION
FR - SUPPRESSION DES CODES RADIO DE  LÖSCHUNG VON SENDEKANÄLEN
*IT - Il buzzer emette un bip ad ogni pressione. EN - The buzzer will make a beep each press. FR - L’avertisseur sonore émet un bip à chaque appui. DE - Das Gerät quittiert jeden Druck mit einem Ton.
IT - TIPO DI CANCELLAZIONE
EN - TYPE OF DELETION
FR - TYPE DE SUPPRESSION
DE - LÖSCHUNGSART
IT - Singolo codice radio
EN - Single radio code
FR - Un seul code radio
DE - Einzelner Sendekanal
*
x1
IT - Premere il tasto del trasmettitore relativo al
codice da cancellare.
EN - Press the button of the transmitter relative to
the code to delete.
FR - Appuyer sur le bouton de l’émetteur concernant
le code à supprimer.
DE - Drücken Sie die Sendertaste die auf den zu
löschenden Code bezogen ist.
IT - Tutti i codici radio
EN - All the radio codes
FR - Tous les codes radio
DE - Alle Sendekanäle
*
x2
...
suono continuo
continuous sound
son continu
Dauerton
(10 s)
suono intermittente
intermittent sound
son intermittent
intermittierender Ton
tenere premuto
keep it pressed
maintenir appuyé
gedrückt halten
P3
5
IT - Premere il tasto P3 del trasmettitore memorizzato. Premere il tasto relativo ad un codice memorizzato. Premere il tasto
relativo al nuovo codice.
EN - Press the button P3 of the memorized transmitter. Press the button relative to a memorized code. Press the button
relative to the new code.
FR - Appuyer sur le bouton P3 de l’émetteur mémorisé. Appuyer sur le bouton concernant un code mémorisé. Appuyer sur
le bouton concernant le nouveau code.
DE - Drücken Sie die Taste P3 des gespeicherten Senders. Drücken Sie die auf den gespeicherten Code bezogene Taste.
Drücken Sie die auf den neuen Code bezogene Taste.
IT - MEMORIZZAZIONE REMOTA DI ULTERIORI CODICI RADIO EN  REMOTE MEMORIZATION OF FURTHER RADIO CODES
FR - MÉMORISATION À DISTANCE D’AUTRES CODES RADIO DE  FERN SPEICHERUNG VON WEITEREN SENDEKANÄLEN
2.1
1 s< 5 s
suono continuo
continuous sound
son continu
Dauerton
suono intermittente
intermittent sound
son intermittent
intermittierender Ton
...
P3
memorizzato
memorized
mémorisé
gespeichert
memorizzato
memorized
mémorisé
gespeichert
< 5 s
suono continuo
continuous sound
son continu
Dauerton
nuovo
new
nouveau
neu
IT - Il tasto P3 si trova all’interno del trasmettitore.
Il codice radio aggiunto avrà le stesse funzioni del
codice usato per l’inserimento. La procedura è
compatibile con qualsiasi tipo di trasmettitore.
EN - P3 button is located inside the transmitter. The
added radio code will have the same functions of
the code used for the memorization. This procedure
is compatible with any type of transmitter.
FR - Le bouton P3 se trouve à l’intérieur de
l’émetteur. Le code radio ajouté aura les mêmes
fonctions que le code utilisé pour la mémorisation.
La procédure est compatible avec n’importe quel
type d’émetteur.
DE - Die Taste P3 bendet sich im Inneren des
Senders. Der hinzugefügte Sendekanal wird
dieselben Funktionen des Codes haben welcher
für die Einlernung verwendet wurde. Die Prozedur
kann mit allen Arten von Sendern durchgeführt
werden.
IT - CANCELLAZIONE REMOTA DI UN CODICE RADIO EN  REMOTE DELETION OF A RADIO CODE
FR - SUPPRESSION À DISTANCE D’UN CODE RADIO DE  FERN LÖSCHUNG EINES SENDEKANALS
2.2
IT - Il tasto P3 si trova all’interno del trasmettitore.
EN - P3 button is located inside the transmitter.
FR - Le bouton P3 se trouve à l’intérieur de
l’émetteur.
DE - Die Taste P3 bendet sich im Inneren des
Senders.
IT - Premere tre volte il tasto P3 del trasmettitore memorizzato. Premere il tasto relativo al codice da cancellare.
EN - Press three times the button P3 of the memorized transmitter. Press the button relative to the code to delete.
FR - Appuyer trois fois sur le bouton P3 de l’émetteur mémorisé. Appuyer sur le bouton concernant le code à supprimer.
DE - Drücken Sie drei mal die Taste P3 des gespeicherten Senders. Drücken Sie die auf den zu löschenden Code bezogene Taste.
x 3
1 s
suono continuo
continuous sound
son continu
Dauerton
suono intermittente
intermittent sound
son intermittent
intermittierender Ton
...
P3
memorizzato
memorized
mémorisé
gespeichert
< 5 s
suono continuo
continuous sound
son continu
Dauerton
6
Attivazione
Activation
Activation
Aktivierung
Disattivazione
Deactivation
Désactivation
Deaktivierung
IT - ATTIVAZIONE/DISATTIVAZIONE MEMORIA DELL’ULTIMO VALORE DI INTENSITÀ LUMINOSA
EN  ACTIVATION/DEACTIVATION OF THE MEMORY OF THE LAST LIGHT INTENSITY VALUE
FR - ACTIVATION/DÉSACTIVATION DE LA MÉMOIRE À LA DERNIÈRE VALEUR D’INTENSITÉ LUMINEUSE
DE  AKTIVIERUNG/ DEAKTIVIERUNG DER SPEICHERUNG LETZTER WERT DER LICHTINTENSITÄT
3.1
IT - Premere i tasti P1 e P3 contemporaneamente.
EN - Press the buttons P1 and P3 at the same time.
FR - Appuyer en même temps sur le boutons P1 et P3.
DE - Drücken Sie gleichzeitig die Tasten P1 und P3.
IT - Se un trasmettitore con valori di luminosità modicati viene usato nella memorizzazione remota (2.1), il trasmettitore aggiunto avrà gli stessi valori modicati.
EN - If any transmitter with modied light values is used in the remote memorization (2.1), the added transmitter will have the same modied values.
FR - Si un émetteur avec valeurs de luminosité modiées est utilisé dans la mémorisation via radio (2.1), l’émetteur ajouté aura les mêmes valeurs modiées.
DE - Wenn ein Sender mit geändertem Helligkeitswert für die Fern- Einlernung (2.1) verwendet wird, wird der Sender dieselben geänderten Werte haben.
IT - 1. Premere il tasto relativo al valore da modicare (CH1..CH4). 2. Regolare il valore con i tasti CH5 e CH6. 3. Premere e tenere premuto CH7 per 5 s.
EN - 1. Press the button relative to the value to modify (CH1..CH4). 2. Adjust the value with buttons CH5 and CH6. 3. Press CH7 and keep it pressed for 5 s.
FR - 1. Appuyer sur le bouton concernant la valeur à modier (CH1..CH4). 2. Régler la valeur par mois des boutons CH5 et CH6. 3. Appuyer et maintenir appuyé CH7 pour 5 s.
DE - 1. Drücken Sie die Taste bezüglich des zu ändernden Werts (CH1..CH4). 2. Stellen Sie den Wert mit den Tasten CH5 und CH6 ein. 3. CH7 drücken und halten Sie 5 Sek. lang gedrückt.
IT - MODIFICA DEI VALORI DI LUMINOSITÀ PREIMPOSTATI DI UN TRASMETTITORE 7/42 CANALI
EN  MODIFICATION OF THE PRESET LIGHT VALUES OF A 7/42 CHANNEL TRANSMITTER
FR - MODIFICATION DES VALEURS DE LUMINOSITÉ PRÉRÉGLÉES D’UN ÉMETTEUR 7/42 CANAUX
DE  ÄNDERUNG DER VOREINGESTELLTEN HELLIGKEITSWERTE EINES 7/42KANAL SENDERS
3.2
suono continuo
continuous sound
son continu
Dauerton
P1+P3
LED4 OFF
LED4 ON
P3
+
P1
CH1
CH2
CH3
CH4
CH5
CH6
CH7
21 CH1
CH2
CH3
CH4
CH5
CH6
CH7
CH1
CH2
CH3
CH4
CH5
CH6
CH7
3
( 5 s)
LED
OFF
LED
ON
7
IT - AVVERTENZE EN  WARNING FR - AVERTISSEMENTS DE  ACHTUNG
IT - Prima di collegare l’alimentatore alla rete elettrica assicurarsi che l’alimentatore e i LED siano collegati correttamente al ricevitore. Un errato collegamento dei diodi LED
(inversione di polarità) potrebbe danneggiarli, fare pertanto molta attenzione al loro collegamento rispettando le polarità. L’alimentatore del dispositivo deve fornire la tensione e la
corrente richiesta dal dispositivo e dai LED collegati. L’alimentatore deve essere conforme alla norma IEC60950-1 e protetto contro i corto circuiti e sovratensioni. All’accensione
il ricevitore riprende la condizione precedente allo spegnimento. Il prodotto non deve essere inglobato o appoggiato in prodotti isolanti come lana di vetro o polistirolo o prodotti
analoghi. Lasciare il contenitore il più arieggiato possibile.
EN - Connect the power supplier and the LED correctly to the receiver before connecting the power supplier to the mains supply. A faulty connection of the LED diodes (polarity
inversion) could damages them, therefore pay attention during their connection by respecting the polarity. The general power supply of the device has to be provided by a power
supplier which can supply the needed power and voltage. The power supply must be compliant with IEC60950-1 and must be protected against short circuit and overvoltage. At
the power-on the device resumes the status it had before the turning-off. The product must not be enclosed or placed with insulating material such as glass wool, polystyrene or
similar materials. Let the housing to be well-ventilated.
FR - Avant de brancher l’alimentation à la ligne électrique, s’assurer que l’alimentation et les LED soient branchées correctement au récepteur. Un branchement incorrect des
diodes LED (inversion de la polarité) peut les endommager, donc bien vérier les polarités lors du branchement. L’alimentation du dispositif doit fournir la tension et le courant
demandés par le dispositif et par les LED reliés. L’alimentation doit être conforme à la norme IEC60950-1 et elle doit être protégée contre les courts-circuits et les surtensions. A
la mise sous-tension, le dernier état avant extinction (ON ou OFF) est restauré. Le produit ne doit pas être incorporé ou posé dans des matériaux isolants (comme bre de verre,
polystyrène ou similaires). Faire en sorte de maintenir le boitier dans un endroit sec et aéré.
DE - Verbinden Sie die Stromversorgung und die LEDs korrekt mit dem Empfänger bevor Sie die Stromversorgung an das Netz anschließen. Ein fehlerhafter Anschluss (verkehrte
Polung) kann die LEDs beschädigen. Der Stromversorger des Geräts muss das Gerät und die angeschlossenen LEDs mit der entsprechenden Spannung und Strom versorgen.
Der Stromversorger des Geräts muss das Gerät und die angeschlossenen LEDs mit der entsprechenden Spannung und Strom versorgen. Das Netzgerät muss der Norm
IEC60950-1 entsprechen und gegen Kurzschlüsse und Überspannungen gesichert sein. Mit power- on- reset werden die Einstellungen vor dem Abschalten wieder hergestellt.
Das Gerät darf nicht eingehaust oder durch Isolationsmaterial wie Glaswolle, Polystyrol oder ähnlichem umbaut werden. Das Gehäuse muss eine ausreichende Durchlüftung
haben.
IT - Il fabbricante, Teleco Automation s.r.l , dichiara che il tipo di Apparecchiatura radio è conforme alla direttiva 2014/53/UE. Il testo completo della dichiarazione di conformità UE è
disponibile al seguente indirizzo Internet: www.telecoautomation.com/ce
EN - The manufacturer, Teleco Automation s.r.l, declares that the type of radio equipment is compliant with Directive 2014/53 / EU. The full text of the EU compliance
declaration is available at the following Internet address: www.telecoautomation.com/ce
FR -Le fabricant, Teleco Automation s.r.l, déclare que le type d’équipement radio est conforme avec la directive 2014/53/EU. Le texte intégral de la déclaration de conformité
EU est disponible à l’adresse internet suivante: www.telecoautomation.com/ce
DE - Der Hersteller, Teleco Automation S.r.l., erklärt hiermit dass die Funk- Produktart der Richtlinie 2014/53/UE entspricht. Die EU Konformitätserklärung kann auf der
folgenden Internetseite abgefragt werden:www.telecoautomation.com/c
ES - El fabricante, Teleco Automation s.r.l, declara que el tipo de equipo radio cumple con la Directiva 2014/53/UE. El texto completo de la declaración de conformidad de la
UE está disponible en la siguiente dirección de Internet: www.telecoautomation.com/ce
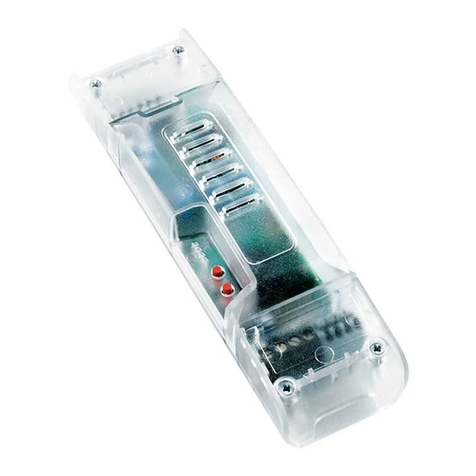
IT - SPECIFICHE TECNICHE EN  TECHNICAL SPECIFICATIONS
FR - SPÉCIFICATIONS TECHNIQUES DE  TECHNISCHE DATEN
IT - Nell’ottica di un continuo sviluppo dei propri prodotti, il produttore si riserva il diritto di apportare modiche a dati tecnici e prestazioni senza preavviso.
EN - In the view of a constant development of their products, the manufacturer reserves the right for changing technical data and features without prior notice.
FR - Dans l’optique d’un développement continu de ses produits, le constructeur se réserve le droit d’apporter sans préavis des modications aux données techniques et aux prestations.
DE - Im Zuge einer kontinuierlichen Weiterentwicklung der Produkte behält sich der Hersteller das Recht vor technische Daten und Funktionen ohne vorherige Ankündigung zu ändern.
Alimentazione - Power supply - Alimentation - Stromversorgung 12 - 24V
Uscite - Output - Sorties - Ausgänge 1
Potenza massima per uscita - Max power for each output
Puissance maximale par sortie - Max. Leistung für Ausgänge
12A
(150W - 12V )
(300W - 24V )
Temperatura di funzionamento - Operating temperature range
Température de fonctionnement - Umgebungstemperatur im Betrieb -20°C - +50°C
Sezione cavi in ingresso (carico massimo) - Section of input cable (maximum load)
Section des câbles pour entrée (charge maximale) - Kabelquerschnitte (Eingang) 2,5 mm2
IT - I cavi di collegamento devono avere una sezione adeguata al carico massimo applicato in uscita, e ai dispositivi
supplementari collegati agli ingressi.
EN - The connection cables must have a section suitable to the maximum load applied to the output, and to the
additional devices connected to the input.
FR - Les câbles de connexion doivent avoir une section appropriée à la charge maximale appliquée en sortie et aux
dispositifs supplémentaires connectés aux entrées.
DE - Die Verbindungskabel müssen einen Durchschnitt haben der angemessen ist für die maximale Ausgangslast und
für die weiteren Geräte die an den Eingängen angeschlossen sind.
Frequenza ricezione - Reception frequency
Fréquence de réception - Empfangsfrequenz
868.3 MHz (TVSTRD868BST24M)
916 MHz (TVSTRD916BST24M)
Capacità memoria radio (trasmettitori) - Radio memory capatibility (transmitters)
Capacité mémoire radio (émetteurs) - Speicherbare Sender 42
Grado di protezione - Protection rating - Degré de protection - Schutzart IP54
TELECO AUTOMATION S.R.L.
ITALY
Tel. +39.0438.388511
info@telecoautomation.com
TELECO AUTOMATION FRANCE
FRANCE
Tel. +33.(0)472.145080
info@telecofrance.com
TELECO AUTOMATION GMBH
GERMANY
Tel. +49.(0)8122.9563024
info.de@telecoautomation.com
TELECO AUTOMATION OCEANIA PTY LTD
AUSTRALIA
Tel. +61.(07)5502.7801
info@telecoautomation.com.au
This document is the property of Teleco Automation Srl who reserves all reproduction and copying rights
NL - RADIO-ONTVANGER VOOR DE BESTURING VAN 1-KLEURIGE LEDSTRIPS MET GEMEENSCHAPPELIJKE
ANNODE.
NL - Productcode
NL - MONTAGE
TVSTRD868BST24M Master 3x4A, Box IP54 (868.3Mhz)
TVSTRD916BST24M Master 3x4A, Box IP54 (916Mhz)
LINE 230V~
LED 12 - 24V
165 mm
IT - Foro per il fissaggio con vite (sotto lo sportello)
EN - Hole for fixing with screw (under the cover)
FR - Trou pour fixation avec vis (sous le couvercle)
DE - Loch für die Montage mit Schraube (unter dem Deckel)
IT - Montaggio su superficie piana
EN - Flat surface mounting
FR - Fixation sur surface plate
DE - Montage auf ebene Oberfläche
70 mm
185 mm
IT - Foro per il fissaggio con vite (sotto lo sportello)
EN - Hole for fixing with screw (under the cover)
FR - Trou pour fixation avec vis (sous le couvercle)
DE - Loch für die Montage mit Schraube (unter dem Deckel)
IT - Montaggio su superficie piana
EN - Flat surface mounting
FR - Fixation sur surface plate
DE - Montage auf ebene Oberfläche
74 mm (50 mm)
56 mm
151 mm
47 mm
40 mm
NL - Gat voor bevestiging met schroef (onder het klepje)
NL - Montage op vlakke ondergrond
TELECO AUTOMATION SRL
Via dell’Artigianato, 16 - 31014 Colle Umberto (TV) ITALY
TELEPHONE: ++39.0438.388511 FAX: ++39.0438.388536 - www.telecoautomation.com
This document is the property of Teleco Automation Srl who reserves all reproduction and copying rights
DOC.: T630.05_B
TVSTRDXXXBST24M DATE:09/05/18
2
NL - AANSLUITINGEN
ON/OFF
(EIN/AUS)
DIMMER
ꜛ ꜜ
Korte druk = ON/OFF
Ingedrukt houden = Dimmer
NL -
NL - Let op: de aan de ontvanger
geleverde voeding moet
overeenkomen met de spanning van
de belasting!
NL - Druk voor de controle van de aansluiting van de leds op P1
NL - Let op: de polariteit van de leds niet omkeren!
< 1s > 1s
2x2.5mm
P1
Led 1
P1
P2
P3 Led 2
Led 3
Led 4
9
10
11
12
13
14
12-24V IN
1
2
3
4
5
6
+
-L
N
-
...
+
-
LINE
IN ~
24V
3
NL- MEMORISATIE RADIOCODES
NL - TYPE MEMORISATIE
NL - 7kanalen *
x1
NL - Druk op de toets
van de zender in
overeenkomst met de
te memoriseren code.
NL - 1 toets: *
x2
NL - 1 toets met functie ON *
x3
NL - 1 toets met functie OFF *
x4
NL - 3kanalen *
x5
GREEN MOUSE *
x6
houd ingedrukt continu geluid
intermitterend geluid
*NL - De zoemer laat bij iedere druk op de knop een pieptoon horen.
1.2
DIMMER
ꜛ ꜜ
> 1 s
P2
OFF
(AUS)
100%
75%
50%
Min.
DIM +
DIM -
CH1
CH2
CH3
CH4
CH5
CH6
CH7
ON/OFF
(EIN/AUS)
DIM +
DIM -
CH5
CH6
CH7
...
ON/OFF
(EIN/AUS)
< 1 s
4
NL - WISSEN RADIOCODES
*NL - De zoemer laat bij iedere druk op de knop een pieptoon horen.
NL - TYPE WISSEN
NL - Enkele radiocode *
x1
NL - Druk op de toets van de zender in overeenkomst
met de te wissen code.
NL - Alle radiocodes *
x2
continu geluid
intermitterend geluid
houd ingedrukt
(10 s)
P3 ...
1.3
5
NL - Druk op de toets P3 van de gememoriseerde zender. Druk op de toets in overeenkomst met een gememoriseerde
code. Druk op de toets in overeenkomst met de nieuwe code.
NL - EXTERNE MEMORISATIE VAN VERDERE RADIOCODES
continu geluid intermitterend geluid
gememorise-
erd gememorise-
erd
continu geluid nieuw
NL - De toets P3 bevindt zich in de zender. De
toegevoegde radiocode zal dezelfde functies
hebben als van de code gebruikt voor het invoeren.
De procedure is compatibel met elk type zender.
NL - EXTERN WISSEN VAN EEN RADIOCODE
NL - De toets P3 bevindt zich in de zender.
NL - Druk drie keer op de toets P3 van de gememoriseerde zender. Druk op de toets in overeenkomst met de te wissen code.
continu geluid intermitterend geluid
gememoriseerd
continu geluid
...
P3 < 5 s 1 s < 5 s
x 3
1 s
...
P3 < 5 s
2.2
2.1
6
Activering
Deactivering
NL - ACTIVERING/DEACTIVERING GEHEUGEN VAN DE LAATSTE HELDERHEIDSWAARDE
NL - Druk gelijktijdig op de toetsen P1 en P3.
NL - Wanneer een zender met gewijzigde helderheidswaarden gebruikt wordt in de externe memorisatie (2.1), zal de toegevoegde zender dezelfde gewijzigde waarden hebben.
NL - 1. Druk op de toets in overeenkomst met de te wijzigen waarde (CH1..CH4). 2. Pas de waarde aan met de toetsen CH5 en CH6.
3. Druk en houd CH7 gedurende 5s. ingedrukt.
NL - WIJZIGING VAN DE VOORAF INGESTELDE HELDERHEIDSWAARDEN VAN EEN ZENDER 7/42 KANALEN
continu geluid
3.2
P1+P3
LED4 OFF
LED4 ON
P3
+
P1
CH1
CH2
CH3
CH4
CH5
CH6
CH7
21 CH1
CH2
CH3
CH4
CH5
CH6
CH7
CH1
CH2
CH3
CH4
CH5
CH6
CH7
3
( 5 s)
LED
OFF
LED
ON
3.1
7
NL - Alvorens de voedingsadapter aan te sluiten op het elektriciteitsnet, moet gecontroleerd worden of de adapter en de LEDS correct op de ontvanger zijn aangesloten. Een
onjuiste aansluiting van de LED-diodes (omgekeerde polariteit) zou deze kunnen beschadigen; let derhalve goed op om ze volgens de correcte polariteit aan te sluiten. De
voedingsadapter van het apparaat moet spanning en stroom leveren die benodigd is voor het apparaat en de aangesloten leds. De voedingsadapter moet voldoen aan de norm
IEC60950-1 en beveiligd zijn tegen kortsluitingen en overspanning. Bij de inschakeling hervat de ontvanger de status van voor de uitschakeling. Het product moet niet worden
ingebouwd of geplaatst worden op isolatiematerialen zoals glaswol, polystyreen of soortgelijke producten. Laat de houder zo geventileerd mogelijk.
NL - De fabrikant, Teleco Automation s.r.l., verklaart dat de type uitrusting radio in overeenkomst is met de richtlijn 2014/53/EU. Een exemplaar van de EU conformiteitverklaring
kan u downloaden vie de site: www.telecoautomation.com/ce.
NL - WAARSCHUWINGEN
NL - TECHNISCHE GEGEVENS
NL - Met het oog op een voortdurende ontwikkeling van zijn producten, behoudt de fabrikant zich het recht voor om zonder voorafgaande kennisgeving wijzigingen aan te
brengen op technische gegevens en prestaties.
Voeding 12 - 24V
Uitgangen 1
Maximaal vermogen per uitgang -
12A
(150W - 12V )
(300W - 24V )
Bedrijfstemperatuur -20°C - +50°C
Doorsnede ingaande kabels (maximale belasting) 2,5 mm2
NL - De verbindingskabels moeten een doorsnede hebben die geschikt is voor de toegepaste maximale uitgaande
belasting en voor de op de
ingangen aangesloten aanvullende apparaten.
Ontvangstfrequentie 868.3 MHz (TVSTRD868BST24M)
916 MHz (TVSTRD916BST24M)
Vermogen geheugen radio (zenders) 42
Beschermingsklasse IP54
TELECO AUTOMATION S.R.L.
ITALY
Tel. +39.0438.388511
info@telecoautomation.com
TELECO AUTOMATION FRANCE
FRANCE
Tel. +33.(0)472.145080
info@telecofrance.com
TELECO AUTOMATION GMBH
GERMANY
Tel. +49.(0)8122.9563024
info.de@telecoautomation.com
TELECO AUTOMATION OCEANIA PTY LTD
AUSTRALIA
Tel. +61.(07)5502.7801
info@telecoautomation.com.au
This document is the property of Teleco Automation Srl who reserves all reproduction and copying rights

This manual suits for next models

1

Other Teleco Receiver manuals

Teleco TVPLT868C80T0 User manual

Teleco

Teleco TVPLT868C80T0 User manual

Teleco Master TVRCD868A04N User manual

Teleco

Teleco Master TVRCD868A04N User manual

Teleco TVRRL868G02P User manual

Teleco

Teleco TVRRL868G02P User manual

Teleco TVRGBDU868ST24 User manual

Teleco

Teleco TVRGBDU868ST24 User manual

Teleco TVLink TVSTRDW ST24 Series User manual

Teleco

Teleco TVLink TVSTRDW ST24 Series User manual

Teleco TVDMM868A06 User manual

Teleco

Teleco TVDMM868A06 User manual

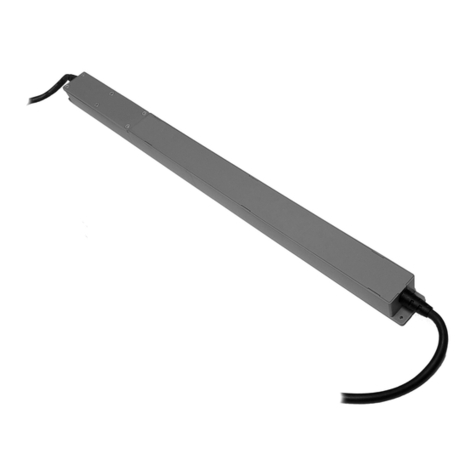
Teleco TVSTICK868NT27 User manual

Teleco

Teleco TVSTICK868NT27 User manual

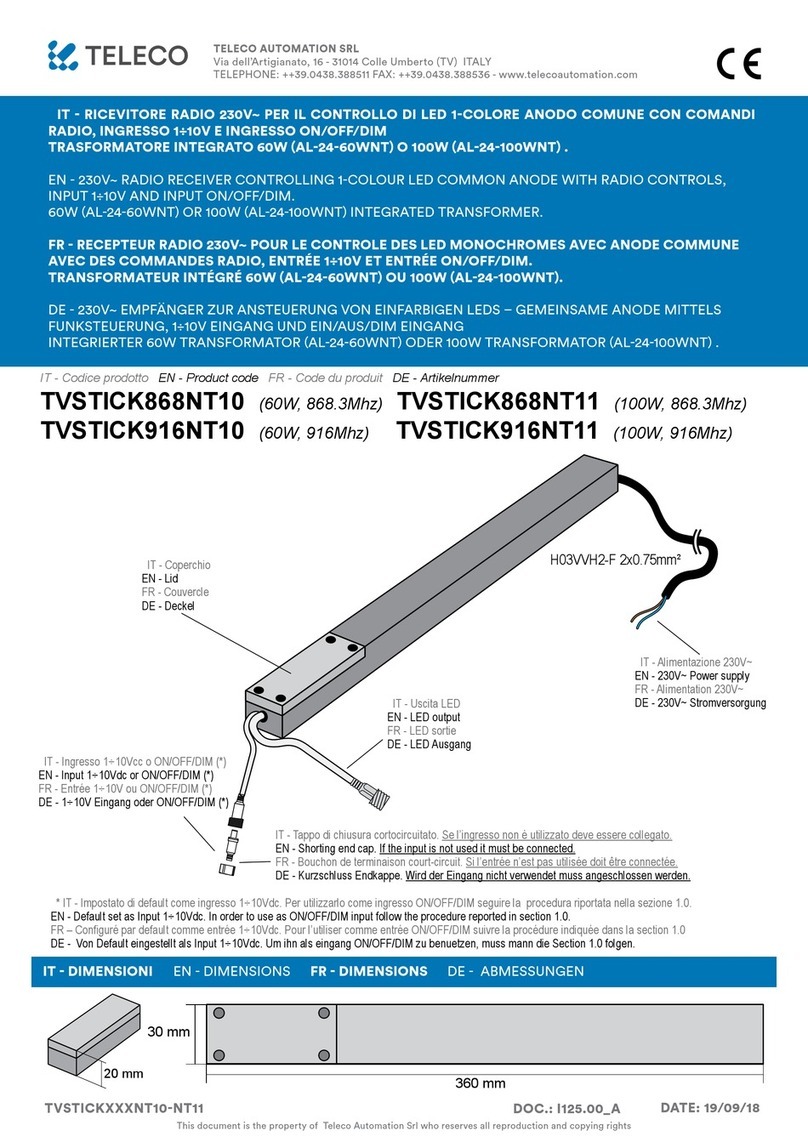
Teleco TVSTICK868NT10 User manual

Teleco

Teleco TVSTICK868NT10 User manual

Teleco TVPL4868AC4 User manual

Teleco

Teleco TVPL4868AC4 User manual

Teleco TVHET868A01C User manual

Teleco

Teleco TVHET868A01C User manual

Teleco TVRRL868G03P User manual

Teleco

Teleco TVRRL868G03P User manual

Teleco TVSPOT868ADI04 User manual

Teleco

Teleco TVSPOT868ADI04 User manual

Teleco TVHET868A01 User manual

Teleco

Teleco TVHET868A01 User manual

Teleco TVSTRD868SI24G User manual

Teleco

Teleco TVSTRD868SI24G User manual

Teleco TUBELITE868A10 User manual

Teleco

Teleco TUBELITE868A10 User manual

Teleco TVSTRD868DI24G User manual

Teleco

Teleco TVSTRD868DI24G User manual

Teleco GSM700 User manual

Teleco

Teleco GSM700 User manual

Teleco TVRGBDU868DT24 User manual

Teleco

Teleco TVRGBDU868DT24 User manual

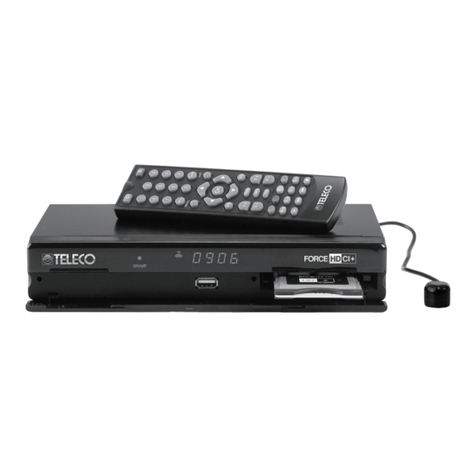
Teleco ForceHDCL+ User manual

Teleco

Teleco ForceHDCL+ User manual

Teleco TVSRGBWU868ST25 User manual

Teleco

Teleco TVSRGBWU868ST25 User manual

Teleco TSDR5000CI User manual

Teleco

Teleco TSDR5000CI User manual

Teleco TRRCL868W60 User manual

Teleco

Teleco TRRCL868W60 User manual

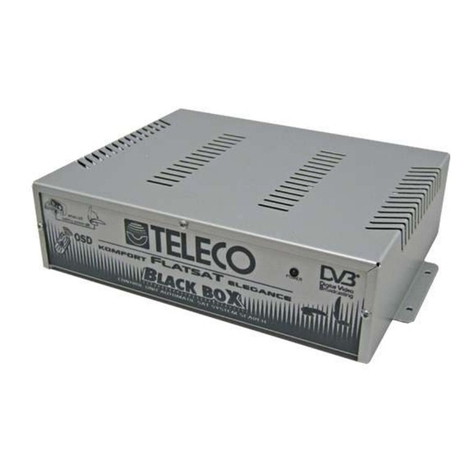
Teleco Flat Sat Elegance User manual

Teleco

Teleco Flat Sat Elegance User manual

Teleco TVLink RS868 User manual

Teleco

Teleco TVLink RS868 User manual

Popular Receiver manuals by other brands

Samsung SP434JMFX/SAP Service manual

Samsung

Samsung SP434JMFX/SAP Service manual

CaptiveWorks CW800 PVR installation guide

CaptiveWorks

CaptiveWorks CW800 PVR installation guide

SoundMax SM-RD2114UB instruction manual

SoundMax

SoundMax SM-RD2114UB instruction manual

Pioneer VSX-D514-K manual

Pioneer

Pioneer VSX-D514-K manual

Strong SRT 5216 user manual

Strong

Strong SRT 5216 user manual

Rotel RSX-1055 Technical manual

Rotel

Rotel RSX-1055 Technical manual

Maycom AR-108 User's operation manual

Maycom

Maycom AR-108 User's operation manual

Switchcraft 318BT user manual

Switchcraft

Switchcraft 318BT user manual

Voltek CRS200 Installation & user's instructions

Voltek

Voltek CRS200 Installation & user's instructions

Pioneer VSX-823-K Specifications

Pioneer

Pioneer VSX-823-K Specifications

ViewSat VSPRO user manual

ViewSat

ViewSat VSPRO user manual

Panasonic RF-SW250S operating instructions

Panasonic

Panasonic RF-SW250S operating instructions

Pioneer MVH-X380BT owner's manual

Pioneer

Pioneer MVH-X380BT owner's manual

Denon AVR-1909 Getting started

Denon

Denon AVR-1909 Getting started

D&R TelCom user manual

D&R

D&R TelCom user manual

PureLink VIP-T400 user manual

PureLink

PureLink VIP-T400 user manual

One Forall SV1810 Quick installation guide

One Forall

One Forall SV1810 Quick installation guide

East oLio user manual

East

East oLio user manual

manuals.online logo
manuals.online logoBrands
  • About & Mission
  • Contact us
  • Privacy Policy
  • Terms and Conditions

Copyright 2025 Manuals.Online. All Rights Reserved.