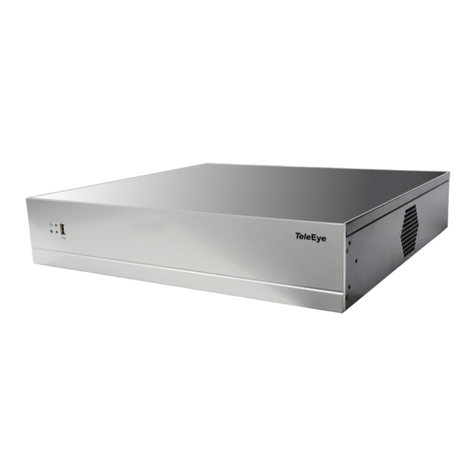
TeleEye RX538 User manual

TeleEye RX538 User Guide Page 1
RX Series
Mobile Digital Video Recorder
RX 538
User Guide
TeleEye RX538 User Guide

TeleEye RX538 User Guide Page 2
Notice:
Signal Communications Limited reserves the right to make improvements to the product
described in this manual at any time and without notice.
This manual is copyrighted. All rights are reserved. This manual should not be copied,
reproduced or translated in whole or part without prior consent from Signal
Communications Limited.
TeleEye is a trademark of Signal Communications Limited and is registered in China,
European Communities, ong Kong, US and other countries.
All other trademarks are the property of their respective owners.
Copyright (c) 2014 Signal Communications Limited (A member of TeleEye Group).
All rights reserved.
Version 1.00
Limits of Liability and Disclaimer of Warranty
Signal Communications Limited has taken care in preparation of this manual, but makes
no expressed or implied warranty of any kind and assumes no responsibility for errors or
omissions. No liability is assumed for incidental or consequential damages in connection
with or arising out of the use of the information or accessories contained herein.
Features and specifications are subject to change without prior notice.
TeleEye RX538 User Guide

TeleEye RX538 User Guide Page 3
Content
1. Introduction
1.1 Introduction ....................................................................................................................... 4
1.2 Packages contents ............................................................................................................ 5
1.3 Features ............................................................................................................................ 6
1.4 Front Panel Description .................................................................................................... 6
1.5 Rear panel Description ..................................................................................................... 7
2. Hardware Installation
2.1 Hard Disk Installation ........................................................................................................
2.2 Hard Disk Removal ........................................................................................................... 9
2.3 Mobile Data Modem Installation ..................................................................................... 10
2.4 Wireless LAN Adaptor Installation .................................................................................. 10
2.5 Vehicle Mounting ............................................................................................................. 11
2.6 Video Installation ............................................................................................................. 13
2.7 Alarm installation ............................................................................................................. 14
2. Power Connection ........................................................................................................... 15
3. Set-up Procedures
3.1 Before Set-up ................................................................................................................... 16
3.1.1 TeleEye sureSIGHT Lite Installation ..................................................................... 16
3.1.2 TeleEye IP Setup Utility Installation ...................................................................... 20
3.1.3 Set-up Preparation ................................................................................................ 22
3.2 Hard Disk Formatting ...................................................................................................... 25
3.3 Hard Disk Available Event ............................................................................................... 26
3.4 Network Setting ............................................................................................................... 27
4. Operation
4.1 Live Operation Through Mobile Data Modem ................................................................. 29
4.2 Live Operation Through LAN/Wireless LAN ................................................................... 32
4.3 Recording ........................................................................................................................ 32
4.4 Footage Extraction .......................................................................................................... 37
5. Appendix
5.1 Limited Warranty ............................................................................................................. 39
5.2 SureLink Technology ....................................................................................................... 40
5.3 Firmware Upgrade .......................................................................................................... 43
5.4 Security Mode ................................................................................................................. 45
5.5 Specification .................................................................................................................... 47
TeleEye RX538 User Guide

TeleEye RX538 User Guide Page 4
1. Introduction
1.1 Introduction
TeleEye RX53 is a robust digtal video recorder designed for fleet security applications.
By using the award-winning SMAC-M multi-streaming video compression technology,
TeleEye RX53 delivers no compromise performance on simultaneous recording and
transmission via mobile network.
TeleEye RX53 can continuously record videos of every single detail during the vehicle in
service. By connecting TeleEye RX53 to a mobile data modem, the driver can push a
button to trigger the TeleEye RX53 to send an alarm and seamless video back to the
central monitoring station via mobile networks such as HSDPA, UMTS, EDGE or GPRS
in an emergency situation. In conjunction to a Wi-Fi gateway, the recorded data can be
reviewed and extracted to the central storage server via a Wi-Fi network after the vehicle
returning back to the depot.
Live onitoring using obile network
Video extraction and playback via WiFi
TeleEye RX538 User Guide
Mobile Data Modem
TeleEye
RX538
Mobile
Network
I ter et
TeleEye CMS
TeleEye
RX538
TeleEye SF360
TeleEye
RX538
TeleEye sureSIGHT

TeleEye RX538 User Guide Page 5
1.2 Packages Contents
TeleEye RX538 User Guide
1.TeleEye RX 538 2.Warra ty Card 3.Registratio Code Sheet
6.HDD Mou t
5.DB 15 Video Cable
8.HDD Mou ti g Screws
7.Mou ti g Screws (Bracket)
4.Bracket

TeleEye RX538 User Guide Page 6
1.3 Features
Automated digital recording initiated by vehicle's ignition
Remote video surveillance on 3G & 4G Network
Max. resolution per channel:
960x576 @25fps (P)
960x4 0 @30fps (N)
Real time crystal clear video recording
Hacker resistant technology
Dual compressions: H.264 for recording and enhanced SMAC-M for video streaming
Support up to 2 x2.5” SATA HDDs
Triplex operations: simultaneous monitoring, recording & playback
Multiple login accounts
sureLink for reliable connection through dynamic IP
BS 41 compliant for sophisticated event management with sureGUARD
Video management software with sureSIGHT
iView HD for remote monitoring on mobile phones
Fast detachment & shock protection design
1.4 Front panel description
TeleEye RX538 User Guide
Power LED

TeleEye RX538 User Guide Page 7
1.5 Rear panel description
1 2 3 4 5 6 7 8 9 10 11 12
TeleEye RX538 User Guide
Item Name Function
1 Alarm IN/ Relay OUT External alarm input and relay output
2 DC12-24V Connecting 12-24 V DC input
3 Power Jack Connecting to 16V DC power adapter
4 RS-4 5 For telemetry use
5 USB port Connecting 3G USB modem
6 Ethernet RJ45 socket for network connection
7 Fuse Protect the machine
VGA port Connecting with VGA port
9 TV OUT Digital video output
10 Audio PA output/ PB output
11 Audio input Audio input
12 Video-in Video input

TeleEye RX538 User Guide Page 8
2. Hardware Installation
2.1 Hard Disk Installation
Step 1
Remove screws on left cover.
Step 2
Open the left cover.
Step 3
Insert the Hard Disk into the SATA port.
Step 4
Mount the Hard Disk with given screws and rings.
Step 5
put the left cover back and fix it with the screws.
TeleEye RX538 User Guide

TeleEye RX538 User Guide Page 9
2.2 Hard Disk Re oval
Step 1
Remove screws on the left cover.
Step 2
Open the left cover.
Step 3
Remove screws which mount the Hard Disk.
Step 4
Slide the Hard disk out.
TeleEye RX538 User Guide

TeleEye RX538 User Guide Page 10
2.3 Mobile data ode installation
Connect Mobile Date Modem to the USB port.
2.4 Wireless LAN adaptor installation
Connect CAT5 Ethernet Cable to the Wireless LAN adaptor.
TeleEye RX538 User Guide
Wireless LAN adaptor
CAT5 Ether et
Cable
Mobile Data Modem

TeleEye RX538 User Guide Page 11
2.5 Vehicle Mounting
Horizontal mounting
Step 1
Measure four positions for mounting screws to the vehicle and then drill holes on the
surface.
Step 2
Mount it with given screws and rings.
Vertical mounting
Step 1
Remove four screws on RX53 .
TeleEye RX538 User Guide
Left Mou ti g Plate
Right Mou ti g Plate
Left Mou ti g Plate Right Mou ti g Plate

TeleEye RX538 User Guide Page 12
Step 2
Swap the left mounting plate with the right mounting plate.
Step 3
Mount the plates to the RX53 with screws and rings.
Step 4
Measure four positions for mounting screws to the vehicle and then drill holes on the
surface.
Step 5
Mount it with given screws and rings.
TeleEye RX538 User Guide
Right Mou ti g Plate Left Mou ti g Plate
Right Mou ti g Plate Left Mou ti g Plate

TeleEye RX538 User Guide Page 13
2.6 Video installation
Fix Camera
Connect the fix camera to the VIDEO IN with DB15 Video Cable(item 5 on P.5).
PTZ Camera
Step 1
Connect the PTZ camera to the VIDEO IN with DB15 Video Cable.
Step 2
Connect RS-4 5 bus to the RS-4 5 port.
TeleEye RX538 User Guide
DB 15 Video
Cable
DB 15 Video
Cable
RS-485 Bus
PTZ Camera
Fix Camera

TeleEye RX538 User Guide Page 14
2.7Alar installation
TeleEye RX supports up to 16 alarm ports in that order with tamper detection for
connecting with alarm sensors, 4 additional input sensors and 4 relay ports for control.
The definitions of alarm and relay control ports are shown in the following diagram.
Pin assign ent for TeleEye RX
TeleEye RX538 User Guide
Pin 1 ALARM 1 Pin 20 GND
Pin 2 ALARM 2 Pin 21 GND
Pin 3 ALARM 3 Pin 22 GND
Pin 4 ALARM 4 Pin 23 GND
Pin 5 ALARM 5 Pin 24 GND
Pin 6 ALARM 6 Pin 25 GND
Pin 7 ALARM 7 Pin 26 GND
Pin 8 ALARM 8 Pin 27 GND
Pin 9 ALARM 9 Pin 28 ARM/DISARM
Pin 10 ALARM 10 Pin 29 SECURITY SWITCH
Pin 11 ALARM 11 Pin 30 POWER FAILURE
Pin 12 ALARM 12 Pin 31 SYSTEM TAMPER
Pin 13 ALARM 13 Pin 32 ALARM 14
Pin 14 ALARM 15 Pin 33 ALARM 16
Pin 15 RELAY 0a Pin 34 RELAY 0b
Pin 16 RELAY 1a Pin 35 RELAY 1b
Pin 17 RELAY 2a Pin 36 RELAY 2b
Pin 18 RELAY 3a Pin 37 RELAY 3b
Pin 19 N/A

TeleEye RX538 User Guide Page 15
2.8 Power connection
Step 1
Connect 16V power supply with adaptor cable according to the following instruction:
V+ (16V) : White, Red
GND : Yellow / Blue, Green, Black
Step 2
Connect Power DC-16V input to the power supply with power adaptor cable.
Step 3
Power on RX53 .
TeleEye RX538 User Guide
Power Supply
Power Adaptor Cable

TeleEye RX538 User Guide Page 16
3. et-up Procedures
3.1 Before Set-up
3.1.1 TeleEye sureSIGHT Lite Installation
sureSIGHT is an integrated video management platform for IP cameras and Video
Recording Servers. Its modular design allows customers to scale up easily and add
functional modules to suit specific requirements.
For the sureSIGHT Lite installation, please refer to the following steps:
Step 1
Put the installation CD into the CD-ROM or DVD-ROM. The installer will pop up
automatically.
If not, go to “My Computer” to browse the CD. Execute “Installer .exe” to run the
installer.
TeleEye RX538 User Guide

TeleEye RX538 User Guide Page 17
Step 2
Click [Install] next to the JAVA Runtime. If JAVA Runtime is installed, jump to Step 3.
Note: JAVA Runtime has to be installed before installing sureSIGHT Lite.
Click [Install >] at the right hand bottom. Click [Close].
Step 3
If JAVA Runtime is successfully installed, the installer menu will be shown as below. Click
[Install] next to the sureSIGHT Lite in the installer menu.
TeleEye RX538 User Guide

TeleEye RX538 User Guide Page 18
Step 4
After reading the terms of License Agreement, click [Yes] to accept and install Microsoft
Visual C++ 2005 Redistributable. After that, click [Next >] in the Welcome Window.
Step 5
After reading the License Agreement, select “I Agree” to confirm and the click [Next >].
TeleEye RX538 User Guide

TeleEye RX538 User Guide Page 19
Step 6
If needed, click [Browse…] to change the installation path of sureSIGHT and click
[Disk Cost…] to check the available space for the installation.
Click [Next >]. Then, click [Next >] to start the installation.
Step 7
Wait until there is the Installation Complete Window shown. Then, click [Close].
TeleEye RX538 User Guide

TeleEye RX538 User Guide Page 20
Step 8
When the sureSIGHT Lite is installed successfully, the installer menu will be shown as
below.
3.1.2 TeleEye IP Setup Utility Installation
Step1
Install “TeleEye IP Setup Utility” from the installation CD.
(Note: “TeleEye IP Setup Utility” requires .NET framework to operate properly, please
install the .NET framework which is in the installation CD if needed.)
TeleEye RX538 User Guide
Other manuals for RX538
1
Table of contents
Other TeleEye DVR manuals
TeleEye
TeleEye RN684 User manual

TeleEye
TeleEye RX364 User manual

TeleEye
TeleEye JN6500-S User manual
TeleEye
TeleEye RX538 User manual

TeleEye
TeleEye GN8808 User manual
TeleEye
TeleEye JN6204 User manual
TeleEye
TeleEye GN6516 User manual

TeleEye
TeleEye GN6516 User manual

TeleEye
TeleEye RA Series Manual
TeleEye
TeleEye RM134 User manual
TeleEye
TeleEye RV432 User manual
TeleEye
TeleEye JN6400 User manual
TeleEye
TeleEye RA204 User manual

TeleEye
TeleEye GN8816 User manual
TeleEye
TeleEye RN284 User manual

TeleEye
TeleEye GN6516 User manual
TeleEye
TeleEye RX324_V3 User manual

TeleEye
TeleEye RX504 User manual
TeleEye
TeleEye JN204X DVR User manual

TeleEye
TeleEye RM134 User manual


