Wall Mounting
A wall-mounting bracket can be
purchased separately from Telstra.
4
79
8
56
1
2
3
4
5
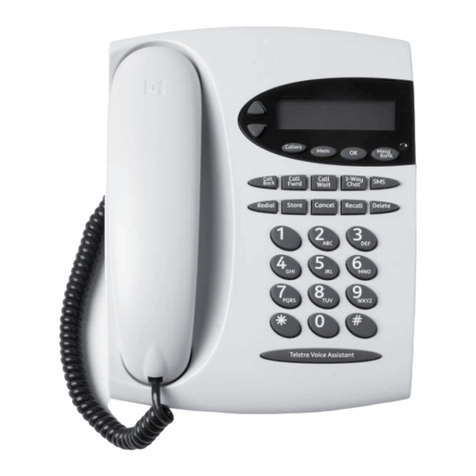
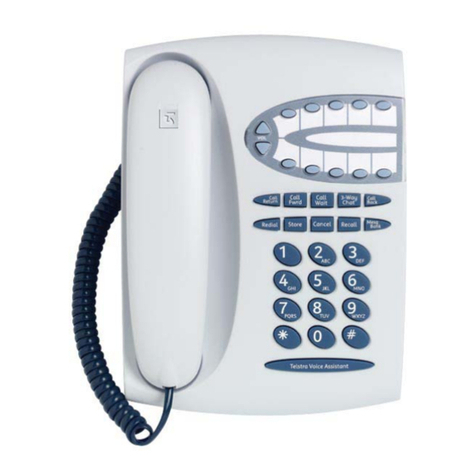
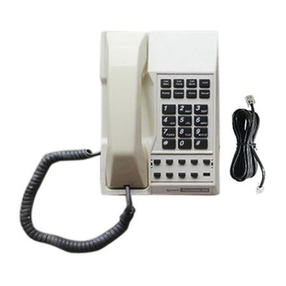
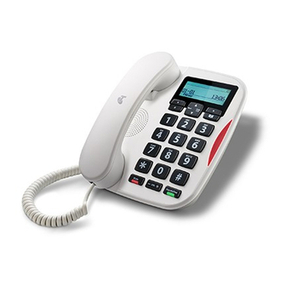
T1000S Explanatory Diagram
1. Ringer and earpiece volume level.
2. Redial button used to easily redial
the last number dialled.
3. Store button used to store numbers
in one touch memories.This button
is also used to adjust ringer volume.
4. Telstra Voice Assistant button –
for voice control of phone features.
5. 10 One Touch Memory buttons.
6. Double sided memory card,
lift clear window.
7. One Touch phone feature buttons.
8. One Touch MessageBank button.
9. Recall button – used to make an
enquiry call.
10. Cancel button used to turn off
phone features,e.g. Call Wait.
Wall mounting diagram
When you unpack the telephone you will need to ensure the cords are placed
in the slots provided in the base as shown in the diagram below.
Connect the telephone to a line,lift the handset and check for dial tone.
This ensures the telephone is powered up and will ring correctly.
Repeat this step whenever the telephone has been disconnected from the line.
TELEPHONE OPERATION
Adjusting the Ringer Volume when the telephone is idle
The ringer has two levels,high and low.
press then or
Setting will be saved.Confirmation tone will stop at minimum or maximum setting.
Adjusting the Ringer Volume when the telephone is ringing
Press or while the phone is ringing.
Adjusting the Headset Earpiece Volume Setting
press or
Adjusts the handset earpiece volume to one of four levels.Confirmation tone
will stop after min or max setting.
Note: The earpiece volume will reset to normal when the handset is replaced.
The T1000S also provides a magnetic coupling in the handset for use with hearing
aids with a ‘T’ position switch.
To Fix the Earpiece Volume
press or to adjust the volume and press
To have the volume reset to normal when the headset is replaced
press or to adjust the volume and press
GETTING STARTED TELEPHONE OPERATION
Last Number Redial
press
This redials the last number dialled.
Dialling from Memory
Select and press Memory button.
Programming the 10 Memory Buttons
Dial phone number and select and press Memory button
Note: Hang up after programming each Memory button.
Use 3-Way Chat button to enter a 1.5 second pause if required.
Storing the Last Number Dialled into Memory
press select and press Memory button
USING MESSAGEBANK®1
If you are a MessageBank user, it’s now even easier to retrieve your messages.
Your T1000S is programmed to access Telstra Home Messages 101® and MessageBank.
To retrieve a message from your MessageBank
press Mesg
Bank and follow the MessageBank prompts.
You can store your PIN under the MessageBank Button
press press press Mesg
Bank
Note: A PIN is not required for Telstra Home Messages 101.
To retrieve a message from your message service when you have stored your PIN
press Mesg
Bank
Wait for the password prompt, press Mesg
Bank and then follow the message service prompts.
To delete your PIN
press Mesg
Bank
You can change the programmed number to access other messaging services,
e.g. MessageBank Virtual and MessageBank Combined.
To change your MessageBank access number to access other messaging services
press press press Mesg
Bank enter access number press Mesg
Bank
1. Monthly charges may apply.
Handset park groove is
located at the top edge
of the telephone.
Handset hook is set
in position by rotating
the dial.
Handset cord clamp.
An additional line
socket is located at
the rear to allow
connection of other
ACA equipment, e.g.
answering machine,
extension ringer or
modem.
