manuals.online logo
Brands
  1. Home
  2. •
  3. Brands
  4. •
  5. Tennsco
  6. •
  7. Indoor Furnishing
  8. •
  9. Tennsco LSS-361872 Instruction Manual

Tennsco LSS-361872 Instruction Manual

Tennsco LLC., Dickson, TN 37056-1888 • (866) 446-8686
ASSEMBLY INSTRUCTIONS & PARTS MANUAL
RETAIN INSTRUCTIONS FOR FUTURE REFERENCERETAIN INSTRUCTIONS FOR FUTURE REFERENCE
GENERAL SAFETY INFORMATIONGENERAL SAFETY INFORMATION
Some parts may have sharp edges. CARE must be taken when handling various pieces to avoid injury.
For safety, wear a pair of work gloves when assembling or performing any maintenance on the units.
LIMITED WARRANTYLIMITED WARRANTY
Tennsco warrants goods purchased hereunder to be free of defects in materials and workmanship for a period of one (1) year from the date of shipment, hereunder. This warranty shall not apply
in the event goods are damaged as a result of misuse, abuse, neglect, accident, improper application, modication or repair by persons not authorized by Seller, where goods are damaged during
shipment, or where the date stamps on the goods have been defaced, modied or removed. UNLESS CONSIDERED UNENFORCEABLE OR UNLAWFUL UNDER APPLICABLE LAW:
a. ALL IMPLIED WARRANTIES, INCLUDING BUT NOT LIMITED TO WARRANTIES OR MERCHANTABILITY AND FITNESS FOR A PARTICULAR PURPOSE ARE HEREBY EXCLUDED:
b. BUYERS REMEDY, IF ANY, FOR ANY DEFECTIVE GOODS SHALL BE LIMITED TO A REFUND BY SELLER OR REPLACEMENT OF THE GOODS AT SELLER’S OPTION, AND SHALL IN NO
EVENT INCLUDE DAMAGES OF ANY KIND, WHETHER INCIDENTAL, CONSEQUENTIAL OR OTHERWISE.
NO GOODS ACCEPTED FOR RETURN WITHOUT PRIOR APPROVAL. Seller shall have the right to inspect any goods claimed to be defective at Buyers place of business or require Buyer to return the
goods to Seller for inspection on Seller’s premises. Transportation charges covering returned goods will be borne by Seller only if such goods are proven to be defective, are covered by this warranty
and are returned within the warranty period stated above.
PK-2910520PK-2910520
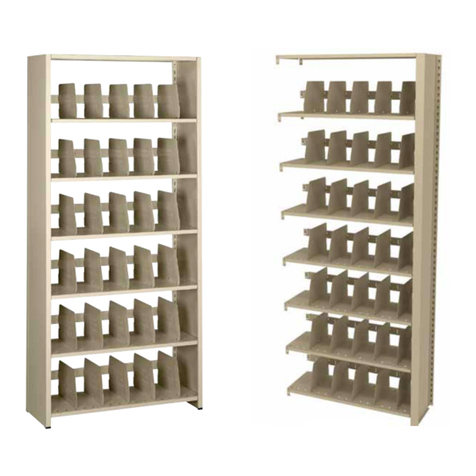
Stur-D-Store Home Shelving System
Models: LSS-361872 and LSS-482484
LOAD CAPACITIES PER SHELF LEVELLOAD CAPACITIES PER SHELF LEVEL
36w x 18d
48w x 24d
1000 lbs.
850 lbs.
UNIT SIZEUNIT SIZE WEIGHT CAPACITYWEIGHT CAPACITY
ASSEMBLY OF VERTICAL SHELVING UNIT
Two people are recommended for assembly. Approximate assembly time: 15-20 minutes.
The reference numbers used throughout this sheet refer to the illustration on the back cover.
This is to help you to identify the various parts as they are mentioned.
1. Create a unit end by connecting two uprights
(Ref. No. 1) with one of the front-to-back shelf
supports (Ref. No. 2) by inserting the shelf support
rivets into the bottom two keyhole slots of each
upright using a rubber mallet to seat the upright
securely in the keyhole slots.
NOTE: Be sure that the narrow end of
the keyhole slots are pointing downward,
and the flat edge of the shelf support
is facing up.
Tool Required: Rubber Mallet
2. Place a second front-to-back shelf support halfway up the upright
assembly to complete one bottom side. Repeat
these steps to prepare a second set of uprights
giving you two upright end assemblies. Set them
with the angled
corners facing
inward toward
each other.
3. Connect two of the left-to-right shelf supports
(Ref. No. 3) between the two assemblies, one
on each side with angled corners facing
toward each other. Be sure to use
the two keyhole slots
nearest the oor, as
in step 1.
NOTE: As in step one,
make sure the flat
edge of the shelf
supports are facing
upwards. If this has
been done correctly,
there would now be
a flat surface around
all four edges on which to lay the bottom particle board
shelf. If any edges have an upward facing angled edge, the
support has been inserted upside down.
4. Repeat step 3 halfway up the upright post.
5. Mount another upright
post to the top of one of
the other uprights and
attach with a shelf
support as in step 1,
mounting the bottom
rivet of the shelf support
in the bottom upright
post and the top rivet
in the new upright post as
shown below.
6. Place another upright
post on the opposite side
of the one you just
mounted. Using the
other side of the same
shelf support, attach in
the same way described
in step 5.
NOTE: Be sure that the narrow
end of the keyhole slots of the
new posts are pointing down
ward, and that the flat side of
the shelf support is facing
upward.
7. Repeat steps 5 and 6 on the
opposite end of the unit. Then,
attach the two ends by placing
two left-to-right shelf supports
across the width of the unit as
in step 4.
8. Continue placing shelf levels,
one level halfway between
the center shelf and the top,
and one level using the top
two keyhole slots. Make sure
all shelf supports are mounted
with the at side facing up.
Place the plastic shelf post
cap (Ref. No. 5) over the top
of the exposed metal edges of
the upright post.
9. Place one particle board shelf
(Ref. No. 4) in each of the ve
levels of shelf supports. Slant
each piece slightly as it is
being placed to allow it to
t between the uprights
and the shelf supports. Make
sure each piece of particle
board is seated between all
the edges of each of the shelf
supports and that the particle
board is laying at when
nished. The shelving system is
now ready for use.
ASSEMBLY OF HORIZONTAL SHELVING UNIT
1. First, follow assembly
steps 1-4 on the
previous page as well
as adding the plastic
shelf post caps. Next,
instead of stacking
the uprights on top
of each other as shown
in step 5, place the four
shelf supports in the
top two keyhole slots,
being sure that the
at edge of each
shelf support is facing
up as described in
the earlier steps.
2. Build the second unit
in the same manner as
the rst unit, except this
part will only have two
levels. Use the shelf
supports to create the
top level using the top
two keyhole slots,
and the second level
using the bottom two
keyhole slots.
3. Insert one particle board shelf at each of the ve shelf levels, as
described in step 9 of the previous instructions. Then place the
two units together or use separately as desired. The shelving unit
is now ready for use.
NOTE: For stability, be
sure to always have a
shelf on the bottom
of both units.
NOTE: Units are meant for stand alone
only. For safety, NEVER double stack
multiple units on top of one another.
NOTE: Units are meant
for stand alone only.
For safety, NEVER double stack
multiple units on top of each other.


REPLACEMENT PARTSREPLACEMENT PARTS
Tennsco makes every effort to ensure that all units ship complete with all parts and arrive undamaged.Tennsco makes every effort to ensure that all units ship complete with all parts and arrive undamaged.
However, should your unit contain missing or damaged parts, please contact your purchase location.However, should your unit contain missing or damaged parts, please contact your purchase location.
REF. NO. DESCRIPTIONREF. NO. DESCRIPTION
PART NUMBERSPART NUMBERS
LSS-361872LSS-361872
QTY.QTY. LSS-482484LSS-482484
1 Upright Post 8 VEUR-36 VEUR-42
2 Front-to-Back Shelf Support 10 VDRS-1816 VDRS-2416
3 Left-to-Right Shelf Support 10 VDRS-3616 VDRS-4816
4 Particle Board Shelf 5 PB-3618 PB-4824
5 Plastic Shelf Post Cap 8 EURPC EURPC
WARNING: This product can expose you to chemicals including formaldehyde which is known to
the State of California to cause cancer. For more information, go to www.P65Warnings.Ca.gov


Upright PostUpright Post
(Ref No. 1)(Ref No. 1)
Front-to-Back Shelf SupportFront-to-Back Shelf Support
(Ref No. 2)(Ref No. 2)
Left-to-Right Shelf SupportLeft-to-Right Shelf Support
(Ref No. 3)(Ref No. 3)
Particle BoardParticle Board
(Ref No. 4)(Ref No. 4)
49B291
Plastic Shelf Post CapPlastic Shelf Post Cap
(Ref No. 5)(Ref No. 5)


This manual suits for next models

1

Other Tennsco Indoor Furnishing manuals
Tennsco FS350 Instruction Manual

Tennsco

Tennsco FS350 Instruction Manual

Tennsco RGL-1236S Instruction Manual

Tennsco

Tennsco RGL-1236S Instruction Manual

Tennsco SRS-601878 Series Instruction Manual
Tennsco

Tennsco SRS-601878 Series Instruction Manual

Tennsco BCD18-72 Instruction Manual

Tennsco

Tennsco BCD18-72 Instruction Manual

Tennsco J1878A-N-W Instruction Manual

Tennsco

Tennsco J1878A-N-W Instruction Manual

Tennsco 1420 Instruction Manual

Tennsco

Tennsco 1420 Instruction Manual

Tennsco 1872 Instruction Manual

Tennsco

Tennsco 1872 Instruction Manual

Tennsco Sliding Door Jumbo Storage Cabinet JSD2478SU Instruction Manual

Tennsco

Tennsco Sliding Door Jumbo Storage Cabinet JSD2478SU Instruction Manual

Tennsco 1470 Instruction Manual

Tennsco

Tennsco 1470 Instruction Manual

Tennsco 1276 Series Instruction Manual

Tennsco

Tennsco 1276 Series Instruction Manual

Tennsco 1472 Instruction Manual

Tennsco

Tennsco 1472 Instruction Manual

Tennsco JUMBO Instructions for use

Tennsco

Tennsco JUMBO Instructions for use

Tennsco Z-Line User manual

Tennsco

Tennsco Z-Line User manual

Tennsco ESPC-1236 Instruction Manual

Tennsco

Tennsco ESPC-1236 Instruction Manual

Tennsco J2478A-N Instruction Manual

Tennsco

Tennsco J2478A-N Instruction Manual

Tennsco Z-Line Steel Shelf Unit Instruction Manual

Tennsco

Tennsco Z-Line Steel Shelf Unit Instruction Manual

Tennsco Standard Combination Cabinet 7220 Instruction Manual

Tennsco

Tennsco Standard Combination Cabinet 7220 Instruction Manual

Tennsco 7114 Instruction Manual

Tennsco

Tennsco 7114 Instruction Manual

Tennsco J2478A-N-W Instruction Manual

Tennsco

Tennsco J2478A-N-W Instruction Manual

Tennsco Enclosed Foreman’s Desk Instruction Manual

Tennsco

Tennsco Enclosed Foreman’s Desk Instruction Manual

Tennsco Jumbo Storage Cabinet J2478SU Instruction Manual

Tennsco

Tennsco Jumbo Storage Cabinet J2478SU Instruction Manual

Tennsco FB-12 Instruction Manual

Tennsco

Tennsco FB-12 Instruction Manual

Tennsco WBHC-1516-MGY Instruction Manual

Tennsco

Tennsco WBHC-1516-MGY Instruction Manual

Tennsco J2478C Instruction Manual

Tennsco

Tennsco J2478C Instruction Manual

Popular Indoor Furnishing manuals by other brands

SleepSafe Beds SleepSafe manual

SleepSafe Beds

SleepSafe Beds SleepSafe manual

Home Decorators Collection Aberwood DP18020-P Use and care guide

Home Decorators Collection

Home Decorators Collection Aberwood DP18020-P Use and care guide

Motoalliance Dock 8x4 installation instructions

Motoalliance

Motoalliance Dock 8x4 installation instructions

Threshold TGAVC72-23 Assembly instructions

Threshold

Threshold TGAVC72-23 Assembly instructions

Interior Solutions BRW3230 Assembly instructions

Interior Solutions

Interior Solutions BRW3230 Assembly instructions

Furniture of America CM3150T Assembly instructions

Furniture of America

Furniture of America CM3150T Assembly instructions

Novogratz 7029891COMNUK Assembly instructions

Novogratz

Novogratz 7029891COMNUK Assembly instructions

Rush Creek Creations 37-0014 instruction manual

Rush Creek Creations

Rush Creek Creations 37-0014 instruction manual

Blanco PERFORMA 441003 Specifications

Blanco

Blanco PERFORMA 441003 Specifications

QUEST ELITE Autograph Surrey F3027 instructions

QUEST ELITE

QUEST ELITE Autograph Surrey F3027 instructions

drew & jonathan P307DJ160 manual

drew & jonathan

drew & jonathan P307DJ160 manual

Aosom Vinsetto 923-043 Assembly & instruction manual

Aosom

Aosom Vinsetto 923-043 Assembly & instruction manual

MAGNUSSEN HOME D5333-62 Assembly instructions

MAGNUSSEN HOME

MAGNUSSEN HOME D5333-62 Assembly instructions

Argos Puerto Rico 368/9277 Assembly instructions

Argos

Argos Puerto Rico 368/9277 Assembly instructions

Boraam JAMESTOWN 77403 manual

Boraam

Boraam JAMESTOWN 77403 manual

ANJ D9878A51 Assembly instructions

ANJ

ANJ D9878A51 Assembly instructions

WB Mfg Universal Appleton Desk Assembly instructions

WB Mfg

WB Mfg Universal Appleton Desk Assembly instructions

Tutti Bambini Lucas Chest 211439 Assembly instructions

Tutti Bambini

Tutti Bambini Lucas Chest 211439 Assembly instructions

manuals.online logo
manuals.online logoBrands
  • About & Mission
  • Contact us
  • Privacy Policy
  • Terms and Conditions

Copyright 2025 Manuals.Online. All Rights Reserved.