manuals.online logo
Brands
  1. Home
  2. •
  3. Brands
  4. •
  5. Tennsco
  6. •
  7. Indoor Furnishing
  8. •
  9. Tennsco J1842A-N Instruction Manual

Tennsco J1842A-N Instruction Manual

GENERAL SAFETY INFORMATION
Some parts may have sharp edges. CARE must be taken when handling various pieces to avoid injury.
For safety, wear a pair of work gloves when assembling or performing any maintenance on products.
LIMITED WARRANTY
Tennsco warrants goods purchased hereunder to be free of defects in materials and workmanship for a period of one (1) year from the date of shipment, hereunder. This warranty shall not apply
in the event goods are damaged as a result of misuse, abuse, neglect, accident, improper application, modication or repair by persons not authorized by Seller, where goods are damaged during
shipment, or where the date stamps on the goods have been defaced, modied or removed. UNLESS CONSIDERED UNENFORCEABLE OR UNLAWFUL UNDER APPLICABLE LAW:
a. ALL IMPLIED WARRANTIES, INCLUDING BUT NOT LIMITED TO WARRANTIES OR MERCHANTABILITY AND FITNESS FOR A PARTICULAR PURPOSE ARE HEREBY EXCLUDED:
b. BUYERS REMEDY, IF ANY, FOR ANY DEFECTIVE GOODS SHALL BE LIMITED TO A REFUND BY SELLER OR REPLACEMENT OF THE GOODS AT SELLER’S OPTION, AND SHALL IN NO
EVENT INCLUDE DAMAGES OF ANY KIND, WHETHER INCIDENTAL, CONSEQUENTIAL OR OTHERWISE.
NO GOODS ACCEPTED FOR RETURN WITHOUT PRIOR APPROVAL. Seller shall have the right to inspect any goods claimed to be defective at Buyers place of business or require Buyer to return the
goods to Seller for inspection on Seller’s premises. Transportation charges covering returned goods will be borne by Seller only if such goods are proven to be defective, are covered by this warranty
and are returned within the warranty period stated above.
PK-2310918
ASSEMBLY INSTRUCTIONS & PARTS MANUAL
RETAIN INSTRUCTIONS FOR FUTURE REFERENCE
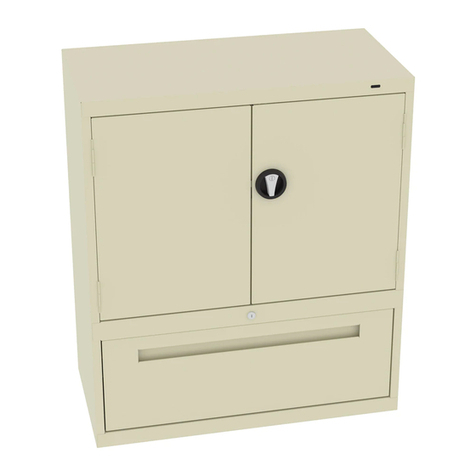
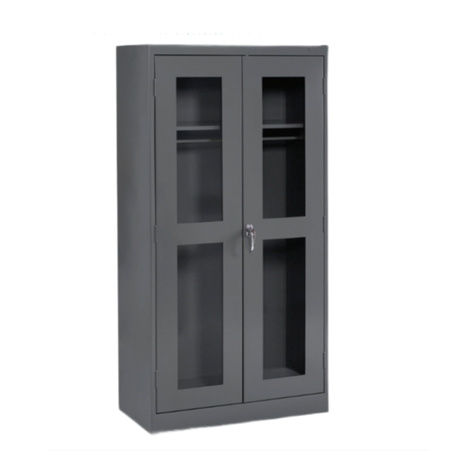
Jumbo Counter-Height Storage Cabinet
Unassembled Models J1842A-N & J2442A-N
Tennsco LLC., Dickson, TN 37056-1888 • (866) 446-8686
LOAD CAPACITIES PER SHELF LEVEL
48w x 18d
48w x 24d
400 lbs.
400 lbs.
UNIT SIZE WEIGHT CAPACITY
EVENLY DISTRIBUTED
ASSEMBLY OF J1842A-N OR J2442A-N CABINET
Tools Needed: A free 11/32” nut driver is included with each Tennsco cabinet.
Two people are recommended for assembly. Approximate assembly time: 20-30 minutes.
2. Place the back panels (Ref. No. 1) on a smooth surface,
making sure that the anges of both panels are facing up.
Overlap the right panel over the left anel. After aligning the
holes, bolt the two panels tightly together with four bolts
and nuts (Ref. Nos. 17 & 18).
1. The reference numbers used throughout this sheet refer to
the illustration on the back cover. This is to help you to
identify the various parts as they are mentioned.
3. Attach the left side (Ref. No. 2) to the back by placing ange
(A) around the back and bolting tightly together with four
bolts and nuts. Be sure that the lances on all the shelf
adjustment strips (B) point in the same direction.
5. Attach the right side (Ref. No. 3) to the back in the same
manner as you did in step 3, again making sure that
the ange is around the back and that the lances on
the shelf adjustment strips are pointed in the same
direction as those on the back and left side. Push the
side panel up so the studs in the top go through the holes
in the top ange of the side and fasten with three nuts.
6. Attach the sill (Ref. No. 4) to the sides. Place a nut
(Ref. No. 19) loosely on each of the studs and slide
the ends of the sill into the slots on both sides of the
unit. Then, securely tighten the nuts.
4. Attach the top (Ref. No. 8) to the unit by sliding the outer
ange over the back of the unit and the side ange to the
side panel on the unit. The threaded studs should go
through the holes in the top ange
of the side and fasten with
three nuts. Attach the
back to the top
using four
bolts and nuts.
All lances point UP on
the back and side.
B
Flange faces upward.

Flange goes
under back.
A
Slide ends into the slots on
the bottom of the sides.
7. Place the rear ange of the bottom shelf (Ref. No. 5)
into the bottom lances of the back. The ange with two
holes should face the front, hanging over the sill.


Nuts places loosely
on studs of the sill.
Insert the bottom into the bottom lances.


1. Place the locking handle
(Ref. No. 10) on the right
hand door and fasten with
two #8-32 X 1/4 hex-head
bolts and lock washers,
provided with the handle.
2. Turn the handle to the
open position and
place the locking cam
(Ref. No. 11) over the
square shank of the
door handle. The latch
must be facing downward
as shown. Then place the
locking cotter pin (Ref. No.
13) through the hole of the
square shank.
3. With the handle still in the open position, hook the
locking bars (Ref. No. 9) to the locking cam (see
“A” at left). Once in position, slowly rotate the door
handle to the closed position so the lock bars
prot rude from the holes at the top and bottom
of the door (shown at right, below).
4. Slide the nylon lock bar
guide inserts (Ref. No.
12) over the lock bar
ends and through the
door slots (see “B” at
right). Push down rmly
until the guides snap
into place.
5. Attach the “dummy” handle
(Ref. No. 14) using two
#8-32 X 1/4 hex-head bolts
and lock washers.
Handle/Locking System Installation
A
B
B
8. Set the unit upright. Insert the second shelf at the desired
level. Be sure that the ange with the two holes should
face the front.


10. Cabinet must be level for doors to
open and close properly. Insert a
athead screwdriver into the two
leveling holes and turn the screws
until the cabinet is level. The cabinet
is now ready for use.
NOTE: In order to place the shelf, you must first tilt
the shelf slightly to the left or right before inserting
into the unit.
9. Attach the left door (Ref. No. 6) to the unit by placing the
door on the hinges, aligning the hinge holes, placing the
hinge pins (Ref. No. 15) into the slots and tapping them in
until secure. Attach the right door (Ref. No. 7) to the unit
in the same manner as the left door.


REPLACEMENT PARTS


Tennsco Nut Driver
(Ref No. 16)
Sill
(Ref No. 4)
Dummy Handle
(Ref No. 14)
Left Side
(Ref No. 2)
Top
(Ref No. 8)
Right Side
(Ref No. 3)
Cotter Pin
(Ref No. 13 )
Locking Bar Guide
Nylon Insert
(Ref No. 12)
Locking Bar Set
(Ref No. 9)
Locking Cam
(Ref No. 11)
Locking Handle
with Keys
(Ref No. 10)
Back Panels
(Ref No. 1)
REF. NO. DESCRIPTION
1 Back Panels 2 042BA 2 042BA
2 Left Side 1 042LSN 1 044LSN
3 Right Side 1 042RSN 1 044RSN
4 Sill 1 055SIN 1 055SIN
5 Shelf 2 306 2 307
6 Left Door 1 042LD 1 042LD
7 Right Door 1 042RD 1 042RD
8 Top 1 042TS 1 044TS
9 Locking Bar Set 1 978LB 1 978LB
10 Locking Handle w/keys & hardware 1 043LH 1 043LH
11 Locking Cam* 1 944LC 1 944LC
12 Locking Bar Guide Insert (Nylon)* 2 944GI 2 944GI
13 Cotter Pin* 1 CTRPN 1 CTRPN
14 Dummy Handle* 1 043DH 1 043DH
15 Hinge Pin* 4 944HP 4 944HP
16 Tennsco Nut Driver 1 TOOL-2 1 TOOL-2
17 #8-32 x 3/8” bolts (not shown above) 15 ** 15 **
18 #8-32 nuts (not shown above) 31 ** 31 **
19 Bolt w/lockwasher #8-32 x 3/8” bolts 4 ** 4 **
(not shown above)
*Included in Ref. No. 10, locking handle with keys and hardware (Part No. 043LH). **Available Locally
QTY. PART NO.

Left Door
(Ref No. 6)
NOTE: Additional hardware may be included for replacement purposes.
QTY. PART NO.
J1842A-N (18”d Cabinet) J2442A-N (24”d Cabinet)
Tennsco makes every effort to ensure that all units ship complete with all parts and arrive undamaged.
However, should your unit contain missing or damaged parts, please contact your purchase location.
Shelf
(Ref No. 5)


Right Door
(Ref No. 7)

Hinge Pin
(Ref No. 7)
49B231

This manual suits for next models

1

Other Tennsco Indoor Furnishing manuals

Tennsco ESPC-1236 Instruction Manual

Tennsco

Tennsco ESPC-1236 Instruction Manual

Tennsco Imperial Shelving 3630 Instruction Manual

Tennsco

Tennsco Imperial Shelving 3630 Instruction Manual

Tennsco 7818 Instruction Manual

Tennsco

Tennsco 7818 Instruction Manual

Tennsco LSS-361872 Instruction Manual

Tennsco

Tennsco LSS-361872 Instruction Manual

Tennsco 3018 Instruction Manual

Tennsco

Tennsco 3018 Instruction Manual

Tennsco B-8400 Instruction Manual

Tennsco

Tennsco B-8400 Instruction Manual

Tennsco Jumbo Storage Cabinet J1878SU Instruction Manual

Tennsco

Tennsco Jumbo Storage Cabinet J1878SU Instruction Manual

Tennsco CC-30 Instruction Manual

Tennsco

Tennsco CC-30 Instruction Manual

Tennsco CINCO NIVELES Instruction Manual

Tennsco

Tennsco CINCO NIVELES Instruction Manual

Tennsco 2476 Series Instruction Manual

Tennsco

Tennsco 2476 Series Instruction Manual

Tennsco 1870 Instruction Manual

Tennsco

Tennsco 1870 Instruction Manual

Tennsco EB-12 Instruction Manual

Tennsco

Tennsco EB-12 Instruction Manual

Tennsco 1442 User manual

Tennsco

Tennsco 1442 User manual

Tennsco FB-12 Instruction Manual

Tennsco

Tennsco FB-12 Instruction Manual

Tennsco Standard Combination Cabinet 7220 Instruction Manual

Tennsco

Tennsco Standard Combination Cabinet 7220 Instruction Manual

Tennsco SINGLE TIER Instruction Manual

Tennsco

Tennsco SINGLE TIER Instruction Manual

Tennsco Imperial Shelving User manual

Tennsco

Tennsco Imperial Shelving User manual

Tennsco DWR-4218 Instruction Manual

Tennsco

Tennsco DWR-4218 Instruction Manual

Tennsco 1872 Instruction Manual

Tennsco

Tennsco 1872 Instruction Manual

Tennsco 1871 Instruction Manual

Tennsco

Tennsco 1871 Instruction Manual

Tennsco 1470 Instruction Manual

Tennsco

Tennsco 1470 Instruction Manual

Tennsco Capstone Shelving Units Instruction Manual

Tennsco

Tennsco Capstone Shelving Units Instruction Manual

Tennsco Stackable Workbench Drawer Unit Instruction Manual

Tennsco

Tennsco Stackable Workbench Drawer Unit Instruction Manual

Tennsco FS350 Instruction Manual

Tennsco

Tennsco FS350 Instruction Manual
Popular Indoor Furnishing manuals by other brands

baby&child AMIRA quick start guide

baby&child

baby&child AMIRA quick start guide

TRIBU SENJA Assembly instructions

TRIBU

TRIBU SENJA Assembly instructions

Next 685326 Assembly instructions

Next

Next 685326 Assembly instructions

Multimo ROYAL BOOKCASE 50 A 504 Assembly instructions

Multimo

Multimo ROYAL BOOKCASE 50 A 504 Assembly instructions

Coaster 305957KW Assembly instructions

Coaster

Coaster 305957KW Assembly instructions

Rauch M2581 Assembly instructions

Rauch

Rauch M2581 Assembly instructions

Safavieh Furniture Edgefield COF7012 manual

Safavieh Furniture

Safavieh Furniture Edgefield COF7012 manual

leco 47 20410 103 Assembly instructions

leco

leco 47 20410 103 Assembly instructions

Baumax INOX IK175 Assembly instructions

Baumax

Baumax INOX IK175 Assembly instructions

Geuther Marit 1142HR manual

Geuther

Geuther Marit 1142HR manual

Onespace JNFF Assembly instructions

Onespace

Onespace JNFF Assembly instructions

TUHOME Furniture TERA CLW4758 Assembly instructions

TUHOME Furniture

TUHOME Furniture TERA CLW4758 Assembly instructions

Whalen WSHD5PSB quick start guide

Whalen

Whalen WSHD5PSB quick start guide

Madeleine Home MH-BD-11506 Assembly instructions

Madeleine Home

Madeleine Home MH-BD-11506 Assembly instructions

Target CAPRI quick start guide

Target

Target CAPRI quick start guide

Gilman Creek 135618 Assembly and care instructions

Gilman Creek

Gilman Creek 135618 Assembly and care instructions

Lightolier FIXTURE Assembly and installation

Lightolier

Lightolier FIXTURE Assembly and installation

Coaster LOVESEAT 506772 Assembly instructions

Coaster

Coaster LOVESEAT 506772 Assembly instructions

manuals.online logo
manuals.online logoBrands
  • About & Mission
  • Contact us
  • Privacy Policy
  • Terms and Conditions

Copyright 2025 Manuals.Online. All Rights Reserved.