Tenovis Integral T3 Compact User manual
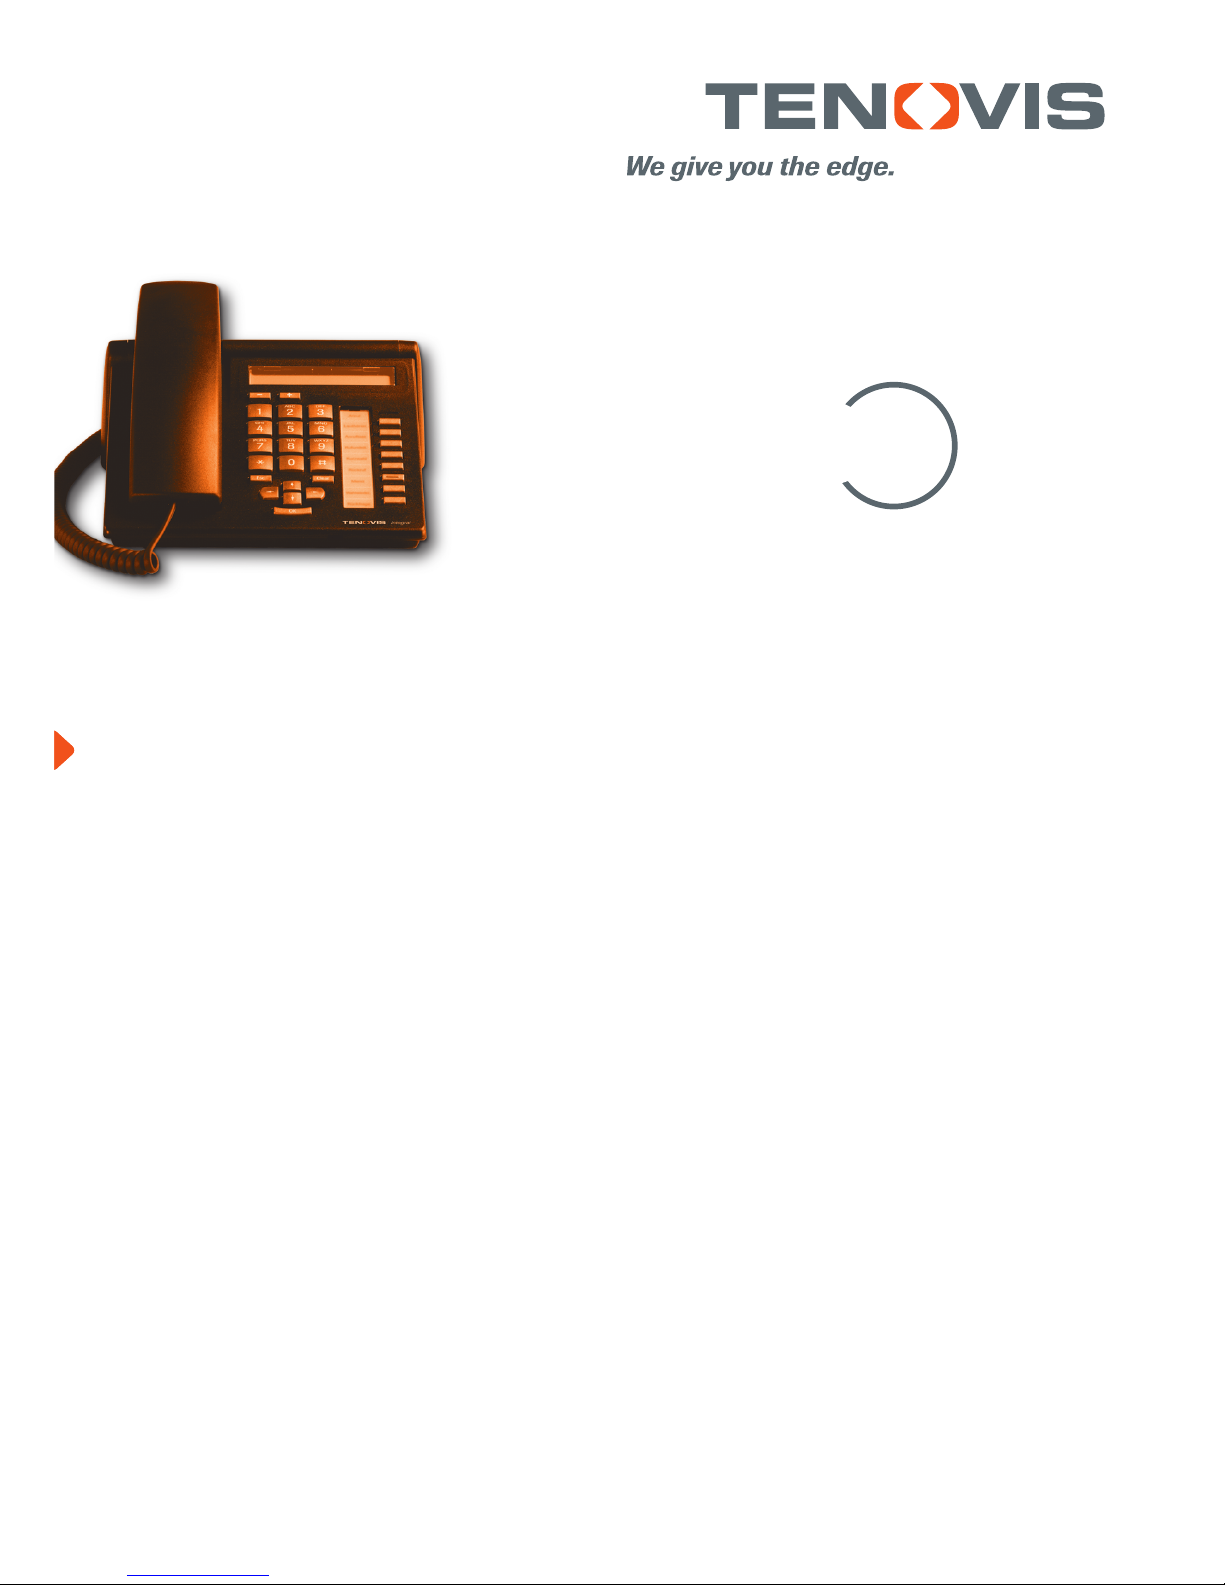
Integral T3
Compact
connected to
Communication Server Integral 55
Operating instructions

An introduction to your telephone
2
Important notes
Which systems are suitable for your telephone
This telephone is only intended for connection to telecommunications systems pro-
duced by Tenovis. It may not be connected directly to a public telephone network.
Declaration of conformity
This telephone is intended for connection to digital interfaces of Tenovis telecommu-
nication systems and fulfils the basic requirements of EU directive 1999/5/EU (Ra-
dio and telecommunication terminal equipment, R&TTE).
This telephone is not designed for direct operation on public telephone network in-
terfaces.
When using link and DSS modules:
This link / DSS module is intended for connection to T3 telephones and meets the
fundamental requirements in accordance with EU directive 1999/5/EG (Radio and
Telecommunication Terminal Equipment, R&TTE).
The design of this link/DSS module means that it is only suitable for operation with
T3 telephones.
If any problems should occur during operation, please initially contact your specialist
dealer or Tenovis Service department.
The Declaration of Conformity can be requested from the following internet address.
www.tenovis.com/deutsch/verzeichnis/conformance.htm or search for the keyword
“Conformity” in the index.
To which telephone system is your telephone connected?
You can find out the type of Tenovis system to which your telephone is connected
as follows:
Press the +key with the handset cradled: If your telephone is connected to the
Tenovis I5 system, Contrast appears as the first menu item.
If your telephone is connected to the Tenovis I33/I55 system, Loudspeaker appears
as the first menu item.

An introduction to your telephone
3
continued
Important notes
Tips on phone location
Place the telephone on a non-slip surface, especially if the furniture is new or has
recently been cleaned or polished. Enamels or cleaning agents may contain sub-
stances which soften the base parts of your telephone, and the softened bases can
leave undesirable marks on the furniture. Tenovis cannot assume liability for dama-
ges of this kind.
Repairs
The equipment may only be opened or repaired by a qualified technician. Do not
open the telephone yourself. Doing so could damage the unit and cause it to mal-
function.
Note on description of operating sequences
All the procedures described in these operating instructions assume standard as-
signment of the function keys.
If you reprogram function keys, you should note that changed sequences may re-
sult.
Functions assigned to keys no longer appear in the menu.
Additional functions
Functions that are marked with -are not part of the standard scope of functions of
your telephone.
Other functions may be locked or, depending on the system software, may not be
available. If you want to use one of these functions, please contact Tenovis Service.
Operating instructions in other languages
Would you like to see these operating instructions in another language? From the
Tenovis homepage www.tenovis.com you can access our document database. Look
there, to see whether the desired language version is available for download.

4
Table of Contents
An introduction to your telephone
Important Notes 2.......................................................
Your T3 Compact at a glance 6...........................................
The keys at a glance 7...................................................
Getting to know your telephone
The display helps you 8..................................................
Basic operating principles 9..............................................
... making your telephone easy to use 11....................................
Using your telephone as normal
Makingacall 12.........................................................
Accepting calls 17........................................................
Activating the loudspeaker 19..............................................
Making several connections simultaneously 21..............................
Diverting calls 25.........................................................
Taking calls somewhere else (follow me) -30...............................
Telephoning made easy
Editing the call list -33..................................................
Lookig for messages 36...................................................
Viewing charges -40....................................................
Locking your telephone 43................................................

5
continued
Table of Contents
Customising your telephone
Do not disturb 46.........................................................
Assigning functions/numbers to keys 47.....................................
Setting audio, contrast and language 56.....................................
Anonymous calling -59..................................................
Enabling auto. direct access tone dialling (DTMF) 60.........................
Change duration of DTMF tone -61.......................................
Enabling direct dial 62....................................................
Cutting your telephone out of the hunt group -63...........................
Links
CTI link -64............................................................
CTI/audio link -65......................................................
Additional equipment
Additional equipment -69................................................
If in doubt, look it up
Overview of telephone functions 74.........................................
Indications in the idle display 76............................................
Ringing and handset tones 77.............................................
Menu overview 78........................................................
If something’s not working 80..............................................
Index 81................................................................
Other manuals for Integral T3 Compact
3
Table of contents
Other Tenovis Telephone manuals

Tenovis
Tenovis Integral T3 Compact User manual

Tenovis
Tenovis OS33 User manual

Tenovis
Tenovis Integral TB 13 User manual

Tenovis
Tenovis Integral TS 13 User manual

Tenovis
Tenovis Integral TH 13 User manual

Tenovis
Tenovis Integral T3 Classic User manual

Tenovis
Tenovis Integral TB 13 User manual

Tenovis
Tenovis Economy Integral TE 13 User manual

Tenovis
Tenovis TS 13 User manual

Tenovis
Tenovis Integral T3 Compact User manual


