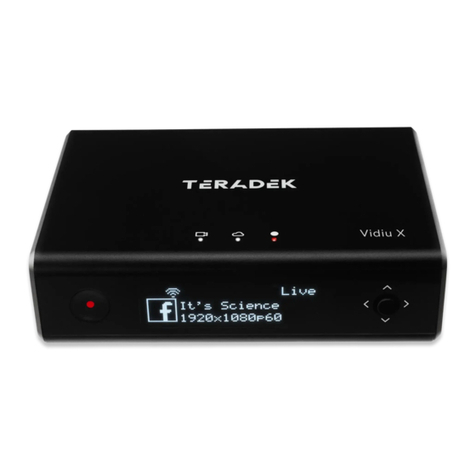
Teradek Vidiu X User manual

Reference Guide
© 2021 Teradek, LLC. All rights reserved.
v1
Vidiu X
Live Streaming Encoder

Teradek, LLC 2021. All rights reserved. v1-0521
TABLE OF CONTENTS
1. Introduction ................................................3
Support Resources ....................................3
Disclaimer................................................3
Warning ...................................................3
2. Physical Properties .......................................4
3. Getting Started ............................................5
Power Your Device ....................................5
Connect to a Network ...............................6
Choose a Platform ....................................9
Internet Streaming with Airmix .................10
4. Settings Overview ......................................10
Streaming: Configure Destination..............11
Streaming: Recording ..............................14
Audio/Video ..........................................15
Network ................................................16
System...................................................17
5. Troubleshooting .........................................18
6. Technical Specifications...............................20
7. FCC Statement...........................................22

Thank you for purchasing Teradek’s Vidiu X, the ultimate entry-level live streaming solution for HDMI
video sources. Vidiu X delivers high definition live streaming video with the quality and reliability
expected in traditional HD broadcasts. More powerful than the previous Vidiu Pro, Vidiu X supports
1080p resolutions, RTMPS streaming, higher encoding bitrates, and also includes native integration
with some of the most popular video platforms.
Support Resources
In addition to this reference guide, there are a number of resources available for more information
on Vidiu X’s features and operation. For tips, information, or to submit help requests to Teradek’s
support team, visit https://teradek.com/pages/contact. For all the latest firmware and software
updates, visit https://teradek.com/pages/downloads.
Disclaimer
This manual is intended for user information only. Every eort has been made to ensure that the
contents within are accurate at the time of printing, and that updates are made in a timely manner.
Teradek cannot be held responsible for inaccuracies, typographical errors, or out-of-date information
contained within this manual.
Warning
Teradek Vidiu products contain no user serviceable parts. Disassembly, modification, or removal
of any of the device’s components may void your warranty. Please visit https://teradek.com/pages/
warranty-information for up-to-date warranty terms and conditions.
INTRODUCTION

4 Teradek, LLC 2021. All rights reserved. v1-0521
BUTTON/JOYSTICK OPERATION
Use the Menu Joystick to navigate the front panel interface.
K
J
L
E
C
B D
A
A: Broadcast button
B: Video status indicator
C: Network status indicator
D: Broadcast status indicator
E: OLED display
F: Menu joystick
G: USB modem port
H: SD card slot
I: HDMI input
J: HDMI output
K: Mic/Line stereo input
L: Ethernet port
M: USB-C power input
G
H
F
M
Menu Joystick
Use the arrow buttons to navigate
through the menus. Press the
joystick to confirm or open
selection.
Broadcast/Record Button
Start/stop broadcast or
recording.
PHYSICAL PROPERTIES
I

5
POWER AND CONNECT
1. Connect the USB-C A/C adapter to the USB-C
port (Fig. 2-1) located on the back of the device.
Vidiu X begins to boot as soon as the power is
connected. NOTE: Leave sucient clearance
underneath the unit to allow airflow.
2. Turn on your video source then connect it to
Vidiu X’s HDMI input (Fig. 2-2).
3. Use a hot shoe mount and a 1/4”-20 screw to
mount Vidiu X to your camera, tripod mount,
or other accessory mount, if desired.
4. Once Vidiu X has booted, verify that the
Video status indicator is illuminated (Fig. 2-3).
This indicates a video source has been
successfully detected and the encoder is
running.
Fig. 2-1
Fig. 2-2
Fig. 2-3
GETTING STARTED
1. Power your device
2. Connect Vidiu X to a network
3. Choose your streaming platform
There are three key steps to going live with Vidiu X:
K: Mic/Line stereo input
L: Ethernet port
M: USB-C power input

6 Teradek, LLC 2021. All rights reserved. v1-0521
CONNECT TO A WI-FI NETWORK
Fig. 2-4
You can use the Vidiu app, the Web User Interface (Web UI), or the front panel interface to connect
Vidiu X to a network. Select one of the following options.
CONNECT TO A NETWORK
USING THE VIDIU APP
The Vidiu app allows you to remotely monitor and configure Vidiu X from your iOS or
Android device. Download the Vidiu app, then choose one of the following methods to
get Vidiu X online.
From the front panel:
1. Use the Menu Navigation Button to navigate to the
Network Settings menu, then select WiFi.
2. Select Client Mode, then select [Setup].
3. Select Visible Networks to scan for available
networks. Select a Wi-Fi Network, then enter your
credentials.
4. Once the device is configured, select [INFO] to view
the IP address (Fig. 2-5).
5. To access the Web UI, enter Vidiu X’s IP address in
your web browser’s navigation bar, then enter the
default password “admin”.
Fig. 2-5
From the Vidiu app:
1. Connect your cellular device to Vidiu X’s Access Point
network (AP Mode), then open the Vidiu App.
2. Tap the button at the top of the display, select
Network, then select Wi-Fi.
3. Select Client Mode, then tap Wi-Fi scan (Fig. 2-4).
4. Select a network, then enter your credentials.
Vidiu X supports two wireless (Wi-Fi) modes; Access Point (AP) Mode and Client Mode. In AP Mode,
Vidiu X generates a Wi-Fi network for your phone or laptop to connect to. To use Wi-Fi as your
Internet connection, you’ll need to connect Vidiu X to another network using Client mode.

7
CONNECT TO AN ETHERNET NETWORK
Fig. 2-7
Fig. 2-8
From the front panel:
Verify that the icon is displayed on the front panel,
indicating that Vidiu X is connected to an Ethernet
network (Fig. 2-7).
VERIFY ETHERNET CONNECTION
Plug an Ethernet cable from the Vidiu X’s Ethernet port
to an Ethernet switch or router.
From the Vidiu app:
1. Connect your cellular device to Vidiu X’s Access
Point (AP) network: Vidiu-X-XXXXX (XXXXX
represents the serial number of the device), then
open the Vidiu app
2. Select Network and verify the Wired status shows
Connected and the IP address shown on the Vidiu X
is in the expected range for the network (Fig. 2-8).

8 Teradek, LLC 2021. All rights reserved. v1-0521
CHOOSE YOUR DESTINATION
Vidiu X oers native integration with many popular video streaming services, making it capable of
broadcasting to any compatible online platform. Simply enter your credentials using the Vidiu app,
Web UI, or the front panel interface.
CONNECT USING THE VIDIU APP
1. Navigate to Settings>Streaming, then select Configure
Destination (Fig. 2-11).
2. Select a streaming destination (Fig. 2-12), then follow
the on-screen prompts to authorize Vidiu X for use
with the selected platform (For more detailed set
up instructions, go to the Configure Destination
section on pg.11).
3. Select a channel or event to broadcast to.
4. After configuring your device, select Apply on the
upper right corner, then navigate back to the home
screen and tap the Go Live button to begin streaming.
Fig. 2-11 Fig. 2-12
CONNECT USING THE WEB UI
1. Click Streaming, then select a stream mode from
the drop-down menu (Fig. 2-13).
2. Select a streaming mode, then follow the on-
screen prompts to authorize Vidiu X for use
with the selected platform (For more detailed
instructions, go to the Configure Destination
section on pg.11).
3. Select a channel or event to broadcast to.
4. After configuring your device, click Save on the
upper right corner, then navigate back to the
home screen and tap the Go Live button to begin
streaming.
Fig. 2-13

9
INTERNET STREAMING WITH AIRMIX
Airmix is a live production suite that converts your live stream into a complete multi-camera
production. Airmix oers an entire suite of tools such as switching, graphics, lower-thirds, looping in
pre-recorded videos and more.
Airmix or Airmix Solo
Airmix is compatible with iPad Air 1 and newer.
Airmix Solo is compatible with both iPad and
iPhone. Both apps are available for download
in the iTunes App Store.
CONNECT AND BROADCAST WITH AIRMIX
1. Connect your iPad to the same network as Vidiu X.
2. Launch the Airmix app.
3. Tap the Add New Source button on the Preview Editor’s
bottom panel, then tap the Teradek Device button.
Select a device (Fig. 2-14), then tap Done.
4. To configure a streaming destination, tap the button
in the upper right-hand corner, enter the Broadcasting
Destinations page, then navigate to Manage
Destinations>Add a Destination (Fig. 2-15). Select a
platform, then enter your credentials (if applicable).
5. To begin live streaming, tap the Go Live! button in the
upper right-hand corner.
Fig. 2-14
Fig. 2-15

10 Teradek, LLC 2021. All rights reserved. v1-0521
SETTINGS OVERVIEW
NAVIGATING THE SETTINGS MENU
The Settings menu allows you to customize and control Vidiu X’s streaming, audio/video, and network
settings. Use the Vidiu app, Web UI, or the front panel interface to access the Settings menu, then
select a setting to modify.
● STREAMING - Configure your streaming destinations and enable recording
● AUDIO/VIDEO - Adjust the resolution, bitrate, and other Video/Audio input settings
● NETWORK - Choose a method of connecting to the Internet
● SYSTEM - Perform factory reset, firmware upgrade, and system diagnostics
MENU OPTIONS

11
STREAMING
Vidiu X is capable of streaming video to some of the most popular streaming platforms using a
number of dierent protocols. To view or modify the current streaming mode, enter the Streaming
menu, then select a Stream Mode. Choose the Stream Mode best suited for your application.
SHARELINK
Sharelink allows you to stream to multiple destinations simultaneously and remotely manage Vidiu
X from anywhere in the world. Sharelink also increases your broadcast’s bandwidth and reliability by
bonding multiple Internet connections. To take advantage of these features, you will need to purchase
a Sharelink subscription, activate Sharelink, and authorize Vidiu X.
TO CONNECT TO SHARELINK:
1. Visit https://sharelink.tv and log in to your account.
2. From the Vidiu X web UI, navigate to the Streaming
menu, select Sharelink, then Save (Fig. 3-1).
3. Tap Link your account to display the authorization
code.
4. Copy the authorization code generated for your
Vidiu X, then click on the link to return to the
Sharelink web UI (Fig. 3-2).
5. Select Add new Vidiu.
6. Enter the authorization code, then click Add.
7. Select a streaming server region then click
Complete & Add (Fig.3-3).
Fig. 3-1
Fig. 3-2 Fig. 3-3

12 Teradek, LLC 2021. All rights reserved. v1-0521
ADD CHANNELS TO SHARELINK:
1. Select Channels from the top of the screen, then
tap Add new Channel at the bottom.
2. Select a platform, than tap Link your account to
enter your credentials (Fig. 3-4). Repeat this step
to pair additional channels (up to five channels).
3. To pair channels that have already been configured,
click Add channel from the home screen, select
the channel(s) you wish to stream to, then click
Add (Fig. 3-5).
1. Select Facebook, YouTube Live, or Vimeo
Livestream, then click Link your Account.
2. Copy the authentication code generated for
your device, go to the link provided, then
follow the instructions to authenticate your
account (Fig.3-6).
3. Return to the Vidiu X’s web UI and click
Continue.
4. Enter the title, description and broadcast
method, then adjust your privacy settings
(if applicable).
5. Click Save.
FACEBOOK, YOUTUBE LIVE, AND VIMEO LIVESTREAM
Vidiu X features native integration with some of the most popular streaming platforms. Select a
Stream Mode (Facebook, YouTube Live, or Vimeo Livestream), then follow the prompts to link
your account.
Fig. 3-4
Fig. 3-5
Fig. 3-6

13
WOWZA STREAMING CLOUD
1. Select Wowza Streaming Cloud mode.
2. Enter the connection code from your Wowza
Streaming account then click Connect (Fig. 3-7).
3. Enter your credentials, then return to the web UI
Home screen.
RTMP(S)
Vidiu can stream to other video platforms, CDNs,
and streaming servers using RTMP mode, which is
supported by most video streaming platforms.
1. Select RTMP.
2. Enter the URL and stream key/name information
provided by the streaming service (Fig. 3-8).
3. Enter your credentials (if applicable) then
click Save.
URL and Stream Name/Key
To stream to a broadcast platform other than a platform already
integrated into Vidiu, you must obtain a URL and stream key/name.
Fig. 3-7
Fig. 3-8

14 Teradek, LLC 2021. All rights reserved. v1-0521
RECORDING
With Vidiu X, you can record your broadcasts directly to a compatible SD card. Each recording is
saved with the same resolution and bitrate set on the device. From the front panel interface, Web UI,
or the Vidiu app, go to your Settings, then select Recording.
1. Insert a compatible SD card into the device’s slot.
2. Toggle the Enable/Disable Recording switch to Enable (from the front panel interface’s
Recording Settings menu, select Enable).
Recording Considerations
● For best results, use Class 6 or higher SD cards.
● Media should be formatted using FAT32 or exFAT.
● File size is limited to 4GB for FAT32 formatted cards.
● New recordings are automatically started after the file size limit is reached.
RTSP
RTSP streaming is a convenient way to stream video
over a local network. In this mode, Vidiu X acts as
the server, and clients can connect to pull the video
stream. RTSP can be helpful for testing local network
connectivity.
1. Select RTSP.
2. Enter the server port and stream name, then click
Save (Fig. 3-9).
3. To view the stream on VLC media player, copy the
RTSP url under the preview window (Fig. 3-10),
launch VLC, then navigate to File>Open Network.
Paste the url in the url field then click Open.
Fig. 3-9
Fig. 3-10

15
AUDIO/VIDEO
The Video/Audio menu contains input source
information and audio source configuration
options. Navigate to Settings>Video/Audio
(Video Settings or Audio Settings from the
front panel), then tap the Video/Audio button
to configure the audio or video settings.
AUDIO/VIDEO SETTINGS
● DEINTERLACER - The Deinterlacer converts interlaced video into progressive video before
streaming, improving the appearance of video that has been scaled down
from the original input resolution. In addition to supporting scaled down
interlaced video, deinterlacing is useful when streaming to the Internet or
mobile devices.
● RESOLUTION - Maintain the input’s native resolution (Auto), or select from a list of resolutions.
● BITRATE
SELECTION
- Select from a list of bitrate figures, or manually enter a custom bitrate.
● BITRATE (kbps) - Select your stream’s target bitrate. Lower bitrates require less
bandwidth and may allow for a more stable stream while higher bitrates
oer better video quality, but require more network bandwidth.
● FRAME RATE
SELECTION
- Select Auto to maintain the input frame rate, or select Custom to choose a
frame rate that matches the exact figure or a fraction of the input frame rate.
● KEY FRAME
INTERVAL
- Adjust the amount of time between full picture refreshes.
● AUDIO INPUT - Choose the source used for the audio stream. Select HDMI (Embedded, or
Analog audio.
● MUTE - Turn o Audio.
● BITRATE
SELECTION
- Select from a list of bitrate figures, or manually enter a custom bitrate.
● BITRATE (kbps) - Select your stream’s target bitrate. Lower bitrates require less
bandwidth and may allow for a more stable stream while higher bitrates
oer better video quality, but require more network bandwidth.

16 Teradek, LLC 2021. All rights reserved. v1-0521
NETWORK
Vidiu X allows you to connect and stream to
the Internet by utilizing one of several network
interfaces. Navigate to Settings>Network
(Network Settings from the front panel), then
make a selection.
NETWORK SETTINGS
● SSL/TLS
ENCRYPTION
- SSL (Secure Sockets Layer), and its successor, TLS (Transport Layer Security),
are encryption protocols used to protect the confidentiality and integrity of any
data transmitted over the Internet. Use this option to enable or disable
SSL/TLS encryption.
● WIRED
- A wired Ethernet connection is typically the most reliable means for
connecting to a network, as you don’t have to deal with the instability of a
Wi-Fi or cellular connection. Connect an Ethernet cable to Vidiu X, select
Wired, then choose a configuration mode:
● Dynamic (DHCP):When set to DHCP, Vidiu X will request an IP address and
network configuration from the network’s DHCP server.
● Static: When set to Static, you will need to manually configure the IP
address, subnet mask, gateway, and DNS server to connect to the network.
● WIFI - Although an Ethernet connection is the most reliable method of connecting
to a network, a Wi-Fi connection may be more convenient, especially if an
Ethernet connection is unavailable. There are two wireless modes available:
● Access Point (AP) Mode: Vidiu acts as its own dual band access point,
allowing you to connect your device directly to Vidiu’s AP network.
● Client Mode: Vidiu and your mobile device connect to the same local
wireless network. Access Client Mode, scan for available networks or
connect to a previously saved network, then enter your credentials.
● MODEM - A USB modem allows you to broadcast wherever a cell connection is
available. Vidiu X automatically detects and supports many modems using
Auto mode. Custom mode allows you to manually configure a modem if it’s
not automatically detected. Available configuration modes are Composite,
and Ethernet.

17
● FIRMWARE - Check for new updates and upgrade Vidiu X’s firmware to the latest version.
If an update is available, simply follow the prompts to complete the firmware
update.
● SECURITY - Add, change, or delete your password.
● DATE & TIME - Enter an NTP link to automatically synchronize the time and date.
● ABOUT - Display Vidiu X’s model and serial number.
● RESET/IMPORT
& EXPORT
- Factory Reset: Restore Vidiu X to its original settings.
Import/Export: Import or export Vidiu X user settings to another Vidiu X unit.
These files can be used by a dierent Vidiu X to replicate the configuration.
Additionally, the export settings feature can be used for troubleshooting.
● LOG OUT
SESSIONS
- Log out of one or all sessions.
● DIAGNOSTICS - Generate a diagnostic report for your Vidiu X. Diagnostic reports can be used
by Teradek’s support team to assist during troubleshooting.
● REBOOT - Restart Vidiu X.
SYSTEM
Essential system functions, including factory
reset, firmware upgrade, and diagnostics
reports can be performed from the System
menu in the web UI.
SYSTEM SETTINGS

18 Teradek, LLC 2021. All rights reserved. v1-0521
MY FIREWALL/ROUTER IS BLOCKING RTMP STREAMING.
Vidiu X uses a set of ports for RTMP streaming. Make sure the required ports are allowed
through your firewall or router. The list can be found at https://support.teradek.com/hc/en-us/
articles/226177168.
WHAT ARE THE SUPPORTED RESOLUTIONS FOR EACH SOCIAL MEDIA CDN?
Every live streaming platform’s specifications are dierent, and generally change over time. Visit your
streaming platform’s website to find supported resolutions.
WHY IS MY STREAM SUDDENLY CHOPPING WHILE STREAMING?
Intermittent Wi-Fi connections can cause instability even when streaming over Ethernet. If you
encounter issues while streaming over Ethernet, disabling Wi-Fi may help. To fix this:
1. Scroll to Network Settings.
2. Select Wi-Fi.
3. Select Client. Turn Client mode to O.
WHY DOES YOUTUBE TELL ME MY BITRATE IS TOO LOW?
Vidiu X is preconfigured to use adaptive bitrate which changes according to the user’s bandwidth. This
means that the bitrates can sometimes jump or dip depending on the stream, prompting a message
from YouTube. While this operation is completely normal, it may cause a message to appear on the
YouTube event control room page.
CONFIGURING VIDIU X VIA FRONT PANEL IS DIFFICULT.
We recommend using Vidiu X’s web interface or the Vidiu app for configuring Vidiu X. It’s much
faster and simpler. To connect to the app, connect Vidiu and your cellular device to the same wireless
network. Vidiu will automatically appear in the app.
To connect using the web interface, find your Vidiu’s IP address from the front panel. Type this
address into your web browser. You will be connected to your Vidiu and can change settings
accordingly.
I’VE PRESSED THE START/STOP BUTTON TO GO LIVE, BUT MY STREAM IS NOT LIVE.
Some streaming networks such as Periscope, YouTube events, and Facebook Pages may require
additional steps to publish your stream.. This depends on the CDN’s workflow. Remember to go live
on both Vidiu and destination page to fully start streaming.
TROUBLESHOOTING

19

20 Teradek, LLC 2021. All rights reserved. v1-0521
TECHNICAL SPECIFICATIONS
VIDEO
Video Input 1x HDMI Type A receptacle
Video Output 1x HDMI Type A receptacle
Supported Resolutions 1080p 23.98/24/25/29.97/30/50/59.94/60
720p 50/59.94/60
Video Compression H.264 (AVC), Main profile
Supported Video Bitrate 250 kbps to 15 Mbps
Preset Bitrates/Resolu-
tions
Max: 12 Mbps + 256 kbps audio 1920x1080
HD+: 8 Mbps + 256 kbps audio 1920x1080
HD: 5 Mbps + 192 kbps 1920x1080
High: 3 Mbps + 192 kbps 1280x720
Medium: 1.5 Mbps + 128 kbps 960x540
Low: 800 kbps + 128 kbps 736x414
Mobile: 500 kbps + 96 kbps 480x270
Video Format
Conversion Support
Built-in video scaler
AUDIO
Audio Inputs Embedded HDMI audio input, 2-Channel
Analog line-in or mic-in, 2-Channel
Audio Compression AAC-LC
Supported Audio Bitrate
Details
HD: 256 kbps
High: 192 kbps
Medium: 128 kbps
Low: 96 kbps
Mobile: 48 kbps
PHYSICAL ATTRIBUTES
Dimensions 4.1” W x 2.9” D x 1.1” H (105 x 75 x 28 mm)
Weight 5.6oz [160g]
Construction Machined aluminum and ABS Plastic
Mountability 1x ¼-20 plus 2 x M3 on the bottom plate
ENVIRONMENTAL
Operating Temperature Operating: 14ºF to 104ºF (-10ºC to 40ºC)
Storage: -40ºF to 194ºF (-40ºC to 90ºC)
Humidity Operating: 5% to 95% (non-condensing)
Storage: Max. 90%
Other manuals for Vidiu X
1
Table of contents
Other Teradek Media Converter manuals

Teradek
Teradek Brik User manual

Teradek
Teradek VidiU User manual

Teradek
Teradek CUBE Series User manual

Teradek
Teradek Cube 605 User manual
Teradek
Teradek 600 Series User manual
Teradek
Teradek CUBE User manual

Teradek
Teradek CUBE Series User manual

Teradek
Teradek CUBE User manual

Teradek
Teradek Wave User manual

Teradek
Teradek Vidiu X User manual
Popular Media Converter manuals by other brands

Sony
Sony CarrierGate PCWA-DE50 troubleshooting guide

YASKAWA
YASKAWA VS-505WII manual

Lynx
Lynx MiniModules 3000 Series Reference manual

DENAFRIPS
DENAFRIPS ARES 12TH DAC owner's manual

Ensemble Designs
Ensemble Designs BrightEye Mitto series quick start guide

Delta Electronics
Delta Electronics Delphi H48SR datasheet