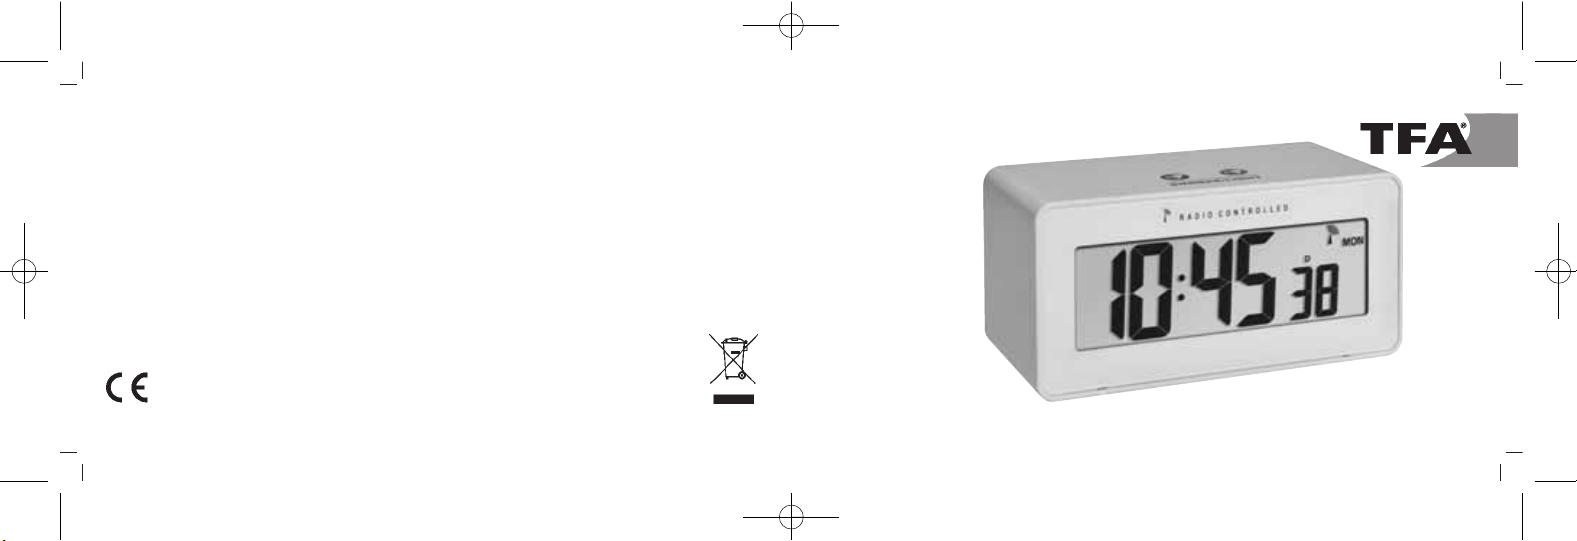
TFA CHANGE User manual

Bedienungsanleitung
Instruction manual
Mode d’emploi
Istruzioni per l'uso
Gebruiksaanwijzing
Instrucciones de uso
Kat. Nr. 60.2544
RoHS
TFA_No. 60.2544_anl_02_18 26.02.2018 9:59 Uhr Seite 1

– 2 – – 3 –
Fig. 1 Fig. 2
A 8
A 7
A 3A 2 A 5
A 4 A 6
C 1A 10A 11 A 9C 5
A 1 B 2
TFA_No. 60.2544_anl_02_18 26.02.2018 9:59 Uhr Seite 2

– 4 – – 5 –
Fig. 3 Fig. 4
C 2
B 1
TFA_No. 60.2544_anl_02_18 26.02.2018 9:59 Uhr Seite 3

– 6 – – 7 –
CHANGE –Funkwecker
Vielen Dank, dass Sie sich für dieses Gerät aus dem Hause TFA entschieden haben.
1. Bevor Sie mit dem Gerät arbeiten
•Lesen Sie sich bitte die Bedienungsanleitung genau durch.
So werden Sie mit Ihrem neuen Gerät vertraut, lernen alle Funktionen und Bestandteile kennen, erfahren
wichtige Details für die Inbetriebnahme und den Umgang mit dem Gerät und erhalten Tipps für den Stö-
rungsfall.
•Durch die Beachtung der Bedienungsanleitung vermeiden Sie auch Beschädigungen des Gerätes und
die Gefährdung Ihrer gesetzlichen Mängelrechte durch Fehlgebrauch.
•Für Schäden, die aus Nichtbeachtung dieser Bedienungsanleitung verursacht werden, übernehmen wir
keine Haftung.
•Beachten Sie besonders die Sicherheitshinweise!
•Bewahren Sie diese Anleitung gut auf!
2. Lieferumfang
• Funkwecker • Bedienungsanleitung
CHANGE –Funkwecker
3. Einsatzbereich und alle Vorteile Ihres neuen Gerätes auf einen Blick
• Funkuhr mit höchster Genauigkeit
• Wochentag und Datum
• Weckalarm mit Snooze-Funktion
• Innentemperatur und Luftfeuchtigkeit
• Automatischer Wechsel des Displays einstellbar
• Hintergrundbeleuchtung
4. Zu Ihrer Sicherheit
• Das Produkt ist ausschließlich für den oben beschriebenen Einsatzbereich geeignet. Verwenden Sie das
Produkt nicht anders, als in dieser Anleitung dargestellt wird.
• Das eigenmächtige Reparieren, Umbauen oder Verändern des Gerätes ist nicht gestattet.
Vorsicht!
Verletzungsgefahr:
TFA_No. 60.2544_anl_02_18 26.02.2018 9:59 Uhr Seite 4

– 8 – – 9 –
CHANGE –Funkwecker
• Bewahren Sie die Batterien und das Gerät außerhalb der Reichweite von Kindern auf.
• Batterien enthalten gesundheitsschädliche Säuren und können bei Verschlucken lebensgefährlich sein.
Wurde eine Batterie verschluckt, kann dies innerhalb von 2 Stunden zu schweren inneren Verätzungen und
zum Tode führen. Wenn Sie vermuten, eine Batterie könnte verschluckt oder anderweitig in den Körper
gelangt sein, nehmen Sie sofort medizinische Hilfe in Anspruch.
• Batterien nicht ins Feuer werfen, kurzschließen, auseinander nehmen oder aufladen. Explosionsgefahr!
• Um ein Auslaufen der Batterien zu vermeiden, sollten schwache Batterien möglichst schnell ausgetauscht
werden. Verwenden Sie nie gleichzeitig alte und neue Batterien oder Batterien unterschiedlichen Typs. Beim
Hantieren mit ausgelaufenen Batterien chemikalienbeständige Schutzhandschuhe und Schutzbrille tragen!
Wichtige Hinweise zur Produktsicherheit!
• Setzen Sie das Gerät keinen extremen Temperaturen, Vibrationen und Erschütterungen aus.
• Vor Feuchtigkeit schützen.
CHANGE –Funkwecker
5. Bestandteile
A: Display (Fig. 1):
A 1: Wahlanzeige:
– Uhrzeit, Sekunden, Wochentag – Datum, Wochentag
– Luftfeuchtigkeit, Innentemperatur – Alarmzeit
A 2: Alarmsymbol A 3: AM/PM
A 4: Kreissymbol für automatischen Displaywechsel
A 5: DCF-Empfangszeichen A 6: Wochentag
A 7: Sommerzeit-Symbol A 8: Batteriesymbol
A 9: Zeitzone A 10: Snooze
A 11: Alarmmodus
B: Tasten (Fig. 2+3):
B 1: SNOOZE/LIGHT Sensortaste B 2: Einstellrad
TFA_No. 60.2544_anl_02_18 26.02.2018 9:59 Uhr Seite 5

– 10 – – 11 –
CHANGE –Funkwecker
C: Gehäuse (Fig. 2+4):
C 1: Batteriefach C 2: Ausklappbarer Ständer
6. Inbetriebnahme
• Öffnen Sie das Batteriefach und legen Sie zwei neue Batterien 1,5 V AA ein. Achten Sie auf die richtige Pola-
rität beim Einlegen der Batterien.
• Schließen Sie das Batteriefach wieder.
• Ein kurzer Signalton ertönt und es werden alle LCD Segmente kurz angezeigt.
6. Empfang der Funkzeit
• Die Uhr versucht nun, das Funksignal zu empfangen und das DCF-Empfangszeichen blinkt. Wenn das Funk-
signal nach 3-7 Minuten empfangen wurde, werden die funkgesteuerte Zeit und das DCF-Empfangszeichen
ständig im Display angezeigt.
• Sollte kein Empfang möglich sein, verschwindet das DCF-Empfangszeichen und die Uhr startet alle 3 Stun-
den einen Empfangsversuch.
CHANGE –Funkwecker
• Der DCF-Funkempfang findet täglich um 1:00 morgens statt. Ist der Empfang nicht erfolgreich, so finden
um 2.00, 3.00, 4.00 und um 5:00 Uhr früh weitere Empfangsversuche statt.
• Falls die Funkuhr kein DCF-Signal empfangen kann (z.B. wegen Störungen, Übertragungsdistanz, etc.),
kann die Zeit auch manuell eingestellt werden.
• Die Uhr arbeitet dann wie eine normale Quarz-Uhr (siehe Manuelle Einstellungen).
Hinweis zum Empfang der Funkzeit
Die Zeitübertragung erfolgt von einer Cäsium Atom-Funkuhr, die von der Physikalisch Technischen Bundesan-
stalt in Braunschweig betrieben wird. Die Abweichung beträgt weniger als 1 Sekunde in einer Million Jahren.
Die Zeit ist kodiert und wird von Mainflingen in der Nähe von Frankfurt am Main durch ein DCF-77 (77.5 kHz)
Frequenzsignal übertragen mit einer Reichweite von ca. 1.500 km. Ihre Funkuhr empfängt das Signal, wandelt
es um und zeigt immer die exakte Zeit an. Auch die Umstellung von Sommer- und Winterzeit erfolgt automa-
tisch. Während der Sommerzeit erscheint DST im Display. Der Empfang hängt hauptsächlich von der geogra-
phischen Lage ab. Im Normalfall sollten innerhalb des Radius von 1.500 km ausgehend von Frankfurt bei der
Übertragung keine Probleme auftauchen.
TFA_No. 60.2544_anl_02_18 26.02.2018 9:59 Uhr Seite 6

– 12 – – 13 –
CHANGE –Funkwecker
Bitte beachten Sie folgende Hinweise:
• Es wird empfohlen, einen Abstand von mindestens 1,5 – 2 Metern zu eventuell störenden Geräten wie
Computerbildschirmen und Fernsehgeräten einzuhalten.
• In Stahlbetonbauten (Kellern, Aufbauten) ist das empfangene Signal natürlicherweise schwächer. In
Extremfällen wird empfohlen, das Gerät in Fensternähe zu platzieren und/oder durch Drehen das Funk-
signal besser zu empfangen.
• Nachts sind die atmosphärischen Störungen meist geringer und ein Empfang ist in den meisten Fällen
möglich. Ein einziger Empfang pro Tag genügt, um die Genauigkeit zu gewährleisten und Abweichungen
unter 1 Sekunde zu halten.
7. Bedienung
7.1 Wechsel des Displays
• Drücken Sie auf das Einstellrad im Normalmodus, um die Anzeige nacheinander umzuschalten:
1. Uhrzeit, Sekunden, Wochentag
2. Datum, Wochentag
CHANGE –Funkwecker
3. Luftfeuchtigkeit, Innentemperatur
4. Alarmzeit
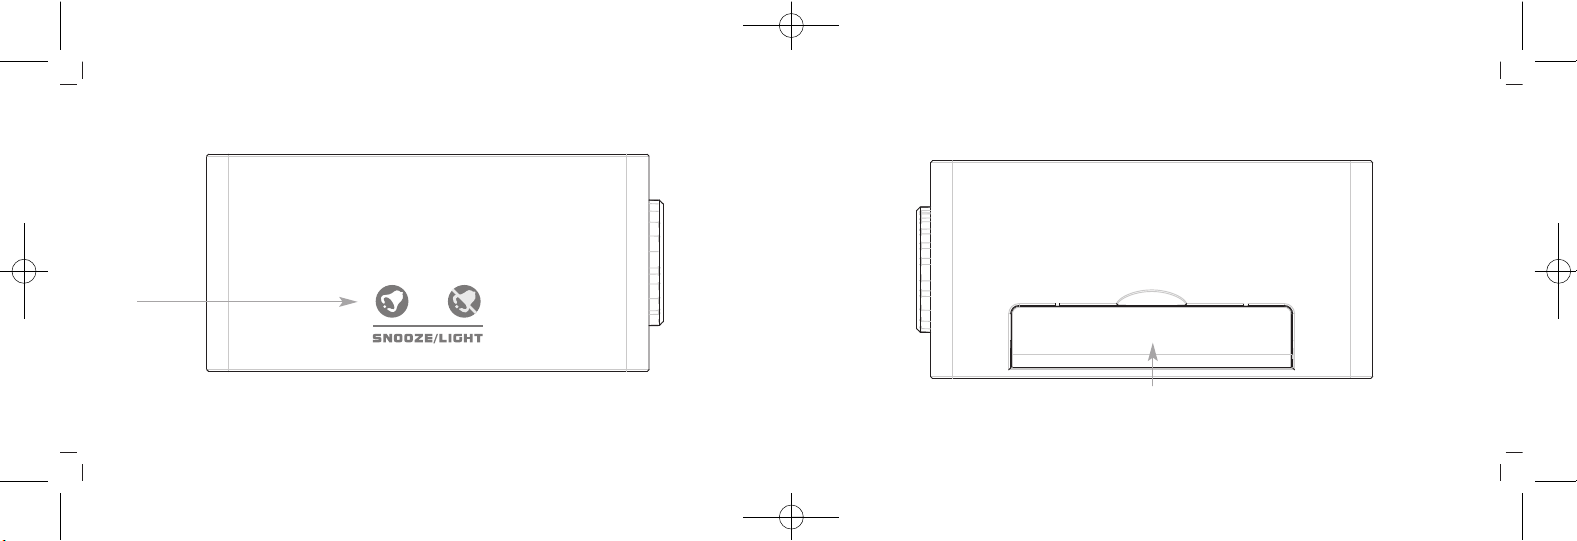
• Drücken Sie noch einmal auf das Einstellrad, erscheint das Kreissymbol auf dem Display.
• Auf dem Display erscheinen nun die 4 Anzeigen im Wechsel.
• Drücken Sie noch einmal auf das Einstellrad, um die Funktion zu beenden.
7.2 Manuelle Einstellungen
• Halten Sie das Einstellrad im Normalmodus für drei Sekunden gedrückt.
• Ein kurzer Signalton ertönt und die Hintergrundbeleuchtung ist aktiviert. ZONE erscheint im Display.
• 00 (Voreinstellung) fängt an zu blinken und Sie können mit dem Einstellrad die Zeitzone einstellen, solange
die Anzeige blinkt.
• Drücken Sie noch einmal auf das Einstellrad und Sie können nun nacheinander die Stunden, die Minuten,
12- oder 24-Stunden-Zeitsystem (24 Hr Voreinstellung), das Jahr, den Monat, den Tag und die Temperatur-
einheit °C oder °F (°C Voreinstellung) ansteuern und mit dem Einstellrad einstellen.
• Drücken Sie auf das Einstellrad zur Bestätigung.
TFA_No. 60.2544_anl_02_18 26.02.2018 9:59 Uhr Seite 7

– 14 – – 15 –
CHANGE –Funkwecker
• Das Gerät verlässt automatisch den Einstellmodus, wenn länger als 30 Sekunden keine Taste gedrückt wird.
• Bei erfolgreichem Empfang des DCF-Funksignals wird die manuell eingestellte Zeit überschrieben.
7.2.1 Einstellung der Zeitzone
• Im Einstellmodus können Sie die Zeitzonenkorrektur (-12/+12) vornehmen.
• Die Zeitzonenkorrektur wird benötigt, wenn das DCF Funksignal empfangen werden kann, die Zeitzone sich
aber von der DCF Zeit unterscheidet (z.B. +1=eine Stunde später).
7.2.2 Einstellung des 24- oder 12- Stunden-Formats
• Im Einstellmodus können Sie zwischen dem 24 Stunden oder 12 Stunden-Format auswählen.
• Im 12-h-Format erscheint AM (vormittags) und PM (nachmittags) auf dem Display.
7.3 Weckalarm
7.3.1 Einstellung der Alarmzeit
• Drücken Sie dreimal auf das Einstellrad im Normalmodus, um in den Alarmmodus zu gelangen.
CHANGE –Funkwecker
• ALARM und 0:00 Uhr bzw. die zuletzt eingestellte Weckzeit erscheint im Display.
• Halten Sie das Einstellrad für drei Sekunden gedrückt, um in den Einstellmodus zu gelangen.
• Ein kurzer Signalton ertönt und die Hintergrundbeleuchtung ist aktiviert.
• Die Stundenanzeige blinkt und das Alarmsymbol erscheint im Display.
• Stellen Sie mit dem Einstellrad die gewünschte Zeit ein.
• Drücken Sie auf das Einstellrad zur Bestätigung.
• Geben Sie auf gleiche Weise die Minuten ein.
• Drücken Sie auf das Einstellrad zur Bestätigung.
• Nun können Sie die Dauer der Weckzeitunterbrechung einstellen.
• 05 (Voreinstellung) oder die zuletzt eingestellte Weckzeitunterbrechung erscheint im Display.
• Stellen Sie mit dem Einstellrad die gewünschte Zeitdauer (5 bis 60 Minuten) ein.
• Drücken Sie auf das Einstellrad zur Bestätigung.
7.3.2 Aktivieren und Deaktivieren des Weckalarms
• Um die Alarm-Funktion zu aktivieren und zu deaktivieren, halten Sie die SNOOZE/LIGHT Sensortaste für drei
Sekunden gedrückt. Das Alarmsymbol erscheint oder verschwindet im Display.
TFA_No. 60.2544_anl_02_18 26.02.2018 9:59 Uhr Seite 8

– 16 – – 17 –
CHANGE –Funkwecker
• Bei aktiviertem Alarm beginnt der Wecker zu klingeln, wenn die eingestellte Weckzeit erreicht ist.
• Drücken Sie auf das Einstellrad und der Alarm wird beendet.
• Wird der Alarm nicht unterbrochen, schaltet sich der ansteigende Alarmton nach 2 Minuten aus und akti-
viert sich erneut zur gleichen Weckzeit wieder.
• Das Alarmsymbol bleibt im Display stehen.
• Wenn der Wecker klingelt, drücken Sie die SNOOZE/LIGHT Sensortaste, um die Snooze-Funktion zu aktivieren.
• Ist die Snooze-Funktion aktiviert, blinkt SNOOZE auf dem Display.
• Der Alarm wird für die Dauer von 5 Minuten (Voreinstellung) unterbrochen.
7.4 Beleuchtung
• Drücken Sie die SNOOZE/LIGHT Sensortaste.
• Die Hintergrundbeleuchtung wird für 5 Sekunden aktiviert.
8. Pflege und Wartung
•
Reinigen Sie das Gerät mit einem weichen, leicht feuchten Tuch. Keine Scheuer- oder Lösungsmittel verwenden!
CHANGE –Funkwecker
• Entfernen Sie die Batterien, wenn Sie das Gerät längere Zeit nicht verwenden.
• Bewahren Sie Ihr Gerät an einem trockenen Platz auf.
8.1 Batteriewechsel
• Sobald das Batteriesymbol im Display erscheint, wechseln Sie bitte die Batterien.
• Öffnen Sie das Batteriefach und legen Sie zwei neue Batterien 1,5 V AA polrichtig ein.
• Schließen Sie das Batteriefach wieder.
9. Fehlerbeseitigung
Problem Lösung
Keine Anzeige ➜ Batterien polrichtig einlegen
➜ Batterien wechseln
Kein DCF Empfang ➜ Empfangsversuch in der Nacht abwarten
➜ Standortwechsel (Störfaktoren!)
TFA_No. 60.2544_anl_02_18 26.02.2018 9:59 Uhr Seite 9

– 18 – – 19 –
CHANGE –Funkwecker
➜ Neuinbetriebnahme gemäß Betriebsanleitung starten
➜ Uhrzeit manuell einstellen
Unkorrekte Anzeige ➜ Batterien wechseln
Wenn Ihr Gerät trotz dieser Maßnahmen immer noch nicht funktioniert, wenden Sie sich an den Händler, bei dem
Sie das Produkt gekauft haben.
10. Entsorgung
Dieses Produkt wurde unter Verwendung hochwertiger Materialien und Bestandteile hergestellt, die recycelt
und wiederverwendet werden können.
Batterien und Akkus dürfen keinesfalls in den Hausmüll!
Als Verbraucher sind Sie gesetzlich verpflichtet, gebrauchte Batterien und Akkus zur umweltgerech-
ten Entsorgung beim Handel oder entsprechenden Sammelstellen gemäß nationaler oder lokaler
Bestimmungen abzugeben.
Die Bezeichnungen für enthaltene Schwermetalle sind: Cd=Cadmium, Hg=Quecksilber, Pb=Blei
CHANGE –Funkwecker
Dieses Gerät ist entsprechend der EU-Richtlinie über die Entsorgung von Elektro- und Elektro-
nik-Altgeräten (WEEE) gekennzeichnet.
Dieses Produkt darf nicht mit dem Hausmüll entsorgt werden. Der Nutzer ist verpflichtet, das
Altgerät zur umweltgerechten Entsorgung bei einer ausgewiesenen Annahmestelle für die Ent-
sorgung von Elektro- und Elektronikgeräten abzugeben.
11. Technische Daten
Messbereich Temperatur -10 ... +50°C (+14…+122 °F)
Messbereich Luftfeuchtigkeit 1…99%
Spannungsversorgung 2 x 1,5 V AA Batterien (nicht inklusive)
Gehäusemaße 124 x 59 x 59 (69) mm
Gewicht 154 g (nur das Gerät)
TFA_No. 60.2544_anl_02_18 26.02.2018 9:59 Uhr Seite 10

– 20 – – 21 –
CHANGE –Funkwecker
Diese Anleitung oder Auszüge daraus dürfen nur mit Zustimmung von TFA Dostmann veröffentlicht werden. Die technischen
Daten entsprechen dem Stand bei Drucklegung und können ohne vorherige Benachrichtigung geändert werden.
Die neuesten technischen Daten und Informationen zu Ihrem Produkt finden Sie unter Eingabe der Artikel-Nummer auf unserer
Homepage.
EU-Konformitätserklärung
Hiermit erklärt TFA Dostmann, dass der Funkanlagentyp 60.2544 der Richtlinie 2014/53/EU entspricht. Der vollständige Text
der EU-Konformitätserklärung ist unter der folgenden Internetadresse verfügbar:
www.tfa-dostmann.de
E-Mail: [email protected]
TFA Dostmann GmbH & Co.KG, Zum Ottersberg 12, D-97877 Wertheim, Deutschland 02/18
CHANGE –Radio-controlled alarm clock
Thank you for choosing this instrument from TFA.
1. Before you use this product
•Please make sure you read the instruction manual carefully.
This information will help you to familiarize yourself with your new device, to learn all of its functions and
parts, to find out important details about its first use and how to operate it and to get advice in the event of
a malfunction.
•Following and respecting the instructions in your manual will prevent damage to your instrument and
loss of your statutory rights arising from defects due to incorrect use.
•We shall not be liable for any damage occurring as a result of non following of these instructions.
•Please take particular note of the safety advice!
•Please keep this instruction manual safe for future reference.
2. Delivery contents
• Radio-controlled alarm clock • Instruction manual
TFA_No. 60.2544_anl_02_18 26.02.2018 9:59 Uhr Seite 11

– 22 – – 23 –
CHANGE –Radio-controlled alarm clock
3. Range of application and all the benefits of your new instrument at a glance
• Highest precision radio-controlled clock
• Date and weekday
• Alarm with snooze function
• Indoor temperature and humidity
• Automatic change of the display is adjustable
• Backlight
4. For your safety
• This product is exclusively intended for the range of application described above. It should only be used as
described within these instructions.
• Unauthorized repairs, alterations or changes to the product are prohibited.
Caution!
Risk of injury:
CHANGE –Radio-controlled alarm clock
• Keep this instrument and the batteries out of reach of children.
• Batteries contain harmful acids and may be hazardous if swallowed. If a battery is swallowed, this can lead
to serious internal burns and death within two hours. If you suspect a battery could have been swallowed
or otherwise caught in the body, seek medical help immediately.
• Batteries must not be thrown into a fire, short-circuited, taken apart or recharged. Risk of explosion!
• Low batteries should be changed as soon as possible to prevent damage caused by leaking. Never use a
combination of old and new batteries together, nor batteries of different types. Wear chemical-resistant
protective gloves and safety glasses when handling leaking batteries.
Important information on product safety!
• Do not expose the device to extreme temperatures, vibrations or shocks.
• Protect it from moisture.
TFA_No. 60.2544_anl_02_18 26.02.2018 9:59 Uhr Seite 12

– 24 – – 25 –
CHANGE –Radio-controlled alarm clock
5. Elements
A: Display (Fig. 1):
A 1: Optional display:
– Clock, seconds, weekday – Date, weekday
– Humidity, indoor temperature – Alarm time
A 2: Alarm symbol A 3: AM/PM
A 4: Circle symbol for alternating display A 5: DCF reception symbol
A 6: Day of the week A 7: Daylight Saving Time symbol
A 8: Battery symbol A 9: Time zone
A 10: Snooze A 11: Alarm mode
B: Buttons (Fig. 2+3):
B 1: SNOOZE/LIGHT sensor button B 2: Dial
CHANGE –Radio-controlled alarm clock
C: Housing (Fig. 2+4):
C 1: Battery compartment C 2: Stand (fold out)
6. Getting started
• Open the battery compartment and insert two new AA 1,5 V batteries. Make sure the polarity is correct.
• Close the battery compartment again.
• The device will alert you with a beep and all segments will be displayed for a short moment.
6. Radio-controlled time reception
• The clock will now scan the DCF frequency signal and the DCF symbol will be flashing on the display. When
the time code is successfully received after 3-7 minutes, the radio-controlled time and the DCF symbol will
be shown steadily on the display.
• If the reception fails, the DCF symbol will disappear and the clock will repeat the reception every 3 hours.
• The DCF reception always takes place at 1:00 in the morning. If the reception is not successfully received,
further attempts will be taken at 2:00, 3:00, 4:00 and 5:00 o'clock.
TFA_No. 60.2544_anl_02_18 26.02.2018 9:59 Uhr Seite 13

– 26 – – 27 –
CHANGE –Radio-controlled alarm clock
• If the clock cannot detect the DCF-signal (e.g. due to interference, transmitting distance, etc.), the time can
be set manually.
• The clock will then work as a normal quartz clock. (see: Manual settings).
Note on radio-controlled time
The time base for the radio-controlled time is a caesium atomic clock operated by the Physikalisch Technische
Bundesanstalt based in Braunschweig (Brunswick), Germany. It has a time deviation of less than one second
in one million years. The time is coded and transmitted from Mainflingen near Frankfurt via the frequency sig-
nal DCF-77 (77.5 kHz) and has a transmitting range of approximately 1,500 km. The adjustment to Daylight
Saving Time (summer/winter time) is automatic. In Daylight Saving Time DST is shown on the display . The
reception quality depends mainly on geographic location. Normally there should be no reception problems
within a 1,500 km radius around Frankfurt.
Therefore, please note the following steps:
• The recommended distance to any interfering sources like computer screens or TV sets is at least 1.5 -
2 meters.
CHANGE –Radio-controlled alarm clock
• Within concrete walls (reinforced with steel) such as basements, the received signal is naturally weakened.
In extreme cases, please place the unit close to a window to improve reception.
• During night-time, the atmospheric interference is usually less severe and reception is possible in most
cases. A single daily reception is adequate to keep the accuracy deviation under 1 second.
7. Operation
7.1 Display options
• Press the dial in normal mode to toggle through the display options:
1. Clock, seconds, weekday
2. Date, weekday
3. Humidity, indoor temperature
4. Alarm time
• Press the dial again and a circle symbol will appear.
• The 4 displays appear alternately.
• Press the dial again to deactivate the function.
TFA_No. 60.2544_anl_02_18 26.02.2018 9:59 Uhr Seite 14

– 28 – – 29 –
CHANGE –Radio-controlled alarm clock
7.2 Manual settings
• Press and hold the dial in normal mode for three seconds.
• The device will alert you with a beep and the backlight is activated. ZONE appears on the display.
• 00 (default) flashes. Turn the dial and set the time zone while the indication flashes.
• Press the dial again and the setting sequence is shown as follows: hours and minutes, the 24 or 12 hours
display (default: 24 Hr), the year, month, day and temperature unit °C or °F (default: °C). Adjust by turning
the dial.
• Press the dial to confirm.
• The device will automatically quit the setting mode if no button is pressed for 30 seconds.
• The manually set time is overwritten once the DCF time signal is successfully received.
7.2.1 Time zone setting
• You can make the time zone correction (-12/+12) in setting mode.
• The time zone correction is needed for countries where the DCF signal can be received but the time zone is
different from the DCF time (e.g. +1=one hour plus).
CHANGE –Radio-controlled alarm clock
7.2.2 24- or 12-hour system setting
• You can choose between the 12 - or 24 hour system in setting mode.
• In the 12-HR system AM (before noon) or PM (after noon) appears on the display.
7.3 Alarm
7.3.1 Alarm time setting
• Press three times the dial in normal mode to enter the alarm mode.
• ALARM and 0:00 or the last adjusted alarm time appear on the display.
• Press and hold the dial for three seconds to enter the setting mode.
• The device will alert you with a beep and the backlight is activated.
• The alarm symbol will appear and the hour digit will be flashing.
• Set the desired alarm time by turning the dial.
• Press the dial to confirm.
• Set the minutes in the same way.
• Press the dial to confirm.
TFA_No. 60.2544_anl_02_18 26.02.2018 9:59 Uhr Seite 15

– 30 – – 31 –
CHANGE –Radio-controlled alarm clock
• You can now set the snooze interval.
• 05 (default) or the last adjusted snooze interval appear on the display.
• Set the desired time duration (5 to 60 minutes) by turning the dial.
• Press the dial to confirm.
7.3.2 Activate and deactivate the alarm
• To activate or deactivate the alarm function, press and hold the SNOOZE/LIGHT sensor button for 3 seconds.
The alarm symbol appears/disappears on the display.
• When the alarm is activated, the alarm starts to ring when the set alarm time is reached.
• Press the dial and the alarm will stop.
• If the alarm is not stopped manually, the ascending alarm tone automatically turns off after two minutes
and it will be reactivated at the same set time on the following day.
• The alarm symbol remains on the display.
• When the alarm rings, press the SNOOZE/LIGHT sensor button briefly and the snooze function is activated.
• Once the snooze function is activated, SNOOZE will be flashing on the display.
• The alarm will be interrupted for 5 minutes (default).
CHANGE –Radio-controlled alarm clock
7.4 Backlight
• Press the SNOOZE/LIGHT sensor button.
• The backlight turns on for 5 seconds.
8. Care and maintenance
• Clean the device with a soft damp cloth. Do not use solvents or scouring agents.
• Remove the batteries if the device will not be used for an extended period of time.
• Keep the device in a dry place.
8.1 Battery replacement
• Change the batteries when the battery symbol appears on the display.
• Open the battery compartment and insert two new AA 1.5 V batteries, polarity as illustrated.
• Close the battery compartment again.
TFA_No. 60.2544_anl_02_18 26.02.2018 9:59 Uhr Seite 16

– 32 – – 33 –
CHANGE –Radio-controlled alarm clock
9. Troubleshooting
Problem Solution
No display ➜ Ensure the batteries' polarity are correct
➜ Change the batteries
No DCF reception ➜ Wait for an attempt reception during the night
➜ Change the location (interference!)
➜ Restart the device according to the manual
➜ Set the clock manually
Incorrect indication ➜ Change the batteries
If your device fails to work despite these measures, contact the retailer where you purchased the product.
CHANGE –Radio-controlled alarm clock
10. Waste disposal
This product has been manufactured using high-grade materials and components which can be recycled and
reused.
Never dispose of empty batteries and rechargeable batteries in ordinary household waste.
As a consumer, you are required by law to take them to your retail store or to an appropriate
collection site depending on national or local regulations in order to protect the environment.
The symbols for the contained heavy metals are:
Cd = cadmium, Hg = mercury, Pb = lead
This product is labelled in accordance with the EU Waste Electrical and Electronic Equipment
Directive (WEEE).
Please do not dispose of this product in ordinary household waste. As a consumer, you are
required to take end-of-life devices to a designated collection point for the disposal of electrical
and electronic equipment, in order to ensure environmentally-compatible disposal.
TFA_No. 60.2544_anl_02_18 26.02.2018 9:59 Uhr Seite 17

– 34 – – 35 –
CHANGE –Radio-controlled alarm clock
11. Specifications
Measuring range - Temperature -10 ... +50°C (+14…+122 °F)
Measuring range - humidity 1…99%
Power consumption Batteries 2 x AA 1,5 V (not included)
Housing dimension 124 x 59 x 59 (69) mm
Weight 154 g (device only)
CHANGE –Radio-controlled alarm clock
No part of this manual may be reproduced without written consent of TFA Dostmann. The technical data are correct at the time
of going to print and may change without prior notice.
The latest technical data and information about your product can be found by entering the product number on our homepage.
EU Declaration of conformity
Hereby, TFA Dostmann declares that the radio equipment type 60.2544 is in compliance with Directive 2014/53/EU. The full
text of the EU declaration of conformity is available at the following Internet address:
www.tfa-dostmann.de
E-Mail: [email protected]
TFA Dostmann GmbH & Co.KG, Zum Ottersberg 12, D-97877 Wertheim, Germany 02/18
TFA_No. 60.2544_anl_02_18 26.02.2018 9:59 Uhr Seite 18

– 36 – – 37 –
CHANGE –Réveil radio piloté
Nous vous remercions d'avoir choisi l'appareil de la société TFA.
1. Avant d'utiliser votre appareil
•Veuillez lire attentivement le mode d'emploi.
Vous vous familiariserez ainsi avec votre nouvel appareil, vous découvrirez toutes les fonctions et tous les
éléments qui le composent, vous noterez les détails importants relatifs à sa mise en service et vous lirez
quelques conseils en cas de dysfonctionnement.
•En respectant ce mode d'emploi, vous éviterez d'endommager votre appareil et de perdre vos droits
légaux en cas de défaut si celui-ci résulte d’une utilisation non-conforme.
•Nous n'assumons aucune responsabilité pour des dommages qui auraient été causés par le non-res-
pect du présent mode d'emploi.
•Suivez bien toutes les consignes de sécurité !
•Conservez soigneusement le mode d'emploi !
2. Contenu de la livraison
• Réveil radio-piloté • Mode d'emploi
CHANGE –Réveil radio piloté
3. Aperçu du domaine d'utilisation et de tous les avantages de votre nouvel appareil
• Horloge radio-pilotée de grande précision
• Jour de la semaine et date
• Réveil avec fonction de répétition snooze
• Température et humidité intérieures
• Changement automatique de l'affichage réglable
• Éclairage de fond
4. Pour votre sécurité
• Le produit est destiné uniquement à l'utilisation décrite ci-dessus. N'utilisez jamais l’appareil à d'autres fins
que celles décrites dans le présent mode d'emploi.
• Vous ne devez en aucun cas réparer, démonter ou modifier l'appareil par vous-même.
Attention !
Danger de blessure :
TFA_No. 60.2544_anl_02_18 26.02.2018 9:59 Uhr Seite 19

– 38 – – 39 –
CHANGE –Réveil radio piloté
• Gardez votre appareil et les piles hors de la portée des enfants.
• Les piles contiennent des acides nocifs pour la santé et peuvent être mortelles dans le cas d’une ingestion.
Si une pile a été avalée, elle peut entraîner des brûlures internes graves ainsi que la mort dans l’espace de 2
heures. Si vous craignez qu’une pile ait pu être avalée ou ingérée d’une autre manière, quelle qu’elle soit,
contactez immédiatement un médecin d’urgence.
• Ne jetez jamais de piles dans le feu, ne les court-circuitez pas, ne les démontez pas et ne les rechargez pas.
Risque d'explosion !
•
Une pile faible doit être remplacée le plus rapidement possible afin d'éviter toute fuite. N'utilisez jamais simulta-
nément de piles anciennes avec des piles neuves ou des piles de types différents. Pour manipuler des piles qui
ont coulé, utilisez des gants de protection chimique spécialement adaptés et portez des lunettes de protection !
Conseils importants de sécurité du produit !
• Évitez d’exposer l’appareil à des températures extrêmes, à des vibrations ou à des chocs.
• Protégez-le contre l'humidité.
CHANGE –Réveil radio piloté
5. Composants
A : Affichage (Fig. 1) :
A 1 : Affichage au choix :
– Horloge, secondes, jour de la semaine – Date, jour de la semaine
– Humidité et température intérieures – Heure de réveil
A 2 : Symbole de réveil A 3 : AM/PM
A 4 : Symbole circulaire pour le changement automatique
A 5 : Symbole de réception DCF A 6 : Jour de la semaine
A 7 : Symbole de l'heure d'été A 8 : Symbole de pile
A 9 : Fuseau horaire A 10 : SNOOZE
A 11 : Mode d’alarme
B : Touches (Fig. 2+3) :
B 1 : Touche sensitive SNOOZE/LIGHT B 2 : Molette de réglage
TFA_No. 60.2544_anl_02_18 26.02.2018 9:59 Uhr Seite 20
This manual suits for next models
1
Table of contents
Languages:
Other TFA Alarm Clock manuals