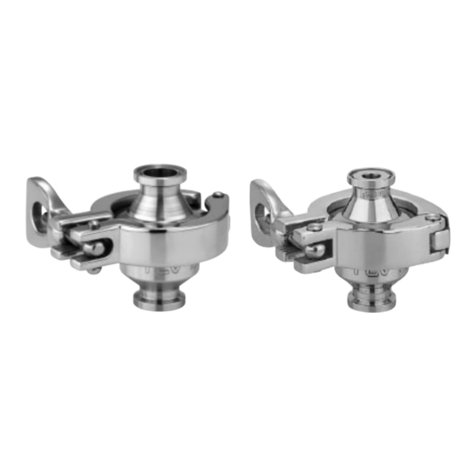
TLV DR8-3P User manual

172-65613MA-04 (DR8-3P/DR8-3EP/DR8-6P/DR8-6EP) 18 May 2021
Clean Steam Direct-acting Pressure Reducing Valve
DR8-3P / DR8-3EP
DR8-6P / DR8-6EP
Copyright © 2021 by TLV CO., LTD.
All rights reserved

172-65613MA-04 (DR8-3P/DR8-3EP/DR8-6P/DR8-6EP) 18 May 2021
1
Contents
Introduction .......................................................................1
Safety Considerations.......................................................2
Specifications....................................................................4
Acceptable Operating Range............................................4
Correct Usage of the DR8 Direct-acting Pressure
Reducing Valve.................................................................5
Configuration.....................................................................8
Installation.........................................................................9
Adjustment ......................................................................12
Maintenance....................................................................13
Disassembly....................................................................14
Reassembly ....................................................................19
Troubleshooting ..............................................................20
Product Warranty ............................................................22
Introduction
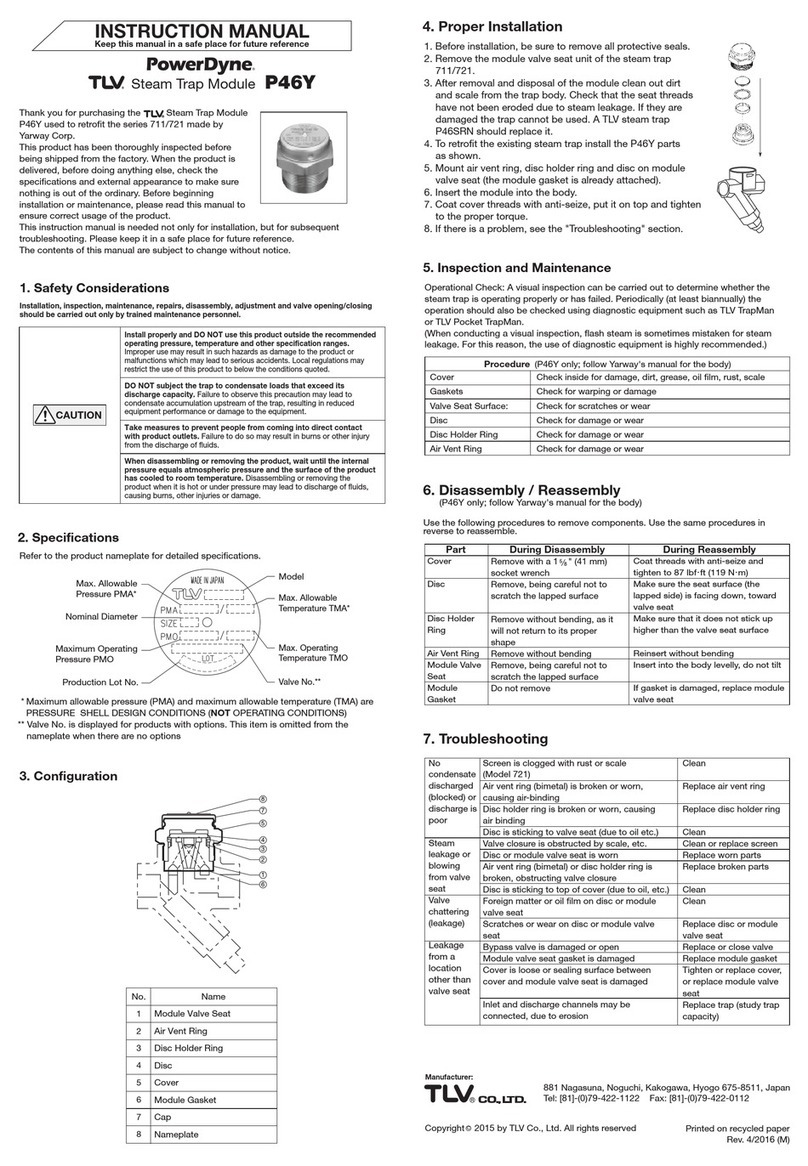
Thank you for purchasing the TLV DR8 clean steam direct-acting pressure
reducing valve.
This product has been thoroughly inspected before being shipped from the
factory. When the product is delivered, before doing anything else, check
the specifications and external appearance to make sure nothing is out of
the ordinary. Also be sure to read this manual carefully before use and
follow the instructions to be sure of using the product properly.
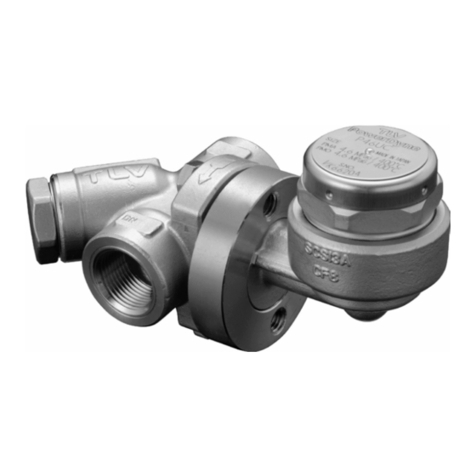
The TLV DR8 clean steam direct-acting pressure reducing valve has been
developed especially for the food, beverage and pharmaceutical
industries. This product has an angle type structure with special polishing
applied to internal parts to minimize areas for condensate to accumulate,
and prevent contamination inside the product. Additionally this product has
a structure that is easily disassembled to make internal cleaning
convenient.
For products with special order specifications or options, if detailed
instructions for the special order specifications or options are not
contained in this manual, please contact TLV for full details.
This instruction manual is intended for use with the model(s) listed on the
front cover. It is necessary not only for installation but for subsequent
maintenance, disassembly/reassembly and troubleshooting. Please keep it
in a safe place for future reference.

172-65613MA-04 (DR8-3P/DR8-3EP/DR8-6P/DR8-6EP) 18 May 2021
2
Safety Considerations
Read this section carefully before use and be sure to follow the
instructions.
Installation, inspection, maintenance, repairs, disassembly, adjustment
and valve opening/closing should be carried out only by trained
maintenance personnel.
The precautions listed in this manual are designed to ensure safety and
prevent equipment damage and personal injury. For situations that may
occur as a result of erroneous handling, three different types of
cautionary items are used to indicate the degree of urgency and the
scale of potential damage and danger: DANGER, WARNING and
CAUTION.
The three types of cautionary items above are very important for safety:
be sure to observe all of them as they relate to installation, use,
maintenance, and repair. Furthermore, TLV accepts no responsibility
for any accidents or damage occurring as a result of failure to observe
these precautions.
Symbols
Indicates a DANGER, WARNING or CAUTION item.
DANGER
Indicates an urgent situation which poses a threat of death or
serious injury
WARNING
Indicates that there is a potential threat of death or serious
injury
CAUTION
Indicates that there is a possibility of injury or
equipment/product damage
CAUTION
Install properly and DO NOT use this product outside the
recommended operating pressure, temperature and other
specification ranges.
Improper use may result in such hazards as damage to the
product or malfunctions that may lead to serious accidents.
Local regulations may restrict the use of this product to below
the conditions quoted.
Take measures to prevent people from coming into direct
contact with product outlets.
Failure to do so may result in burns or other injury from the
discharge of fluids.
When disassembling or removing the product, wait until
the internal pressure equals atmospheric pressure and the
surface of the product has cooled to room temperature.
Disassembling or removing the product when it is hot or under
pressure may lead to discharge of fluids, causing burns, other
injuries or damage.
Continued on the next page

172-65613MA-04 (DR8-3P/DR8-3EP/DR8-6P/DR8-6EP) 18 May 2021
3
CAUTION
Be sure to use only the recommended components when
repairing the product, and NEVER attempt to modify the
product in any way.
Failure to observe these precautions may result in damage to
the product and burns or other injury due to malfunction or the
discharge of fluids.
Use only under conditions in which no freeze-up will occur.
Freezing may damage the product, leading to fluid discharge,
which may cause burns or other injury.
Use only under conditions in which no water hammer will
occur.
The impact of water hammer may damage the product, leading
to fluid discharge, which may cause burns or other injury.

172-65613MA-04 (DR8-3P/DR8-3EP/DR8-6P/DR8-6EP) 18 May 2021
4
Specifications
Install properly and DO NOT use this product outside the recom mended
operating pressure, temperature and other specification ranges.
Im proper use may result in such hazards as dam age to the product or
malfunctions which m ay lead to serious accidents. Local regulations
may restrict the use of this product to below the conditions quoted.
CAUTION
Use only under conditions in which no freeze-up will occur. Freezing
may dam age the product, leading to fluid discharge, which may cause
burns or other injury.
CAUTION
Refer to the indications on the spring housing for detailed specifications.
Connection Standard No.
CNo.**
Production
Lot No.
Inner Diameter
Primary Pressure Range
Secondary Pressure Adjustable Range
Connection Standard
Nominal Diameter
Maximum Allowable
Pressure/Temperature*
Maximum Operating
Pressure/Temperature
Model
*Maximum allowable pressure (PMA) and maximum
allowable temperature (TMA) are PRESSURE SHELL
DESIGN CONDITIONS, NOT OPERATING CONDITIONS.
**CNo. (Charge/Mill No.) is displayed for products with
options. This item is omitted when there are no options.
Acceptable Operating Range
Model
DR8-3P/DR8-3EP
DR8-6P/DR8-6EP
Primary Pressure Range
0.2 to 0.4 MPaG
(30 to 60 psig)
0.4 to 0.8 MPaG
(60 to 115 psig)
Adjustable Pressure Range
0.018 to 0.3 MPaG
(2.5 to 45 psig)
0.27 to 0.6 MPaG
(40 to 85 psig)
No more than a maximum of 75% of the primary pressure
Minimum Adjustable Flow Rate
Steam: 20 kg/h (44 lb/h) or more
(1 MPa = 10.197 kg/cm2)

172-65613MA-04 (DR8-3P/DR8-3EP/DR8-6P/DR8-6EP) 18 May 2021
5
Correct Usage of the DR8 Direct-acting Pressure
Reducing Valve
Install properly and DO NOT use this product outside the recom mended
operating pressure, temperature and other specification ranges.
Im proper use may result in such hazards as dam age to the product or
malfunctions which m ay lead to serious accidents. Local regulations
may restrict the use of this product to below the conditions quoted.
CAUTION
1. The DR8 should be operated only within its specifications.
2. Installing an ON/OFF valve (solenoid valve or motorized valve)
Motorized
Valve
DR8
Inlet Side
Steam Trap
Motorized
Valve
DR8
Outlet Side
Steam Trap
If an on-off valve, such as a motorized valve, is required to stop supply of
steam to the steam-using equipment, install it at the inlet side of the DR8. If a
solenoid valve is installed at the outlet of the DR8, it will cause heavy
chattering and may lead to damage of the DR8. (When the on-off valve opens,
the secondary pressure of the DR8 changes from zero to the set pressure,
passing through an area of the reducing ratio of less than 30:1, where
adjustment is impossible, chattering occurs momentarily.) To save energy, it is
recommended to install the on-off valve as near to the boiler, as possible.
NOTE: To prevent water hammer, it is recommended that aslow-acting motorized
on-off valve be used. In particular, if a fast-acting on-off solenoid valve is
used for frequent temperaturecontrol, the potential water hammer effect
can damage the steam-using equipment and the DR8.
3. Installing a control and/or safety valve
Inlet
Valve
Steam
Trap
Pressure
Gauge
Outlet
Valve
Safety
(Relief)
Valve
Steam-using
Equipment
Steam
Trap
Steam-using
Equipment
Inlet
Valve
Steam
Trap
Pressure
Gauge
Outlet
Valve
Safety (Relief)
Valve
Steam
Trap
A control valve (i.e. for temperature control) installed between the DR8 and
the steam-using equipment (downstream of the DR8) may raise the pressure
between the DR8 and the control valve when the control valve is closed,
depending on the spatial relationship. Therefore, a safety valve should be
installed downstream of the control valve.
NOTE: When installing a safety valve to protect steam-using equipment, be sure to
install it on, or directly before, the inlet of the steam-using equipment. If the
safety valve is installed between the DR8 and a control valve, an eventual
pressure rise could activate the safety valve.

172-65613MA-04 (DR8-3P/DR8-3EP/DR8-6P/DR8-6EP) 18 May 2021
6
4. Precautions for the installation of additional fittings before or after the DR8
In order to ensure a stable steam flow, the piping upstream and downstream
of the DR8must be in straight runs. If the DR8 is installed either directly
before or after an elbow or control valve, unevenness in steam flow may result
in chattering and unstable pressure.
To ensure a stable steam flow, it is recommended that the DR8be installed on
straight runs of piping, as illustrated below.
①Inlet (primary side) of the pressure reducing valve (NOTE: d = pipe diameter)
Maintain a straight
piping run of 10 d or
more when a manual
valve, a strainer or an
elbow, etc. is installed.
(Example: if nominal
size is 25 mm (1 in),
have 250 mm (10 in)
or more)
Inlet
Valve
Steam
Trap
Control
Valve
DR8
Steam
Trap
Steam
Trap
Steam
Trap
Steam
Trap
Steam
Trap
DR8
DR8 DR8
DR8 DR8
Control
Valve
Inlet
Valve
10 dor more Lessthan
10 d
30 dor more Lessthan
30d
10 d or more
Lessthan
10 d
Maintain a straight
piping run of 30 d or
more when an
automatic valve (on-off
valve) is installed.
(Example: if nominal
size is 25 mm (1 in),
have 750 mm (30 in)
or more)
Maintain a straight
piping run of 10 d or
more when a manual
valve, a strainer or an
elbow, etc. is installed.
(Example: if nominal
size is 25 mm (1 in),
have 250 mm (10 in)
or more)

172-65613MA-04 (DR8-3P/DR8-3EP/DR8-6P/DR8-6EP) 18 May 2021
7
②Outlet (secondary side) of the pressure reducing valve
Maintain a straight piping
run of 15 d or more when a
manual valve, a strainer or
an elbow, etc. is installed.
(Example: if nominal size
is 25 mm (1 in), have 375
mm (15 in) or more)
Steam
Trap
Second
Pressure
Reducing
Valve
DR8
Steam
Trap
Steam
Trap
Steam
Trap
Steam
Trap
Steam
Trap
DR8
DR8 DR8
DR8 DR8
Safety (Relief)
Valve
Outlet
Valve
15 dor more Lessthan
15d
30 dor more Lessthan
30d
Outlet
Valve
Safety (Relief)
Valve
Second
Pressure
Reducing
Valve
30 dor more
Lessthan
10d
Lessthan
10d
Lessthan
30d
Maintain a straight piping
run of 30 d or more when a
safety valve is installed.
(Example: if nominal size is
25 mm (1 in), have 750 mm
(30 in) or more)
Maintain a straight piping
run of 30 d or more when
another pressure reducing
valve is installed. (Two-
stage pressure reduction)
(Example: if nominal size
is 25 mm (1 in), have 750
mm (30 in) or more)

172-65613MA-04 (DR8-3P/DR8-3EP/DR8-6P/DR8-6EP) 18 May 2021
8
Configuration
A
A
Fig. A
Size 40 mm (1 1/2 in) (1,1 1/2,1 1/2 in)
Size 25,38,40 mm
Size 25 mm (1 in) (1/2 to 3/4 in)
Size 15 to 20 mm
(1/2 to 3/4 in)
Size 15 to 20 mm
No.
Name
A*1
B*1
C*1
D*1
1
Body
2
Valve
3
Diaphragm
4
Protective Sheet
5
Spring Housing
6
Upper Diaphragm
Retainer
7
Coil Spring
8
Cap
9
Lower Diaphragm
Retainer
10
Spacer
11
Spring Washer
12
Locknut
13
Plain Washer
14
Retainer Gasket
15
Spring Retainer
16
Locknut
17
Adjustment Screw
18
Valve Guide
19
Inlet Clamp Gasket*2
20
Snap Ring
21
Slide Bearing
22
Body Clamp
23
Body Clamp Bolt*3
24
Body Clamp Nut*3
25
Spring Washer*3
26
Inlet Clamp*3
27
Inlet Clamp Bolt*4
28
Inlet Clamp Nut*4
29
Spring Washer*4
30
Adapter*5
*1 Replacement parts are available
only in the following kits:
A: Maintenance Kit
B: Repair Kit for Diaphragm
C: Repair Kit for Valve
D: Repair Kit for Valve Guide
*2 Number of parts for sizes 15 to 20
mm (1/2to 3/4in): 2 pieces, 25 mm
(1 in): 1 piece
*3 Number of parts: 2 pieces
*4 Number of parts for sizes 15 to 20
mm (1/2to 3/4in): 4 pieces, 25 mm
(1 in): 2 pieces
*5 For sizes 15 to 20 mm (1/2to 3/4in)
only

172-65613MA-04 (DR8-3P/DR8-3EP/DR8-6P/DR8-6EP) 18 May 2021
9
Installation
Install properly and DO NOT use this product outside the recom mended
operating pressure, temperature and other specification ranges.
Im proper use may result in such hazards as dam age to the product or
malfunctions which m ay lead to serious accidents. Local regulations
may restrict the use of this product to below the conditions quoted.
CAUTION
Take measures to prevent people from com ing into direct contact with
product outlets. Failure to do so may result in burns or other injury from
the discharge of fluids.
CAUTION
Installation, inspection, maintenance, repairs, disassembly, adjustment and valve
opening/closing should be carried out only by trained maintenance personnel.
1. Removing the Protective Caps
Before installation, be sure to remove all protective seals and caps
covering the product inlet and outlets. (Found in 2 locations)
2. Tolerance Angle for Installation
Make sure the DR8 is installed vertically so that the arrow mark on
the body matches the direction of steam flow, the outlet is
horizontal, and the adjustment screw section faces up.
Allowable inclination is 10 degrees in the fore-aft direction
and 15 degrees side to side in the plane perpendicular to
the steam flow line.
3. Piping Support
Install the DR8, paying attention to avoid excessive load, bending and
vibration. It is recommended that the inlet and
outlet pipes be supported securely.
4. Maintenance Space
Leave sufficient space for maintenance,
inspection and repair.
A: 260 mm (101/4in)
B: 110 mm (41/2in)
A
BB
DR-8
Piping
Support
Piping
Support

172-65613MA-04 (DR8-3P/DR8-3EP/DR8-6P/DR8-6EP) 18 May 2021
10
5. Piping Size
If the secondary steam flow velocity is expected to be more than 30 m/s (100
ft/s), install a diffuser in order to keep the flow velocity below 30 m/s (100 ft/s).
If the distance between the DR8 and the steam-using equipment is great, a
possible drop in pressure should be taken into consideration when selecting
the piping size.
Bypass Valve
DR8
Pressure
Gauge
Inlet Side Inlet
Valve
Outlet
Valve
Pressure
Gauge
Secondary
Side
Safety Valve
(Relief Valve)
Steam Trap
Bypass Valve
Safety Valve
(Relief Valve)
DR8 Outlet
Valve
Pressure
Gauge
Pressure
Gauge
Inlet Side Inlet
Valve
Secondary
Side
Steam Trap
Outlet Pressure Valve Gauge
Straight piping: 10d or longer for primaryside,15d
or longer for secondary side (d=pipe diameter)
6. Two-stage Pressure Reduction
Employ 2-stage pressure reduction if the required reduction is not possible due
to DR8 operating range limitations (when it is not possible to reduce to the
desired pressure using a single pressure reducing valve).
Steam
Trap
Steam Trap
Primary
Side
Inlet
Valve
Inlet
Valve Steam
Trap
Secondary
Side
Outlet
Valve
Outlet
Valve
Bypass Valve
Bypass Valve DR8
DR8 Pressure
Gauge
Pressure
Gauge

172-65613MA-04 (DR8-3P/DR8-3EP/DR8-6P/DR8-6EP) 18 May 2021
11
7. Accessories
Always install a bypass line. At the inlet and outlet, install a pressure gauge
and a shut-off valve. Ball valves, which will not retain condensate, are
recommended for inlet/outlet shut-off valves. The nominal pipe size for the
bypass line should be 1/2or greater of the primary pipe size.
Ball Valve
Steam Trap
Primary
Side
Pressure
Gauge Inlet
Valve
Outlet
Valve
Ball Valve Pressure
Gauge
Bypass Valve Safety Valve
(Relief Valve)
Secondary
Side
8. Blowdown (Installing the bypass valve)
Before installing the DR8 or supplying steam to the DR8, be sure to blow down
all piping thoroughly. Installing the bypass valve makes blowdown easier.
Blowdown is especially important for newly installed piping or after the system
has been shut down for a long period of time. This will reduce operation failure
caused by condensate or foreign matter. The bypass valve should not be
opened too quickly. If a safety valve (or relief valve) is installed, perform
blowdown staying clear of pressurized blow-out.
If condensate accumulates while the inlet valve is closed, install a steam trap
that has a sufficient discharge capacity considering the initial condensate
discharge amount.
To perform blowdown, close the inlet valve (A) first, then the outlet valve (B), and
open the bypass valve (C). Do not open valves too quickly.
Steam Trap
Primary
Side
Pressure
Gauge Inlet
Valve
(A)
Outlet
Valve
(B)
Pressure
Gauge
Bypass Valve
(C) Safety Valve
(Relief Valve)
Secondary
Side
DR8
Steam Trap

172-65613MA-04 (DR8-3P/DR8-3EP/DR8-6P/DR8-6EP) 18 May 2021
12
Adjustment
Use only under conditions in which no water hammer will occur. The
impact of water hammer may damage the product, leading to fluid
discharge, which m ay cause burns or other injury.
CAUTION
To avoid problems such as water hammer and to protect steam-using equipment,
the DR8 should be correctly adjusted.
1. It is necessary to blow down all pipe lines thoroughly. The blowdown is
especially important if the line is new or has been shut down for a long period
of time. Take particular care to ensure that matter such as condensate and dirt
does not remain inside the steam-using equipment.
(Stay clear of any pressurized blow-out from the safety valve.)
2. Make sure that the shut-off and bypass valves located upstream and
downstream of the DR8 are completely closed.
3. Remove the cap and loosen the locknut, then turn the adjustment screw
counterclockwise to free the coil spring.
4. Slowly, fully open the shut-off valve at the inlet of the DR8.
5. Slightly open the shut-off valve at the outlet of the DR8.
6. Turn the adjustment screw clockwise until the desired outlet pressure is
obtained. Wait several minutes.
Clockwise Counter-
clockwise
Increase Pressure Decrease Pressure
7. Slowly, fully open the shut-off valve at the outlet of the DR8.
8. After setting, hold the adjustment screw and retighten the locknut.
9. When shutting down the system, always close the outlet shut-off valve first and
then the inlet valve. (If the inlet shut-off valve is closed first, the safety valve
may be tripped.)

172-65613MA-04 (DR8-3P/DR8-3EP/DR8-6P/DR8-6EP) 18 May 2021
13
Maintenance
Take measures to prevent people from com ing into direct contact with
product outlets. Failure to do so may result in burns or other injury from
the discharge of fluids.
CAUTION
Be sure to use only the recommended com ponents when repairing the
product, and NEVER attem pt to modify the product in any way. Failure to
observe these precautions may result in dam age to the product or burns
or other injury due to malfunction or the discharge of fluids.
CAUTION
Parts Inspection
When parts have been removed, or during periodic inspections, use the following
table to inspect the parts and replace any that are found to be defective.
Part
Inspection and Maintenance Frequency
Diaphragm
If hunting or chattering takes place, cracks or fatigue may develop in
a short period of time.
Protective Sheet
Check for cracks
Body
(Seat section)
If there is chattering or dirt, premature wear may result.
Valve
(Seat section)
If there is chattering or dirt, premature wear may result.
Valve Guide,
(Slide Bearing)
If hunting or chattering takes place, premature wear may result.
Gaskets
Check for deformation or scratches

172-65613MA-04 (DR8-3P/DR8-3EP/DR8-6P/DR8-6EP) 18 May 2021
14
Disassembly
When disassembling or removing the product, wait until the internal
pressure equals atm ospheric pressure and the surface of the product
has cooled to room temperature. Disassem bling or removing the
product when it is hot or under pressure m ay lead to discharge of fluids,
causing burns, other injuries or damage.
CAUTION
It is a recommended practice to dismantle and inspect the DR8 once a year for
preventive maintenance purposes. It is especially important to perform an
inspection immediately after the initial run of a new line or before or after
equipment such as a heater is out of service for a long period of time.
(Installation, inspection, maintenance, repairs, disassembly, adjustment and valve
opening/closing should be carried out only by trained maintenance personnel.)
Remove all steam from the piping (both upstream and downstream).
Wait for the body to cool before attempting to remove the DR8 from the line.
Then remove the DR8 from the piping, and secure it in a vise to perform the
inspection.
Disassembling the Adjustment Section
Loosen the cap and the locknut first. Loosen the adjustment screw completely
and remove the body clamp.

172-65613MA-04 (DR8-3P/DR8-3EP/DR8-6P/DR8-6EP) 18 May 2021
15
After removing the spring housing, remove the adjustment screw, spring retainer,
and coil spring.
Check for seizure or any damaged screw threads.
Adjustment Screw
(Reverse thread)
Spring Retainer
(Reverse thread)
Coil Spring
Disassembling the Diaphragm Section
Hold the valve in place with an adjustable wrench across the flats on the upper
part of the valve and use another wrench to remove the locknut. After removing
the locknut, remove the plain washer, the upper diaphragm retainer and the
diaphragm.
The upper diaphragm retainer,
diaphragm, protective sheet,
lower diaphragm retainer and
retainer gasket can be removed
after removing the locknut.
UpperDiaphragm
Retainer
Diaphragm
Lower Diaphragm
Retainer
Retainer Gasket
Locknut
Spring Washer
Plain Washer
Spacer
Protective Sheet
Locknut
Valve

172-65613MA-04 (DR8-3P/DR8-3EP/DR8-6P/DR8-6EP) 18 May 2021
16
Disassembling the Valve Section
Remove the inlet clamp(s) holding the body, valve guide and adapter (for sizes
15 to 20 mm (1/2to 3/4in) only).
Remove the adapter and the inlet clamp gasket.
(for sizes 15 to 20 mm (1/2to 3/4in) only)
Separate the valve guide from the body. The valve comes off with the valve guide.
Valve
Inlet Clamp Gasket
Valve Guide

172-65613MA-04 (DR8-3P/DR8-3EP/DR8-6P/DR8-6EP) 18 May 2021
17
Disassembling the Valve Guide Section
Snap Ring*
Slide Bearing*
Valve Guide
*The slide bearing and snap ring cannot be
removed individually as they are
incorporated with the valve guide and
must be replaced as a set with the valve
guide.
Cleaning
After inspecting for scratches, erosion, etc. on the seating surface of the body
and valve, cracks or deterioration of the diaphragm and protective sheet, wear on
the valve guide, cracks or deterioration of the retainer gasket, and if there are no
abnormalities, clean and reassemble the parts.
The following parts will require cleaning before reassembly:
Diaphragm, protective sheet, valve, valve guide, retainer gasket, body,
lower diaphragm retainer, adapter (for sizes 15 to 20 mm (1/2to 3/4in) only)
NOTE: Avoid using solvent to clean these parts as it may accelerate deterioration
of the diaphragm, protective sheet, and resin part of the valve guide and
retainer gasket.

172-65613MA-04 (DR8-3P/DR8-3EP/DR8-6P/DR8-6EP) 18 May 2021
18
Exploded View
Adjustment Srew
Spring Retainer
Coil Spring
Cap
Locknut
Spring Housing
Locknut
Plain Washer
Spring Washer
Upper Diaphragm
Retainer
Spacer
Protective Sheet
Lower Diaphragm
Retainer
Retainer
Gasket
Valve
Inlet Clamp Nut
Spring Washer
Inlet Clamp
Inlet Clamp Gasket
Inlet Clamp Gasket
Snap
Ring*
Slide Bearing*
Valve Guide
Inlet Clamp Nut
Spring Washer
Inlet Clamp Bolt
Inlet Clamp Bolt
Inlet Clamp
Adapter
(For sizes 15 to 20 mm (1/2to 3/4in) only)
Body Clamp Nut
Spring Washer
Body Clamp
Body Clamp Bolt
Body
For sizes 15 to 20 mm
(1/2to 3/4in)
* The slide bearing and snap ring cannot be removed individually as they are incorporated
with the valve guide and must be replaced as a set with the valve guide.

172-65613MA-04 (DR8-3P/DR8-3EP/DR8-6P/DR8-6EP) 18 May 2021
19
Reassembly
Reassemble the unit using the same procedure as used for disassembly; but in
reverse order. In addition, observe the following precautions:
1. The diaphragm and the protective sheet also perform the role of gaskets and
may be re-used if free from cracks, deterioration or deformation. If any
abnormalities are found, these parts need to be replaced. The protective
sheet must fit to the groove of the body. Make sure that the convex portion
of the diaphragm faces up.
Protective Sheet
Diaphragm
2. Make sure there are no scratches or erosion on the surface of the valve seat
section of the body and seating surface of the valve, as this will lead to leakage.
If no abnormalities are found, these parts can be reused. When there are
scratches or erosion on these parts, the body and/or valve need to be replaced.
Viewing the valve seat section
of the body from the inlet side Valve
Seating
surface
3. The retainer gasket may be re-used if it has no cracks or deterioration. If any
abnormalities are found, it needs to be replaced.
4. Applying anti-seize to all non-wetted threaded parts is recommended.
Threaded portion of
the valve
5. Standard torques for fastening the respective screws and the width across
flats of the tools to be used are as follows:
Part
Torque
Distance Across Flats
Nm
(lbfft)
mm
(in)
Locknut
3
(2.2)
17
(21/32)
Body Clamp Nut,
Inlet Clamp Nut
3
(2.2)
17
(21/32)
(1 Nm 10 kgcm)
NOTE: If drawings or other special documentation were supplied for the product, any
torque given there takes precedence over values shown here.
Other manuals for DR8-3P
2
This manual suits for next models
3
Table of contents
Other TLV Control Unit manuals
Popular Control Unit manuals by other brands

LSIS
LSIS XGT Series user manual
Grohe
Grohe GROHSAFE 3.0 35 11 Series owner's manual

Emerson
Emerson ANDERSON GREENWOOD MARVAC 121 Series Installation and maintenance instructions
Vortice
Vortice SCNRL5 Instruction booklet

V Expressions
V Expressions Roland TD-27 quick start guide

Sices
Sices REWIND user manual
Baker Hughes
Baker Hughes Masoneilan MiniTork II 37002 Series instruction manual
ADEMCO
ADEMCO LYNX-AVM Installation and setup guide
jbc
jbc ALE-908UVA instruction manual

american flame
american flame AF-LMF-RV Installation and operation instructions

VXI
VXI VT1419A Multifunction Plus user manual
Bürkert
Bürkert Type 2000 Service manual
