manuals.online logo
Brands
  1. Home
  2. •
  3. Brands
  4. •
  5. Toro
  6. •
  7. Lawn Mower Accessories
  8. •
  9. Toro SUPER RECYCLER 59193 User manual

Toro SUPER RECYCLER 59193 User manual

This manual suits for next models

1

Other Toro Lawn Mower Accessories manuals

Toro 04722 User manual

Toro

Toro 04722 User manual

Toro 136-1830 User manual

Toro

Toro 136-1830 User manual

Toro 31529 User manual

Toro

Toro 31529 User manual

Toro 23126 User manual

Toro

Toro 23126 User manual

Toro 04135 User manual

Toro

Toro 04135 User manual

Toro Sand Pro 3040 User manual

Toro

Toro Sand Pro 3040 User manual

Toro 31353 User manual

Toro

Toro 31353 User manual

Toro CT Series User manual

Toro

Toro CT Series User manual

Toro 115-4917 User manual

Toro

Toro 115-4917 User manual

Toro GrandStand 133-1434 User manual

Toro

Toro GrandStand 133-1434 User manual

Toro Z Master 74060 Quick start guide

Toro

Toro Z Master 74060 Quick start guide

Toro 133-0150 User manual

Toro

Toro 133-0150 User manual

Toro 30460 User manual

Toro

Toro 30460 User manual

Toro Pro Sneak 360 User manual

Toro

Toro Pro Sneak 360 User manual

Toro 04063 User manual

Toro

Toro 04063 User manual

Toro 133-0609 User manual

Toro

Toro 133-0609 User manual

Toro 310000001 User manual

Toro

Toro 310000001 User manual

Toro TransPro 80 series User manual

Toro

Toro TransPro 80 series User manual

Toro 03527 User manual

Toro

Toro 03527 User manual

Toro 04482-60001 User manual

Toro

Toro 04482-60001 User manual

Toro 30421 User manual

Toro

Toro 30421 User manual

Toro 131-2814 User manual

Toro

Toro 131-2814 User manual

Toro 136-5850 User manual

Toro

Toro 136-5850 User manual

Toro 121-7530 User manual

Toro

Toro 121-7530 User manual

Popular Lawn Mower Accessories manuals by other brands

Ariens 891008 Operator's manual

Ariens

Ariens 891008 Operator's manual

Rover 108 - 109 owner's manual

Rover

Rover 108 - 109 owner's manual

Snapper 1690047 Operator's manual

Snapper

Snapper 1690047 Operator's manual

RHINO 800 Operator's manual

RHINO

RHINO 800 Operator's manual

Exmark Quest 126-7506 Operator's manual

Exmark

Exmark Quest 126-7506 Operator's manual

Snapper 1685167 installation instructions

Snapper

Snapper 1685167 installation instructions

Cub Cadet 19B70029100 installation manual

Cub Cadet

Cub Cadet 19B70029100 installation manual

Stihl AMK 043.1 instruction manual

Stihl

Stihl AMK 043.1 instruction manual

MTD 753-0873 Service kit manual

MTD

MTD 753-0873 Service kit manual

Bush Hog RG60 Operator's manual

Bush Hog

Bush Hog RG60 Operator's manual

Scag Power Equipment GC-F4 Operator's manual

Scag Power Equipment

Scag Power Equipment GC-F4 Operator's manual

Land Pride RCF2760 Operator's manual

Land Pride

Land Pride RCF2760 Operator's manual

Peco SPARTAN RZ Series Operator's manual

Peco

Peco SPARTAN RZ Series Operator's manual

Peco 28621206 Operator's manual

Peco

Peco 28621206 Operator's manual

Simplicity 367 Operator's manual

Simplicity

Simplicity 367 Operator's manual

Simplicity 211 Operator's manual

Simplicity

Simplicity 211 Operator's manual

Iseki SSM72 Operators & service manual

Iseki

Iseki SSM72 Operators & service manual

Simplicity 1690043 Operator's manual

Simplicity

Simplicity 1690043 Operator's manual

manuals.online logo
manuals.online logoBrands
  • About & Mission
  • Contact us
  • Privacy Policy
  • Terms and Conditions

Copyright 2025 Manuals.Online. All Rights Reserved.

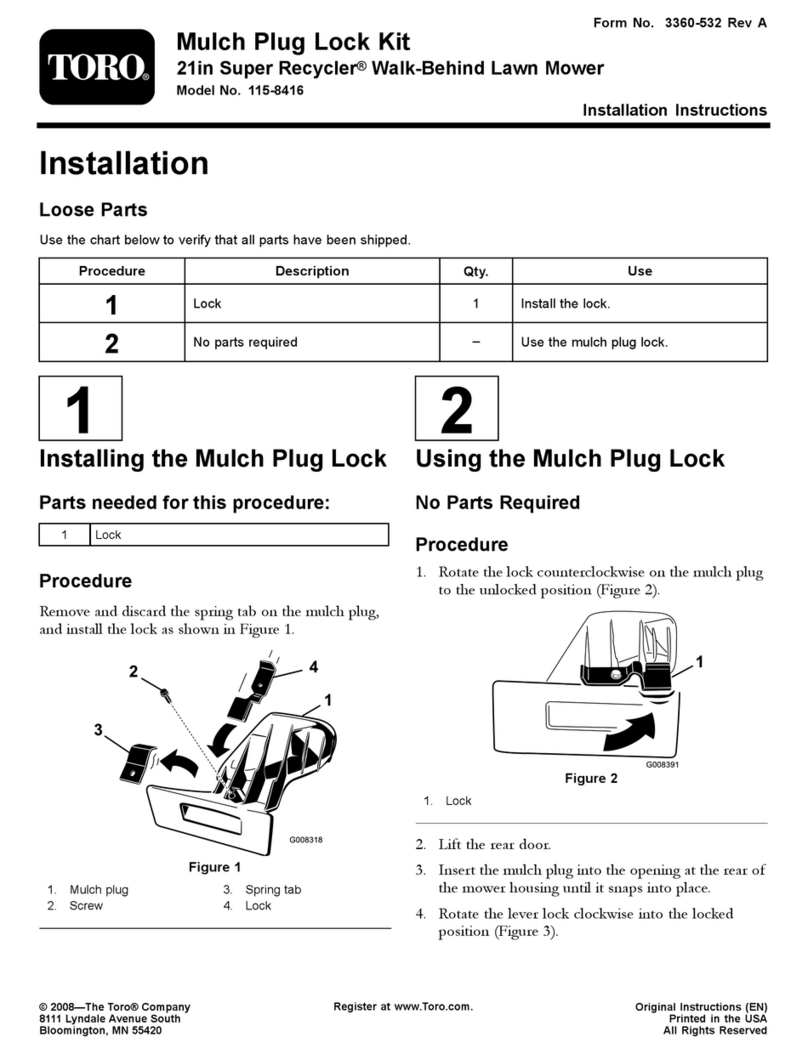
The T
oro Company
– 1998
All Rights Reserved Printed in USA
1
FORM NO. 3322–311
INSTALLATION
INSTRUCTIONS
MODEL
NO. 59193
MODEL NO. 59194
SUPER RECYCLERMOWER
BAGGING KIT
Para
obtener una versión gratis de este manual en español, escriba a la dirección
indicada más abajo. Asegúrese de indicar el modelo y el número de serie de su producto.
Pour obtenir gratuitement une version en français de ce manuel, écrivez à l’adresse
ci-dessous. N’oubliez pas d’indiquer les numéros de modèle et de série de votre produit.
The T
oro Company
, Attn: Parts Dept., 81
1
1 L
yndale A
ve S, Bloomington, MN 55420–1
196
Keep
this material with your Operator
’
s Manual and refer
to both documents for instructions concerning safe
operation and proper maintenance procedures.
IMPORTANT
: Y
our Recycler

mower has been
updated to permit bagging. Make sur
e that your dealer
is awar
e of this whenever parts ar
e order
ed or
servicing is r
equired.
Safety
and Instruction Decals
Safety decals and instructions are easily visible to the operator and are located near
any area of potential danger. Replace any decal that is damaged or lost.
ON REAR OF MOWER
(Part No. 100–1
175)
BY DISCHARGE TUNNEL
(Part No. 99–6018)
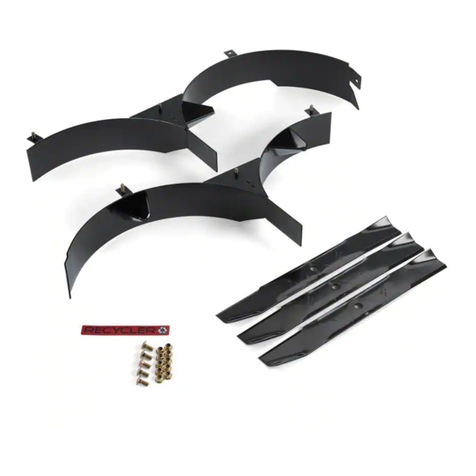
Kit
Contents
DESCRIPTION QTY.
Discharge T
unnel Assembly
1
Spring 1
Spring Bracket
1
Grass Bag Assembly
1
Decal 2
Assembly
Installing
the Discharge T
unnel
Note:
Determine the left and right sides of the mower by
standing behind the handles.
1.
Disconnect the spark plug wire.
2.
Remove and save the four bolts securing the Recycler

cover and deflector assembly to the mower (Fig. 1).
Save the parts for future use.
2
503
12
Figure
1
1. Bolt
(4)
2.
Cover and deflector
assembly
3. Position
the discharge tunnel and door assembly on the
mower
, aligning the holes in the dischar
ge tunnel with
holes in the mower (Fig. 2).
420
1
23
Figure
2
1. Discharge
tunnel
2. V
ertical bolts
3.
Horizontal bolt
4. Fasten
the front right, rear right, and rear left corners
of the dischar
ge tunnel to the mower
, using the bolts
saved from step 2. Ensure that the shorter horizontal
bolt is installed in the front right location.
5.
Secure the spring bracket and discharge tunnel to the
mower with the left front bolt (Fig. 3). A socket set
extension may be necessary (Fig. 4).
1911
1
23
Figure
3
1. Spring
2. Spring
bracket
3.
Left front bolt
505
1
2
Figure
4
1. Socket
set extension
2.
Spring bracket
6. Hook
the end of the spring through the small hole on
the spring bracket (Fig. 3).
7.
Open and close the dischar
ge door to ensure that the
spring is not contacting any part of the engine and that
the door closes when the handle is released.
WARNING
POTENTIAL HAZARD
•Ensur
e that the spring does not contact the gas
tank or any other part of the engine.
WHA
T CAN HAPPEN
•W
ear between the spring and engine parts may
r
esult in an unsafe operating condition.
HOW T
O A
V
OID THE HAZARD
•
If the spring contacts any part of engine, do not
install the bagger kit on the mower and contact
an Authorized T
or
o Service Dealer befor
e
proceeding.
Installing
the Bagging Decal
1. Thoroughly
clean the flat area of the mower behind
the dischar
ge tunnel and to the left of the tunnel with
soap and water
, then dry thoroughly
.
3
2.
Install the decals in the area shown in Figure 5.
Do not
place the decals over the model/serial number
decal.
420
1
2
Figure
5
1. Location
of decal number
100–1175 2.
Location of decal number
99–6018
Operation
Using
the Grass Bag
1. Stop
the engine and wait for all moving parts to stop.
2.
Ensure that the dischar
ge door handle is fully forward
and the pin is engaged in the catch (Fig. 6).
1912
1
3
2
Figure
6
1. Bag
frame on retaining
post
2.
Pin contacting latch plate
3.
Handle fully
forward–discharge door
closed
3. Slide
the hole in the bag frame onto the retaining post
on the dischar
ge tunnel (Fig. 6).
4.
Set the rear of the bag frame onto the lower handle.
5.
Open the dischar
ge door by
, pulling the dischar
ge door
handle forward until the pin clears the ramp on the bag
door and moving the handle rearward until the pin
locks in the bag notch (Fig. 7).
1913
1
Figure
7
1. Pin
in bag notch
DANGER
POTENTIAL
HAZARD
•
A worn grass bag could allow small stones and
other similar debris to be thrown in operator
’s
or bystanders dir
ection.
WHA
T CAN HAPPEN
•Thr
own objects can cause serious personal
injury or death to the operator or bystanders.
HOW T
O A
V
OID THE HAZARD
•
Check the grass bag fr
equently
. If it is
damaged, install a new T
or
o r
eplacement bag.
DANGER
POTENTIAL HAZARD
•Thr
own objects may r
esult if the discharge
door does not close completely
.
WHA
T CAN HAPPEN
•Thr
own objects can cause serious personal
injury or death.
HOW T
O A
V
OID THE HAZARD
•
If the discharge door cannot be closed because
grass clippings clog discharge ar
ea, stop the
engine and gently move the discharge door
handle back and forth until the door can be
closed completely
. If the door still cannot be
closed, r
emove the obstruction with a stick; not
your hand.
6.
Cut grass until the bag is full.
IMPORTANT
: Do not overfill the bag.
7.
Stop the engine and wait for all moving parts to stop.
8.
Pull the dischar
ge door handle up and out of the bag
notch (Fig. 7) and pull it forward until it engages the
catch (Fig. 6).
4
9.
Remove the bag from the mower and empty the grass.
Checking
the Blade Brake
Clutch System
If
your mower has a BBC (Blade Brake Clutch) safety
system, the grass bag can be used to check for BBC
system deterioration. (For additional BBC tests, refer to
your operator
’
s manual.)
1.
Install the empty grass bag on the dischar
ge tunnel.
2.
Push the control bar down to the lowest position
(Fig. 8).
147
1
2
Figure
8
1. Control
bar
2. T
wo inches
3. Lift
the control bar to the normal “blade engaged
position, about 2” below the handle. The bag should
begin to inflate which indicates the blade is engaged
and rotating.
4.
Release the control bar
. If the bag does not
immediately deflate, it indicates that the blade is still
rotating and deterioration of the Blade Brake Clutch
mechanism may have occurred, which could result in
an unsafe operating condition. Have mower inspected
by an Authorized Toro Service Dealer
.
Maintenance
Cleaning
Always ensure that the dischar
ge tunnel door closes when
the handle is released. If debris prevents the dischar
ge
door from closing, clean the inside of the dischar
ge tunnel
and door thoroughly
. Perform all cleaning procedures
described in the Operator
’
s Manual.
DANGER
POTENTIAL HAZARD
•Thr
own objects may r
esult if the discharge
door does not close completely
.
WHA
T CAN HAPPEN
•Thr
own objects can cause serious personal
injury or death.
HOW T
O A
V
OID THE HAZARD
•
If the discharge door cannot be closed because
grass clippings clog the discharge ar
ea, stop the
engine and gently move the discharge door
handle back and forth until the door can be
closed completely
. If door still cannot be closed,
r
emove the obstruction with a stick; not your
hand.
DANGER
POTENTIAL HAZARD
•
Grass clippings and other objects can be
thr
own fr
om an open discharge tunnel.
WHA
T CAN HAPPEN
•
Objects thrown with enough for
ce could cause
serious personal injury or death to the operator
or bystander
.
HOW T
O A
V
OID THE HAZARD
•
Never open the door on the discharge tunnel
when the engine is running.