manuals.online logo
Brands
  1. Home
  2. •
  3. Brands
  4. •
  5. Toshiba
  6. •
  7. Computer Hardware
  8. •
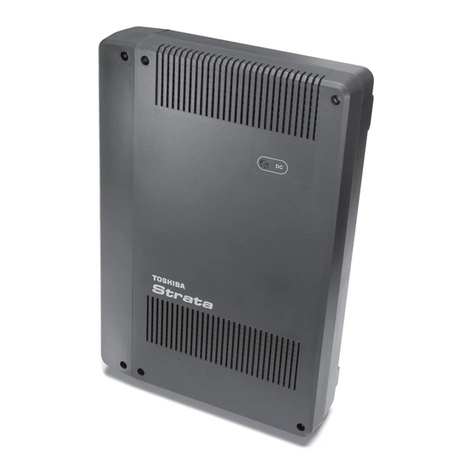
  9. Toshiba Desk Station V Plus User manual

Toshiba Desk Station V Plus User manual

Introduction 1-1
Chapter 1
Introduction
This chapter introduces the Toshiba Desk Station V Plus. The Toshiba
Desk Station V Plus expands the capabilities of your Toshiba Portégé 650CT,
Tecra 500 and 710/720 notebook computers.
How to Use This Manual
Conventions
This manual uses the following conventions:
❖Italics identify variables for which you substitute values.
For example, when this manual discusses entering the time and date, it
refers to the hours and minutes as hh:mm. Replace hh with the current
hour and mm with the current minutes.
❖A distinctive typeface distinguishes keytops and embossed legends and
icons identifying ports on the Desk Station V Plus and the computer from
surrounding text.
For example, we refer to the printer port as the Printer port.
❖Each key is spelled exactly as you see it on the keyboard. A plus (+) sign
indicates combinations of keys.
For example, Ctrl + Break means you must hold down Ctrl and at the
same time press Break.
❖References to parts of the computer are in boldface type the first time
they are referred to in the text.
❖A distinctive typeface is used to indicate text from the computer monitor,
such as, "TOSHIBA Desk Station ATTACHED."
1-2 Desk Station V Plus User's Manual
Check Your Equipment
Your Desk Station V Plus comes with everything you need to get up and run-
ning quickly. However, it's a good idea to make sure you received every-
thing you were supposed to. The following items are provided with your
Desk Station V Plus. Additional items may be included, depending on the
country in which you purchased your Desk Station V Plus.
❖Desk Station V Plus unit
❖AC power cord
❖Keys (2)
❖CRT stand
❖Desk Station V Plus User’s Manual (this manual)
❖AMD PCSCSI Software Installation Guide
❖Warranty Card
If any of the items are missing or damaged, notify your dealer immediately.
If your Desk Station V Plus needs repair, if you want a referral to a Toshiba
authorized service center, or if you want answers to questions regarding
technical support, call Toshiba Product Support at (800) 999-4273.
There is a list of addresses for worldwide Toshiba support at the end of
Chapter 5.
CAUTION: Do not disassemble or modify any part of the Desk Station V
Plus unless you are following the procedures in this manual.
Introduction 1-3
Features and Benefits
The Desk Station V Plus incorporates the following features and benefits:
Expansion board slots Two full-sized slots for both 8-bit or 16-bit ISA
expansion boards and 32-bit PCI expansion boards.
One half-size slot for 32-bit PCI expansion boards.
SelectBay™ The SelectBay makes it easy to install and remove
a Toshiba 3 1/2" diskette drive module, a Toshiba
CD-ROM drive module or a Toshiba HDD drive
module.
5 1/4" expansion bay A space is provided in the Desk Station V Plus for
any industry standard half-height 5 1/4" device
(such as a hard disk, a tape drive or a CD-ROM
drive). This expansion bay has internal SCSI and
EIDE/ATAPI interface connections.
Type III PC Card slots The Desk Station V Plus includes two Card Bus
ready Type III PC Card slots, allowing you to
connect up to two PCMCIA compatible PC Cards,
such as modems, network cards and ATA devices.
RGB port You can connect an external VGA or SVGA video
monitor to this port. This port replaces the
computer’s RGB port.
Parallel port The Centronics-compatible parallel interface port
allows you to connect a parallel printer. If you do
not use this parallel port for a printer, you can
connect one of the following through the use of an
Enhanced Capabilities port (ECP) function:
LAN adapter
Tape backup device
SCSI adapter
ECP printer
This port replaces the computer's parallel port.
Serial port A standard 9-pin, RS-232C serial port lets you
connect serial devices such as a serial printer, a
mouse, a bar code reader, or an Optical Character
Reader (OCR) wand. This port replaces the
computer’s serial port.
SCSI II port A 50-pin, high-density shielded connector lets you
connect SCSI devices internally and externally.
Keyboard port An external keyboard port lets you connect a PS/2
keyboard. This port replaces the computer’s
external keyboard port.
1-4 Desk Station V Plus User's Manual
Mouse port A mouse port lets you connect a PS/2 mouse. This
port replaces the computer’s mouse port.
MIDI/Joystick port This port lets you connect a MIDI device or a
Joystick.
Microphone jack A microphone jack lets you connect a stereo
microphone to your computer.
Headphone jack A headphone jack lets you connect a stereo
headphone to your computer. Use a headphone with
an impedance of 16Ω.
Line-In jack Use this jack to connect an audio device such as a
tape deck, CD-ROM player or radio.
Line-Out jack Use this jack to connect external speakers or a tape
deck for recording.
Speakers Two stereo speakers supply audio support with
adjustable volume.
Power supply The universal power supply automatically adjusts
to a wide range of voltage inputs, which means you
can connect the Desk Station V Plus to most AC
power sources around the world. This power supply
simultaneously supplies AC power to the Desk
Station V Plus and DC power to the computer. It
also charges the computer’s battery when the
computer is docked.
Power indicator The Desk Station V Plus’s power indicator glows
orange when the Desk Station V Plus is supplied
with AC power. It glows green when the Desk
Station V Plus is supplied with AC power and
computer is turned on.
CRT stand A CRT stand rests over the top of the Desk Station
V Plus for convenient use of an external monitor.
VCR-style docking mechanism A VCR-style docking mechanism provides you
with an easy and secure way to dock and undock
the computer from the Desk Station V Plus.
Security Lock With the addition of the Noteworthy Computer
Lock, you can secure the Desk Station V Plus to an
immovable object.
Security Ring You can use the Security Ring to attach the Desk
Station V Plus to an immovable object.
Introduction 1-5
Using Your Desk Station V Plus
Select a Place To Work
Your Desk Station V Plus is designed to be used in a variety of circumstances
and locations. However, by giving some thought to your work environment,
you can protect the Desk Station and make your work hours more
comfortable.
Your Work Area
Use a flat surface with enough room to operate your equipment. If you're
planning to use a printer or other external device, make sure there is enough
space for it as well.
To keep your Desk Station in prime operating condition, make sure your
work area is free from:
❖dust, moisture and direct sunlight.
❖liquids and corrosive chemicals.
❖objects that generate a strong electromagnetic field, such as stereo
speakers or speakerphones.
❖rapid changes in temperature or humidity and sources of temperature
changes such as air conditioner vents or heaters.
❖extreme heat, cold or humidity. Operate the Desk Station within a
temperature range of 40 to 95 degrees Fahrenheit (5 to 35 degrees
Celsius) and a relative humidity of 20 to 80 percent.
KeepYourself Comfortable
Strain and stress injuries are becoming more common as people spend more
time using their computers. However, with a little care and proper use of the
equipment, you can work comfortable throughout the day.
1-6 Desk Station V Plus User's Manual
In addition to the hints provided in the following sections, there are a number
of books available on ergonomics, repetitive strain injury, and repetitive
stress syndrome.
Placement of the Computer
Proper placement of the computer, the Desk Station V Plus and external
devices is important to avoid stress-related injuries:
❖Place the Desk Station V Plus on a flat, level surface at a comfortable
height and distance. Your arms and hands should be in a relaxed position
with your forearms parallel to the floor. The display should be no higher
than eye level.
❖Leave enough room for any external devices you will use, such as an
external monitor, keyboard or mouse.
❖Maintain good posture with your body relaxed and your weight
distributed evenly. You should be able to type without twisting
your torso or neck, and you should be able to see the display panel
without slouching.
❖Adjust the display panel to avoid glare.
❖If you use a paper holder, set it about the same height and distance
as the monitor.
Seating and Posture
Proper seating is one of the primary factors in reducing work strain. Some
people find a backless chair more comfortable than a conventional chair.
Whichever type your choose, refer to the following guidelines to adjust your
chair for maximum computing comfort.
❖Position your chair so the keyboard is at or slightly below the level of
your elbow. You should be able to type comfortably with your shoulders
relaxed.
❖Allow for the increased height of the keyboard from the table surface if
you are typing on the computer's keyboard when it is docked in the Desk
Station V Plus.
If you are using a conventional chair:
❖Your knees should be slightly higher than your hips. If necessary, use a
foot rest to raise the level of your knees and ease the pressure on the back
of your thighs.
❖Adjust the back of your chair so it supports the lower curve of your spine.
If necessary, use a cushion to provide extra back support. Lower back
support cushions are available at many office supply stores.
Introduction 1-7
❖Sit with your back straight so that your knees, hips and elbows are
at approximately 90 degree angles when you work. Do not slump
forward or lean back too far.
Lighting
Proper lighting can improve the legibility of the display and reduce eye
strain.
❖Position the display panel so that sunlight or bright indoor lighting does
not reflect off the screen. Use tinted windows or shades to reduce glare.
❖Avoid placing your Desk Station V Plus in front of a bright light that
could shine directly in your eyes.
❖If possible, use soft, indirect lighting in your computer work area.
Arms and Wrists
❖Avoid bending, arching or angling your wrists. Keep them in a relaxed,
neutral position while typing.
❖Exercise your hands, wrists and arms to improve circulation.
Work Habits
The key to avoiding discomfort or injury from repetitive strain is to vary your
activities. If possible, schedule a variety of tasks into your work day. Finding
ways to break up the routine can reduce stress and improve your efficiency.
❖Take frequent breaks to change position, stretch your muscles and relieve
your eyes.
❖Avoid performing repetitive activities for prolonged periods of time. Vary
activities from one task to another.
❖Focusing your eyes on your computer screen for long periods of time can
cause eye strain. Look away from the computer frequently and focus your
eyes on a distant object.
1-8 Desk Station V Plus User's Manual
The Grand Tour 2-1
Drive-in-use Indicator
Docking IndicatorPower Indicator
Computer
Latch
5 1/4" Expansion Bay
Right Speaker
Expansion Port Connector Guide Pin
Undocking Switch
Power Switch
Top Cover 5 1/4" Expansion Bay Access Cover
Speaker Volume
Knob
Left Speaker
Top Cover Latch
SelectBay Eject Lever
Chapter 2
The Grand Tour
This chapter introduces the various parts of your Toshiba Desk Station V
Plus. Please become familiar with each component before using the Desk
Station V Plus.
The Front
The top cover latches located on both sides of the top cover are used to open
the top cover when installing expansion cards in the expansion card slots.
Data shared by the computer and the Desk Station V Plus passes through the
expansion port connector. This connector attaches to the expansion
port on the back of the computer.
The guide pins insert into the holes on the bottom of the rear corners of the
computer and guide the computer to a proper connection with the Desk
Station V Plus.
SelectBay Release Button
Computer Latch
Top Cover
Latch
SelectBay
Guide Pin
2-2 Desk Station V Plus User's Manual
PUSH
On
Power Switch
On
Power Indicator
Drive-in-use Indicator
The computer latches engage slots on the bottom of the computer to secure
it to the Desk Station V Plus.
The built-in stereo speakers are located on the front left and right sides of
the desk station. These speakers are used for audio applications including
multimedia programs.
Notice the SelectBay next to the left speaker. You can install the optional
CD-ROM or floppy drive modules in this slot. To remove the installed
SelectBay module use the SelectBay release button and the SelectBay
eject lever on the top of the Desk Station V Plus.
When the Desk Station V Plus power cord is plugged into the wall socket,
the Desk Station V Plus is always in the low power standby state. It is normal
for the internal fan to run whenever the Desk Station is plugged in. The
switch on the left below the SelectBay is the power switch. This switch
turns the power to the computer on and off when the computer is attached to
the Desk Station V Plus. To turn the computer on, push this switch and hold
it until the power indicator glows green. To turn the computer off, push
the power switch and hold it until the power indicator glows orange.
The power indicator glows green when the Desk Station V Plus is supplied
with AC power and the computer is powered on. It glows orange when the
Desk Station V Plus is supplied with AC power and the computer is not
connected or the connected computer is powered off. It is off when the Desk
Station V Plus is not supplied with AC power.
The drive-in-use indicator glows green when the drive installed in the
SelectBay is in use.
The docking indicator glows green when the computer is docked on the
Desk Station V Plus. It blinks green while docking and undocking
procedures are in process. It blinks orange when a docking error occurs.
Pressing the undocking switch ejects the computer from the Desk Station
V Plus so you can easily remove it.
CAUTION: Never remove a disk, turn the computer off or undock the
computer when the drive-in-use indicator glows green.
Always save your files before undocking or going into the
Resume Mode.
The 5 1/4" expansion bay on the right of the SelectBay is protected by the
Expansion bay access cover. You can install any industry standard
half-height 5 1/4" device in this bay.
SelectBay Release Button
SelectBay Eject Lever
Docking Indicator
Undocking Switch
The Grand Tour 2-3
Emergency Release
Lever
The Left Side
Rotate the speaker volume knob to adjust the volume of the audio
speakers.
The cooling vent helps keep the Desk Station V Plus at a safe temperature.
Do not block this vent.
The emergency release lever is used to manually disconnect the
computer from the Desk Station V Plus in case of emergency. You can
disconnect the computer by sliding this lever to the left after setting
the lock switch on the right side of the Desk Station V Plus to the Emer-
gency position.
The security lock slot lets you anchor your Desk Station V Plus to a secure
object using the Noteworthy® Computer Lock cable.
Security Lock
Cooling Vent
Emergency Release Lever Speaker Volume Knob
Speaker Volume Knob
Security Lock
2-4 Desk Station V Plus User's Manual
Printer Port
The Back
You can connect a Centronics compatible parallel device such as a printer to
the DB-25 printer port. This port also supports an Enhanced Capabilities
port (ECP) function. This port replaces the computer’s printer port.
You can use this RS-232C serial port to connect a serial device, such as an
external modem, mouse, or serial printer to the Desk Station V Plus. This
port replaces the computer’s serial port.
You can connect a PS/2 type mouse to the Desk Station V Plus via the
mouse port. This port replaces the computer's mouse port.
You can connect a PS/2 type keyboard to the Desk Station V Plus via the
external keyboard port. This port replaces the computer's keyboard port.
At the far left and below the printer port is the MIDI/Joystick port.
The RGB port is a 15-pin connector. You can connect a VGA-compatible
analog RGB or monochrome monitor with this port. This port replaces the
computer’s RGB port.
Security
Ring
Printer Port
SCSI Port RGB Port
Line-In Jack
Line-Out Jack
AC-IN Socket
Headphone Jack
Microphone Jack
Fan Vent
PS/2 Mouse
Port
Serial Port
PS/2 External
Keyboard Port
MIDI/Joystick
Port
Mouse Port
Serial Port
Ext. Keyboard
Port
RGB Port
MIDI/Joystick Port
The Grand Tour 2-5
The SCSI II port is a 50-pin, high density shielded connector. This port lets
you connect SCSI devices to the Desk Station V Plus.
The microphone jack is a standard 3.5mm diameter miniature stereo jack
through which you can connect a microphone to your Desk Station V Plus.
The headphone jack is a standard 3.5mm diameter miniature stereo jack
through which you can connect headphones to your Desk Station V Plus.
You can use the line-in jack to input audio signals from an external sound
source to the computer via the standard 3.5mm diameter miniature stereo
jack.
You can use the line-out jack to output audio signals from the computer via
the standard 3.5mm diameter miniature stereo jack.
A fan behind the fan vent maintains the Desk Station V Plus at optimum
tem-perature. Do not block the vent when using the Desk Station V Plus.
The fan is always on when the Desk Station V Plus is connected to a wall
socket.
The rectangular end of the AC power cord fits into the AC-IN socket. The
auto-sensing, universal power supply, located inside the Desk Station V Plus,
converts the AC power to DC and reduces the voltage for use by the Desk
Station V Plus and the computer. The power supply automatically senses
whether you plug the Desk Station V Plus into a 100-115 or 220-240 volt
power source, and configures itself appropriately.
Use the security ring to deter theft by anchoring your Desk Station V Plus
to a desk or other secure object.
Microphone Jack
Headphone Jack
Line-In Jack
AC-IN
Security Ring
Line-Out Jack
IR
SCSI
SCSI Port
2-6 Desk Station V Plus User's Manual
Key-lock
2
PC Card Slots
3
EMERGENCY
NORMAL
Key-Lock
BLOCK
PC Card Slot 2 Expansion SlotsPC Card Slot 3
The Right Side
The PC Card slots are on the right side of the Desk Station V Plus. You
can install up to two Type III PCMCIA-compatible PC Cards, such as a
modem or an ATA device, to these slots. Each slot has a card ejector to the
left of the slot allowing you to eject an installed card. Slot 0 and slot 1 are
located on the computer, enabling you to install up to four PC Cards.
The key-lock secures the computer to the Desk Station V Plus, preventing
unintentional separation of the two units.
The expansion slots let you install a combination of up to two full-length
ISA or PCI expansion cards and one half-length PCI expansion card. To
install a card, open the top cover, remove the metal exterior panel that
protects the slot and insert the card.
Preparing the Desk Station V Plus 3-1
Chapter 3
Preparing the Desk Station V Plus
This chapter explains how to install expansion cards and connect your
computer to the Desk Station V Plus.
Before installing an expansion card, confirm that the Desk Station V Plus can
support it. Set up the card following the instructions in the card's
documentation. If you are using Windows 3.1 or Windows for Workgroups,
or installing an ISA card in a Windows 95 system, consider how the new card
will affect other cards, your computer, and the Desk Station V Plus. For
example:
❖What are the power requirements for your expansion card?
❖What Interrupt ReQuest line settings (IRQ) will you assign your card?
❖What Direct Memory Access (DMA) ReQuest line settings (DRQ) will
you assign your card?
❖What Input/Output address settings will you assign your card?
NOTE: The Desk Station V Plus does not support expansion cards
requiring a 4.77 MHz clock rate for proper operation.
Before buying a card, check to see that it does not require
operation at 4.77 MHz.
The Desk Station V Plus and Expansion Cards
The Desk Station V Plus has two full-length expansion slots and one half-
length expansion slot. These support most standard expansion cards. Each
of the two full-length slots, slot 1 and 2, allows you to install either a full
length 8-bit or 16-bit ISA, or 32-bit PCI expansion card. The half-length
slot, slot 3, allows you to install a half-length 32-bit PCI expansion card.
Among the expansions you can install are: a modem card, a video card and a
network interface card.
3-2 Desk Station V Plus User's Manual
1234567890123456789
1234567890123456789
Supported Cards
Each of the two full-length expansion slots, slot 1 and 2, incorporates a
standard 124-pin PCI socket and a standard 62-pin and 36-pin ISA socket,
which allows you to install a PCI or an ISA expansion card. The PCI socket
provides support for standard full-length 32-bit PCI cards. Together, the two
ISA sockets provide support for standard 8-bit and 16-bit ISA expansion
cards. The maximum size for these slots are 0.8 x 13.3 x 4.8 inches
(20.3 x 339 x 122 mm).
The following illustration shows the outline of a supported full-length, 8-bit
ISA card and a supported full-length, 16-bit ISA card:
Notice that an 8-bit ISA card has one connector and a 16-bit ISA card has
two connectors.
Some 8-bit ISA cards do not conform to this shape. This illustration shows
the outline of an unsupported 8-bit card:
The card above has an extension below the bottom of the card. Before you
purchase an 8-bit ISA expansion card to use in the Desk Station V Plus, make
sure it does not have this extension.
The half-length expansion slot, slot 3, incorporates a standard 124-pin PCI
socket and provides support for standard half-length PCI cards.
Extension
8-bit ISA Card 16-bit ISA Card
Preparing the Desk Station V Plus 3-3
Power Considerations
The Desk Station V Plus is designed specifically for the new generation of
more efficient, low-power peripherals. Configure your system for optimum
power use.
This section summarizes the Desk Station V Plus’s power specification and
provides a power calculation example.
Maximum Power Specification
This table summarizes the Desk Station V Plus’s power availability for the
expansion slots, the PC Card slots, the SelectBay, and the 5 1/4"
expansion bay:
Volts DC Continuous Amps Peak Amps
+5VDC (+5%/-5%) 5.9 8.2
-5VDC (+5%/-5%) 0.3
+12VDC (+10%/-10%) 1.8 4.0
-12VDC (+10%/-10%) 0.3
+3.3VDC 7.0
The power required by each peripheral powered by the Desk Station V Plus
(expansion cards, PC Card slots, SelectBay, and the 5 1/4" expansion bay)
may not exceed these specifications. The total power consumption may not
exceed 80W.
3-4 Desk Station V Plus User's Manual
Power Calculation Example
Appendix D, titled Desk Station V Plus Worksheets and Resource Maps,
includes a Power Consumption Worksheet. Use this to determine if your
cards and devices fall within the Desk Station V Plus’s power requirements.
This section shows how to fill in the worksheet when calculating power
requirements. Photocopy the worksheet before you use it.
In the following power calculation sample, there is an expansion card A
installed in slot 1, an expansion card B in slot 2, an expansion card C in slot
3, a SCSI device D in the 5 1/4" expansion bay, and no device in PC Card
slots 2 and 3 and the SelectBay.
The power required by this configuration of peripherals does not exceed the
Desk Station V Plus's power specification.
Power Consumption Worksheet
Date Prepared: / / .
Fill in the type of device, its power requirements and setup information. Figure the
total power required for your devices to determine if you will exceed the Desk
Station V Plus's power specification.
Power Requirements
Card/Device +5 -5 +12 -12 +3.3
Desk Station Manufacturer Cont./Peak Cont./Peak
Slot #1 Card A 1.0/1.0 0.0 0.0/0.0 0.0 0.0
Slot #2 Card B 1.4/1.4 0.0 0.0/0.0 0.0 0.0
Slot #3 Card C 0.8/0.8 0.0 0.0/0.0 0.0 0.0
none - / - - - / - - -
Drive D 0.3/1.2 N/A 0.3/0.5 N/A N/A
0.9/1.3 N/A N/A N/A N/A
Total Power Used by Peripherals: 3.5/4.4 0.0 0.3/0.5 0.0 0.0
Maximum Power Specification: 5.9/8.2 0.3 1.8/4.0 0.3 7.0
The power used by your peripherals may not exceed the Desk Station V Plus's
specification. If your calculations fall below the numbers listed for Maximum
Power Specification, you can continue with your installation.
PC Card
Slot 2
PC Card
Slot 3
SelectBay
5 1/4" Expan-
sion Bay
❏ FDD
❏ CD-ROM
❏ HDD Pack
SAMPLE
Preparing the Desk Station V Plus 3-5
Toshiba Desk Station V Plus Setup Worksheet
.
Date Prepared ____/____/____
Expansion slot configuration. Fill in the type of device, serial number and setup information.
Expansion Slot Card Device Type Serial Number / Setup Information
(Non-Plug and Play ISA Cards only)
Slot#1 ❑Network Serial Number ________________
❑ISA ❑ SCSI IRQ #_____ ❑ Fixed ❑ Changeable
❑ISA Plug and Play ❑Video DRQ #_____ ❑ Fixed ❑ Changeable
❑ PCI ❑ Other_____________ I/O Base__________
Memory Base #1______ Size______
Memory Base #2______ Size______
Slot#2 ❑Network Serial Number ________________
❑ISA ❑ SCSI IRQ #_____ ❑ Fixed ❑ Changeable
❑ISA Plug and Play ❑Video DRQ #_____ ❑ Fixed ❑ Changeable
❑ PCI ❑ Other_____________ I/O Base__________
Memory Base #1______ Size______
Memory Base #2______ Size______
Slot#3 ❑Network Serial Number ________________
❑ PCI ❑ SCSI IRQ # 11
❑Video
❑ Other_____________
Preparing to Install Cards and Devices
PCI Cards and Plug and Play ISA Cards are normally configured
automatically and use the same interrupt (Default 11). PCI Cards
do not use DMA channels.
The following applies to non-Plug and Play ISA cards.
Begin your installation by filling in a working copy of the Desk Station V
Plus Setup Worksheet. For each card and peripheral device, you need to
know the following information:
❖Can you change the device’s Interrupt ReQuest (IRQ) line and base
address (usually by a switch or a jumper), or is it fixed?
❖Does the device use Direct Memory Access (DMA)? If so, can you
change the card’s DRQ line (by a switch or a jumper), or is it fixed?
The Setup Worksheet lets you record the type of cards in the Desk Station V
Plus and the devices connected to the station’s ports. Below is a condensed
view of the worksheet’s contents.
The full-page version of the worksheet is in the Appendix D: Desk Station V
Plus Worksheets.
3-6 Desk Station V Plus User's Manual
Worksheet Contents
The information on the worksheet may come in handy when you need to
know how you configured the expansion cards in the Desk Station V Plus. If
you call Toshiba Product Support, have this information available.
Fill in the date on the line at the top of worksheet.
Part one of the worksheet is for the three expansion slots. Check the type of
expansion card you are using, check the type of slot card device and fill in
the serial number of the card, the IRQ number and the DRQ number you
assign during installation. For more information on IRQ and DRQ, please see
the section "Configuration Considerations" on the next page.
Part two of the worksheet is for devices attached to the Desk Station V Plus’s
ports. Identify the device in the left column. Where appropriate, check the
box to indicate which setting you used.
Filling in theWorksheet
1 Check the appropriate boxes indicating the type of cards you plan to
install in the Desk Station V Plus on the first part of the worksheet.
2 Fill in the base I/O address for each card.
3 Note the IRQ (if applicable) for each card. Mark whether the IRQ is fixed
or changeable. Consult the card’s documentation for this information.
4 Note the DRQ line (if applicable) for each card. Mark whether it is fixed
or changeable. Consult the card’s documentation for this information.
5 Note any serial peripheral device(s) you plan to attach to the Desk Station
V Plus on the second part of the worksheet. Examples of such devices
include external modems and mice or other pointing devices.
If the device uses a special device driver, make a note of whether there is
a required IRQ. For example, MOUSE.SYS and MOUSE.COM (mouse
device drivers) generally have to use COM1 or COM2, each of which
have a required IRQ (IRQ4 and IRQ3, respectively).
5 Review the information you’ve entered on the worksheet. If necessary,
make changes to each card’s setup so each device has a unique IRQ and a
unique DRQ.
6 Set each card’s switches and/or jumpers to conform to the information on
your worksheet. You may need to consult each card’s documentation.
NOTE: Be sure to configure devices before you install them. For
example, if you’re installing a diskette drive, make sure you
set the drive selection properly. Save your Setup Worksheet.
Having the information when you install additional cards
may save you much time and aggravation.

Other Toshiba Computer Hardware manuals
Toshiba ETB003Z User manual

Toshiba

Toshiba ETB003Z User manual

Toshiba E3 User manual

Toshiba

Toshiba E3 User manual

Toshiba B-EP700-WLAN-QM-R User manual

Toshiba

Toshiba B-EP700-WLAN-QM-R User manual

Toshiba TOSVERT VF-MB1 Parts list manual

Toshiba

Toshiba TOSVERT VF-MB1 Parts list manual

Toshiba TCB-PSMT1E User manual

Toshiba

Toshiba TCB-PSMT1E User manual

Toshiba nv-pack JTLI41 User manual

Toshiba

Toshiba nv-pack JTLI41 User manual

Toshiba TX49 TMPR4937 User manual

Toshiba

Toshiba TX49 TMPR4937 User manual

Toshiba BCN002Z User manual

Toshiba

Toshiba BCN002Z User manual

Toshiba Stratagy IVP8 User manual

Toshiba

Toshiba Stratagy IVP8 User manual

Toshiba HDTS106XZSWA User manual

Toshiba

Toshiba HDTS106XZSWA User manual

Toshiba G7 User manual

Toshiba

Toshiba G7 User manual

Toshiba Stratagy Flash User manual

Toshiba

Toshiba Stratagy Flash User manual

Toshiba C3PU35 User manual

Toshiba

Toshiba C3PU35 User manual

Toshiba DA364/DA374 User manual

Toshiba

Toshiba DA364/DA374 User manual

Toshiba TOSVERT VF-MB1/S15 IPE002Z Parts list manual

Toshiba

Toshiba TOSVERT VF-MB1/S15 IPE002Z Parts list manual

Toshiba TPCS8209 User manual

Toshiba

Toshiba TPCS8209 User manual

Toshiba TMP92CM22FG TLCS-900/H1 Series User manual

Toshiba

Toshiba TMP92CM22FG TLCS-900/H1 Series User manual

Toshiba RemotEye III User manual

Toshiba

Toshiba RemotEye III User manual

Toshiba Satellite L3xW-B Series Owner's manual

Toshiba

Toshiba Satellite L3xW-B Series Owner's manual

Toshiba Memory Module Parts list manual

Toshiba

Toshiba Memory Module Parts list manual

Toshiba GX7 Series User manual

Toshiba

Toshiba GX7 Series User manual

Toshiba TMPR4925 User manual

Toshiba

Toshiba TMPR4925 User manual

Toshiba Libretto 50CT User manual

Toshiba

Toshiba Libretto 50CT User manual

Toshiba D660 User manual

Toshiba

Toshiba D660 User manual
Popular Computer Hardware manuals by other brands

ADLINK Technology SMARC LEC-MTK-I1200 user guide

ADLINK Technology

ADLINK Technology SMARC LEC-MTK-I1200 user guide

Aplus aPR33AxDB-C2.1F user guide

Aplus

Aplus aPR33AxDB-C2.1F user guide

NXP Semiconductors MCF5272 ColdFire user manual

NXP Semiconductors

NXP Semiconductors MCF5272 ColdFire user manual

Intel 946GZ user manual

Intel

Intel 946GZ user manual

PORT Noteworthy Slim instruction manual

PORT

PORT Noteworthy Slim instruction manual

NETGEAR WPN511 - RangeMax Wireless PC Card user manual

NETGEAR

NETGEAR WPN511 - RangeMax Wireless PC Card user manual

StarTech.com MPEX1394B3 user manual

StarTech.com

StarTech.com MPEX1394B3 user manual

NAD Surround Sound Preamp Processor S 170i product manual

NAD

NAD Surround Sound Preamp Processor S 170i product manual

TRENDnet TEW-421PC user guide

TRENDnet

TRENDnet TEW-421PC user guide

B&B Electronics 4 Channel Input Buffer Board SDAIBB product manual

B&B Electronics

B&B Electronics 4 Channel Input Buffer Board SDAIBB product manual

Manhattan 158169 Brochure & specs

Manhattan

Manhattan 158169 Brochure & specs

ADS Technologies PTV-380-EF user guide

ADS Technologies

ADS Technologies PTV-380-EF user guide

Panasonic CF-VEBC21Un operating instructions

Panasonic

Panasonic CF-VEBC21Un operating instructions

Kramer VIAcast quick start guide

Kramer

Kramer VIAcast quick start guide

Cypress Semiconductor CY7C1166V18 Specification sheet

Cypress Semiconductor

Cypress Semiconductor CY7C1166V18 Specification sheet

Renesas H8/36109 user manual

Renesas

Renesas H8/36109 user manual

Roland VP-9000 user guide

Roland

Roland VP-9000 user guide

Sony HKCU-SFP30 operating instructions

Sony

Sony HKCU-SFP30 operating instructions

manuals.online logo
manuals.online logoBrands
  • About & Mission
  • Contact us
  • Privacy Policy
  • Terms and Conditions

Copyright 2025 Manuals.Online. All Rights Reserved.