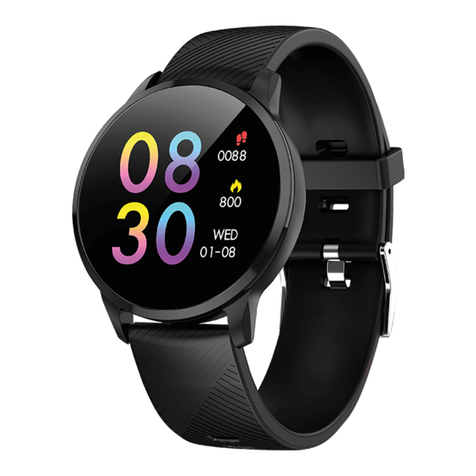
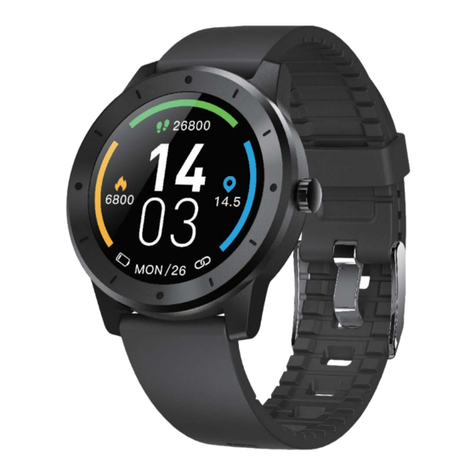
Trevi T-Fit 260 PLUS User manual

MANUALE UTENTE ITALIANO
USER MANUAL ENGLISH
T-Fit 260 PLUS

T-Fit 260 PLUS
2
Si prega di leggere il manuale prima dell’uso.
- Le informazioni contenute in questo documento non verranno
modicate o estese in conformità ad alcun avviso.
- L’orologio deve essere caricato 3 ore almeno prima dell’uso.
1. Cautele
1.1 Impermeabile e anpolvere
L’orologio è impermeabile e anpolvere. Si prega di seguire le linee
guida riportate di seguito per mantenere le funzioni. In caso contra-
rio, il disposivo potrebbe essere danneggiato.
- Non usare l’orologio soo l’acqua a forte pressione.
- Non usare l’orologio durante le immersioni, lo snorkeling o altri
sport in acqua.
- Si prega di asciugare completamente le mani o l’orologio prima
dell’uso.
- Se l’orologio è esposto all’acqua, asciugarlo completamente con un
panno morbido. Se è esposto ad altri liquidi (come acqua salata,
acqua di piscina, acqua saponata, olio, profumo, crema solare, disin-
feante per le mani) o prodo chimici (come cosmeci), si prega di
lavarlo con acqua pulita e asciugarlo completamente con un panno
morbido. Non seguire queste istruzioni potrebbe danneggiarne le
prestazioni e l’aspeo.
- Se l’orologio cade o viene colpito, le funzioni di cui sopra potrebbero
danneggiarsi.
- Non smontare l’orologio. Le funzioni di cui sopra potrebbero dan-
neggiarsi.
- Non ulizzare l’orologio in ambien ad alta o bassa temperatura.
- Non ulizzare aria compressa e altre apparecchiature riscaldate per
asciugare l’orologio.
- Nella sauna, la funzione impermeabile potrebbe essere danneggiarsi.
1.2 Pulizia e gesone del T-Fit 260 PLUS
Seguire i seguen pun per assicurarsi che il T-Fit 260 PLUS funzioni
normalmente. Altrimen il T-Fit 260 PLUS si potrebbe danneggiare e
causare irritazione della pelle.
Italiano

3
T-Fit 260 PLUS
- Proteggi l’orologio da polvere, sudore, inchiostro, olio e prodo
chimici (come cosmeci, spray anbaerici, disinfean per le
mani, detergen e insecidi). In caso contrario, le par interne ed
esterne potrebbero essere danneggiate o causare un degrado delle
prestazioni. Se il T-Fit 260 PLUS è macchiato con le sostanze di cui
sopra, pulirlo con un panno morbido privo di lanugine.
- Quando si pulisce il T-Fit 260 PLUS, non ulizzare sapone, detergen-
te, materiali abrasivi, aria compressa, onde ultrasoniche o fon di
calore esterne. In caso contrario, il T-Fit 260 PLUS potrebbe essere
danneggiato. Sapone, detergente, disinfeante per le mani o residui
di detergente possono causare irritazione della pelle.
- Dopo l’esercizio sico o la sudorazione, si prega di pulire il polso e il
cinturino. Ulizzare acqua per pulire il T-Fit 260 PLUS e immergere
una piccola quantà di alcol per pulirlo, quindi asciugarlo accurata-
mente.
- Se il T-Fit 260 PLUS è macchiato o inltrato da corpi estranei, uliz-
zare uno spazzolino morbido bagnato per pulirlo.
1.3 Se si è allergici al materiale del T-Fit 260 PLUS, prestare aen-
zione quando si ulizza
- Il produore ha condoo test sui materiali pericolosi per il T-Fit 260
PLUS da parte di un’agenzia di cercazione interna ed esterna,
inclusi test di tu i materiali a contao con la pelle, test di tossicità
cutanea e test di usura.
- Il T-Fit 260 PLUS conene nichel. Se la tua pelle è molto sensibile
o sei allergico ai materiali del T-Fit 260 PLUS, prendi le precauzioni
necessarie.
- Nichel: il T-Fit 260 PLUS conene una piccola quantà di nichel.
Il contenuto è inferiore al valore di riferimento delle normave
europee REACH. Non sarai esposto al nichel del T-Fit 260 PLUS e il
nostro disposivo ha superato il test di cercazione internazionale.
Tuavia, se si è allergici al nichel, si prega di ulizzare T-Fit 260 PLUS
con cautela.
- Tu i materiali ulizza sul T-Fit 260 PLUS sono conformi agli stan-
dard di ispezione pernen come REACH e RoHS.
Italiano

T-Fit 260 PLUS
4
2. Speciche del prodoo
- Modello: T-Fit 260 PLUS
- CPU RTL8762D ARM Cortex-M0 53MHz
- Memoria: RAM 128kb + ROM 128Mb
- Touch screen capacivo 1.7” 240x280 pixel IPS
- Versione Bluetooth 5.0
- Picco di potenza di trasmissione Bluetooth 1mW
- Massima potenza di trasmissione Bluetooth 0,8mW
- Banda di trasmissione Bluetooth 2,4GHz
- Funzioni: Frequenza cardiaca, Ossigenazione del sangue, Pressione san-
guigna, Temperatura corporea, Pedometro, Monitoraggio del sonno,
noche social (Whatsapp, Facebook, Messenger, Twier, ecc...)
- Baeria agli Ioni di Lithio 3.7V/240mAh
3. Deagli prodoo
3.1 Carica il tuo orologio
3.Product details
3.1 Charge your watch
Connect and charge the watch according to the picture. It needs to be
charged to activate the watch when it is started for the first time.
Notice: Do not use a charger exceeding 5V 2A for charging.
3.2 Operate your watch
(1) Power on: When the watch is Off status, press and hold the power
button for 5 seconds to turn it on. The home screen of the watch will
be displayed after booting.
(2) Touch screen operation: From the home screen, swipe to the right
to the menu screen, then tap the function icon to enter the
Collegare e caricare l’orologio in base all’immagine. Deve essere cari-
cato quando l’orologio viene avviato per la prima volta. Avviso: Non
ulizzare un caricabaerie superiore a 5V/2A per la ricarica.
3.2 Ulizzare l’orologio
(1) Accensione: a orologio spento, eni premuto il touch screen per 5
secondi per accenderlo. Dopo l’avvio verrà visualizzato l’orario.
(2) Funzionamento touch screen: scorri verso destra per selezionare
la pagina del menu, quindi tocca l’icona per accedere alla funzione
corrispondente. Scorri in alto o in basso per scorrere le funzioni.
Italiano

5
T-Fit 260 PLUS
(3) Schermata di riavazione: quando lo schermo dell’orologio è di-
savato, è possibile premere il pulsante di accensione per riavare
lo schermo. Se il pulsante di controllo gestuale è avato nell’APP,
puoi anche riavare lo schermo ruotando il polso.
(4) Spegnimento: accedere alla funzione di Impostazioni (Sengs) e
successivamente alla funzione di Spegnimento (Shutdown), quindi
toccare su
corresponding sub-menu.
(3) Wake up screen: When the watch screen is Off status, you can
press the power button to wake up the screen. If the Gesture control
button is turned on in the APP, you can also wake up the screen by
turning the wrist.
(4) Shutdown: Click the Setting icon, click System - Shut down, click
to shut down.
3.3 Replace the strap
Remove the strap from the watch by sliding the quick release on the
strap.
4. Products quick into
4.1 Products quick into
(1) Long press the main interface to enter the home page thumbnail.
You can view it left and right, click touch to switch the home page.
(2) Swipe to the right: Display function list -> Daily activity, Sports,
Quick release
per spegnere.
3.3 Sostuire il cinturino
corresponding sub-menu.
(3) Wake up screen: When the watch screen is Off status, you can
press the power button to wake up the screen. If the Gesture control
button is turned on in the APP, you can also wake up the screen by
turning the wrist.
(4) Shutdown: Click the Setting icon, click System - Shut down, click
to shut down.
3.3 Replace the strap
Remove the strap from the watch by sliding the quick release on the
strap.
4. Products quick into
4.1 Products quick into
(1) Long press the main interface to enter the home page thumbnail.
You can view it left and right, click touch to switch the home page.
(2) Swipe to the right: Display function list -> Daily activity, Sports,
Quick release
Rimuovere il cinturino dall’orologio facendo scorrere lo sgancio
rapido sul cinturino.
4. Informazioni rapide del prodoo
4.1 Descrizione quadrante touch
(1) Tenere premuto: si cambia l’interfaccia principale (visualizzazione
orario): scorrere a sinistra e a destra per selezionare la miniatura
dell’interfaccia principale, toccare per cambiarla.
(2) Scorrere verso destra: viene visualizzata la lista di -> da giornalie-
ri di avità, avità sica, registro delle avità siche, temperatura
corporea, frequenza cardiaca, monitoraggio del sonno, messaggi,
meteo, relax, sveglia, cronometro, mer, controllo musica, ciclo
femminile, trova telefono, pressione sanguigna, ossigeno nel sangue,
sistema. Tocca l’icona per accedere alla funzione corrispondente.
Scorri in alto o in basso per scorrere le funzioni.
(3) Scorrere verso il basso: vengono visualizza -> modalità non distur-
bare, modalità visualizzazione orario sempre acceso, luminosità, trova
telefono, risparmio energeco e sistema.
(4) Scorrere verso l’alto: leura messaggi.
Italiano
Sgancio rapido

T-Fit 260 PLUS
6
(5) Scorrere verso sinistra: come per scorrere verso destra ma
visualizzato a icone.
Sports record, Temperature, etc... Swipe up and down to navigate the
list and tap a function to select.
(3) Swipe down: Display Battery, Bluetooth, Timer, and shortcut icons.
(4) Swipe up: Storage information.
(5) Swipe to the left: Display the static icon list, click to enter the
corresponding function, right stroke to return to the previous level.
Setting Menu style method:
You ca n choose the Menu style from menu Setting > Choose style:
List or Smart.
Metodo di impostazione sle menù:
È possibile scegliere lo sle Menu dal menu Impostazione > Sle
menù: Elenco o Griglia a 9 icone.
Sports record, Temperature, etc... Swipe up and down to navigate the
list and tap a function to select.
(3) Swipe down: Display Battery, Bluetooth, Timer, and shortcut icons.
(4) Swipe up: Storage information.
(5) Swipe to the left: Display the static icon list, click to enter the
corresponding function, right stroke to return to the previous level.
Setting Menu style method:
You ca n choose the Menu style from menu Setting > Choose style:
List or Smart.
4.2 Visualizzazione orario
4.2 Clock Display
Setting dial watch method:
When the watch in clock mode, please long press on the middle
screen and set different clock interfaces if you like.
5.Product quick use
5.1 Download and install App
You can set up the watch through the "HitFit Pro" App for iOS or
Android devices. You need download and install the "HitFit Pro" App
from APP Store or Google Play Store:
Or you can scan the following QR code to download the app:
Metodo di impostazione:
Una volta acceso l’orologio, premere a lungo per impostare l’interfac-
cia dell’orologio, se la si vuole cambiare.
5.Ulizzo rapido del prodoo
5.1 Download e installazione
Occorre scaricare e installare la App “ HitFit Pro “ da APP Store o
Google Play Store:
4.2 Clock Display
Setting dial watch method:
When the watch in clock mode, please long press on the middle
screen and set different clock interfaces if you like.
5.Product quick use
5.1 Download and install App
You can set up the watch through the "HitFit Pro" App for iOS or
Android devices. You need download and install the "HitFit Pro" App
from APP Store or Google Play Store:
Or you can scan the following QR code to download the app:
Oppure puoi scansionare il seguente codice QR per scaricare l’app:
Italiano
Per Android:

7
T-Fit 260 PLUS
For Android: For iOS:
5.2 Bluetooth Connection
Turn on the Bluetooth on your mobile phone.
Turn on your watch, in the app, search the device, select product
mode T-Fit260+xxx to bind. You can view more detailed instructions
at the link below:
After connected successfully, shown as the icon in the watch status
bar:
Notice:
* During the process of opening the APP or binding the watch, please
agree to all the permission prompts. During binding process, "Hitfit
Pro" will prompt you to enable Bluetooth and authorize "Hitfit Pro" to
5.2 Connessione Bluetooth
Accendere il Bluetooth e il GPS sul proprio telefono cellulare.
Aprire HitFit Pro e, dopo una prima registrazione richiesta al primo
ulizzo, cliccare in corrispondenza del modello T-Fit260+ per accop-
piare l’orologio.
È possibile visualizzare istruzioni più deagliate tramite il QR code di seguito:
For Android: For iOS:
5.2 Bluetooth Connection
Turn on the Bluetooth on your mobile phone.
Turn on your watch, in the app, search the device, select product
mode T-Fit260+xxx to bind. You can view more detailed instructions
at the link below:
After connected successfully, shown as the icon in the watch status
bar:
Notice:
* During the process of opening the APP or binding the watch, please
agree to all the permission prompts. During binding process, "Hitfit
Pro" will prompt you to enable Bluetooth and authorize "Hitfit Pro" to
A connessione avvenuta, verrà mostrata la seguente icona
For Android: For iOS:
5.2 Bluetooth Connection
Turn on the Bluetooth on your mobile phone.
Turn on your watch, in the app, search the device, select product
mode T-Fit260+xxx to bind. You can view more detailed instructions
at the link below:
After connected successfully, shown as the icon in the watch status
bar:
Notice:
* During the process of opening the APP or binding the watch, please
agree to all the permission prompts. During binding process, "Hitfit
Pro" will prompt you to enable Bluetooth and authorize "Hitfit Pro" to
.
Avviso:
Durante il processo di apertura dell’APP o di associazione dell’orologio,
si prega di acceare tue le richieste di autorizzazione. Durante il pro-
cesso di accoppiamento, Hiit Pro chiederà di abilitare il Bluetooth e
autorizzare Hiit Pro ad accedere al proprio telefono cellulare. Se il te-
lefono cellulare ha un sistema iOS, occorre acceare l’abbinamento al
telefono cellulare e la visualizzazione delle noche del proprio iPhone.
Funzionamento errato: abbinare l’orologio direamente al Bluetooth
nelle impostazioni del tuo telefono cellulare.
Si prega di non chiudere il servizio di noca Bluetooth o terminare
il soware applicavo in background. Inuenzerà la funzione di
sincronizzazione tra orologio e telefono se lo si chiude.
Se si desidera che l’orologio riceva noche di terze par, è necessa-
rio avare le autorizzazioni di noca.
Italiano
Per Android: Per iOS:

T-Fit 260 PLUS
8
5.3 Funzioni di base
5.3.1
get access to your mobile phone. If your phone is iOS system, you
need agree to pair with your phone and display your iPhone
notifications.
* Wrong operation: Pair the watch directly with the Bluetooth in your
mobile phone’s settings.
* Please don’t shut the Bluetooth notify service when you are
clearing software by background or close background application
software. It will affect the sync function between watch and phone if
shut it.
* If you want your watch to receive third-party notifications, you
need to turn on the notification permissions.
5.3 Basic functions
5.3.1 Daily activity
The watch will display the user's total number of steps on the day,
walking distance, calories burned on the same day, and the data will
be cleared at 0 o'clock (midnight) every day.
5.3.2 Sports
In sports mode: the single-point function icon allows you to enter
sports modes such as Walking, Running, Climbing, Riding, Basketball,
Yoga, Elliptical, Treadmill and Fitness.
Da giornalieri di avità
L’orologio mostrerà il numero totale di passi dell’utente, la distanza
a piedi e le calorie bruciate del giorno. I da verranno cancella alle
ore 24 ogni giorno.
5.3.2
get access to your mobile phone. If your phone is iOS system, you
need agree to pair with your phone and display your iPhone
notifications.
* Wrong operation: Pair the watch directly with the Bluetooth in your
mobile phone’s settings.
* Please don’t shut the Bluetooth notify service when you are
clearing software by background or close background application
software. It will affect the sync function between watch and phone if
shut it.
* If you want your watch to receive third-party notifications, you
need to turn on the notification permissions.
5.3 Basic functions
5.3.1 Daily activity
The watch will display the user's total number of steps on the day,
walking distance, calories burned on the same day, and the data will
be cleared at 0 o'clock (midnight) every day.
5.3.2 Sports
In sports mode: the single-point function icon allows you to enter
sports modes such as Walking, Running, Climbing, Riding, Basketball,
Yoga, Elliptical, Treadmill and Fitness.
Sports
La modalità Sport consente di avviare le varie sessioni sporve come
camminata, corsa, arrampicata, equitazione, basket, yoga, macchina
ellica, tapis roulant e tness. Una volta avviata la sessione, è possibile
meerla in pausa o arrestarla.
5.3.3
5.3.3 Sports record
If you have done any sports and saved, in this function will show the
information of sports record.
5.3.4 Temperature
(1) Function introduction: The watch will measure the user's
temperature under the temperature measurement interface. After
the test is completed, the vibration will display the result.
(2) Operating instructions: Swipe to the left on the main interface and
click the temperature static icon to switch to the temperature
measurement interface. Once the interface is entered, the
measurement will start. The left data is for Body surface temperature,
it is changed in real time. The right data is for Body temperature,
measuring 60s to complete the measurement. During the
measurement, the interface value will be show “--”. After the
measurement is completed, the value will be displayed.
Remark: During testing body temperature, environment temperature
requires within 18-30°C.
Registro sporvo
Se si sono svolte e salvate sessioni sporve, questa funzione mostrerà le
informazioni relave.
5.3.4
5.3.3 Sports record
If you have done any sports and saved, in this function will show the
information of sports record.
5.3.4 Temperature
(1) Function introduction: The watch will measure the user's
temperature under the temperature measurement interface. After
the test is completed, the vibration will display the result.
(2) Operating instructions: Swipe to the left on the main interface and
click the temperature static icon to switch to the temperature
measurement interface. Once the interface is entered, the
measurement will start. The left data is for Body surface temperature,
it is changed in real time. The right data is for Body temperature,
measuring 60s to complete the measurement. During the
measurement, the interface value will be show “--”. After the
measurement is completed, the value will be displayed.
Remark: During testing body temperature, environment temperature
requires within 18-30°C.
Temperatura corporea
(1) Introduzione alla funzione: l’orologio misurerà la temperatura dell’u-
tente nell’interfaccia di misurazione della temperatura. Al termine della
prova, l’orologio vibrerà e visualizzerà il risultato.
(2) Istruzioni per l’operazione: dall’interfaccia principale (visualizza-
zione orario) scorrere a destra e cliccare su Temperatura. Una volta
entra nella funzione, inizierà la misurazione. I da a sinistra sono
per la temperatura corporea superciale e viene modicata in tempo
reale. I da a destra sono per la temperatura corporea. Occorrono
60 secondi per completare la misurazione. Durante la misurazione, il
valore dell’interfaccia verrà mostrato “--”. Al termine della misurazio-
ne, verrà visualizzato il valore. Nota: Durante il test della temperatura
corporea, la temperatura ambiente deve essere entro 18-30°C.
5.3.3 Sports record
If you have done any sports and saved, in this function will show the
information of sports record.
5.3.4 Temperature
(1) Function introduction: The watch will measure the user's
temperature under the temperature measurement interface. After
the test is completed, the vibration will display the result.
(2) Operating instructions: Swipe to the left on the main interface and
click the temperature static icon to switch to the temperature
measurement interface. Once the interface is entered, the
measurement will start. The left data is for Body surface temperature,
it is changed in real time. The right data is for Body temperature,
measuring 60s to complete the measurement. During the
measurement, the interface value will be show “--”. After the
measurement is completed, the value will be displayed.
Remark: During testing body temperature, environment temperature
requires within 18-30°C.
Italiano

9
T-Fit 260 PLUS
5.3.5
5.3.5 Heart rate
(1) Function introduction: The watch will measure the user's heart
rate under the heart rate measurement interface. After the test is
completed, the vibration will display the result. After no operation,
the screen will automatically go out.
(2) Operating instructions: Swipe to the left on the main interface and
click the heart rate static icon to switch to the heart rate
measurement interface. Once the interface is entered, the
measurement will start. During the measurement, the interface value
will be zero. After the measurement is completed, the value will be
displayed.
5.3.6 Sleep
(1) Function introduction: The watch will display the user's sleep time
the night before. (Sleep measurement time 21:30 - 12:00 next day)
(2) Operation instructions: Swipe the main interface left and right,
click sleep to switch to the sleep interface, you can view the sleep
time of the previous day.
Frequenza cardiaca
(1) Introduzione alla funzione: l’orologio misurerà la frequenza
cardiaca dell’utente nell’interfaccia di misurazione della frequenza
cardiaca. Al termine della prova, l’orologio vibrerà e visualizzerà il
risultato. Dopo nessuna operazione per 3 secondi, il display si spegne
automacamente.
(2) Istruzioni per l’operazione: dall’interfaccia principale (visualiz-
zazione orario) scorrere a sinistra o a destra e cliccare su Cuore.
Una volta entra nella funzione, inizierà la misurazione. Durante la
misurazione, il valore della frequenza cardiaca sarà zero. Al termine
della misurazione, verrà visualizzato il valore.
5.3.5 Heart rate
(1) Function introduction: The watch will measure the user's heart
rate under the heart rate measurement interface. After the test is
completed, the vibration will display the result. After no operation,
the screen will automatically go out.
(2) Operating instructions: Swipe to the left on the main interface and
click the heart rate static icon to switch to the heart rate
measurement interface. Once the interface is entered, the
measurement will start. During the measurement, the interface value
will be zero. After the measurement is completed, the value will be
displayed.
5.3.6 Sleep
(1) Function introduction: The watch will display the user's sleep time
the night before. (Sleep measurement time 21:30 - 12:00 next day)
(2) Operation instructions: Swipe the main interface left and right,
click sleep to switch to the sleep interface, you can view the sleep
time of the previous day.
5.3.6
5.3.5 Heart rate
(1) Function introduction: The watch will measure the user's heart
rate under the heart rate measurement interface. After the test is
completed, the vibration will display the result. After no operation,
the screen will automatically go out.
(2) Operating instructions: Swipe to the left on the main interface and
click the heart rate static icon to switch to the heart rate
measurement interface. Once the interface is entered, the
measurement will start. During the measurement, the interface value
will be zero. After the measurement is completed, the value will be
displayed.
5.3.6 Sleep
(1) Function introduction: The watch will display the user's sleep time
the night before. (Sleep measurement time 21:30 - 12:00 next day)
(2) Operation instructions: Swipe the main interface left and right,
click sleep to switch to the sleep interface, you can view the sleep
time of the previous day.
Monitoraggio del sonno
(1) Introduzione alla funzione: l’orologio mostrerà le ore di sonno
dell’utente della noe prima. Il tempo di misurazione del sonno va
dalle 21:30 alle 12:00 del giorno successivo.
(2) Istruzioni per l’operazione: dall’interfaccia principale (visualizza-
zione orario) scorrere a sinistra o a destra e cliccare su Monitoraggio
del sonno (Sleep monitor). È possibile visualizzare le ore di sonno
eeuate, divise in sonno profondo e sonno leggero.
5.3.5 Heart rate
(1) Function introduction: The watch will measure the user's heart
rate under the heart rate measurement interface. After the test is
completed, the vibration will display the result. After no operation,
the screen will automatically go out.
(2) Operating instructions: Swipe to the left on the main interface and
click the heart rate static icon to switch to the heart rate
measurement interface. Once the interface is entered, the
measurement will start. During the measurement, the interface value
will be zero. After the measurement is completed, the value will be
displayed.
5.3.6 Sleep
(1) Function introduction: The watch will display the user's sleep time
the night before. (Sleep measurement time 21:30 - 12:00 next day)
(2) Operation instructions: Swipe the main interface left and right,
click sleep to switch to the sleep interface, you can view the sleep
time of the previous day.
5.3.7
5.3.7 Message
When connected to Bluetooth, notifications from your phone will be
sent to your watch. (You need to open the push switch in the app in
advance)
5.3.8 Weather
After connected with APP, the watch will show local weather
information.
5.3.9 Relax
Adjust your breathing and relax.
5.3.10 Alarm clock
When you set alarm clock in the APP, the watch will show the alarm
clock information, and you also can open or close it in the watch.
5.3.11 Timer
Click to start timing. During the timing, you can start/pause/reset
switching with a single touch.
Messaggi
Una volta connesso al Bluetooth, verranno inviate le noche dal
telefono all’orologio. È necessario avare prima il push dei messaggi
nella App alla voce Device>Message push.
Italiano

T-Fit 260 PLUS
10
5.3.8
5.3.7 Message
When connected to Bluetooth, notifications from your phone will be
sent to your watch. (You need to open the push switch in the app in
advance)
5.3.8 Weather
After connected with APP, the watch will show local weather
information.
5.3.9 Relax
Adjust your breathing and relax.
5.3.10 Alarm clock
When you set alarm clock in the APP, the watch will show the alarm
clock information, and you also can open or close it in the watch.
5.3.11 Timer
Click to start timing. During the timing, you can start/pause/reset
switching with a single touch.
Meteo (Weather)
Una volta connesso all’App HitFit Pro, l’orologio mostrerà il meteo locale,
la temperatura più alta e la temperatura più bassa.
5.3.7 Message
When connected to Bluetooth, notifications from your phone will be
sent to your watch. (You need to open the push switch in the app in
advance)
5.3.8 Weather
After connected with APP, the watch will show local weather
information.
5.3.9 Relax
Adjust your breathing and relax.
5.3.10 Alarm clock
When you set alarm clock in the APP, the watch will show the alarm
clock information, and you also can open or close it in the watch.
5.3.11 Timer
Click to start timing. During the timing, you can start/pause/reset
switching with a single touch.
5.3.9
5.3.7 Message
When connected to Bluetooth, notifications from your phone will be
sent to your watch. (You need to open the push switch in the app in
advance)
5.3.8 Weather
After connected with APP, the watch will show local weather
information.
5.3.9 Relax
Adjust your breathing and relax.
5.3.10 Alarm clock
When you set alarm clock in the APP, the watch will show the alarm
clock information, and you also can open or close it in the watch.
5.3.11 Timer
Click to start timing. During the timing, you can start/pause/reset
switching with a single touch.
Relax
Regola la respirazione e rilassa.
5.3.10
5.3.7 Message
When connected to Bluetooth, notifications from your phone will be
sent to your watch. (You need to open the push switch in the app in
advance)
5.3.8 Weather
After connected with APP, the watch will show local weather
information.
5.3.9 Relax
Adjust your breathing and relax.
5.3.10 Alarm clock
When you set alarm clock in the APP, the watch will show the alarm
clock information, and you also can open or close it in the watch.
5.3.11 Timer
Click to start timing. During the timing, you can start/pause/reset
switching with a single touch.
Sveglia
Una volta impostata la sveglia nell’APP, l’orologio mostrerà le informa-
zioni sulla sveglia e sarà possibile avarla o disavarla nell’orologio.
5.3.11
5.3.7 Message
When connected to Bluetooth, notifications from your phone will be
sent to your watch. (You need to open the push switch in the app in
advance)
5.3.8 Weather
After connected with APP, the watch will show local weather
information.
5.3.9 Relax
Adjust your breathing and relax.
5.3.10 Alarm clock
When you set alarm clock in the APP, the watch will show the alarm
clock information, and you also can open or close it in the watch.
5.3.11 Timer
Click to start timing. During the timing, you can start/pause/reset
switching with a single touch.
Cronometro
Cliccare per avviare il tempo. Cliccare nuovamente per meere in
pausa.
5.3.12
5.3.12 Countdown
You can choose 1min, 3min, 5min, 10min, 20min, 30min, 1H, 2H, or
set any time you want to use countdown function. You can
pause/start switching with a single touch.
5.3.13 Music
After connected with the Bluetooth, you can manipulate Mobile to play
music and adjust the volume, voice will come out from mobile phone.
5.3.14 Female care
After you set the menstruation in the APP, and open reminder, the
watch will display relevant information simultaneously.
5.3.15 Find phone
When you connect your phone, the phone vibrates and rings when
you click the Find Phone icon.
5.3.16 Blood pressure
Switch to the blood pressure interface, once you enter the blood
pressure interface, the bracelet will start measuring blood pressure,
during the measurement process (for about 30s).
5.3.17 Blood oxygen
Switch to the blood oxygen interface, once you enter the blood
oxygen interface, the bracelet start measuring blood oxygen, during
the measurement process (for about 30s).
Timer (Countdown)
È possibile scegliere 1min, 3min, 5min, 10min, 20min, 30min, 1ora,
2ore, o impostare manualmente il tempo di conto alla rovescia. È
possibile meere in pausa e riprendere il conteggio con un solo
tocco.
5.3.13
5.3.12 Countdown
You can choose 1min, 3min, 5min, 10min, 20min, 30min, 1H, 2H, or
set any time you want to use countdown function. You can
pause/start switching with a single touch.
5.3.13 Music
After connected with the Bluetooth, you can manipulate Mobile to play
music and adjust the volume, voice will come out from mobile phone.
5.3.14 Female care
After you set the menstruation in the APP, and open reminder, the
watch will display relevant information simultaneously.
5.3.15 Find phone
When you connect your phone, the phone vibrates and rings when
you click the Find Phone icon.
5.3.16 Blood pressure
Switch to the blood pressure interface, once you enter the blood
pressure interface, the bracelet will start measuring blood pressure,
during the measurement process (for about 30s).
5.3.17 Blood oxygen
Switch to the blood oxygen interface, once you enter the blood
oxygen interface, the bracelet start measuring blood oxygen, during
the measurement process (for about 30s).
Musica
Una volta connesso al Bluetooth, è possibile agire sui comandi di
riproduzione/pausa, salto traccia avan e indietro, delle tracce
musicali presen sul telefono.
5.3.14
5.3.12 Countdown
You can choose 1min, 3min, 5min, 10min, 20min, 30min, 1H, 2H, or
set any time you want to use countdown function. You can
pause/start switching with a single touch.
5.3.13 Music
After connected with the Bluetooth, you can manipulate Mobile to play
music and adjust the volume, voice will come out from mobile phone.
5.3.14 Female care
After you set the menstruation in the APP, and open reminder, the
watch will display relevant information simultaneously.
5.3.15 Find phone
When you connect your phone, the phone vibrates and rings when
you click the Find Phone icon.
5.3.16 Blood pressure
Switch to the blood pressure interface, once you enter the blood
pressure interface, the bracelet will start measuring blood pressure,
during the measurement process (for about 30s).
5.3.17 Blood oxygen
Switch to the blood oxygen interface, once you enter the blood
oxygen interface, the bracelet start measuring blood oxygen, during
the measurement process (for about 30s).
Ciclo femminile
Una volta impostato il ciclo mestruale nell’APP e aver avato il
promemoria, l’orologio visualizzerà le informazioni relave.
5.3.15
5.3.12 Countdown
You can choose 1min, 3min, 5min, 10min, 20min, 30min, 1H, 2H, or
set any time you want to use countdown function. You can
pause/start switching with a single touch.
5.3.13 Music
After connected with the Bluetooth, you can manipulate Mobile to play
music and adjust the volume, voice will come out from mobile phone.
5.3.14 Female care
After you set the menstruation in the APP, and open reminder, the
watch will display relevant information simultaneously.
5.3.15 Find phone
When you connect your phone, the phone vibrates and rings when
you click the Find Phone icon.
5.3.16 Blood pressure
Switch to the blood pressure interface, once you enter the blood
pressure interface, the bracelet will start measuring blood pressure,
during the measurement process (for about 30s).
5.3.17 Blood oxygen
Switch to the blood oxygen interface, once you enter the blood
oxygen interface, the bracelet start measuring blood oxygen, during
the measurement process (for about 30s).
Trova telefono
Il telefono vibrerà e suonerà per permeerne il ritrovamento. Il tele-
fono emeerà il suono in base al volume impostato su di esso.
Italiano
11
T-Fit 260 PLUS
5.3.16
5.3.12 Countdown
You can choose 1min, 3min, 5min, 10min, 20min, 30min, 1H, 2H, or
set any time you want to use countdown function. You can
pause/start switching with a single touch.
5.3.13 Music
After connected with the Bluetooth, you can manipulate Mobile to play
music and adjust the volume, voice will come out from mobile phone.
5.3.14 Female care
After you set the menstruation in the APP, and open reminder, the
watch will display relevant information simultaneously.
5.3.15 Find phone
When you connect your phone, the phone vibrates and rings when
you click the Find Phone icon.
5.3.16 Blood pressure
Switch to the blood pressure interface, once you enter the blood
pressure interface, the bracelet will start measuring blood pressure,
during the measurement process (for about 30s).
5.3.17 Blood oxygen
Switch to the blood oxygen interface, once you enter the blood
oxygen interface, the bracelet start measuring blood oxygen, during
the measurement process (for about 30s).
Pressione sanguigna
Una volta entrata nell’interfaccia della Pressione sanguigna, l’orologio
inizia a misurare la pressione sanguigna, per circa 30secondi.
5.3.17
5.3.12 Countdown
You can choose 1min, 3min, 5min, 10min, 20min, 30min, 1H, 2H, or
set any time you want to use countdown function. You can
pause/start switching with a single touch.
5.3.13 Music
After connected with the Bluetooth, you can manipulate Mobile to play
music and adjust the volume, voice will come out from mobile phone.
5.3.14 Female care
After you set the menstruation in the APP, and open reminder, the
watch will display relevant information simultaneously.
5.3.15 Find phone
When you connect your phone, the phone vibrates and rings when
you click the Find Phone icon.
5.3.16 Blood pressure
Switch to the blood pressure interface, once you enter the blood
pressure interface, the bracelet will start measuring blood pressure,
during the measurement process (for about 30s).
5.3.17 Blood oxygen
Switch to the blood oxygen interface, once you enter the blood
oxygen interface, the bracelet start measuring blood oxygen, during
the measurement process (for about 30s).
Ossigenazione del sangue
Una volta entrata nell’interfaccia dell’Ossigenazione del sangue, l’oro-
logio inizia a misurare l’ossigeno nel sangue, per circa 30secondi.
5.3.18
5.3.18 Setting
Screen display: Including Brightness, Screen time, Turn
wrist wake, Change dial, Always on setting.
Choose style: Choose menu style for List or Smart.
Battery: Show the battery power, set Power saving mode.
Vibration: Set vibration intensity.
Do not disturb: Set enter, or exit do not disturb mode.
System: Including Language, System version, Shut down,
Reset settings.
6. Caveat
Please follow the doctor's instructions and measure the results of
self-diagnosis and treatment. Users with blood circulation disorders
and blood diseases should be treated under the guidance of a doctor.
The measurement results of this product are for reference only and
are not intended for any medical use or basis.
Impostazioni
●
5.3.18 Setting
Screen display: Including Brightness, Screen time, Turn
wrist wake, Change dial, Always on setting.
Choose style: Choose menu style for List or Smart.
Battery: Show the battery power, set Power saving mode.
Vibration: Set vibration intensity.
Do not disturb: Set enter, or exit do not disturb mode.
System: Including Language, System version, Shut down,
Reset settings.
6. Caveat
Please follow the doctor's instructions and measure the results of
self-diagnosis and treatment. Users with blood circulation disorders
and blood diseases should be treated under the guidance of a doctor.
The measurement results of this product are for reference only and
are not intended for any medical use or basis.
Luminosità display: è possibile impostare la luminosità del
display, il tempo di accensione del display, il tempo di acensione col
movimento del polso, il quadrante dell’orologio e il tempo di display
sempre acceso.
●
5.3.18 Setting
Screen display: Including Brightness, Screen time, Turn
wrist wake, Change dial, Always on setting.
Choose style: Choose menu style for List or Smart.
Battery: Show the battery power, set Power saving mode.
Vibration: Set vibration intensity.
Do not disturb: Set enter, or exit do not disturb mode.
System: Including Language, System version, Shut down,
Reset settings.
6. Caveat
Please follow the doctor's instructions and measure the results of
self-diagnosis and treatment. Users with blood circulation disorders
and blood diseases should be treated under the guidance of a doctor.
The measurement results of this product are for reference only and
are not intended for any medical use or basis.
Sle menù: è possibile scegliere lo sle Menu in Elenco o Griglia
a 9 icone.
●
5.3.18 Setting
Screen display: Including Brightness, Screen time, Turn
wrist wake, Change dial, Always on setting.
Choose style: Choose menu style for List or Smart.
Battery: Show the battery power, set Power saving mode.
Vibration: Set vibration intensity.
Do not disturb: Set enter, or exit do not disturb mode.
System: Including Language, System version, Shut down,
Reset settings.
6. Caveat
Please follow the doctor's instructions and measure the results of
self-diagnosis and treatment. Users with blood circulation disorders
and blood diseases should be treated under the guidance of a doctor.
The measurement results of this product are for reference only and
are not intended for any medical use or basis.
Baeria: mostra lo stato della baeria ed è possibile avare la
modalità di risparmio energeco.
●
5.3.18 Setting
Screen display: Including Brightness, Screen time, Turn
wrist wake, Change dial, Always on setting.
Choose style: Choose menu style for List or Smart.
Battery: Show the battery power, set Power saving mode.
Vibration: Set vibration intensity.
Do not disturb: Set enter, or exit do not disturb mode.
System: Including Language, System version, Shut down,
Reset settings.
6. Caveat
Please follow the doctor's instructions and measure the results of
self-diagnosis and treatment. Users with blood circulation disorders
and blood diseases should be treated under the guidance of a doctor.
The measurement results of this product are for reference only and
are not intended for any medical use or basis.
Intensità vibrazione: è possibile impostare l’intensità della
vibrazione dell’orologio.
●
5.3.18 Setting
Screen display: Including Brightness, Screen time, Turn
wrist wake, Change dial, Always on setting.
Choose style: Choose menu style for List or Smart.
Battery: Show the battery power, set Power saving mode.
Vibration: Set vibration intensity.
Do not disturb: Set enter, or exit do not disturb mode.
System: Including Language, System version, Shut down,
Reset settings.
6. Caveat
Please follow the doctor's instructions and measure the results of
self-diagnosis and treatment. Users with blood circulation disorders
and blood diseases should be treated under the guidance of a doctor.
The measurement results of this product are for reference only and
are not intended for any medical use or basis.
Non disturbare: la modalità Non disturbare disava tu i pro-
memoria, inclusi telefono, SMS, push dei messaggi, tranne la sveglia
e l’orologio.
●
5.3.18 Setting
Screen display: Including Brightness, Screen time, Turn
wrist wake, Change dial, Always on setting.
Choose style: Choose menu style for List or Smart.
Battery: Show the battery power, set Power saving mode.
Vibration: Set vibration intensity.
Do not disturb: Set enter, or exit do not disturb mode.
System: Including Language, System version, Shut down,
Reset settings.
6. Caveat
Please follow the doctor's instructions and measure the results of
self-diagnosis and treatment. Users with blood circulation disorders
and blood diseases should be treated under the guidance of a doctor.
The measurement results of this product are for reference only and
are not intended for any medical use or basis.
Sistema (System): è possibile impostare la lingua dell’orologio,
visualizzare il nome Bluetooth, la versione del rmware e altre
informazioni, spegnere l’orologio e researe l’orlogio riportandolo
alle impostazioni di fabbrica (Nota: tu i da verranno cancella).
Italiano

T-Fit 260 PLUS
12
6. AVVERTIMENTO
Consultare sempre il proprio medico prima di avviare un
programma di esercizi. TREVI T-Fit 260 PLUS non è un disposivo
medico ma un apparecchio in grado di misurare e di visualizzare su
un display LCD la frequenza cardiaca di chi lo indossa. I risulta della
misurazione di questo prodoo sono solo di riferimento e non sono
desna ad alcun uso medico.
Avvertenze
Questo disposivo è uno strumento eleronico di alta precisione;
evitate quindi di ulizzarlo nei seguen casi:
• Vicino a for fon di calore come caloriferi e stufe.
• In ambien troppo freddi o troppo caldi o molto polverosi.
• L’apparecchio non deve essere esposto a sllicidio o a spruzzi d’acqua.
Nessun oggeo pieno di liquido, quali vasi, deve essere posto
sull’apparecchio.
• Se dei liquidi penetrano all’interno del disposivo portare il disposi-
vo al più vicino centro assistenza autorizzato TREVI.
• Non ulizzare il disposivo in prossimità di gas inammabili o esplo-
sivi, questo potrebbe causare un malfunzionamento del disposivo
o un pericolo di incendio.
• Nessuna sorgente di amma nuda, quali candele accese, deve
essere posta sull’apparecchio.
• Tenere il disposivo fuori dalla portata dei bambini. Il disposivo non
è un giocaolo. Il disposivo è composto da par smontabili di pic-
cole dimensioni che, se ingerite, possono provocare soocamento.
• Non esporre il disposivo a for ur.
• Conservare il prodoo in un luogo asciuo quando non lo si ulizza.
• Conservare questo manuale.
Italiano

13
T-Fit 260 PLUS
INFORMAZIONI AGLI UTENTI ai sensi del Decreto
Legislavo N° 49 del 14 Marzo 2014 “Auazione della
Direva 2012/19/UE sui riu di apparecchiature
eleriche ed eleroniche (RAEE)”
Il simbolo del cassoneo barrato riportato sull’apparecchiatura indica
che il prodoo alla ne della propria vita ule deve essere raccolto
separatamente dagli altri riu. L’utente dovrà, pertanto, conferire
l’apparecchiatura integra dei componen essenziali giunta a ne
vita agli idonei centri di raccolta dierenziata dei riu eleronici
ed elerotecnici, oppure riconsegnarla al rivenditore al momento
dell’acquisto di nuova apparecchiatura di po equivalente, in ragione
di uno a uno, oppure 1 a zero per le apparecchiature aven lato mag-
giore inferiore a 25 cm. L’adeguata raccolta dierenziata per l’avvio
successivo dell’apparecchiatura dimessa al riciclaggio, al traamento
e allo smalmento ambientale compabile contribuisce ad evitare
possibili ee negavi sull’ambiente e sulla salute e favorisce il rici-
clo dei materiali di cui è composta l’apparecchiatura. Lo smalmento
abusivo del prodoo da parte dell’utente comporta
l’applicazione delle sanzioni amministrave di cui al D.Lgs n. Decreto
Legislavo N° 49 del 14 Marzo 2014.
Italiano

T-Fit 260 PLUS
User manual
14

15
T-Fit 260 PLUS English
Please read the manual before use.
The information in this document won't be modified or
extended in accordance with any notice.
The watch should be charging 3 hours at least before use.
1. Caution:
1.1 Waterproof and dustproof
The watch supports waterproof and dustproof. Please follow below
guidelines to maintain the waterproof and dustproof function.
Otherwise, your device might be damaged.
·Do not use watch under the strong pressure water.
·Do not use watch when diving, snorkeling or other sports in
turbulent water.
·Please dry your hands or watch fully before operating.
·If the watch is exposed to water, please dry it fully with soft cloth. If
it is exposed to other liquids (such as salt water, pool water, soapy
water, oil, perfume, sunscreen, hand sanitizer) or chemicals (such as
cosmetics), please wash it with clean water and dry it fully with soft
cloth. Do not follow these instructions may damage its performance
and appearance.
·If the watch is dropped or hit, the waterproof and dustproof
function may be damaged.

T-Fit 260 PLUS
16
English
·Do not disassemble your watch. The waterproof and dustproof
function may be damaged.
·Do not use watch in extremely high or low temperature
environments.
·Do not use blowers and other heated equipment to dry the watch.
·In sauna room, the waterproof function may be damaged.
1.2 Cleaning and management of T-Fit 260 PLUS
Follow the below points to ensure that T-Fit 260 PLUS is operating
normally and looks good. Otherwise, maybe damage T-Fit 260 PLUS
and cause skin irritation.
·Protect watch from dust, sweat, ink, oil, and chemical products (such
as cosmetics, antibacterial sprays, hand sanitizers, detergents, and
insecticides). Otherwise, the internal and external parts may be
damaged or causes performance degradation. If T-Fit 260 PLUS is
stained with above substances, please clean it with lint-free soft
cloth.
·When cleaning T-Fit 260 PLUS, do not use soap, detergent, abrasive
materials, compressed air, ultrasonic waves, or external heat sources.
Otherwise, T-Fit 260 PLUS may be damaged. Soap, detergent, hand
sanitizer, or detergent residue may cause skin irritation.
·After exercising or sweating, please clean your wrist and strap. Use
water to clean T-Fit 260 PLUS and dip a small amount of alcohol to
wipe, then dry it thoroughly.

17
T-Fit 260 PLUS English
·If T-Fit 260 PLUS is stained or infiltrated with other objects, please
use wet soft toothbrush to clean it.
1.3 If you are allergic to material on T-Fit 260 PLUS,
please pay attention when using
·Manufacturer conducted testing about hazardous materials on T-Fit
260 PLUS by internal and external certification agency, including
testing of all materials contact skin, skin toxicity testing, and wearing
testing.
·T-Fit 260 PLUS contains nickel. If your skin is very sensitive or you are
allergic to the materials on T-Fit 260 PLUS, please take necessary
precautions.
- -- Nickel: T-Fit 260 PLUS contains a small amount of nickel. The
content is lower than the reference value of European REACH
regulations. You will not be exposed to the nickel in T-Fit 260 PLUS
and our device has passed the international certification test.
However, if you are allergic to nickel, please use T-Fit 260 PLUS with
caution.
·All materials used on T-Fit 260 PLUS comply with relevant inspection
standards such as REACH and RoHS.

T-Fit 260 PLUS
18
2. Product specification
Model T-Fit 260 PLUS
CPU RTL8762D
ARM Cortex-M0 53MHz
Memory RAM 128KB + ROM 128Mb
Full touch screen
1.7”IPS
240*280 big screen
2.5D glass
Bluetooth version 5.0
BT tx peak power 1mW
Max BT tx power 0,8mW
BT tx band 2,4GHz
Battery Lithium-ion 3.7V/240mAh
Function
IP68 waterproof, 24h Body Temperature, Heart
Rate, Sleep, Daily activity, sports tracking, female
care, stylish Dials Push, DIY f
avorite dial
customized, 7 days weather forecast,
Notification (Ins/Facebook/Skype/WhatsApp etc...),
2 operations styles choose
Other features
alarm clock, do not disturb mode,
battery saving
mode, show time setting,
multi-Languages supported, changeable strap
English

19
T-Fit 260 PLUS English
3.Product details
3.1 Charge your watch
Connect and charge the watch according to the picture. It needs to be
charged to activate the watch when it is started for the first time.
Notice: Do not use a charger exceeding 5V 2A for charging.
3.2 Operate your watch
(1) Power on: When the watch is Off status, press and hold the power
button for 5 seconds to turn it on. The home screen of the watch will
be displayed after booting.
(2) Touch screen operation: From the home screen, swipe to the right
to the menu screen, then tap the function icon to enter the

T-Fit 260 PLUS
20
corresponding sub-menu.
(3) Wake up screen: When the watch screen is Off status, you can
press the power button to wake up the screen. If the Gesture control
button is turned on in the APP, you can also wake up the screen by
turning the wrist.
(4) Shutdown: Click the Setting icon, click System - Shut down, click
to shut down.
3.3 Replace the strap
Remove the strap from the watch by sliding the quick release on the
strap.
4. Products quick into
4.1 Products quick into
(1) Long press the main interface to enter the home page thumbnail.
You can view it left and right, click touch to switch the home page.
(2) Swipe to the right: Display function list -> Daily activity, Sports,
Quick release
English
Table of contents
Other Trevi Watch manuals

Trevi
Trevi T-Fit 210 HB User manual

Trevi
Trevi SF 120 User manual

Trevi
Trevi RACER SG 320 User manual

Trevi
Trevi SF 150 HR User manual

Trevi
Trevi T-Fit 220 HB User manual

Trevi
Trevi T-Fit 210 SLIM User manual

Trevi
Trevi T-Fit 220 HB User manual

Trevi
Trevi T-Fit 260 HB User manual

Trevi
Trevi T-Fit 220 PLUS User manual

Trevi
Trevi T-Fit 270 S CALL User manual