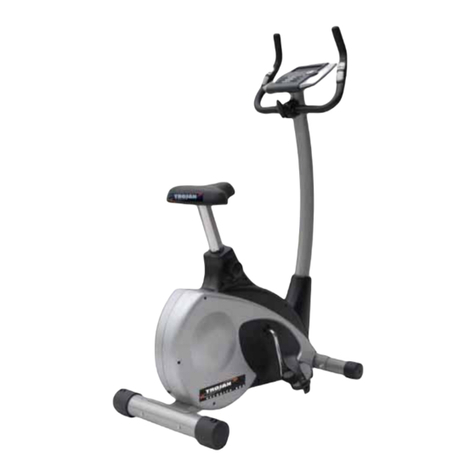
Trojan SHAPE 210 User manual

10253 - 1
SHAPE 210
STATIONARY CYCLE
STATIONARY CYCLE CARE, INSTRUCTION
AND ASSEMBLY MANUAL

10253 - 2
INDEX PAGE
1. SAFETY INSTRUCTIONS 3
2. PRE ASSEMBLY CHECK LIST 5
3. HARDWARE LIST 6
4. ASSEMBLY STEPS 7
5. COMPUTER FUNCTIONS 10
6. FITNESS TIPS AND TECHNIQUES 11
7. CONDITIONING GUIDELINES 12
8. WARM-UP AND COOL-DOWN 13
9. FREQUENTLY ASKED QUESTIONS 14
10. PARTS LIST 15
11. EXPLODED DRAWING 16
12. TROJAN 1YEAR LIMITED WARRANTY 17
13. TROJAN REPAIRS PROCEDURE 18

10253 - 3
1. SAFETY INSTRUCTIONS
It is the sole responsibility of the purchaser of TROJAN products to read the owner’s manual, warning labels and instruct
all individuals, on proper usage of the equipment. Understanding each and every warning to the fullest is important. If any
of these instructions or warnings are unclear please contact Trojan Customer Services on 0861 876 526 (0861 Trojan),
within the Republic of South Africa.
The equipment is only intended for HOME USE and is NOT INTENDED FOR COMMERCIAL, INSTITUTIONAL AND/
OR STUDIO FACILITIES USE.
Contact TROJAN with any questions regarding this classication. It is recommended that all users of TROJAN be informed
of the following information prior to use.
HEALTH WARNING
• Beforestartinganyexerciseorconditioningprogramyoushouldconsultwithyourpersonalphysiciantoseeifyou
requireacompletephysicalexam.Thisisespeciallyimportantifyouareinactive,pregnantorsufferfromanyillness.
• Ifatanytimeduringexerciseyoufeelfaint,dizzyorexperiencepain,stopexercisingimmediatelyandconsultyour
physician.
• Toavoidmuscularpainandstrain,begineachworkoutbystretchingandwarmingupandendeachsessionbycooling
down and stretching.
ACCESS CONTROL
TROJAN recommends that all tness equipment be used in a supervised area. It is recommended that the equipment be
located in an access controlled area. Control is the responsibility of the owner. Keep children away from all equipment.
Parents or others supervising adults must provide close supervision of children if the equipment is used in the presence
of children.
INSTALLATION
TROJAN recommends that all equipment:
• Besecuredtoorsetuponasolid,levelsurfacetostabilizeandeliminaterockingortippingoverduringtraining.
• Besetupinsideyourhomeawayfrommoistureanddust(theequipmentisnotdesignedforoutdooruse).
• Besetupwithsufcientventilationtoensureproperoperation.
• Besetupwithsufcientspacearoundtheequipmentsothatallexercisescanbecompletedsafely.Itisrecommended
thatthereshouldbeatleast1mofspacearoundtheequipmentwhereaccessisrequiredtoexercise.
PROPER USAGE
• Donotusetheequipmentinanywayotherthanasdesignedorintendedbythemanufacturer.Itisimperativethat
TROJAN equipment is used properly to avoid injury.
• Injuriesmayresultfromexercisingimproperlyorexcessively.
• YourTROJANequipmentshouldonlybeusedbyonepersonatatime.
• Becarefultomaintainyourbalancewhileusing,mounting,dismountingorassemblingyourTROJANequipmentto
avoid injury.
• DonotattempttoadjusttheseatorhandlebarswhileyouareonyourTROJANequipment.
• Servicingotherthantheproceduresinthismanualshouldbeperformedbyanauthorizedservicerepresentativeonly.

10253 - 4
1. SAFETY INSTRUCTIONS (CONT.)
INSPECTION
• Donotuseorpermituseofanyequipmentthatisdamagedorhaswornorbrokenparts.ForallTROJAN
equipment use only replacement parts supplied by TROJAN.
• Alwaysmakesurethatallnutsandboltsaretightenedpriortoeachuse.
• Maintainlabelsandnameplates–donotremovelabelsforanyreason.Theycontainimportantinformation.
• Equipmentmaintenance–preventativemaintenanceisthekeytosmoothoperatingequipment.Pleaseensurethat
you follow our maintenance tips to ensure the continued correct function of your TROJAN equipment.
• Beforeanyuse,examineallaccessoriesapprovedforusewiththeTROJANequipmentfordamageorwear.
• ShouldyourTrojanequipmentappeardamagedorworn,donotattempttouseorrepairtheequipmentyourself.
Please contact our service department on 0861 876526 (0861 Trojan) to arrange a repair.
OPERATING WARNINGS
•
It is the purchaser’s responsibility to instruct all users as to the proper operating procedures of all TROJAN equipment.
• Keepchildrenawayfromallmovingparts.Parentsmustprovideclosesupervisionofchildreniftheequipmentisused
in the presence of children.
• Donotwearloosettingclothingorjewellerywhenusingtheequipment.Itisalsorecommendedthatuserstieup
long hair to avoid contact with moving parts.
• Ensurethatanyonenotusingtheequipmentstaysclearoftheuser,accessoriesandmovingpartswhilethemachine
is in operation.
USER WEIGHT LIMITATIONS
• ThisTROJAN SHAPE 210 STATIONARY CYCLE maynotbeusedbypersonsweighingmorethan100kg.
SAVE THIS INSTRUCTION MANUAL FOR FUTURE USE AND REFERENCE
If any of these instructions or warnings are unclear please contact Trojan Customer Services on
0861 876526 (0861 Trojan), within the Republic of South Africa or visit www.trojanhealth.co.za.

10253 - 5
2. PRE ASSEMBLY CHECK LIST
ThankyouforchoosingtheTROJANSHAPE210.Wetakegreatprideinproducingthisproductandhopeitwillprovide
manyhoursofqualityexercisetomakeyoufeelbetter,lookbetterandenjoylifetoitsfullest.
Yes,itisaprovenfactthataregularexerciseprogramcanimproveyourphysicalandmentalhealth.Toooften,ourbusy
lifestyleslimitourtimeandopportunitytoexercise.TheTROJANSHAPE210providesaconvenientandsimplemethodto
begin your assault on getting your body in shape and achieving a healthier lifestyle.
Before reading further, please familiarise yourself with the parts that are labelled.
Read this manual carefully before using the TROJAN SHAPE 210.
Seat
Adjustment
Knob
Rear Stabiliser
Computer
Handlebar
Handlebar Post
Tension Control Knob
Main Cover
Pedal
Front Stabiliser
Hand Pulse

10253 - 6
3. HARDWARE LIST
6 mm Allen Key
Spanner IPC
S13-14-15 Multi Tool
35BoltM10x57
4 pieces
34 Nut M10
4 pieces
36 Curved Washer Ø10
4 pieces
Instructions for assembly
• Beforeyoustarttoassemble,pleasecheckthehardwarepackagingtomakesureallpartsareincluded.

10253 - 7
• AttachtheFrontStabilizer(6)ontothefrontcurveplateof
the Main Frame (1) with two M10 Cap Nuts (34), two
M10x57Bolts(35)andtwoØ10BigCurved
Washers (36).
• AttachtheRearStabilizer(4)inthesamemannerasthe
FrontStabilizer(6).
• ConnecttheLeftFootPedal(20)totheLeftCrank(19).
Threaditintothecrankassemblyinacounterclockwise
direction using the tool provided. Connect the Right Foot
Pedal(21)totheRightCrank(19)bythreadingitina
clockwisedirection.
NOTE:TheLeftandRightFootPedals(20,21)andCrank(19)
aremarkedwith“L”&“R”(leftandright).
• RemovethreeM8Locknuts(42)andthreeØ8Washers
(38) from underneath the Seat Cushion (27).
• AttachtheSeatCushion(27)ontothetriangleplateofthe
SeatPost(25)withthreeM8Locknuts(42)andthreeØ8
Washers (38) that were previously removed.
• InserttheSeatPost(25)withthePlasticSleeve(65)intothe
bushing on the tube of the Main Frame (1) and then attach
the Round Knob (8) onto the tube of the Main Frame (1) by
turningitinaclockwisedirectiontolocktheSeatPost(25)
in the suitable position.
Adjusting the seat post:
• TurntheRoundKnob(8)inacounterclockwisedirection
until it can be pulled out. Pull out the Round Knob (8)
and then slide the Seat Post (25) up or down to a suitable
position.LocktheSeatPost(25)inplacebyreleasingthe
Round Knob (8) and sliding the Seat Post (25) up or down
slightlyuntiltheRoundKnob(8)“pops”downintothe
lockedposition.Foraddedsafety,tightentheRoundKnob
(8)inaclockwisedirection.
Instructions for assembly
• Unpackthecartonandusingthepartslistcheckthatallpartsareaccountedfor.
• Donotdisposeofthepackagingmaterialuntilassemblyiscompleted.
• Toolsareprovidedforuseinassembly.
4.ASSEMBLY STEPS
STEP 1: STABILIZERS AND PEDAL ASSEMBLY.
STEP 2: SEAT CUSHION AND SEAT POST ASSEMBLY.

10253 - 8
• RemovefourM8x15Bolts(24)andfourØ8
Curved Washers (37) from the tube of the Main
Frame (1).
• ConnecttheSensorWire(26)intheMainFrame
(1) to the Middle Section Sensor Wire (59) which
is in the Handlebar Post (3). Put the cable end of
the resistance cable of the Tension Control Knob
(7)intothespringhookoftheTensionCable(54)
as shown in drawing A. Pull the resistance cable
of Tension Control Knob (54) up and force it into
thegapofthemetalbracketoftheTensionCable
(54) as shown in drawing B .
• PlacetheHandlebarPost(3)ontothetubeof
theMainFrame(1)andsecurewithfourM8x15
Bolts (24) and four Ø8 Curved Washers (37) that
were previously removed.
STEP 4: HANDLEBAR ASSEMBLY.
• RemovetwoM8x15Bolts(24)andtwoØ8
Curved Washers (64) from the Handlebar
Post (3).
• InserttheHandPulseSensorWires(53)into
the hole on the Handlebar Post (3) and then pull
them out the top end of the Handlebar Post (3).
• AttachtheHandlebar(2)ontotheHandlebar
Post(3)withtwoM8x15Bolts(24)andtwo
Ø8 Curved Washers (37) that were previously
removed.
CAUTION:
Ensure that cables are not damaged
during assembly or when tightening screws.
CAUTION:
Ensure that cables are not damaged
during assembly or when tightening screws.
4.ASSEMBLY STEPS
STEP 3: HANDLEBAR POST ASSEMBLY

10253 - 9
STEP 5: COMPUTER ASSEMBLY
• RemovetwoM5x10Bolts(47)fromthe
Computer (10).
• ConnecttheHandPulseSensorWires(53)and
Middle Section Sensor Wire (59) to the wires that
come from the Computer (10).
• AttachtheComputer(10)ontothetopendofthe
HandlebarPost(3)withthetwoM5x10Bolts(47)
that were previously removed.
4.ASSEMBLY STEPS
Recheck
all bolts and nuts are
tightened securely
before using the machine
CAUTION:
Ensure that cables are not damaged
during assembly or when tightening screws.

10253 - 10
5. COMPUTER FUNCTIONS
FUNCTIONS
Thefollowingfunctionsaremarkedonthecomputerconsol
SCAN - SPEED - DIST - TIME - ODO - CAL - PULSE
FUNCTIONS AND OPERATIONS:
MODE: Press MODE to choose functions.
AUTOON/OFF:Themonitorwillactivateautomaticallyiftheexercise
machineisinmotion.Ifyoustopexercising
for longer than 4 minutes the monitor will
automatically turn off.
SCAN: Press the button until the monitor displays SCAN.The
monitor will automatically rotate the display between
SPEED,DIST,TIME,ODO&CALevery30seconds.
Each display will be held for 6 seconds.
SPEED: Press the button until the arrow points to SPEED. The monitor will display the current speed.
DISTANCE: Press the button until the arrow points to DIST. The monitor will display the trip distance you have
travelled.
TIME: PressthebuttonuntilthearrowpointstoTIME.Themonitorwillcounttheridetimefromzerountil
you stop cycling.
ODOMETER: Press the button until the arrow points to ODO.The monitor will display the total accumulated
distance.
CALORIE: Press the button until the arrow points to CAL.The monitor will accumulate the calorie consumption.
*PULSE: Pressthebuttonuntiltheheartbeatsymbolisickering;themonitorwilldisplayyourcurrent
heartbeat per minute.
SPECIFICATION:
FUNCTION
Auto Scan Every 6 seconds
Speed Unit: KPH
Distance 0.0-999.9 KM
Time 0:00-99:59 (Minute: Second)
Odometer 0.0-999.9 KM
Calorie 0.0-999.9 Kcal
* Pulse 40-240 BPM
Sensor No-contact magnetic type
Battery type Two pieces of SIZE-AAA or UM-4
Operation temperature 0 C - +40C ( 32F - 104F )

10253 - 11
Tr apezius
Posterior
Tricep
Latissimus Dorsi
Gluteals
Hamstrings
Gastrocnemius
Tr apezius
Anterior
Pectoralis Major
Serratus Anterior
Biceps
Abdominal
Sartorius
Quadriceps
Tibialis
AEROBIC EXERCISE
•Aerobicexerciseisanysustainedactivitythatsendsoxygentoyourmusclesviayourheartandlungs.
•Aerobicexerciseimprovesthetnessofyourlungsandheart-yourbody’smostimportantmuscle.
•Aerobicexercisetnessispromotedbyanyactivitythatusesyourlargemuscleeg.arms,legsorbuttock.
Yourheartbeatsquicklyandyoubreathedeeply.
•Aerobicexerciseshouldbepartofyourexerciseroutine.
WEIGHT TRAINING
Alongwithaerobicexercisingwhichhelpsgetridofandkeepofftheexcessfatthatourbodiescanstore,weighttraining
isanessentialpartoftheexerciseroutineprocess.Weighttraininghelpstone,buildandstrengthenmuscle.Ifyouare
workingaboveyourtargetzone,youmaywanttodoalessamountofreps.
MUSCLE CHART
SHAPE 210 STATIONARY BIKE
TheexerciseroutinethatisperformedontheShape210Bikewilldevelopthelowerbodymusclegroupaswellas
conditionthecirculatorysystemandprovideagoodaerobicworkout.Thesemusclegroupsarehighlightedonthe
muscle chart below.
6. FITNESS TIPS AND TECHNIQUES
TrojanandtheHeartandStrokeFoundationhavejoinedforcestoKEEPSOUTHAFRICAMOVING.
TheHeartandStrokeFoundationSouthAfricaencouragesallSouthAfricanstomakeheart-healthychoices
thatincludedailyphysicalactivity,exerciseandabalanceddiet.UseTrojan,SA’sNo.1sellingHomeFitness
brandtogivesyoutheabilitytoboostyourtnesslevelandloweryourriskofcardiovasculardisease.
Visitwww.trojanhealth.co.zaforequipmentchoicesandexerciseprograms,and
www.heartfoundation.co.za for information on how to adopt a healthy lifestyle.

10253 - 12
7. CONDITIONING GUIDELINES
Howyoubeginyourexerciseprogramdependsonyourphysicalcondition.Ifyouhavebeeninactiveforseveralyears,or
areseverelyoverweight,youmuststartslowlyandincreaseyourtimeontheequipment;afewminutesperworkout.
Initially,youmaybeabletoexerciseonlyforafewminutesinyourtargetzone,however,youraerobictnesswillimprove
overthenextsixtoeightweeks.Don’tbediscouragedifittakeslonger.It’simportanttoworkatyourownpace.
Ultimately,you’llbeabletoexercisecontinuouslyfor30minutes.Thebetteryouraerobictness,theharderyouwillhave
to
worktostayinyourtargetzone.Pleaseremembertheseessentials:
•Haveyourdoctorreviewyourtraininganddietprogramstoadviseyouofaworkoutroutineyoushouldadopt.
•Beginyourtrainingprogramslowlywithrealisticgoalsthathavebeensetbyyouandyourdoctor.
•Monitoryourpulsefrequently.Establishyourtargetheartratebasedonyourageandcondition.
EXERCISE INTENSITY
Tomaximizethebenetsofexercising,itisimportanttoexercisewiththe
proper intensity.The proper intensity level can be found by using your heart
rateasaguide.Foreffectiveaerobicexercise,yourheartrateshouldbe
maintainedatalevelbetween65%and85%ofyourmaximumheartrate
asyouexercise.Thisisknownasyourtargetzone.Youcanndyourtarget
zoneinthetablebelow.
Duringtherstfewmonthsofyourexerciseprogram,keepyourheartratenearthelowendofyourtargetzoneasyou
exercise.Afterafewmonths,yourheartratecanbeincreasedgraduallyuntilitisnearthemiddleofyourtargetzoneas
youexercise.
Tomeasureyourheartrate,stopexercisingbutcontinuemovingyourlegsorwalkingaroundandplacetwongerson
yourwrist.Takeasixsecondheartbeatcountandmultiplytheresultsby10tondyourheartrate.Forexample,ifyour
six-secondheartbeatcountis14,yourheartrateis140beatsperminute.(Asixsecondscountisusedbecauseyour
heartratewilldroprapidlywhenyoustopexercising.)
Adjusttheintensityofyourexerciseuntilyour
heart rate is at the proper level.
For more information visit www.trojanhealth.co.za

10253 - 13
1
2
3
4
5
8.WARM-UP AND COOL-DOWN
WORKOUT GUIDELINES
Eachworkoutshouldincludethefollowingthreeparts:
Awarm-up,consistingof5to10minutesofstretchingandlightexercise.Aproperwarm-upincreasesyourbody
temperature,heartrate,andcirculationinpreparationforexercise.
Trainingzoneexercise,consistingof20to30minutesofexercisingwithyourheartrateinyourtrainingzone.
(Note:Duringtherstfewweeksofyourexerciseprogram,donotkeepyourheartrateinyourtrainingzonefor
longer than 20 minutes).
Acool-down,with5to10minutesofstretching.Thiswillincreasetheexibilityofyourmusclesandwillhelptoprevent
post-exerciseproblems.
EXERCISE FREQUENCY
Tomaintainorimproveyourcondition,planthreeworkoutseachweek,withatleastonedayofrestbetweenworkouts.
Afterafewmonthsofregularexercise,youmaycompleteuptoveworkoutseachweek,ifdesired.Remember,thekey
tosuccessismakeexercisearegularandenjoyablepartofyoureverydaylife.
SUGGESTED STRETCHES
The correct form for several basic stretches is shown at the right. Move slowly as you
stretch, never bounce.
1.Toe Touch Stretch
Standwithyourkneesbentslightlyandslowlybendforwardfromyourhips.Allow
yourbackandshoulderstorelaxasyoureachdowntowardyourtoesasfaras
possible.Holdfor15counts,thenrelax.Repeat3times.Stretches:Hamstrings,back
ofkneesandback.
2. Hamstring Stretch
Sitwithonelegextended.Bringthesoleoftheoppositefoottowardyouand
restitagainsttheinnerthighofyourextendedleg.Reachtowardyourtoesasfar
aspossible.Holdfor15counts,thenrelax.Repeat3timesforeachleg.Stretches:
Hamstrings,lowerbackandgroin.
3. Calf/Achilles Stretch
With one leg in front of the other, reach forward and place your hands against a wall.
Keepyourbacklegstraightandyourbackfootatontheoor.Bendyourfrontleg,
leanforwardandmoveyourhipstowardthewall.Holdfor15counts,thenrelax.
Repeat 3 times for each leg.To cause further stretching of the achilles tendons, bend
yourbacklegaswell.Stretches:Calves,achillestendonsandankles.
4. Quadriceps Stretch
Withonehandagainstawallforbalance,reachbackandgrasponefootwithyour
otherhand.Bringyourheelasclosetoyourbuttocksaspossible.Holdfor15counts,
thenrelax.Repeat3timesforeachleg.Stretches:Quadricepsandhipmuscles.
5. Inner Thigh Stretch
Sitwiththesolesofyourfeettogetherandyourkneesoutward.Pullyourfeet
towardyourgroinareaasfaraspossible.Holdfor15counts,thenrelax.Repeat3
times. Stretches: Quadriceps and hip muscles.
For more information visit www.trojanhealth.co.za

10253 - 14
9. FREQUENTLY ASKED QUESTIONS – SHAPE 210
1.The consol is showing the incorrect readings.
• Checkthattheconnectoronthebackoftheconsolispluggedincorrectly.
• Checkthebatteriesintheconsolareinsertedinthecorrectorientationandthattheyareinworkingcondition.
• Presstheresetbuttontotestiftheerrorhascorrecteditself.
2.The functions are not working properly or display incorrectly.
• Checkthattheconnectoronthebackoftheconsolispluggedincorrectly.
• Presstheresetbuttontotestiftheerrorhascorrecteditself.
3.There is no pulse reading or the data displayed is unstable.
• Checkthatthereisaproperconnectionbetweenyourhandsandthehandpulseconnector(thehandpulse
sensorswillnotoperatecorrectlyifyourskinisextremelydry.Moistenyourhandsandtryagain).
• Checkthattheconnectionwireisnotbroken.
• Resetandcarefullyfollowtheinstructionsinthemanual.Ifdisplaydoesnotimprove,pleasecontact0861876526
(0861 TROJAN).
Note
• Avoidmovingyourhandswhileexercisingandholdthehandpulsesensorsrmlywhileexercising.Ifyoudomove
yourhandswhileexercising,givethecomputerafewsecondstoresampleanddisplayyourcorrectheartpulse
rate.
4. My LCD is dim
• Checkiftheunitisindirectsunlight.Moveifnecessary.Ifdisplaydoesnotimprove,pleasecontact0861876526
(0861 TROJAN).
5. Maintenance and cleaning.
• Useaclean,damp,softragtocleanthesurface.
• Useamilddetergenttocleanthedirtyspots.
• Donotuseasteelbrushorabrasiveclothtocleanthesurface.
• Immediatelyafterexercisewipeoffanysweatfromthesurfaceoftheequipment.Perspirationcontainssaltwhich
could ruin the equipment.

10253 - 15
No. Description Qty No. Description Qty
001 Main Frame 1 034 Cap Nut M10 4
002 Handlebar Ø25 x 1.5 1 035 Bolt M10 x 57 4
003 Handlebar Post Ø50 x 1.5 1 036 Big Curved Washer Ø10 4
004 Rear Stabilizer Ø50 x 1.5 1 037 Curved Washer Ø20 x Ø8 x1.5 4
005 Flywheel Ø230,4kg 1 038 Washer Ø8 3
006 Front Stabilizer Ø50 x 1.5 1 039 Bolt M8 x 10 1
007 Tension Control Knob 1 040 Pan Head Phillips Self Tapping Screw ST4.2 x 25 6
008 Round Knob M16 1 041 Pan Head Phillips Self Drilling Screw ST4.2 x 25 4
009 Belt 320/J6 1 042 Locknut M8 3
010 Computer 1 043 Bolt M8 x 30 1
011 Nut M10 x 1 2 044 Pressing Belt Wheel 1
012 Bushing Ø50 x 1.5 1 045 Bearing 6000zz 2
013 Left Cover 1 046 Big Curved Washer Ø5 x 1.5 1
014 Right Cover 1 047 Bolt M5 x 10 2
015 Screw ST2.9 x 10 2 048 Washer Ø40 x Ø24 x 3.0 1
016 Ring II 1 049 Handlebar End Cap Ø25 2
017 Axle Sleeve 15/16” 1 050 Handlebar Foam Grip Ø30 x Ø24 x 455 2
018 Nut 7/8” 1 051 Screw ST4.2 x 20 2
019 Belt Pulley with Crank 240J6 1 052 Screw M6 x 10 1
020 Left Foot Pedal YH-30X 1 053 Hand Pulse Sensor with Wire L=750 mm 2
021 Right Foot Pedal YH-30X 1 054 Tension Cable L=600 mm 1
022 Axle Bush 2 055 Washer Ø6 x 1.5 4
023 Ball Bearing 2 056 Washer Ø10.2 x Ø14 x1.0 2
024 Bolt M8 x 15 S6 6 057 Bolt M5 x 45 1
025 Seat Post 1 058 Axle Sleeve II 7/8” 1
026 Sensor with Wire L=450 mm 1 059 Middle Section Sensor Wire L=800 mm 1
027 Seat Cushion DD-982AT 1 060 Decoration Cover 2
028 Front Stabilizer End Cap Ø50 2 61 Transport Wheel 2
029 Rear Stabilizer End Cap Ø50 2 62 Bolt M6 x 48 2
030 U Bracket 2 63 Nylon Nut M6 2
031 Adjustable Bolt M6 x 36 2 64 Curved Washer Ø16 x Ø8 x 1.5 2
032 Hex Nut M6 2 65 Plastic Sleeve 1
033 Spring Washer Ø6 2
10. PARTS LIST

10253 - 16
11. EXPLODED DRAWING

10253 - 17
12.TROJAN 1YEAR LIMITED WARRANTY
The Manufacturer hereby provides a warranty to the original purchaser of this product (‘the Consumer’) that this
productwillbefreeofmanufacturingdefectsinmaterialsandworkmanshipwhichundernormal,personal,familyor
householduse(commercialuseexpresslyexcluded)manifestthemselveswithinthe1yearfromthedateofpurchase.
EXCLUSIONS
• Thewarrantydoesnotincludeandwillnotbeconstruedtocoverproductsdamagedasaresultofdisaster;misuse;
commercialuse;usenotinaccordancewithinthewritteninstructionsincludedwiththeproduct;abuseand/orany
non-authorizedmodicationoftheproduct,incorrectinstallationoftheproductornormalwearandtear.
WAIVER
The warranty and the obligations of the manufacturer provided herein are in lieu of, and the consumer, waives all other
warranties,guarantees,conditionsorliabilities,expressorimplied,arisingbylaworotherwise,includingwithoutlimitation,
any obligation of the manufacturer in respect of any injury, loss or damage (direct, indirect or consequential) arising out of
the use of, or inability to use this product and whether or not occasioned by the manufacturer’s negligence or any act or
omission on its part.
PROOF OF PURCHASE
Any claim in terms of the warranty must be supported by a proof of purchase or a warranty number. Warranty numbers
can be issued through contacting our call centre on 0861 876526 (0861 Trojan), or online at www.trojanhealth.co.za.
If such proof is not available, then notwithstanding anything to the contrary herein, the service agent’s prevailing charges
for services/repairs including call-out and/or spares will be payable by the consumer upon collection or delivery of the
repaired product.
Duringthewarrantyperiodtheproductmayonlybeservicedand/orrepairedbythemanufacturer’sdulyauthorized
agent(s).

10253 - 18
13.TROJAN REPAIRS PROCEDURE
1. Procedure for repairs
ShouldyouexperienceanyfaultsorbreakdownsonyourTrojanequipment,pleaseadheretothefollowingprocedureto
have the fault rectied speedily and professionally.
• Donotreturntheproducttothestore*
• Call0861 Trojan (0861 876526) to log the faulty product (under warranty or out of warranty)
• Theoperatorortechnicaladvisorwilltryidentifythefault,andwillbookaserviceteamcallout.
• Theserviceteamwillendeavourtoxtheprobleminyourhomeonanagreeddateandtime.
• Onlyifthefaultcannotberepairedintheconvenienceofyourhome,willtheserviceteamtakethe
faultyproductbacktotheservicecentre.
• Itemsrepairedinourservicecentrewillbereturnedtoyourhomeonanagreeddateandtime.
* Note:
Should you live in an outlying area, it may be necessary to return the product to the store nearest to you. Our service operator
will advise you of your repair procedure.
2. Cost of Repairs
2.1 Under warranty
• Anyitemsstillunderwarrantywillberepairedfreeofcharge,aslongasitcomplieswiththetermsandconditions
ofthewarranty.(referto“warranties”sectioninthismanual)
• AnyitemsthatneedtoberepairedthatareNOTcoveredinthewarrantywillbefortheconsumer’sexpense.A
quote for the repair/replacement of these items will be provided to the consumer for approval prior to repairs
being conducted.
2.2 Out of Warranty
• Anyitemsthatneedtoberepairedoncethewarrantyhasexpiredwillbefortheconsumer’sexpenseincluding
the call out fee. A quote for the repair/replacement of these items will be provided to the consumer for approval
prior to repairs being conducted.
www.trojanhealth.co.za
QUALITY GUARANTEE
YEAR
WARRANTY
0861 876526
0861 TROJAN
✆
Manufactured For Masstores (Pty) Ltd.
16 Peltier Drive, Sunninghill, Ext 6, Sandton, 2146,
South Africa.
If this product proves to be faulty during
normal use due to defective materials or
workmanship. Refer to user manual or
website for terms and conditions.
Please call us for any
product queries, after
sales support, repairs
or installations.
#11M11T007
Other manuals for SHAPE 210
1
Table of contents
Other Trojan Bicycle manuals

Trojan
Trojan SHAPE 200 Installation guide

Trojan
Trojan RECUMBENT 400 User manual

Trojan
Trojan ENDURO 320 Installation guide

Trojan
Trojan TOUR 370 User manual

Trojan
Trojan PACE 360 Installation guide

Trojan
Trojan PULSE 500 Installation guide

Trojan
Trojan CADENCE 420 User manual

Trojan
Trojan PACE 370 User manual

Trojan
Trojan PURSUIT 330 User manual

Trojan
Trojan PURSUIT 300 Installation guide