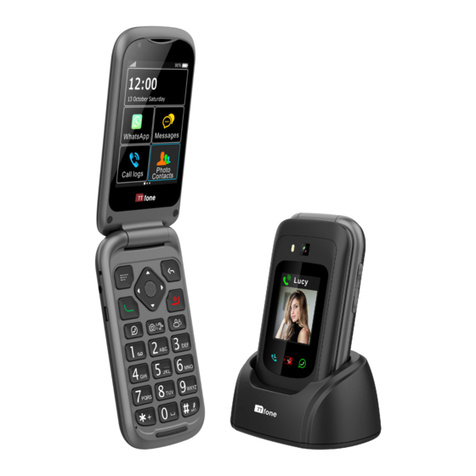
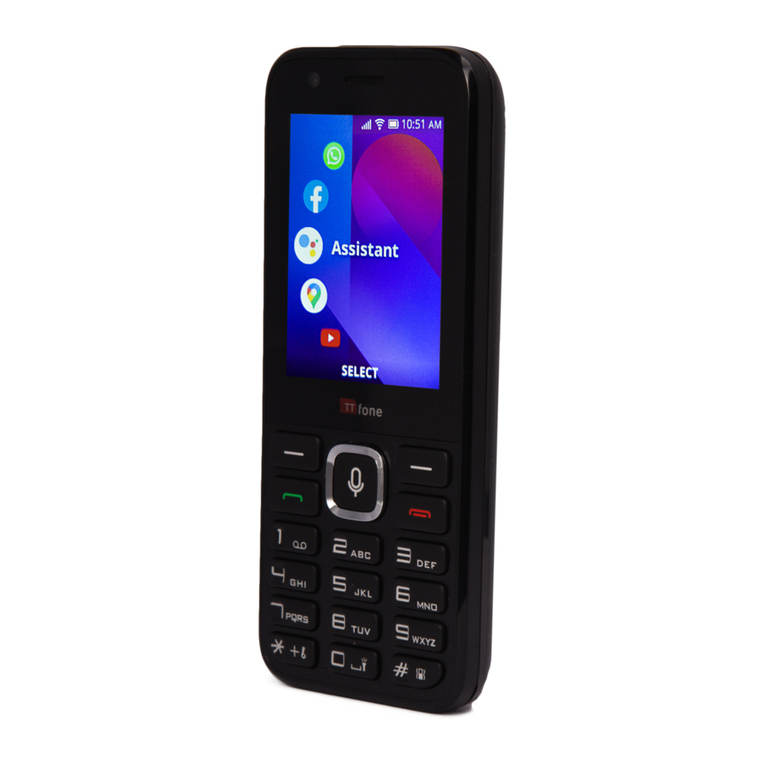
ttfone TITAN TT950 User manual

3
THANK YOU FOR CHOOSING OUR MOBILE PHONE!
Check out our website for video
guides of how to use your phone
www.ttfone.com
We reserve the right to upgrade the soware and
product and/or to make changes to this user
manual without prior noce.
The icons in this user manual may slightly dier from your phone,
depending on the phone you
purchased. All rights reserved.

4
CONTENTS
6
9
Remove the Back Cover .................................................................................9
Install the SIM card and baery .....................................................................9
Turning the Phone On ..................................................................................12
Turning the Phone O ..................................................................................12
Charging the Baery ....................................................................................12
Charging Using the Docking Charger ...........................................................13
Baery Level Indicaon ...............................................................................13
Low Baery Alert .........................................................................................13
Low Baery Nocaon ..............................................................................13
14
Key Funcons ...............................................................................................15
Icons on Screen ............................................................................................17
18
Navigang the menu ....................................................................................18
Making Calls .................................................................................................18
Receiving Calls .............................................................................................18
Changing the Volume during a call ..............................................................18
Mobile Internet and Wi .............................................................................19
Torch ............................................................................................................19
Menu Visibility .............................................................................................19
WhatsApp ..............................................................................................20
Messages ...............................................................................................21
Leers and Numbers Input ..........................................................................21
Call logs ..................................................................................................22

5
Photo Contacts ......................................................................................22
Phonebook ............................................................................................23
Phonebook/Opons Menu ..........................................................................24
Camera ..................................................................................................24
Gallery ...................................................................................................25
Alarm .....................................................................................................26
Voice memos .........................................................................................26
Magnier ...............................................................................................27
Social media...........................................................................................27
Mulmedia ............................................................................................28
SOS ........................................................................................................29
Tools .......................................................................................................30
Sengs ..................................................................................................31
APP ........................................................................................................31
Aptoide ........................................................................................................31
Wireless Update...........................................................................................32
Voicemail ....................................................................................................32
Bluetooth .....................................................................................................33
Low Baery Nocaon ..............................................................................34
35
37
Correct disposal of this product ...................................................................37
38
39
46
53
60

6
SAFETY INSTRUCTIONS
This user manual includes important safety informaon. Please
read below instrucons carefully. It may be dangerous or illegal if
you do not follow these instrucons.
Obey local trac laws and do not use the phone while driving.
Using a cell phone while driving is dangerous and it is illegal in
some areas. Radio frequency (RF) signals may aect improperly
installed or inadequately shielded electronic systems in motor
vehicles such as electronic fuel injecon systems, electronic anskid
(anlock) braking systems, electronic speed control systems, and air
bag systems. For more informaon, check with the manufacturer of
your vehicle for any equipment that has been added. Do not place
objects, including installed or portable wireless equipment in the
area over the air bag or in the air bag deployment area.
Pacemaker manufacturers recommend that a minimum separaon
of 15.3 cenmeters (6 inches) be maintained between a wireless
phone and a pacemaker in order to avoid potenal interference
with the pacemaker.

7
Switch o your device in health care facilies when any regulaons
posted in these areas instruct you to do so. Hospitals or health
care facilies may be using equipment that could be sensive to
external RF energy.
Using your device while ying in aircra is prohibited. Switch o
your device before boarding an aircra. The use of wireless devices
in an aircra may be dangerous to the operaon of the aircra,
disrupt the wireless telephone network, and may be illegal.
Use only the approved accessories and baeries. Please do not try
to use with any product that was not manufactured for use with
this phone. Please be sure the phone has been switched o before
taking out the baery. Please dispose of scrap baeries properly
according to the local regulaons.
Potenally explosive atmospheres include areas where you would
normally be advised to turn o your vehicle engine. Sparks in such
areas could cause an explosion or re resulng in bodily injury or
even death. Switch o the device at refueling points such as near
EN

8
gas pumps at service staons and in any area with a potenally
explosive atmosphere and obey all signs and instrucons. Observe
restricons on the use of radio equipment in fuel depots, storage,
chemical plants or where blasng operaons are in progress.
Please use this phone in its normal intended posion. Do not let
children use the phone without supervision. Your phone contains
small parts such as SIM card, which can be accidentally swallowed
by a child.
This phone is not waterproof. Please do not expose your phone to
wet weather or environment (such as rain, snow, seawater, etc.).

9
GETTING STARTED
Remove the Back Cover
Open the baery cover carefully by sliding down the back cover of
the phone.
Install the SIM card and baery
For availability and informaon about using SIM card services, contact
your SIM card vendor. This may be the service provider, network
operator, or other vendor.
EN

10
Note: The SIM card and its contacts are easily damaged by scratches or
bending, so please be careful when handling, inserng, or removing the
card.
Note: Keep all SIM cards out of the reach of small children.
1. Ensure the phone is switched o and the charger is disconnected
before removing the baery.
2. With the back cover removed,
install the SIM card by locking it
into the metal plate, gently slide
the locking plate to the right to
unlock and le to lock. Ensure
the angled corner of the SIM
card is on the boom le side.
Please note you can only use a
Micro SIM card not a Standard
or Nano SIM. You can also install
a microSD memory card into the
slot next the SIM slot. (this is
oponal)
Micro SD
Micro SD
Micro SD
SIM
SIM
SIM

11
3. Install the baery into the
baery slot, ensuring that the
three metallic stripes on the
baery align with the three
metallic prongs in the baery
slot.
4. Put on the baery cover and
slide up. Ensure the cover is
completely closed and the
matching sound (click) could be
heard.
5. Plug the phone in to charge it fully. You can also use the included dock
charger to charge the phone easily.
Charging port
EN

12
Turning the Phone On
To turn the phone on, press and hold the red key unl the screen
lights up. If you switch on the mobile phone before inserng
the SIM card, it prompts you to insert the SIM card. The mobile
phone checks whether the SIM card is valid automacally aer it is
inserted.
The following prompts appear on the screen in sequence when the
mobile phone is just switching on:
• - If the password of the phone has been
set.
• - If the password of the SIM card has been set.
• - Default to English so just select Start to
confirm.
• - Connect to available wifi network.
Turning the Phone O
To turn the phone o, press and hold the red key unl the screen
turns blank.
Charging the Baery
The baery can be charged when the phone is either on or o.
Please ensure the baery is inserted into the phone before
charging. The charging me is four hours.
To connect the charger:

13
1. Insert the cord into its port on the le hand side of the phone
2. Plug the charger into an electrical outlet.
To disconnect the charger:
1. Unplug the wall charger.
2. Remove the cord from the phone.
Charging Using the Docking Charger
You can also use the included docking charger for
easy charging.
1. Simply plug the charger into the back of the dock
2. Place the phone into the dock to start charging.
3. Remove the phone when charging is complete.
Baery Level Indicaon
EMPTY FULL
Low Baery Alert
The phone will sound an alert when the baery is low and display a
message of low baery on the screen.
Low Baery Nocaon
When the baery level on the phone goes down to 10% the phone
can send reminder texts to up to three set numbers. See page 34.
EN

14
YOUR PHONE
Green Key
WhatsApp shortcut
Red Key
Photo Contacts
shortcut
Camera shortcut
Right so Key
* Key # Key
Le so Key
SOS Buon
CameraTorch
Message
Indicator
Call
Indicator Baery
Indicator
Navigaon
Down Key
Navigaon
Up Key
Number
Keys

15
Key Funcons
Select Press to enter funcons.
Back Press to exit funcons.
Navigaons Use to navigate, middle key to select.
Call Use to make/answer calls
End Use to end calls and exit menus.
Whatsapp Shortcut to WhatsApp messaging.
Camera Shortcut to camera.
Charging port
Torch
Volume
EN

16
Photo
Contacts
Shortcut to speed dial contacts.
Number
Pad
Use to enter numbers/leers
Press twice for Internaonal call symbol (+).
Press and hold for silent shortcut.
Touchscreen The touchpad screen can be used for all funcons.
SOS Press and hold for emergency.
Volume and
Torch
On the side of the phone, increase and decreased
volume.
Hold down up for torch.

17
Icons on Screen
The following icons may be displayed on the screen:
Silent Mode Acvated
Missed Call
Alarm Set
Bluetooth
New SMS Text Message(s)
Good Signal
Invalid Sim or No Signal
SOS/Emergency Buon Enabled
No Sim Card
Voice Memo Set
WLAN
New WhatsApp Message(s)
Memory Card Installed
Airplane Mode Acvated
Mobile Data Acvated
Hotspot Acvated
EN

18
USING THE PHONE
Navigang the menu
The navigaon keys work to help you through the menu home
screen. You can also use the touchscreen if you nd it easier. To
select an opon you can press the middle navigaon key or you can
touch the opon using your nger on the touchscreen.
Making Calls
To Make a call simply type the phone number and press the green
call key. Alternavely you can call someone who has been saved in
your photo contacts by either selecng from the menu or pressing
the photo contacts shortcut buon. Press the green call key once
you have chosen whom you wish to call.
Receiving Calls
To answer an incoming call you can simply open the ip this will
answer the call and you can start speaking to the caller right away.
you can change this in the sengs if you wish to press a
buon to answer the call instead. Simply go to Sengs>Flip Answer.
Changing the Volume during a call
To increase or decrease the volume of the speaker use the volume
buons on the side of the phone. To reach maximum volume press
the Opons or the le so key and select Speaker on the screen to

19
switch on the speaker phone.
Mobile Internet and Wi
To get the most out of all the features of the TT950 including
Whatsapp, Facebook and Youtube you will need a mobile data
plan with your network provider. Please contact your provider
for details. You can also use Wi but that will restrict some of the
APPs from working when you are no longer in the Wi area. To
set Wi go to Sengs/WLAN and choose your network from the
list. Enter the password for your Wi network and click Connect.
Torch
The TT950 comes with a handy torch ashlight feature which you
can switch on by holding down the up volume key on the right side
of the phone. Hold it down again to switch o.
Menu Visibility
You can use this to hide menu items that you do not use on the
home screens by simply going to Sengs/Menu Visibility and
choose the menu items you want to hide. You can easily un-hide
these later by coming back to the same menu.
Please note that if you have hidden certain apps, you will sll be
able to use the app especially if there is a shortcut buon on the
keypad and you will sll receive nocaons as well (for WhatsApp,
Messages and Call logs).
EN

20
The rst me you use Whatsapp it will ask you to agree the terms
and condions and verify your phone number. You may have to
allow the app to use certain features of your phone in order for the
app to work correctly. Navigate around the app with the navigaons
keys or the touchscreen any contacts that are in your phonebook
will show up in the app to either message or call.
Whatsapp can be used for messages, voice notes, voice calls and video
calls by following the opons within the app. The app may periodically
need to be updated when Whatsapp team release updated versions.
Your phone will inform you when these are available please see our
video help page for more informaon about how to update the apps
on your TTfone Titan.
Within WhatsApp you can increase the size of the text by going to
WhatsApp>Sengs>Chats>Font size.
The date and me in the phone must be set correctly before
using Whatsapp.

21
Also known as SMS this is where you will nd text messages sent
to you and where you can send and reply. Click NEW to create a
new message and chose whom you wish to send the message to
using the navigaon keys and touch screen.
Leers and Numbers Input
English leers are set on number keys from "2" to "9". You can
input numbers, upper or lower case leers and punctuaon
symbols. Pressing the # hash key while typing lets you switch
between the dierent types of input modes. Each number key
is set for three or four leers. Press the number key one me to
display the rst leer, two mes to display the second leer, etc.
Numbers can be entered by pressing the # hash key ll 123 seng
is selected. Punctuaon available includes: . , ? ! ' " ( ) @ \ / : - ; + - *
and more press the * star key to access these.
EN

22
This menu will allow you to see your call history including calls
made, calls received and missed calls. Use the navigaon keys and
the touch screen to view, call or delete.
A unique and new feature for TTfone Titan TT950 is photo contacts,
here you can set shortcut contacts and add a photo of the person
you want to call. This makes it easy and simple to make a call
without having to read the names in a small list. Use the navigaon
keys or the touchscreen to select Opons and here you can edit the
contact or import from your exisng contacts. To add the picture
you can use the Camera on the back/front of the phone or you can
import the picture le.
Table of contents
Languages:
Other ttfone Cell Phone manuals

ttfone
ttfone TT100 Comet User manual

ttfone
ttfone TT20 User manual

ttfone
ttfone TT31 Venus 2 User manual

ttfone
ttfone TT970 User manual

ttfone
ttfone Neptune User manual

ttfone
ttfone TT700 User manual

ttfone
ttfone TT130 User manual

ttfone
ttfone TT26 User manual
ttfone
ttfone TT900 User manual
ttfone
ttfone TT140 User manual