TFP296
Page 6 of 8
Installation
TYCO Series TY-FRB 5.6 and 8.0
K-factor Extended Coverage Horizon-
tal Sidewall Sprinklers Quick and Stan-
dard Response (Light Hazard) must
be installed in accordance with this
section.
Do not install any bulb type sprinkler
if the bulb is cracked or there is a loss
of liquid from the bulb. With the sprin-
kler held horizontally, a small air bubble
should be present. The diameter of the
air bubble is approximately 1/16 in.
(1,6 mm).
A leak tight 1/2 inch NPT sprinkler joint
should be obtained with a torque of
7 to 14 lb-ft (9,5 to 19,0 N·m). A leak
tight 3/4 in. NPT sprinkler joint should
be obtained with a torque of 10 to
20 lb-ft (13,4 to 26,8 N·m). Higher levels
of torque may distort the sprinkler inlet
and cause leakage or impairment of the
sprinkler.
Do not attempt to make-up for insuf-
cient adjustment in the escutcheon
plate by under- or over-tightening the
sprinkler. Readjust the position of the
sprinkler tting to suit.
Series TY-FRB EC
Sidewall Sprinkler
The Series TY-FRB EC Sidewall Sprin-
klers must be installed in accordance
with the following instructions:
Step 1. Horizontal sidewall sprinklers
are to be installed with their center-
line perpendicular to the back wall and
parallel to the ceiling. The word “TOP”
on the deector is to face towards the
ceiling.
Step 2. With pipe thread sealant
applied to the pipe threads, hand
tighten the sprinkler into the sprinkler
tting.
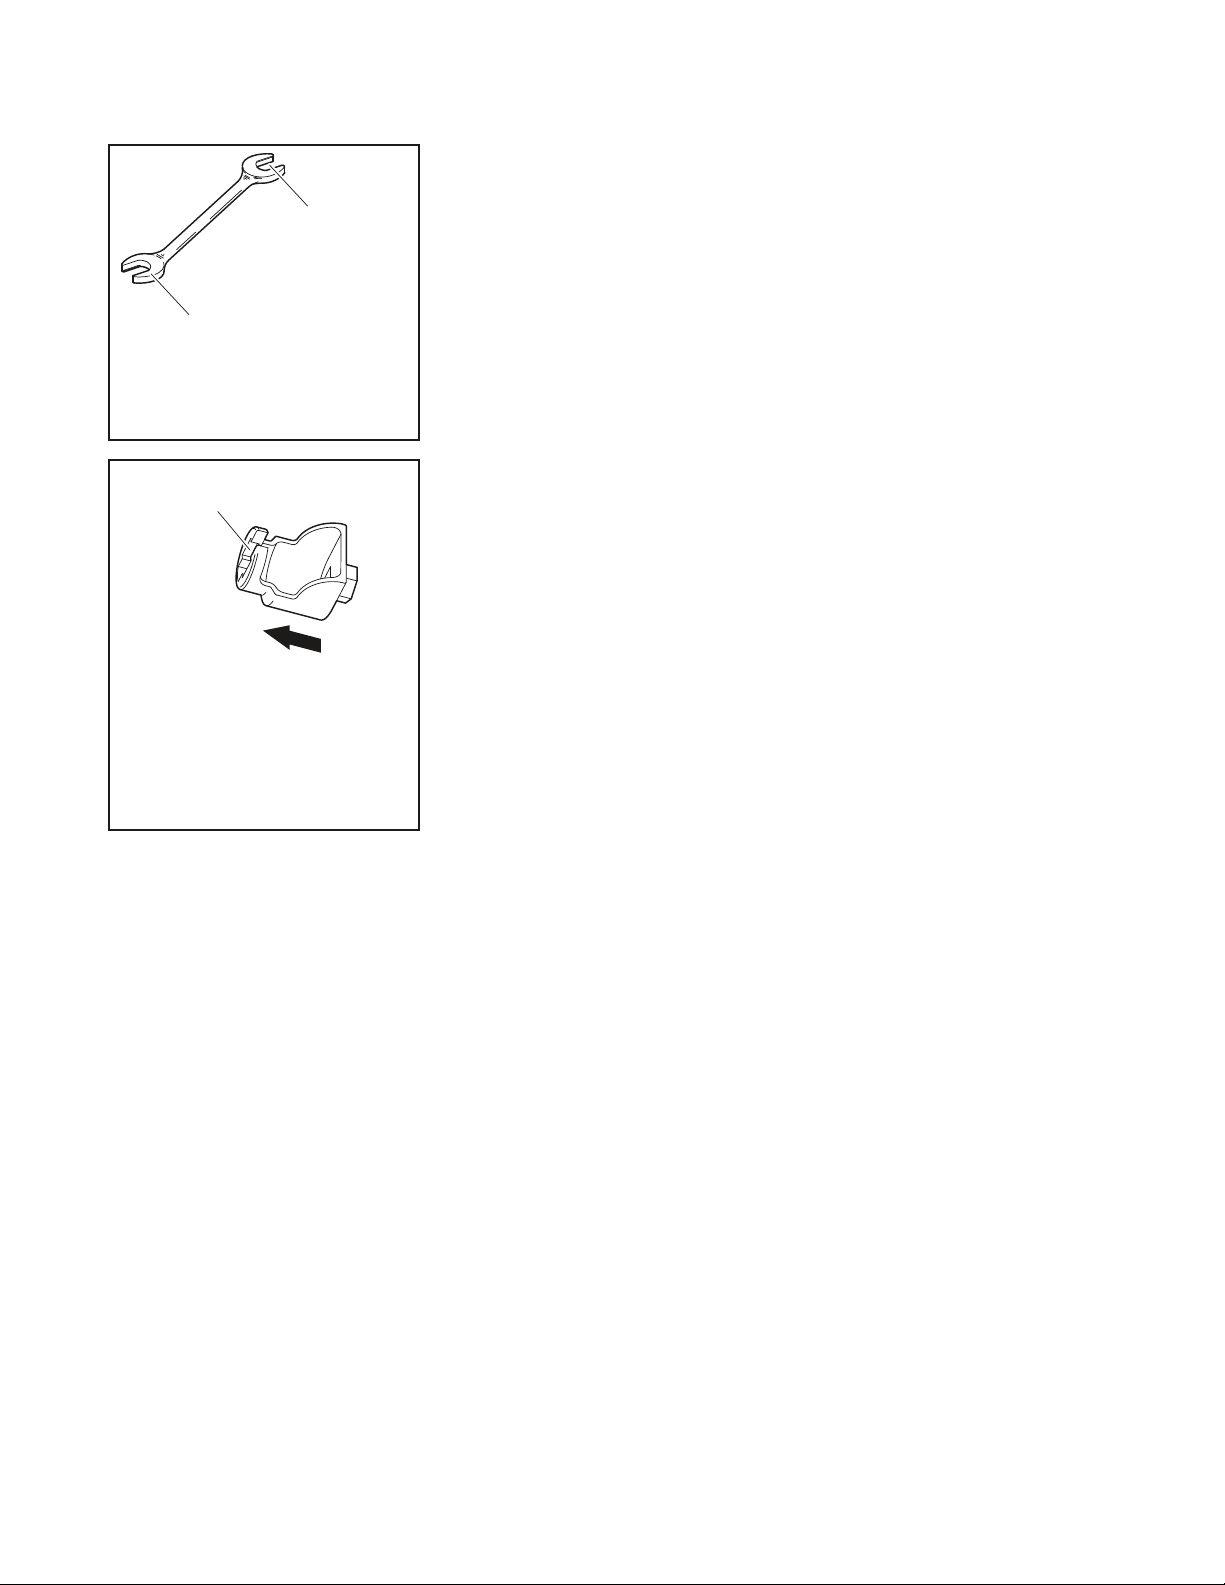
Step 3. Tighten the sprinkler into the
sprinkler tting using only the W-Type
6 Sprinkler Wrench as shown in Figure
3. Apply the W-Type 6 Sprinkler Wrench
is to be applied to the sprinkler wrench
ats as shown in Figures 1 and 2.
Series TY-FRB Recessed EC
Sidewall Sprinkler
The Series TY-FRB Recessed EC
Sidewall Sprinklers must be installed
in accordance with the following
instructions:
Step 1. Horizontal sidewall sprinklers
are to be installed with their center-
line perpendicular to the back wall and
parallel to the ceiling. The word “TOP”
on the deector is to face towards the
ceiling.
Step 2. After installing the Style 10, 20,
30, or 40 Mounting Plate, as applica-
ble, over the sprinkler threads and with
pipe thread sealant applied to the pipe
threads, hand tighten the sprinkler into
the sprinkler tting.
Step 3. Tighten the sprinkler into the
sprinkler tting using only the W-Type
7 Recessed Sprinkler Wrench as
shown in Figure 4. Apply the W-Type
7 Recessed Sprinkler Wrench to the
sprinkler wrench flats as shown in
Figures 1 and 2.
Step 4. After the wall has been installed
or the nish coat has been applied,
slide on the Style 10, 20, 30, or 40.
Closure over the Series TY-FRB Sprin-
kler and push the Closure over the
Mounting Plate until its ange comes
in contact with the wall.
Care and
Maintenance
TYCO Series TY-FRB 5.6 and 8.0
K-factor Extended Coverage Horizon-
tal Sidewall Sprinklers Quick and Stan-
dard Response (Light Hazard) must be
maintained and serviced in accordance
with this section. Before closing a re
protection system main control valve
for maintenance work on the re pro-
tection system that it controls, per-
mission to shut down the affected re
protection system must be obtained
from the proper authorities and all per-
sonnel who may be affected by this
action must be notied.
The owner must assure that the sprin-
klers are not used for hanging of any
objects; otherwise, non-operation in
the event of a re or inadvertent oper-
ation may result.
Absence of an escutcheon, which is
used to cover a clearance hole, may
delay the time to sprinkler operation in
a re situation.
Sprinklers that are found to be leaking
or exhibiting visible signs of corrosion
must be replaced.
Automatic sprinklers must never be
painted, plated, coated or other-
wise altered after leaving the factory.
Modied sprinklers must be replaced.
Sprinklers that have been exposed to
corrosive products of combustion, but
have not operated, should be replaced
if they cannot be completely cleaned
by wiping the sprinkler with a cloth or
by brushing it with a soft bristle brush.
Care must be exercised to avoid
damage to the sprinklers before,
during, and after installation. Sprin-
klers damaged by dropping, striking,
wrench twist/slippage, or the like, must
be replaced. Also, replace any sprinkler
that has a cracked bulb or that has lost
liquid from its bulb. See the Installation
Section.
Frequent visual inspections are rec-
ommended to be initially performed
for corrosion resistant coated sprin-
klers, after the installation has been
completed, to verify the integrity of the
corrosion resistant coating. Thereafter,
annual inspections per NFPA 25 should
sufce; however, instead of inspecting
from the oor level, a random sampling
of close-up visual inspections should
be made, so as to better determine the
exact sprinkler condition and the long
term integrity of the corrosion resistant
coating, as it may be affected by the
corrosive conditions present.
The owner is responsible for the
inspection, testing, and maintenance of
their re protection system and devices
in compliance with this document, as
well as with the applicable standards
of the National Fire Protection Associ-
ation such as NFPA 25, in addition to
the standards of any other authorities
having jurisdiction. Contact the install-
ing contractor or product manufacturer
with any questions. It is recommended
that automatic sprinkler systems be
inspected, tested, and maintained by
a qualied Inspection Service in accor-
dance with local requirements and/or
national codes.
WRENCH RECESS
1/2" NPT MODELS)
WRENCH RECESS
(END "B" USED FOR
RECESS
PUSH WRENCH
IN TO ENSURE
ENGAGEMENT
WITH SPRINKLER
FIGURE 3
W-T YPE 6
SPRINKLER WRENCH
FIGURE 4
W-TYPE 7 RECESSED
SPRINKLER WRENCH