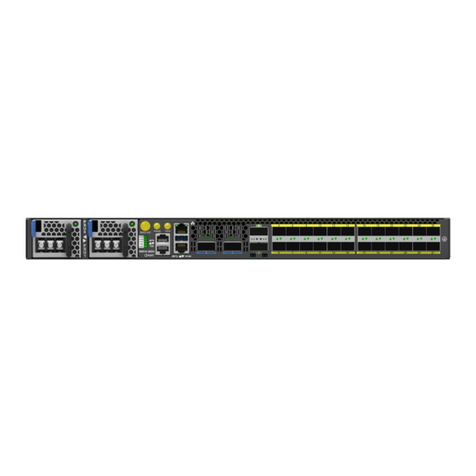
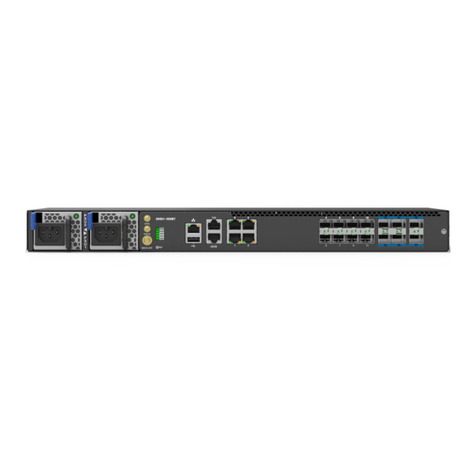
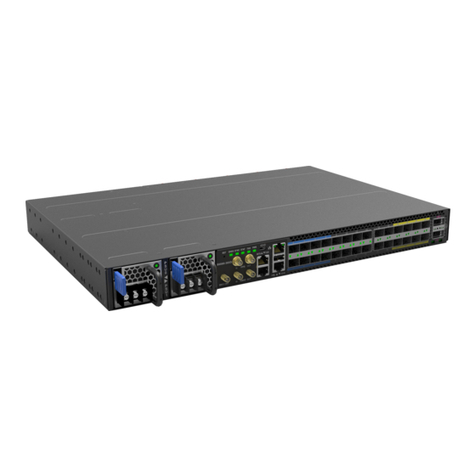
UfiSpace S9502-12SM Manual

Hardware Installation Guide
S9502-12SM
Disaggregated Cell Site
Gateway
R1.0

S9502-12SM Hardware Installation Guide | 1
Table of Contents
1Overview.............................................................................................................................2
2Preparation.........................................................................................................................3
Installation Tools .....................................................................................................................3
Installation Environment Requirements .................................................................................4
Preparation Check List.............................................................................................................5
3Package Contents................................................................................................................6
Accessory List ..........................................................................................................................6
Component Physical Information............................................................................................7
4Identifying Your System.......................................................................................................8
S9502-12SM DC Version Overview .........................................................................................8
S9502-12SM AC Version Overview..........................................................................................9
DC Version PSU Overview .....................................................................................................10
AC Version PSU Overview......................................................................................................10
Port Overview........................................................................................................................10
5Rack Mounting..................................................................................................................12
6Grounding the Router........................................................................................................14
7Connecting Power .............................................................................................................16
DC Version .............................................................................................................................16
AC Version .............................................................................................................................17
8Verifying System Operation...............................................................................................18
Front Panel LED .....................................................................................................................18
Management port LED ..........................................................................................................19
9Initial System Setup...........................................................................................................20
10 Cable Connections.............................................................................................................21
Connecting the USB Extender Cable ...................................................................................21
Connecting a Cable to the ToD Interface ............................................................................21
Connecting the 1PPS Interface............................................................................................22
Connecting the 10MHz Interface ........................................................................................22
Connecting the Transceiver.................................................................................................22
11 Cautions............................................................................................................................24

S9502-12SM Hardware Installation Guide | 2
1Overview
The UfiSpace S9502-12SM is an economic, versatile open networking white box router that
is designed to address the changing needs of backhaul transport requirements as Telecoms
make the transition from legacy technologies towards 5G.
It enables telecommunication service providers to deploy disaggregated, open network
infrastructure to lower costs and rapidly scale existing services for edge computing, mobile
backhaul, and broadband access applications.
The S9502-12SM has a lightweight design without fans and fixed power supplies to reduce
moving parts and enable longer lasting operations with minimal maintenance servicing. It
has a powerful dual-core processor, 1G/10GE high-speed interfaces, and timing features
supporting IEEE 1588v2 and SyncE, which enables service providers to easily migrate from
2G, 3G, 4G BBUs to 5G.
This document describes the hardware installation process for S9502-12SM.

S9502-12SM Hardware Installation Guide | 3
2Preparation
Installation Tools
Screw driver
Crimping tool
14 AWG wire with ring terminal for
DC power supply
6-AWG green-and-yellow ground wire
Wire-stripping tools for
stripping 6-AWG copper wire
•PC with terminal emulation software. Refer to the "Initial System Setup" section for
details.
•Baud rate: 115200 bps
•Data bits: 8
•Parity: None
•Stop bits: 1
•Flow control: None

S9502-12SM Hardware Installation Guide | 4
Installation Environment Requirements
•Power Reserve: The S9502-12SM power supply is available with:
1. DC Version: Fixed, 1+1 active-active -36V to -75V voltage DC power supply or;
2. AC Version: Fixed, 1+1 active-active universal 100-240V AC power supply.
To ensure the active-active feed power design functions properly, a field with dual power
circuit is recommend with a reserve of at least 120 watts on each power circuit.
•Space Clearance: The S9502-12SM width is 17.32 inches (44cm) and shipped with a rack
mount brackets suitable for 19 inch (48.3cm) wide racks. The rack mount brackets can be
installed at the front or in the center of the S9502-12SM. The depth of the S9502-12SM
chassis is 9.84 inches (25cm). The connectors for the power supplies and interfaces will
extend outwards from the front panel by 0.55 inches (1.4cm). To allow adequate airflow and
space for cable connections, it is recommended a 3” (7.62cm) clearance in the front and a 5”
(12.7cm) clearance in the back of the unit. When deploying the S9502-12SM in environments
where the operating temperatures may be between 113OF and 149OF (45OC and 65OC), please
allow a 1.71” (43.5mm, 1RU) space clearance above and below the unit.
Figure 1.
Figure 2.

S9502-12SM Hardware Installation Guide | 5
•
Cooling: The S9502-12SM has a fanless design so the rack or cabinet must have a
minimum of 3.28 feet/second (1 meter/second) airflow in any direction without
recirculation.
Figure 3.
Figure 4.
Preparation Check List
Task
Check
Date
Power voltage and electric current requirement
DC version: -36V~ -75V DC, 4.5-2.5 ampere maximum or;
AC version: 100-240V, 2-1 ampere
Installation spacing requirement
S9502-12SM is 1RU (1.71”/4.35cm) in height, 17.32” (44.0cm) in
width, and 9.84”(25.0cm) in depth without considering cable
routing
Thermal requirement
S9502-12SM working temperature is -40 to 65°C (-40°F to 149°F),
airflow direction is front-to-back and back to front
Installation tools required
#2 Philips Screwdriver, 6-AWG wire stripper, and crimping tool
Accessories required
PC with terminal emulation software, console cable, 14-AWGwire
with ring terminal for power, 6-AWG green-and-yellow ground wire

S9502-12SM Hardware Installation Guide | 6
3Package Contents
Accessory List
Item
Description
Spec. & Dimensions
Qty.
Weight
1
Grounding Lug
1.97” x 0.44” x 0.3”
(#6 AWG)
(50 x 11.1 x 7.5mm)
1 pcs
0.22lbs (10.0g)/pcs
2
Screw Kit
(for Grounding Lug)
2 x Screws M4*L8.0mm
4 x M4 Lock Washers
1 set
0.008lbs (3.8g)/set
3
Rack Mount Bracket
1.98” x 1.69” x 0.79”
(19” width rack)
(50.4 x 43 x 20mm)
2 pcs
0.15lbs (67.2g)/2 pcs
(0.07lbs (33.6g)/pcs)
4
Screw Kit (for Rack
Mount Bracket)
8 x Screws M4.0*L6.5mm
1 set
0.01lbs (6.5g)/set
5
Cable USB2.0 A TYPE
Male to Female
200mm
7.87” (200mm)
1 pcs
0.021lbs (9.7g)/pcs
6
AC power cord
(AC version only)
72.05” (1830mm)
2 pcs
1.04lbs (470g)/2 pcs
(0.52lbs (235g)/pcs)
7
RJ45 to DB9 Female
Cable
94.49”(2400mm)
1 pcs
0.27lbs (123.9g)/pcs

S9502-12SM Hardware Installation Guide | 7
Component Physical Information
Specification
Item
Description
Weight
Total package contents
AC Version: 16.67lbs (7.56kg)
DC Version: 15.32lbs (6.95kg)
Chassis
AC Version: 9.39lbs (4.26kg)
DC Version: 9.08lbs (4.12kg)
Ground lug
0.022lbs (10g)
Rack mount bracket
0.07lbs (33.6g)
AC Power
(AC version only)
0.52lbs (235g) per pcs
USB extension cord
0.021lbs (9.7g)
RJ45 to DB9 Female Cable
0.27lbs (123.9g) per pcs
Screw kit for ground lug
0.008lbs (3.8g) per set
Screw kit for rack mount bracket
0.01lbs (6.5g) per set
Dimension
S9502-12SM (W x D x H)
17.32” x 9.84” x 1.713”
(440 x 250 x 43.5mm)

S9502-12SM Hardware Installation Guide | 8
4Identifying Your System
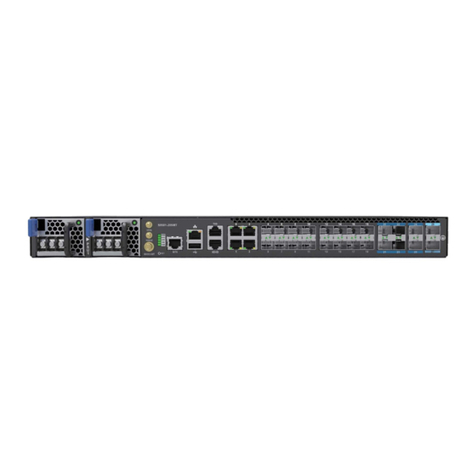
S9502-12SM DC Version Overview
Figure 5.
Figure 6.

S9502-12SM Hardware Installation Guide | 9
S9502-12SM AC Version Overview
Figure 7.
Figure 8.

S9502-12SM Hardware Installation Guide | 10
DC Version PSU Overview
1+1, Fixed power supply unit (PSU).
Figure 9.
AC Version PSU Overview
1+1, Fixed power supply unit (PSU).
Figure 10.
Port Overview
Port ID
Form Factor
Maximum Support Distance
Support Speed
0 ~ 7
SFP
24.85mi (40km)
1GE
8 ~ 11
SFP+
24.85mi (40km)
1GE/10GE
DC Version:
Figure 11.

S9502-12SM Hardware Installation Guide | 11
AC Version:
Figure 12.

S9502-12SM Hardware Installation Guide | 12
5Rack Mounting
It is recommended that installation be done by two trained professionals. One
individual should hold the equipment in position on the rack while the other
secures it in place.
1. Secure the rack mount brackets onto the router.
Align the rack mount brackets with the holes provided on the both sides of the case and
secure the brackets using the 8 M4.0*L6.5mm screws provided with the package.
Figure 13.
2. Secure the router onto the rack posts.
Mark the location on both posts to ensure it is leveled before securing the router onto
the rack using the screws and cage nuts provided with the package (See Figure 14). For rack
post widths wider than 19”, different brackets are available upon request (See Figure 15).
Illustrations are for reference purposes only. Actual cabinet posts may differ.
Figure 14.

S9502-12SM Hardware Installation Guide | 13
Figure 15.

S9502-12SM Hardware Installation Guide | 14
6Grounding the Router
It is recommended that equipment changes be done on a grounded rack system. This will reduce
or prevent the risk of shock hazards, equipment damage, and potential of data corruption.
The router can be grounded from the router's case and/or the power supply units (PSUs). When
grounding the PSUs, ensure that both PSUs are grounded at the same time. A grounding lug and
M4 screws and washers are provided with the package contents, however, the green-and-yellow
grounding wire is not included.
The following instructions are for grounding the router.
This equipment must be grounded. Do not defeat the ground conductor or
operate the equipment without correctly grounding the equipment. If there is any
uncertainty about the integrity of the equipment's grounding, please contact the
electrical inspection authority or a certified electrician.
1. Before grounding the router, ensure that the rack is properly grounded and in compliance with
local regulatory guidelines. Ensure that there is nothing that can obstruct the connection for
grounding and remove any paint or materials that may prevent good grounding contact.
2. Strip the insulation from a size #6 AWG grounding wire (not provided within the package
contents), leaving 0.5” +/-0.02” (12.7mm +/-0.5mm) of exposed grounding wire.
3. Insert the exposed grounding wire all the way into the hole of the grounding lug (provided with
package contents).
4. Using a crimping tool, firmly secure the grounding wire to the grounding lug.
Figure 16.
5. Locate the designated location for securing the grounding lug, which is located on the side of

S9502-12SM Hardware Installation Guide | 15
the router.
6. Using 2 M4 screws and 4 washers (provided with the package contents), firmly lock the
grounding lug to the designated grounding location on the router.
Figure 17.
Figure 18.
Figure 19.

S9502-12SM Hardware Installation Guide | 16
7Connecting Power
DC Version
1. Ensure there is enough power to supply the system.
The maximum system power consumption is 54 watts. The minimum power distribution unit
fuse requirement is 4 amperes based on the lowest voltage of 36 volts.
2. Attach the power cable.
Locate the DC power screw-type terminal block on the DC PSU. Attach the UL 1015, 14 AWG DC
power cable (not provided within the package contents) to the DC inlet connector on the PSU.
Dangerous voltage!
•Must be powered off before removing!
•Verify that all electrical connections are grounded before powering on
•The DC power source must be reliably grounded.
Figure 20.
3. Tighten the screws to the specified torque.
Tighten the screws to a torque value of 6.94lbf.in (+/-10%). If the torque is not enough, the lug
will not be secure and may cause malfunctions. If the torque is too much, the terminal block or
lug may be damaged.
Figure 21.
4. Feed DC power into the system.
The PSU will immediately output 12V and 5VSB to the system when a -48V DC power source is
applied. The PSU has a built in 6 amperes, fast acting fuse based on the PSU maximum capacity,

S9502-12SM Hardware Installation Guide | 17
which will act as a second tier system protection in case the power distribution unit’s fuse is
not functioning.
5. Verify that the power supply is operating.
If connected correctly, when turned on, the system LED will light up with a Green color
designating normal operation.
AC Version
1. Ensure there is enough power to supply the system.
The maximum system power consumption is 54 watts with an input voltage of 100~240V and
0.7 amperes.
2. Attach the power cable.
Plug the power cord into the AC PSU and secure it tightly.
3. Verify that the power supply is operating.
If connected correctly, when turned on, the system LED will light up with a Green color
designating normal operation.
Figure 22.

S9502-12SM Hardware Installation Guide | 18
8Verifying System Operation
Front Panel LED
Verify basic operations by checking the system LEDs located on the front panel. When operating
normally, the PWR and STAT LEDs should all display green.
Figure 23.
LED Condition
Equipment Status
PWR
Off
No power or in shutdown mode.
Solid Green
System power good & BMC heating done
Blinking Green
System power good but BMC is heating
Solid Yellow
System power good but BMC heating fail
Blinking Yellow
System power fail
PSU
Off
Reserved
Solid Green
All PSU work well
Blinking Yellow
One or more PSU(s) fail
SYNC
Off
System timing synchronization is disabled or in free-run mode.
**Note: need NOS to activate this feature
Solid Green
System timing core (1588 and SyncE) is synchronized to external
timing source (ex: GNSS, 1PPS, PTP, BITS, etc)
**Note: need NOS to activate this feature
Blinking Green
System is synchronized in SyncE mode.
**Note: need NOS to activate this feature
Solid Yellow
System timing core is in acquiring state or holdover mode.
Blinking Yellow
System timing synchronization fail.
**Note: need NOS to activate this feature
STAT
Off
System (X86 & BMC) no boot
Solid Green
System boot complete
**Note: need NOS to activate this feature
Blinking Green
System is booting

S9502-12SM Hardware Installation Guide | 19
Management port LED
Left LED Condition
Equipment Status
Off
No link
Green-solid
Link-up at 1G
Green-blinking
TX/RX activity at 1G
Right LED Condition
Equipment Status
Off
No link
Amber-solid
Link-up at 10M/100M
Amber-blinking
TX/RX activity at 10M/100M
Table of contents
Other UfiSpace Gateway manuals

UfiSpace
UfiSpace S9501-28SMT Manual

UfiSpace
UfiSpace S9510-28DC Manual

UfiSpace
UfiSpace S9501-18SMT Manual

UfiSpace
UfiSpace S9500-30XS Manual

UfiSpace
UfiSpace GEE810E-868U User manual

UfiSpace
UfiSpace S9510-30XC Manual

UfiSpace
UfiSpace Outdoor R1 Series User guide

UfiSpace
UfiSpace S9500-22XST Manual

UfiSpace
UfiSpace LoRa GPE810U User manual

UfiSpace
UfiSpace S9502-16SMT Manual
Popular Gateway manuals by other brands

Commend
Commend Audiocodes MP-11 Series Setup guide

Ruckus Wireless
Ruckus Wireless Virtual SmartZone High Scale reference guide

ZyXEL Communications
ZyXEL Communications P-660HN-51 - user guide

NETGEAR
NETGEAR DVG834N datasheet

SerVision
SerVision HVG400 Configuration and management guide

AT&T
AT&T NVG599 Self-installation guide