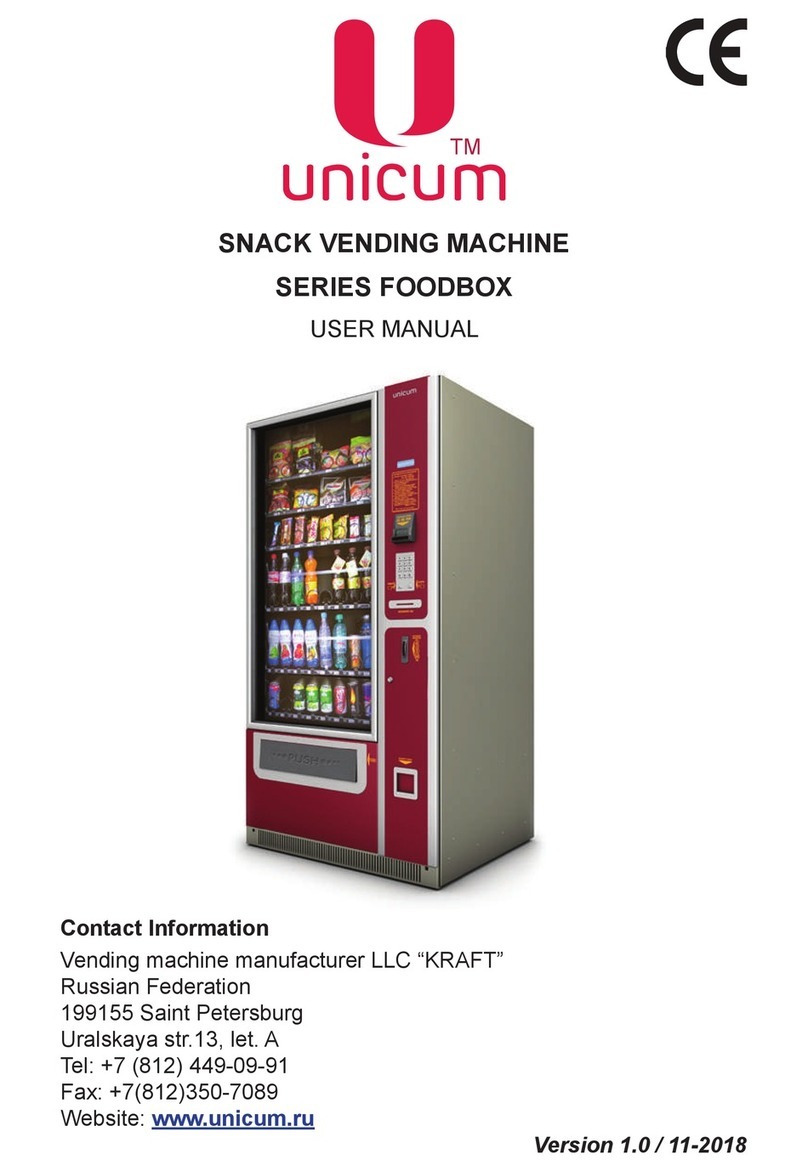
Unicum Foodbox User manual

ТМ
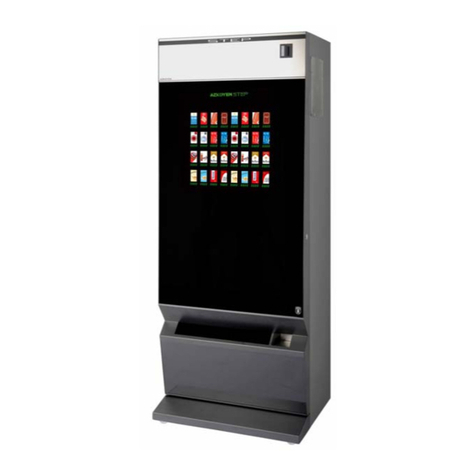
SNACKS VENDING MACHINE
models FOODBOX, FOODBOX LONG
USER MANUAL
Version 3.4 / November 2016

ТМ
FOODBOX / FOODBOX LONG
Version 3.4 / November 2016 Page 2
Change
Version Date Brief description Pages
3.0 03.2015 Document creation
Update of maintenance menu to version 0.49
All
3.1 11.2015 Changing items in the service menu Operator 57
3.2 12.2015 Changing items in the service menu Operator 49,53
3.3 10.2016 Replacing door lock machine model 15,16
3.4 11.2016 Adding an item ‘‘Manufacturer’s warranty’’ 7

ТМ
FOODBOX / FOODBOX LONG
Version 3.4 / November 2016 Page 3
COMPLIANCE DATA
Snack vending machines models FOODBOX and FOODBOX LONG are compliant with the require-
ments of the European Directives and Standards, listed in the following table:
Directive Description
2004/108/CE Electromagnetic compatibility directive
2006/95/CE Low voltage directive
2006/42/CE Machinery Directive
1999/5/CE Artical No 3(1) (b) R&TTE Directive
2011/65/CE Directive of the European parliament and of the Council of 8 june 2011 on the
restriction of the use of certain hazardous substances in electrical and elec-
tronic equipment (RoHS)
Vending machine manufacturer LLC “KRAFT”
Russian Federation
199155 Saint Petersburg
Uralskaya str.13, let. A
Tel: +7 (812) 449-09-91
Fax: +7(812)350-7089
http://www.unicum.ru/en/
Original language - Russian

ТМ
FOODBOX / FOODBOX LONG
Version 3.4 / November 2016 Page 4
CONTENTS
INTRODUCTION ............................................................................................................................ 6
1.0 DESCRIPTION AND FUNCTIONING OF THE MACHINE ....................................................... 8
1.1 Operation of the machine.................................................................................................... 8
1.2 The basic working principle of vending machine................................................................. 9
1.3 Technical features ............................................................................................................... 10
1.4 General information about the machine and its composition .............................................. 11
1.4.1 Product dispensing section......................................................................................... 13
1.4.2 Management compartment......................................................................................... 13
1.4.3 Keyboard .................................................................................................................... 14
1.4.4 RIELDA lock set ......................................................................................................... 15
1.4.5 Refrigeration unit ........................................................................................................ 17
1.4.5.1 Operational modes ......................................................................................... 17
1.4.5.2 Standby .......................................................................................................... 18
1.4.5.3 Defrosting ....................................................................................................... 18
1.4.5.4 Cooling mode ................................................................................................. 18
1.4.5.5 Anti-icing mode............................................................................................... 18
1.4.5.6 Evaporator fan................................................................................................ 19
1.4.6 Main Board ................................................................................................................. 19
1.4.7 Removable LCD board ............................................................................................... 21
1.4.8 Keyboard short cuts.................................................................................................... 21
1.4.9 Bank Note Acceptor (BNA) ......................................................................................... 22
1.4.10 Coin slot with change dispensing function................................................................ 24
1.5 Markings.............................................................................................................................. 25
1.6 Packing................................................................................................................................ 26
2.0 OPERATION ............................................................................................................................. 27
2.1 Visual inspection at the time of receiving the delivery......................................................... 27
2.2 Operational limitations......................................................................................................... 27
2.3 Preparing the product for use.............................................................................................. 29
2.3.1 Safety measures while preparing the product for use ................................................ 29
2.3.2 Installation................................................................................................................... 30
2.4 Using the product ................................................................................................................ 33
2.4.1 Safety measures......................................................................................................... 33
2.4.2 The turning ON procedure.......................................................................................... 33
2.4.3 Turning OFF procedure .............................................................................................. 33
2.4.4 Servicing mode ........................................................................................................... 34
2.4.4.1 Technician’s menu (Service engineer’s menu)............................................... 34
2.4.4.1.1 Menu item [1.1 SYSTEM]................................................................. 34
2.4.4.1.2 Menu item [1.2 PAYMENT SYSTEMS]............................................. 40

ТМ
FOODBOX / FOODBOX LONG
Version 3.4 / November 2016 Page 5
2.4.4.1.3 Menu item [1.3 TIME INTERVALS] .................................................. 46
2.4.4.1.4 Menu item [1.4 CASH REGISTER] .................................................. 47
2.4.4.1.5 Menu item [1.5 MODEM].................................................................. 48
2.4.4.1.6 Menu item [1.6 PRICES] .................................................................. 50
2.4.4.1.7 Menu item [1.7 SNACK 1] ................................................................ 54
2.4.4.1.8 Menu item [1.9 HOT 1 / 1.10 HOT 2] .............................................. 57
2.4.4.1.9 Menu item [1.11 MAINTENANCE].................................................... 57
2.4.4.2 Operator’s menu............................................................................................ 58
2.4.4.2.1 Menu item [2.1 STATUS].................................................................. 58
2.4.4.2.2 Menu item [2.2 CASH]...................................................................... 59
2.4.4.2.3 Menu item [2.3 SNACK 1] ............................................................... 60
2.4.4.2.4 Menu item [2.7 STATISTICS] ........................................................... 61
2.4.4.2.5 Menu item [2.8 DATA] ...................................................................... 63
2.4.4.2.6 Menu item [2.9 PRICES] .................................................................. 64
2.5 Product loading (replenishment) and price tagging............................................................. 65
3.0 WORKING WITH USB FLASH DRIVE .................................................................................... 66
4.0 MAINTENANCE........................................................................................................................ 68
4.1 Safety measures ................................................................................................................. 68
4.2 Dusting and cleaning.......................................................................................................... 68
4.3 Cleaning the Bank Note Acceptor (BNA) ............................................................................ 68
4.4 Cleaning the coin slot.......................................................................................................... 70
4.5 Maintenance of refrigeration unit......................................................................................... 70
4.6Changingshelfconguration............................................................................................... 72
4.6.1 Changing the spirals................................................................................................... 72
4.6.2Changingshelfconguration ...................................................................................... 74
4.6.2.1 Replacing a single cell shelf with a double cell shelf.......................................... 74
4.6.2.2Alterationofshelfcongurationtoconvertsinglespacecellsintol½ width cells ....75
4.6.2.3 Additional accessories........................................................................................ 75
4.7 Adjusting the shelf height .................................................................................................... 77
4.8 Conservation ....................................................................................................................... 77
5.0 RUNNING MAINTENANCE...................................................................................................... 78
6.0 STORAGE ................................................................................................................................ 78
7.0 TRANSPORTATION ................................................................................................................. 78
8.0 UTILIZATION ............................................................................................................................ 79

ТМ
FOODBOX / FOODBOX LONG
Version 3.4 / November 2016 Page 6
INTRODUCTION
General information
This user manual (hereinafter called the “Manual”) covers snack vending machines type FOODBOX
models:
FOODBOX
,
FOODBOX LONG
(hereinafter called the ‘‘Machine’’).
The manual contains basic information about the Machine and its software. It includes the informa-
tion, necessary for preparation for use, use and technical servicing of the Machine, as well as basic infor-
mation about the Machine’s software.
This Manual is for the technical and engineering personnel, who provide technical servicing for the Ma-
chine and are permitted to handle electrical units of similar category.
Breach of the requirements of the current Manual can lead to trauma, device damage and renders the
warranty ineffective. You must read and understand the requirements indicated in the current Manual, be-
fore installing and using the Machine, because it contains important information regarding unit safety, and
servicing and usage instructions.
The knowledge of safety requirements is necessary to instruct the users to properly use the Machine.
The Machine buyer is responsible to make sure that the serving personnel had undergone needed
training and was informed properly and that the instructions of the technical documents were fully ob-
served.
The Machine manufacturer carries no responsibility for damage or loss incurred under the following
circumstances:
- In case of unsanctioned modernization;
- In case of improper installation;
- In case of improper power connection;
- In case of cleaning and servicing contrary to the requirements;
- In case of improper operations or use of Machine’s equipment;
- In case of use of non-genuine spare parts.
The manufacturer of the Machine is in no case liable for any possible losses, which might result from
interruption of business due to Machine breakdown.
Supplementary documentation
To better understand the workings of the Machine with peripheral devices, such as cheque printer, Bank
Note Acceptor (BNA), coin slot and other devices, which are included in the base composition of the Ma-
chine, we recommend that you read the user manuals for these devices and other related documentation.
Terms of use
The Machine software described in this Manual is only for use in Machine models FOODBOX /
FOODBOX LONG. The observation of all the requirements of this Manual is mandatory for the proper
functioning of the software.
This Manual is for a certain version of vending machine software, which is current at the time of printing
of this Manual.
Allpossiblemodications,modernizationsand/oradaptations,whichareeffectedorwillbeexecutedin
future for following sales, do not mandate the manufacturer to conduct similar modernization of software
for the earlier sold Machines, as well as it does not mandate the manufacturer to amend the user docu-
mentation, which is a part of the Machine’s package.
The developer of the Machine and regulatory software have the right to make necessary changes to the
Machine’sstructure,software’sowandinthedocumentationforitsusewithoutnoticetotheuser.

ТМ
FOODBOX / FOODBOX LONG
Version 3.4 / November 2016 Page 7
Safety requirements
It is important and necessary, before the installation and use of the Machine, to read and understand
the instructions contained in this Manual, which address important issues related to Machine’s safety in
use and it’s servicing.
Main types of safety that can pose threat to life:
Threat of electrocution – The Machines operate on dangerous for life ~230V. During servicing
(use)ofMachines,itisnecessarytoobservesafetymeasures,whicharespecicforuseof
electrical units of the given type.
Trauma caused by Machine tipping/falling! The Machines are pretty heavy and large. In case
of improper installation of the Machine it can tip/fall on a person. To avoid this, it is necessary
toobservetheinstallationrequirementsanduseallnecessaryoradditionalttingsforMa-
chine installation.
Gaspoisoningduetoleakageofcoolant!TheMachinehasarefrigerationunitttedinit.This
refrigeration unit works on coolant type R134a. During technical servicing, it is important to
make sure that the refrigeration unit’s joints are not leaking and to observe the requirements
of storage and transportation. In case of leakage of it is necessary to immediately vent the
premises, evacuate everyone from the premises and call the technical personnel.
Hazardous for the Machine! Do not use water jet devices, such as hose pipes, for washing
the Machine.
The Machine installation specialist must know the structure and operating principles of the Machine
very nicely.
ThemanufacturerguaranteesthefunctionaldependabilityandefciencyoftechnicalservicingofMa-
chines only in case of use of genuine spare parts.
Only use food products in the Machine, which are properly packed for use in vending machines.
Vending machines of this type are not meant for outside use.
The Machines must be installed in dry location, where the air temperature does not fall below 1 0Сand
does not exceed 35 0C.
Due to a non-stop improvement process for the Machines their structure can be changed (amended), in
ways not affecting the type of their functioning and such amendments may not be covered in this Manual.
Some descriptions, contained in the current Manual, may not be valid for certain models of bank note
acceptors and other peripheral devices, which are part of the Machine.
When servicing the peripheral devices it is necessary to follow their documentation, which is included
in the user documentation and is supplied with the Machine.
Manufacturer’s warranty
The manufacturer’s warranty during the warranty period covers all vending machine units and as-
semblies, except for malfunctions, arising from non-observance of current maintenance documentation
requirements by the customer or due to any mechanical failures.
The following components are excluded from the manufacturer’s warranty:
• Fuses;
• Control board batteries.

ТМ
FOODBOX / FOODBOX LONG
Version 3.4 / November 2016 Page 8
1.0 DESCRIPTION AND FUNCTIONING OF THE MACHINE
1.1 OPERATION OF THE MACHINE
Snacks vending machines, models FOODBOX and FOODBOX LONG are meant for retail sales and
storage under set temperature of preliminarily packed food items and cold drinks (snacks).
The food items recommended for loading in the Machine:
• Per piece products in air-tight packing, which prevents leakage and spillage (chips, dry breakfast,
meat snacks, rusks, chocolate bars, packed biscuits, nuts, packed croissants etc.);
• Drinks in plastic packing or in tetra-packs of up to 0.5l;
• Drinks in aluminium cans of volume up to 0.33l;
• Drinks in plastic bottles of volumes up to 0.5…0.6l.
The following should not be loaded in the Machine:
• Food or drinks in glass containers;
• Food products packed in materials, which do not guarantee no spillage of contents;
• Food without packing;
• Milk products in soft pack.
The FOODBOX type vending machines are compliant with mandatory requirements, enforced in the
countries, where their use is permitted.
The vending machines are designed and manufactured in accordance with the applicable safety stand-
ards.
ATTENTION! Please follow the manufacturer’s instructions regarding validity of food and its
storage temperature!

ТМ
FOODBOX / FOODBOX LONG
Version 3.4 / November 2016 Page 9
1.2 THE BASIC WORKING PRINCIPLE OF VENDING MACHINE
Most of the time the vending machines are operational and dispense food.
After the selection of the needed product using the keyboard, payment according to the price tag and
afterpressingthebuttontoconrmtheselectedproduct,theproductdispensingprocessstarts.
Algorithm of getting the selected product:
1. Pay the required amount for the selected product, feeding bank note in the Bank Note Acceptor
(BNA) and/or coins in the coin slot;
2. Using the keyboard type the number, corresponding to the cell containing the needed product;
3. Presstheconrmationkeyonthekeyboard(formostofthemodelsthiskeyislabelled“Product”).
4. The electrical motor which moves the spiral in the cell containing the selected product makes a full
turn of 3600droppingtheproductintothedischarge(dispensing)tray(seeg1);
5. Push the door on the dispensing tray and take your purchase;
6. To receive remainder of money press the “Change” button and collect your change from the coin
tray.
3600
Fig. 1 - Working principle

ТМ
FOODBOX / FOODBOX LONG
Version 3.4 / November 2016 Page 10
1.3 TECHNICAL FEATURES
Vending machine initialization time – maximum 5 minutes.
The Machines are powered through single phase mains with 230 V AC at 50 Hz.
The vending machines stay operational within the voltage range of 207 to 253 V Ac.
Maximum power consumption – maximum 700 W.
The Machines’ mass and dimensions without the packing are shown in table 1.
Table 1
Model Mass (kg), max
(without load)
Width (mm),
max
Depth (mm),
max
Height (mm),
max
FOODBOX without add-ons 300 980 820 1850
FOODBOX with add-ons 320 980 820 2250
FOODBOX LONG
without add-ons 370 1300 820 1850
FOODBOX LONG with add-ons 390 1300 820 2250
Themachineisdesignedforoperationatambienttemperaturesbetween10to35°С,relativehumidity
notmorethan80%at25°С,atmosphericpressurefrom84to106,7kPa. Thevendingmachinescom-
ply with IEC 61140:2009 requirements for electrical safety.
The structure of the vending machines provides for safety against the penetration of hard objects and
water, according to code IP30 IEC 60529:2013, into places, which have current. Otherwise the level of
protection is IP20.
Refrigeration unit:
• Cooling gas (Coolant) - R134a;
• Evaporator with fan;
• Variable temperature in the refrigerated area: from plus 40to plus 100 С
Terms of usage:
Covered, air-conditioned room.

ТМ
FOODBOX / FOODBOX LONG
Version 3.4 / November 2016 Page 11
1.4 GENERAL INFORMATION ABOUT THE MACHINE AND ITS COMPOSITION
• FOODBOX-basicconguration;
• FOODBOX LONG -thisisanextendedconguration,whichallowstheplacementofagreaternum-
ber of cells on each shelf;
Figure 2 shows the detailed composition of FOODBOX type of vending machine.
Note: Youcanalwaysndmoredetailedinformationabouttheprice,look,technicaldocumentationand
basic characteristics of all models of FOODBOX on our corporate site: http://www.unicum.ru/en/

ТМ
FOODBOX / FOODBOX LONG
Version 3.4 / November 2016 Page 12
The look of model FOODBOX and FOODBOX LONG of vending machines
Fig. 2a - Model FOODBOX
Fig. 2b - Model FOODBOX LONG
Figure 2 (description):
1 - Product display shelf 2 - LED lighting
3 - Glazed door 4 - Product dispensing tray
5 - Ventilation cover 6 - Support pegs
7 - Management section 8 - Keyboard for quick access to the maintenance menu
9 - Slide-out panel of management section 10 - Liquid Crystal Display (LCD)
11 - Main Board (019-02) 12 - BNA (Bank Note Acceptor)
13 - Keyboard 14 - Coin slot
15 - Lock 16 - Coin slot with built-in change dispensing function
17 - Change dispensing tray 18 - Power supply

ТМ
FOODBOX / FOODBOX LONG
Version 3.4 / November 2016 Page 13
1.4.1 Product dispensing section
The product dispensing section covers most of the space in the Machine. It is closed behind a glass
door, which is blocked by the move able management section panel.
The dimensions of the product dispensing section provide for the installation of up to 6 (optionally up to 8)
shelves with various sized cells:
•Cellsforproductsinwiderpackingwithtwosimultaneouslyrotatingspirals(doublecells);
•Singularcellswithonespiral;
•Extendedcellswithonespiral.
The shelves are structured in such a way that makes it possible to easily move them out or in for quicker
loading/dispensingofgoods.Theshelvesarebehindaglazeddoor(seegure2,position3).Theproducts
aredispensedfromtheshelves,usingthespirals,intothedispensingtray(seegure2position4).
Optical sensors, located near the dispensing tray, register the dispensing of goods. The customer ollects
the product from the tray. The lower part of the vending machine contains the ventilation cover (body)see
gure2,position5).
Thelowerpartofthe productdispensingsectionisttedwiththerefrigerationunit,whichmaintains
the set temperature of goods. The temperature is controlled using the readings of 3 temperature sensors,
whicharelocatedinthelowerpart(sensor№1),upperpart(sensor№2)andontherefrigerationunit’s
evaporator(sensor№3).
1.4.2 Management compartment
The management compartment is a metallic rectangular compartment, insulated from the product-
dispensing
compartment.Themanagementcompartmentisclosedusingamoveablepanel(seegure2,
position 9). The management (control) compartment holds the main controlling circuit board (hereinafter
calledthe“Regulator”)(seegure2,position11).
LocatedintheupperpartofthemoveablepanelistheBNA(seegure2,position12)withtheacceptor
part facing outwards from the Machine. The cash drawer (hereinafter called the “Stacker”) of the BNA in
located inside the vending machine, behind the front part of the BNA.
Located above the BNA is the liquid crystal display (see gure 2, position 10), which displays the
information for customer or the serving personnel, regarding the state of the Machine and the actions that
canbeexecutedusingthekeyboard(seegure2,position13)etc.
The keyboard allows you to enter information for purchases or to enter data while servicing the Machine.
TheRegulator(seegure2,position11)performsthemanagement,datatransferandcontrolofthe
Machine’s functioning.
NOTE: ItispossiblethattheBNA,LCDandkeyboardmightbeplaceddifferentlyinthemodicationsof
the Machine, which have BNA suited for acceptance and dispensing of change.
Located in the lower part of the move able panel of the management section is the coin slot, which also
dispenseschange(seegure2,position14).Thedispensingofchangeandreturnofunrecognizedcoins
isperformedinthecoindispensingtray(seegure2,position17).
Thecoinboxislocatedinthelowerpartofthemanagementcompartment(seegure2,position7).The
coin box is used to collect the coins accepted by the coin slot. The coins gathered in the coin box are not
used for dispensing change. The coin slot disposes of the coins in case when the tube is full, unless the
given type of Machine does not have the tube installed in it.
Themanagementcompartment’spanelandthecompartmentdoorareclosedsuingalock(seegure
2, position 15).
ForbetterbalancingtheMachineisttedwithadjustablepegs(seegure2,position6),whicharein-
stalled.
on the bottom of Machine in the corners.

ТМ
FOODBOX / FOODBOX LONG
Version 3.4 / November 2016 Page 14
TheMachinesarettedwiththreebuttonkeyboard(seegure2,position8),whichprovidesquickac-
cess to the following functions:
• Operator’s menu – access to the operator’s menu;
• Technician’s menu – access to the technician’s menu;
• Test – product dispensing mode, without payment, used to check the Machine.
1.4.3 Keyboard
Thekeyboard(seegure2,position13,gure3)isasingularanti-vandalsuitablemodulewithbuttons.
Depending on the mode of operations the buyer or the serving personnel (operator, technician) enter, by
pressing the buttons, information, which is used by the Regulator to execute certain actions.
123
456
789
А0В
product change
Fig. 3 - The exterior look of the keyboard

ТМ
FOODBOX / FOODBOX LONG
Version 3.4 / November 2016 Page 15
1.4.4 RIELDA lock set
Locks type RIELDA allow you to program the lock to the correct set of keys, what makes it possible to
use one working key for multiple locks RIELDA and easily change the combination of the lock under the
new working key with loss, theft or damage to the old key.
Thelockcomescompletewiththreekeys(see.gure5):
- one master key - GOLDEN key is used only for the lock programming;
- two operating SILVER key - used for opening / closing machine door.
Fig. 4
The lock can be located in two positions:
• operatingposition(‘‘closed’’position-seegure4);
• positionfortheprogramming(the‘‘open’’position-seegure4);
The machine is supplied with pre-programmed lock. To open / close the door machine, insert the oper-
ating SILVER(seegure5)keylockandturnitinthelock90degreestotherighttomarry(seegure4).
WARNING! Programming lock operations must be performed only when the machine
door is open! Otherwise, there will be lock (lock) the door latch.
Control risk
Closed
Open/programming
900Master key Working keys
Fig. 5
To program the lock by other working key (for example, to use one working key for multiple machines
or operating loss of key) you must perform the following operations when you open the door machine:
• Insertthemasterkeylock(‘‘closed’’position-seegure4)inwhichthecastlewasthelasttimethat
programmed or is supplied with a lock (for primary programming). Lock master key in the lock at least
onesecond.Thenturn90degreesinthedirectionofthecontrolkeyrisk(seegure4).
• While holding shutting off device of the door in order to avoid a spontaneous turn of the lock, remove
the master key from the lock and insert them into the new master key , which you want to program
the lock.If you want to program the lock on the same master key, don’t remove the master key from
the lock.
• Thenturnthemasterkey90degreesintheoppositedirection(the‘‘closed’’position-seegure4).

ТМ
FOODBOX / FOODBOX LONG
Version 3.4 / November 2016 Page 16
• Remove the master key from the lock and put it in a safe place. To open / close the lock, use the op-
erating keys, coming complete with a new master key.
WARNING! Return the switch to the programming can only be the master key to which
the lock has been programmed the last time!

ТМ
FOODBOX / FOODBOX LONG
Version 3.4 / November 2016 Page 17
1.4.5 Refrigeration unit
1.4.5.1 Operational modes
In the lower part of the dispensing section installed is the refrigeration unit, which maintains the set
temperature. The temperature is maintained using the readings from 3 temperature sensors:
• Sensor№1–Locatedinthelowerpartofthedispensingcompartment;
• Sensor№2–locatedintheupperpartofthedispensingcompartment;
• Sensor№3–locatedontherefrigerationunit’sevaporator(seegure6).
Note: Recommended temperature settings:
- Minimum temperature 4±20 C
- Maximum temperature – 10±20 C
- Minimum evaporator temperature minus 1±10 C
- Maximum evaporator temperature 5±10 C
1
2
1 - Temperature sensor
2 - Clamping bands
Fig.6-Locationoftemperaturesensor№3
ATTENTION! To maintain proper settings for the refrigeration unit it is important that
temperature sensor 3 should be installed properly. It should be properly clamped on
the second last bend of the evaporator, as shown in gure 7. The sensor must be in-
stalled before the refrigeration unit is tted in the Machine. After the placement of the
refrigeration unit inside the Machine the Sensor’s connector must be connected to the
sensor connection strip.
The refrigeration unit’s operational modes are controlled using the Regulator. The refrigeration unit can
operate in 4 modes:
• Standby
• Defrosting
• Cooling
• Anti-icing

ТМ
FOODBOX / FOODBOX LONG
Version 3.4 / November 2016 Page 18
The refrigeration unit turns ON or OFF in each of the operational modes. It also includes turning ON or
OFF of evaporator fan and regulation of temperature sensors.
When the Machine is turned ON the refrigeration unit switches to standby mode for two minutes, further
working according to the algorithm of the set mode.
Ifat the timeof turning ON ofthe Machine theevaporator’stemperature (sensor№3) is below the
minimum temperature setting, the regulator switches the Machine into DEFROSTING mode. When the
temperature for Sensor 3 reaches minimum or above minimum value the refrigeration unit is switched to
STANDBY mode.
1.4.5.2 Standby
In the Standby mode the refrigeration unit is in fact turned OFF, the evaporator’s fan works as per the
mode set by the user and the sensor readings are obtained.
If the temperature for sensor 1 exceeds the “Max Temperature” settings and the defrosting time is
over – the unit switches to COOLING mode.
1.4.5.3 Defrosting
In the defrosting mode the refrigeration unit is turned OFF, the evaporator’s fan works in accordance
with the user given temperature settings and the temperature sensor readings are noted.
The length of defrosting time depends on the time of defrosting, which is set in the menu item “De-
frosting time”. At the end of the set time interval the refrigeration unit switches to the Standby mode. The
length of Defrosting time also depends on the reading s of Sensor 3 – if the temperature of the evaporator
would be below the minimum temperature settings the unit switches to Defrosting mode, or remains in this
mode, until the evaporator’s temperature would not exceed the minimum temperature value.
1.4.5.4 Cooling mode
In the cooling mode the unit is turned ON, the evaporator fan works in accordance with the user settings
and the temperature sensor readings are noted.
The duration of refrigeration unit’s working cannot exceed 30 minutes. At the end of the given period the
unit turns OFF and after an additional period of two minutes the Regulator switches to STANDBY mode.
If during the working of the refrigeration unit the temperature of sensor 1 drops below the value set in
“Min. Temperature” setting – the refrigeration unit turns OFF and after two minutes switches to STAND-
BY mode.
If the temperature for sensor 3 goes below the value set in “Min. Evaporator Temperature” settings –
the refrigeration unit turns OFF and switches to ANTI ICING mode
1.4.5.5 Anti-icing mode
The Anti-icing mode helps avoid the icing (freezing) of the refrigeration unit. In the given mode the re-
frigeration unit is turned OFF and the temperature readings of the sensor 3 are noted.
When the “Max. Evaporator Temperature” is reached – the Regulator switches to STANDBY mode.
To avoid possible icing, please use the recommended values for temperature settings.

ТМ
FOODBOX / FOODBOX LONG
Version 3.4 / November 2016 Page 19
1.4.5.6 Evaporator fan
The operational mode of the evaporator fan can be changed by the operator by selecting required set-
tings in the maintenance menu (Menu item – “Fan regulation”):
• Always ON (Menu item “Always ON”)
• On only during cooling mode (Menu item 0 “Only during cooling”)
• The fan works during the cooling and defrosting modes (Menu item “Cooling and defrosting
modes”)
When the vending machine is turned ON the evaporator fan turns ON automatically, independent of its
settings. When the refrigeration unit switches to COOLING mode or DEFROSTING mode the fan works
according to the settings selected in the menu item.
1.4.6 Main Board (controller)
The operations of the units and devices of the Machine are controlled using the Regulator.
The vending machine can operate in two modes according to the algorithm of the built-in software –
control software (hereinafter called the “Firmware”):
• Vending mode (Main operational mode)
• Servicing mode (for specialists only)
The main mode, in which the Machine operates – vending mode. In this mode the vending machine
serves the customers (sale, storage and dispensing of products). The Machine switches to this mode right
after it is turned ON.
Servicing mode – this mode is meant for testing the Machine’s equipment, parameter settings for nodes
and devices, regulation of Machine’s parameters and price regulation. The Machine switches to the Ser-
vicing mode upon the pressing and holding for 2-3 seconds of the relevant button (see section 3.4.7).

ТМ
FOODBOX / FOODBOX LONG
Version 3.4 / November 2016 Page 20
Рисунок7
12
3
4 5
67
8
9
10
11
Fig. 7- Main Board (019-02)
1. Button to access the operator’s menu (is used as a Reserve in case the button corresponding button
keyboard shortcut faulty -See section 1.4.8)
2. Button to access the Technician’s menu (is used as a Reserve in case the button corresponding button
keyboard shortcut faulty -See section 1.4.8)
3. USB-drive slot
4. LCD connection slot
5. Modem connector
6. Programming and RS232 connection slot
7. Cash register connection slot (check printer)
8. MDB payment system connection slot
9. Power supply connection slot
10. Dispensing motor slot
11. CAN-BUS connection slot
This manual suits for next models
1
Table of contents
Other Unicum Vending Machine manuals
Popular Vending Machine manuals by other brands

Elektral
Elektral TRU-VEND Maxi-Buffet Instructions for use & maintenance manual

Seaga
Seaga Quick Break Combo QB218 Service manual

AutoCrib
AutoCrib AUTOLOCKER FX Operation manual

FAS International
FAS International 480 ELE manual

Jofemar
Jofemar Coffeemar G-250 Technical manual

Dixie Narco
Dixie Narco 55 Series Technical manual