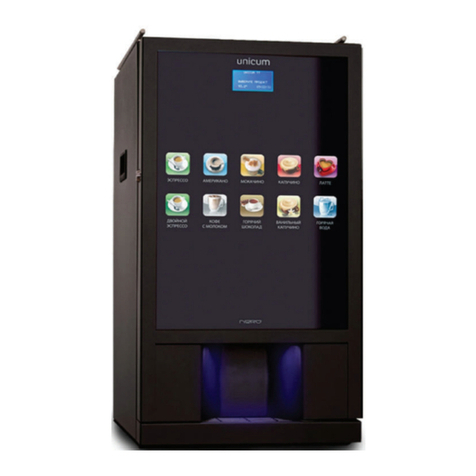
Unicum NERO User manual

DRINKS VENDING MACHINE
models NERO, NERO INSTANT
USER MANUAL
Version 3.2 / December 2017
ТМ
English

User manual for NERO / NERO INSTANT
ТМ
Version 3.1 / August 2015
COMPLIANCE DATA
The drinks vending machines models NERO and NERO INSTANT are compliant with the requirements
of the European Directives and Standards, listed in the following table:
Directive / Standard Description
2004/108/ЕС Electromagnetic compatibility
2006/95/ЕС Low-voltage equipment
The drinks vending machines models NERO and NERO INSTANT are compliant with following require-
ments of the Technical Regulations of the Customs Union, listed in the table:
Code Description
ТR CU 004/2011 Technical Regulation of the Customs Union 004/2011 “About the safety of
low-voltage equipment”
ТR CU 010/2011 Technical Regulation of the Customs Union 010/2011 “About the safety of
machines and equipment”
ТR CU 020/2011 Technical Regulations of the Customs Union 020/2011 “Electromagnetic com-
patibility of machines”
Vending machine manufacturer LLC “KRAFT”
Russian Federation
199155 Saint Petersburg
13 Uralskaya Str., lit.А
Tel: +7(812)449-09-91
Fax: +7(812)350-70-89
www.unicum.ru
Original language - Russian

User manual for NERO / NERO INSTANT
Version 3.2 / December 2017
ТМ
Стр. 1
CONTENTS
1.0 GENERAL INFORMATION................................................................................................. 3
1.1 Introduction ................................................................................................................................3
1.2 Terms of use...............................................................................................................................3
2.0 SAFETY .............................................................................................................................. 4
2.1 Main provision............................................................................................................................4
3.0 PURPOSE........................................................................................................................... 6
3.1 Technical features ......................................................................................................................6
3.2 Conguration options .................................................................................................................7
3.3 Transportation and storage ........................................................................................................7
3.4 Installation of the vending machine............................................................................................8
3.5 The vending machine’s components.........................................................................................10
3.5.1 The vending machine’s exterior.......................................................................................10
3.5.2 Internal components ........................................................................................................12
3.5.3 Open door circuit-breaker................................................................................................14
3.5.4 Containers for ingredients and coffee beans...................................................................14
3.5.5 Waste container...............................................................................................................16
3.5.6 Autonomous operations kit ..............................................................................................16
3.5.7 Connecting the vending machine to water supply mains (optional) ...............................16
3.5.8 Flot chamber, pump and boiler ........................................................................................18
3.5.9 Coffee grinder and dosing apparatus (for NERO) ...........................................................19
3.5.10 Espresso group (for NERO) ..........................................................................................21
3.5.11 Mixers for instant ingredients.........................................................................................23
3.5.12 Main board (controller) ..................................................................................................24
3.5.13 Quick access keypad.....................................................................................................25
3.5.14 Vending machine keypad ..............................................................................................25
3.6 Vending machine’s working principle ........................................................................................26
3.6.1 Placement of the cup.......................................................................................................26
3.6.2 Preparation of drinks .......................................................................................................26
3.6.3 Dispensing the drink ........................................................................................................27
3.7 General technical servicing.......................................................................................................28
3.7.1 Cleaning and disinfection ................................................................................................28
3.7.2 Periodic technical service ................................................................................................28
3.7.3 Flushing the vending machine’s water tract ....................................................................29
3.7.4 Weighing the ingredients ................................................................................................30

User manual for NERO / NERO INSTANT
Page 2Version 3.2 / December 2017
ТМ
4.0 SERVICE MODE ............................................................................................................... 31
4.1 Technician’s menu (Service engineer’s menu) .........................................................................32
4.1.1 Menu item ‘‘ 1.1 SYSTEM’’ ..............................................................................................32
4.1.2 Menu item ‘‘1.2 PAYMENT SYSTEMS’’...........................................................................37
4.1.3 Menu item ‘‘1.3 TIME INTERVALS’’.................................................................................43
4.1.4 Menu item ‘‘1.4 CASH REGISTER’’ ................................................................................43
4.1.5 Menu item ‘‘1.5 MODEM’’ ................................................................................................44
4.1.6 Menu item ‘‘1.6 PRICES’’ ................................................................................................46
4.1.7 Menu item ‘‘1.7 SNACK 1’’ / ‘‘1.8 SNACK 2’’ ...................................................................48
4.1.8 Menu item ‘‘1.9 HOT 1’’ ...................................................................................................49
4.2 Operator’s menu .......................................................................................................................56
4.2.1 Menu item ‘‘2.1 STATUS’’ ................................................................................................56
4.2.2 Menu item ‘‘2.2 CASH’’...................................................................................................57
4.2.3 Menu item ‘‘2.3 SNACK 1’’ & ‘‘2.4 SNACK 2’’..................................................................57
4.2.4 Menu item ‘‘2.5 HOT 1’’ ...................................................................................................58
4.2.5 Menu item ‘‘2.7 STATISTICS’’..........................................................................................60
4.2.6 Menu item ‘‘2.8 DATA’’.....................................................................................................62
4.2.7 Menu item ‘‘2.9 PRICES’’ ................................................................................................63
5.0 WORKING WITH USB FLASH DRIVE ............................................................................. 64
6.0 RECOMMENDED DRINK CONFIGURATIONS................................................................. 66
7.0 AIR FINE TUNING VALVE ADJUSTMENT....................................................................... 67

User manual for NERO / NERO INSTANT
Page 3Version 3.2 / December 2017
ТМ
1.0 GENERAL INFORMATION
1.1 Introduction
This user manual (hereinafter called the “Manual”) covers drinks vending machines models:
NERO, NERO INSTANT (hereinafter called the ‘‘Machine’’).
The manual contains basic information about the Machine and its software. It includes the information,
necessary for preparation for use, use and technical servicing of the Machine, as well as basic information
about the Machine’s software.
This manual is meant for engineering-technical personnel, who perform technical servicing of vending
machines and are qualied to work with similar electronic and electrical equipment.
This Manual is for the technical and engineering personnel, who provide technical servicing for the Ma-
chine and are permitted to handle electrical units of similar category.
Breach of the requirements of the current Manual can lead to trauma, device damage and renders the
warranty ineffective. You must read and understand the requirements indicated in the current Manual, be-
fore installing and using the Machine, because it contains important information regarding unit safety, and
servicing and usage instructions.
The knowledge of safety requirements is necessary to instruct the users to properly use the Machine.
The Machine buyer is responsible to make sure that the serving personnel had undergone needed
training and was informed properly and that the instructions of the technical documents were fully ob-
served.
The Machine manufacturer carries no responsibility for damage or loss incurred under the following
circumstances:
• In case of unsanctioned modernization;
• In case of improper installation;
• In case of improper connection to the power and / or water supply;
• In case of cleaning and servicing contrary to the requirements;
• In case of improper operations or use of Machine’s equipment;
• In case of use of non-genuine spare parts.
• rejection of the use of food products, designed specically for vending machines.
The manufacturer of the Machine is in no case liable for any possible losses, which might result from
interruption of business due to Machine breakdown.
According to the client’s requirements the vending machine can have additional (optional) functions.
These vending machine should only be used for making and selling drinks!
1.2 Terms of use
This Manual is for a certain version of vending machine software, which is current at the time of printing
of this Manual.
All possible modications, modernizations and/or adaptations, which are effected or will be executed in
future for following sales, do not mandate the manufacturer to conduct similar modernization of software
for the earlier sold Machines, as well as it does not mandate the manufacturer to amend the user docu-
mentation, which is a part of the Machine’s package.
The developer of the Machine and regulatory software have the right to make necessary changes to the
Machine’s structure, software’s ow and in the documentation for its use without notice to the user.

User manual for NERO / NERO INSTANT
Page 4Version 3.2 / December 2017
ТМ
ATTENTION: Do not touch the power plug with wet hands and do not insert it into the socket
if the plug is wet!
2.0 SAFETY
2.1 Main provision
• Before the installation and usage of the vending machine, it is necessary to carefully read and
understand all the instructions, contained in the current manual, because they embody important
information regarding safety of the unit, its operations and technical servicing.
• The vending machines should not be subjected to negative temperatures during operations and
storage.
• These vending machines should not be installed in open air.
• The vending machines should be installed and if necessary repaired only by qualied personnel,
who have undergone training to handle the machines and their constituent parts and are procient
in safety procedures. The vending machines should be connected to water supply and power sup-
ply in conformity with the applicable rules (standards) of the country in which they are installed.
• The vending machines should be installed on an even surface, where the angle of vertical inclina-
tion should be less than 2O. You can use the adjustable pegs of the machine to achieve desired
vertical inclination. These pegs are included in the machine’s base conguration.
• The vending machines should be connected only to protected power supply with earthing.
• The power plug of the machine should be approachable (accessible) after the machine has been
installed.
• If the power cable would be damaged, it should immediately be replaced. It is strictly PROHIBITED
to use the vending machine with damaged power cable!
• The vending machines should be cleaned, lled and installed only by qualied personnel.
• It is strictly prohibited to clean the vending machine using a water jet and the machines should not
be installed in locations, where water jets are used (for example in the kitchens).
• You should always use genuine spare parts.
ATTENTION: Please check the quality of drinking water used in the vending machine. The
vending machine must be connected to the water supply according to the instructions issued
by the competent authorities and in accordance with local rules!
Please make sure that the voltage in the power mains is compliant with the permissible value
indicated on the machine’s specication plate!
Please wash the vending machine before putting it to use!

User manual for NERO / NERO INSTANT
Page 5Version 3.2 / December 2017
ТМ
ATTENTION: This vending machine only be used inside covered premises!
• Regularly clean the vending machine, to adhere to the hygienic safety rules.
• Please only use washing materials, permitted for use in food preparation areas, to clean the
vending machine’s body.
• Make sure that the vending machine is OFF before starting technical service or repair.
• It is strictly prohibited to cover the vending machine with fabric or any other such material.
• Each vending machine is identied by the serial number inscribed on the specication plate,
which is tted on the rear wall of the machine. The specication plates carries all the technical
details of the machine.

User manual for NERO / NERO INSTANT
Page 6Version 3.2 / December 2017
ТМ
3.0 PURPOSE
The NERO and NERO INSTANT drinks vending machines are designed for the preparation and sales of:
• Hot drinks using coffee beans (Model NERO);
• Hot drinks using instant coffee (Model NERO INSTANT);
• Hot drinks made of instant ingredients;
• Hot water.
The ingredients that you use for making the drinks, must be declared by the ingredient manufacturer as
t for use in open containers.
3.1 Technical features
Parameters NERO NERO INSTANT
Height (А), maximum 800 mm 800 mm
Width (В), maximum 385 mm 385 mm
Depth (С), maximum 495 mm 495 mm
Weight, maximum 55 kg 55 kg
Voltage 220 - 230 V 220 - 230
Power frequency 50 Hz 50 Hz
Power consumption (max) 1800 W 1800 W
Consumption of electricity per day,
when surrounding air temperature
is 220C and making 40 drinks (each
100ml), maximum permissible (*)
3 kWh 3 kWh
External water supply
Water pressure, minimum 0.5 bar (0.05 MPa) 0.5 bar (0.05 MPa)
Water pressure, maximum 8.5 bar (0.85 MPa) 8.5 bar (0.85 MPa)
Connection to water supply line G 3/4’’ G 3/4’’
Internal water supply
Hardness 0.9 - 1.0 mgeq/l 0.9 - 1.0 mgeq/l
Calcium 18 - 20 mg/l 18 - 20 mg/l
Number of containers
Coffee bean container 1 pcs -
Instant ingredients container 3 pcs 4 pcs
Volume of containers (**)
Coffee beans 1,0 kg -
Instant coffee - 0,7 kg
Powdered milk
/ Granulated milk
1,5 / 0,75 kg 2,2 / 1,1 kg
Chocolate 1,5 kg 2,4 kg
Vanilla 1,0 kg 2,4 kg
*) The estimated power consumption indicators are average numbers and are shown only as reference points;
**) The quantity of ingredients can be different from the one shown depending on the specic weight of the ingredient.

User manual for NERO / NERO INSTANT
Page 7Version 3.2 / December 2017
ТМ
3.3 Transportation and storage
All transportation and storage procedures should be executed very carefully to avoid damaging the
vending machine. All the operations related to lifting and displacement of the vending machine should be
executed using a fork lift. The forks of the lift should be slipped under the vending machine at the spots
indicated on the machine’s packing.
The following should be observed during the vending machine’s transportation:
• The vending machine should be transported only in the original packing;
• The vending machine should be transported in strictly vertical position;
• The vending machine should not be tilted and turned or ipped over;
• It is not permissible to shake the machine or its packing;
• It is not permitted to lift the vending machine, pushing on the side panels;
• It is not permissible to lift the vending machine using ropes, cables etc.
The vending machine should be stored in dry premises where air temperature is in the range of 1 to
40OC and level of humidity is no more than 80%.
It is prohibited to stack the vending machines on top of each other in storage. The vending machines
should be stored in vertical position in original packing.
3.2Congurationoptions
NERO NERO INSTANT

User manual for NERO / NERO INSTANT
Page 8Version 3.2 / December 2017
ТМ
3.4 Installation of the vending machine
Figure 1 - Machine in the package
The vending machine’s inner components are all wrapped in packing.
Before turning the machine ON please make sure that all of the packing
materials have been removed.
For NERO: Before putting to use please remove the transportation
bracket, which holds the coffee grinder unit, by loosening the not, shown
in gure 2.
The ROSSO and ROSSO INSTANT vending machines cannot be
installed in open air. The vending machines should be installed in dry
premises with temperatures ranging from 100to 300 C.
The vending machine can be installed on a table or any other suitable
stand (it is recommended to use NERO or NERO with payment systems
stand to install the machine). If needed please level the vending ma-
chine with the help of the adjustable pegs.
The vending machine should be installed at a distance of 5cm from
the wall to provide for sufcient ventilation.
It is prohibited to cover the vending machine with fabric or any other
such material.
The vending machine must not have a vertical tilt of more than 20.
Remove machine packing, take the master-key, program the ma-
chine’s lock with it, then open the door with the functional key (the key is
xed with a plastic band to the cover of the machine by the cup retainer)
– (see section 3.5.15).
ATTENTION: If the transportation bracket would not be removed before the start of opera-
tions, this can cause excessive vibration in machine parts, which can cause premature break-
downs and failures.
Figure 2 - Removal of the transportation bracket
After removing the transportation bracket, install the bafe plate in
the NERO vending machine (se gure 4 position 1), which comes with
the package.
To install the bafe plate, hang it on the bolt (see gure 3 position 1),
which is situated on the left inside wall of the vending machine’s body
under the espresso group.
1
Figure 3 - Installation of bafe plate

User manual for NERO / NERO INSTANT
Page 9Version 3.2 / December 2017
ТМ
The vending machine must be installed and serviced only by qualied and authorized personnel, who
have undergone training to operate and service the given class of machines.
The packing materials must be utilized in accordance with the applicable laws related to environmental
safety.
The components and parts, included in the ma-
chine’s package are packed in the waste contain-
ers, inside the machine (see gure 4).
1
2
3
4
5
6
7
Figure 4 - Components
Figure 4 (description):
1 - Bafe plate (for NERO);
2 - Power cable;
3 - Passport vending machine;
4 - Coffee bean container (for NERO);
5 - Silicone tube with terminal (nozzle);
6 - Service key;
7 - Set of extra (spare) fuses.

User manual for NERO / NERO INSTANT
Page 10Version 3.2 / December 2017
ТМ
3.5 The vending machine’s components
The NERO and NERO INSTANT vending machines come in the shape of rectangular metallic boxes
of the following dimensions (max):
- Height 800 mm (for NERO);
- Height 840 mm (for NERO: with installed coffee bean container);
- Height 740 mm (for NERO INSTANT: with cup retainer);
- Breadth 385 mm;
- Depth 480 mm.
The body houses various functional units of the vending machine. There is the following equipment
installed on the inner side of the door that closes the vending machine:
- Main board (controller);
- Sensor keypad board (circuit);
- Modem (optional);
- Smart Card reader (optional);
- Display.
All the equipment installed on the inner side of the door is protected by metallic casing.
3.5.1 The vending machine’s exterior
ExteriorlookforNERO(seegure5)
1. Coffee bean container with lock;
2. Machine door lock;
3. Cup retainer;
4. Graphic display;
5. Drink selection sensor keypad;
6. Drink disposal ow;
7. Tray
Figure 5 - Exterior look for NERO
1
2
3
4
5
6
7
ExteriorlookNEROINSTANT(seegure6)
1. Cup retainer;
2. Machine door lock;
3. Graphic display;
4. Drink selection sensor keypad;
5. Drink disposal tray;
6. Tray
Figure 6 - Exterior look for NERO INSTANT
1
2
3
4
5
6

User manual for NERO / NERO INSTANT
Page 11Version 3.2 / December 2017
ТМ
The following components are located on the rear outer wall of the vending machine.
Figure 7 - Switching unit Figure 8 - Water inlets
Power unit with switch, fuse holder and power cable connector.
The water inlets are located underneath:
1 - Valve nozzle for connection to water supply line;
2 - Pipe for water supply from the canisters/bottles.
12

User manual for NERO / NERO INSTANT
Page 12Version 3.2 / December 2017
ТМ
3.5.2 Internal components
a. Body
Following are installed inside the body: drinks preparation units, ingredients’ containers, waste contain-
ers. The vending machine’s body is divided into two sections: front and rear.
It is sufcient to open the machine’s door to access the front section (see gure 9a, b).
To access the rear section of the machine it is necessary to remove the machine’s rear panel (see gure 10).
Figure 9а (description):
1. Coffee grinder and dosing mechanism;
2. Espresso group;
3. Waste containers;
4. Containers for powdered ingredients;
5. Mixers;
6. Tubes for the supply of solved ingredients, coffee and hot
water to the cup;
Figure 9а - Internal layout of NERO
Figure 9b (description):
1. Powdered ingredients containers;
2. Mixers;
3. Tubes for the supply of solved ingredients and hot water
to the cup;
4. Waste containers.
1
2
3
4
5
6
1
2
3
4
Figure 9b - Internal layout of NERO INSTANT

User manual for NERO / NERO INSTANT
Page 13Version 3.2 / December 2017
ТМ
b. Door
The machine’s door is tted, on the outer side, with sen-
sor keypad for selection of drinks and drink disposal sec-
tion.
The regulatory (control) units are located on the inner
side of the door: regulator board (controller), sensor key-
pad board, modem (optional), smart card reader (optional),
quick access keypad, which are covered by a metallic cas-
ing.
Figure 11 (description):
1. Display;
2. Main board (controller);
3. Modem antenna (optional);
4. Quick access keypad;
5. Board touch pad selection of drinks;
6. Modem (optional).
1
2
3
4
5
6
7
8
9
Figure 10 (description):
1. Power board;
2. Fan;
3. Boiler pump;
4. Pump for supply of water from the canister/bottle;
5. Valve for connection to the water supply system;
6. Toroidal-core transformer;
7. Switching unit;
8. Boiler;
9. Hot water valve.
Figure 10 - Internal layout of vending machines
1
2
3
4
5
6
Figure 11 - Internal layout of the door

User manual for NERO / NERO INSTANT
Page 14Version 3.2 / December 2017
ТМ
3.5.3 Open door circuit-breaker
In case of opening the vending machine’s door, a special circuit-breaker cuts off the power, which runs
the devices and units inside the machine. All checking, loading and cleaning operations must be performed
safely. Any operations with open door, should only be performed by qualied personnel only.
Figure 12а Figure 12b Figure 12c
To turn ON the power, with the door open,
it is necessary to insert the special key (see
gures 12 a, b, c) into the breaker and turn it
through 900 until it is xed. Please make sure
to remove this key before closing the door.
3.5.4 Containers for ingredients and coffee beans
For NERO:
The NERO vending machine comes with three types of containers for ingredient storage: containers for
coffee beans (see gure 13), containers for ingredients such as “Chocolate” and “Milk” (see gure 14a) and
container for “Vanilla” (see gure 14b).
Figure 13 Figure 14а Figure 14b
For NERO INSTANT:
The NERO INSTANT vending machine comes with a single type of container for drinks preparation:
ingredients containers (see gure 15).
Figure 15

User manual for NERO / NERO INSTANT
Page 15Version 3.2 / December 2017
ТМ
To install and remove the coffee bean container (for NERO):
With open vending machine door, pull the container’s clamp (1),
which is located in the left upper corner of the machine (see gure
16) and holding the clamp remove the container.
The container can be installed in the reverse order of actions.
Filling the coffee beans into the container (for NERO):
To ll the container remove the lid (see gure 13) from top of the container and pour in the coffee beans.
1
Filling the instant ingredients containers:
• Open the vending machine’s door;
• Lift the top lid of the machine;
• Lift the lid of the required container;
• Fill in the ingredient.
Figure 16 - Clamps of coffee bean container
Figure 17
If necessary (for convenience in lling) the containers can be re-
moved from the vending machine. For the purpose:
• Turn the container’s “nose” upwards;
• Slightly raise the container using the “nose” in such a way that
the container’s base grip would be removed from the body;
• Pull out the container.
The ingredient is supplied from the container using a reducer-mo-
tor, which is installed behind the container. The reducer-motor sup-
plies the required dose of ingredient into the mixer.
The quantity of the ingredient for each drink is set in the drinks
recipe menu. The quantity is equal to the duration of rotation of the
motor multiplied by 100.
ATTENTION: After lling the container, make sure that there are no foreign objects in the
container.
Make sure that the ingredient did not get compressed during the lling process.
Remove all remnants or spill-overs of ingredient from the outer surfaces of the container or
the machine’s parts.

User manual for NERO / NERO INSTANT
Page 16Version 3.2 / December 2017
ТМ
3.5.5 Waste container
The liquid waste container is situated in the lower left part of the machine. You must drop the oat into
this container. The given oat acts as the sensor indicating the container’s level of lling.
Except for the liquid waste, which is produced during the preparation of drinks, the process of making
coffee from coffee beans, we also have hard waste in the shape of pressed ground coffee, which the es-
presso group throws out into the waste container, situated in the lower left side of the machine. The quan-
tity of waste is monitored programmatically.
When the quantity of drinks made of ground coffee reaches 150, such drinks are taken ofine and are
no more available. To reset the waste counter, you must remove the container from the working machine
for at least 10 seconds, remove the waste and replace the empty container into the machine.
3.5.6 Autonomous operations kit
In its standard conguration the vending machine is congured to use water from the canister/bottle,
which is installed near the machine.
For water supply connection we have a silicone water pipe, which comes with the package (see gure
4 position 5), which from one end is connected to water inlet 2 (see gure 8) and from the other end of the
tube is immersed into the source of water (canister/bottle).
3.5.7Connectingthevendingmachinetowatersupplymains(optional)
The vending machines can also be connected directly to the water supply mains, taking into consider-
ation the applicable laws of the country of use. The inlet nozzle for connection to the water supply mains
is situated on the rear panel of the vending machine (see gure 8 position 1) and comprises of a threaded
connector of diameter ¾”. The machine is connected using a pipe, which can handle the pressure of the
water supply and which is suitable for use with food products (minimum inner diameter of 6mm).
The water pressure in the supply line must be in the range of 0.05 to 0.85 MPa (0.5 – 8.5 bar).
Before connecting the vending machine to the water supply mains:
• Set the switch on the switch board of the machine to position “O” / “OFF”;
• Unplug the machine by removing the plug from the power socket;
• Remove the vending machine’s rear panel by removing the screws;
• Disconnect the pump connectors with blue and white wires (see gure 18a position 1, 2);
• Disconnect the silicone tube (see gure 18a, position 3);
• Connect the silicone tube and power connectors to the electric valve (see gure 18b).
1
2
3
1- White wire
2 - Blue wire
3 - Silicone tube
Figure 18а - Disconnection of pump Figure 18b - Connecting the electrical valve

User manual for NERO / NERO INSTANT
Page 17Version 3.2 / December 2017
ТМ
ATTENTION: The machine must be connected to the water supply mains, only by a qualied
technician!
It is recommended to place the water supply tap (valve) outside the machine’s body at an easily acces-
sible spot.
After connecting the water supply mains replace the machine’s rear panel, connect the vending ma-
chine to the power supply and switch the button on the switch board to the “I” / “ON” position.
After that change the vending machine’s congurations (settings). For the purpose access the service
menu of the machine (see section 3.0) and select menu item “1.9.9 Tank” and reset it to “NO”. The machine
will now switch to operation using water supply mains.
To switch back to the use of water from canister/bottle, reset the value of menu item “1.9.9 Tank” to
“YES”.
ATTENTION: Any traces of leakage of water show incorrect connection (loose connection) of
water supply or improper supply pressure, beyond the pressure range indicated for the vend-
ing machine!
This manual suits for next models
1
Table of contents
Other Unicum Vending Machine manuals
Popular Vending Machine manuals by other brands

SCRUB TRAK
SCRUB TRAK VendNet 3599 Programming manual

Maytag
Maytag Skybox MBV1976AAP Service

Crane
Crane Snack Eenter I Troubleshooting & Repair Guide

Westomatic
Westomatic Elevate quick start guide

Crane Merchandising Systems
Crane Merchandising Systems Genesis Technical manual

SandenVendo
SandenVendo Snack Safety Point User and maintenance manual

Automatic Products
Automatic Products Showcase 748 operating manual

Anvil
Anvil POPCORN MACHINE 8oz Installation, Operation and Care Manual

Cafection
Cafection EMBLEM Service & installation manual

Vendo
Vendo VARI-PAK 450 manual

N&W Global Vending
N&W Global Vending KORI NTO FB Service manual

Necta
Necta Rondo Programming manual