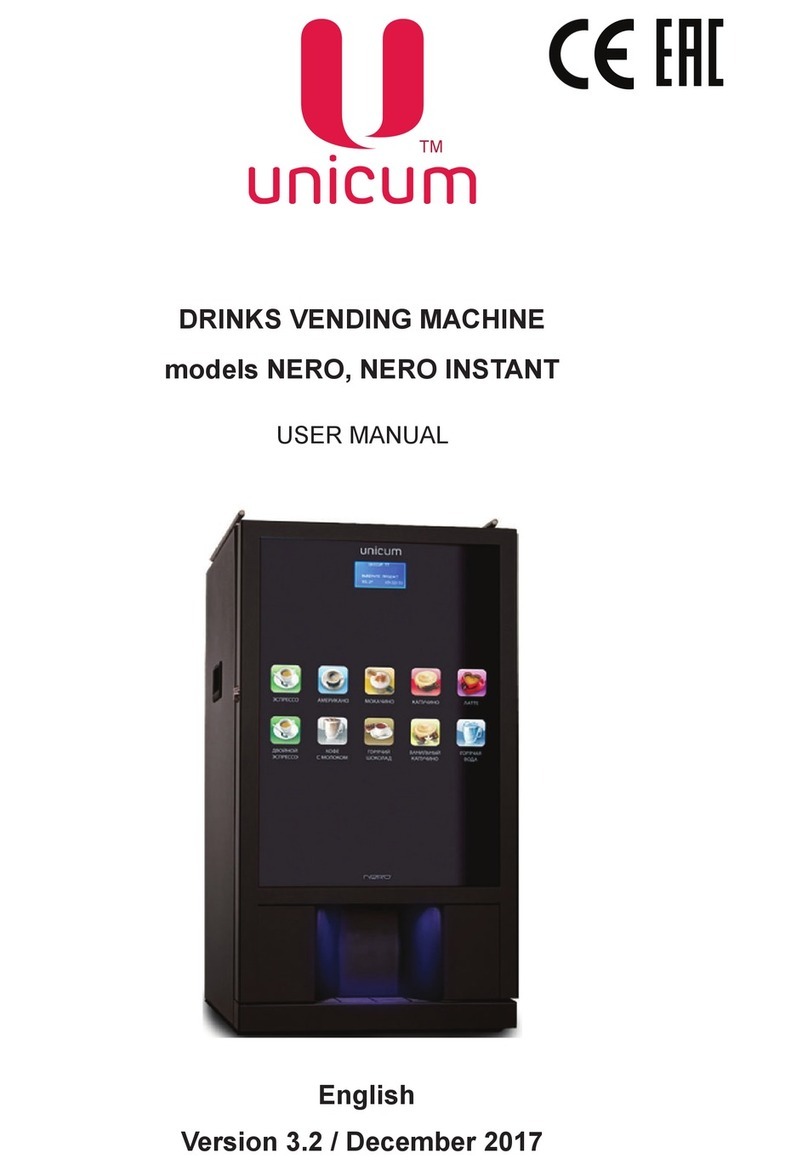
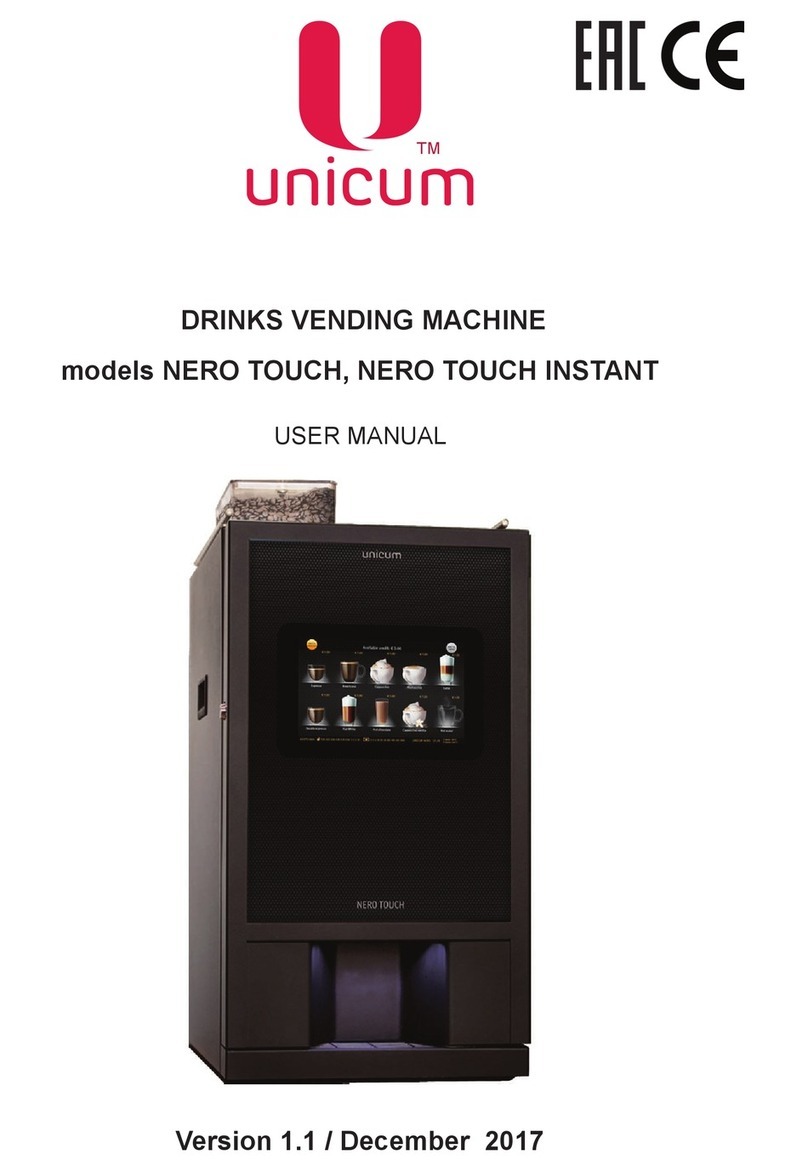
Unicum NERO INSTANT User manual

DRINKS VENDING MACHINE
models NERO, NERO INSTANT
USER MANUAL
Version 1.4 / January 2018
ТМ

NERO / NERO INSTANT
Page 2Version 1.4 / January 2018
ТМ
Changes
Version Date Brief description Pages
1.0 11.2016 Document creation All
1.1 01.2017 Update of hydraulic circuits 86-89
1.2 04.2017 Update document All
1.3 11.2017 Section 4.3.2 ‘‘Air ne tuning valve adjustment’’ - added 19
1.4 01.2018 Section 4.3.4 ‘‘Disabling unused beverage selection buttons’’
- added
26

NERO / NERO INSTANT
Page 3Version 1.4 / January 2018
ТМ
Version 3.1 / August 2015
COMPLIANCE DATA
The drinks vending machines models NERO and NERO INSTANT are compliant with the requirements
of the European Directives, listed in the following table:
Vending machine manufacturer LLC “KRAFT”
Russian Federation
199155 Saint Petersburg
13 Uralskaya Str., lit.А
Tel: +7(812)449-09-91
Fax: +7(812)350-70-89
www.unicum.ru
Original language - Russian
Directive
Description
2004/108/CE Electromagnetic compatibility directive
2006/95/CE Low voltage directive
2006/42/CE Machinery Directive
1999/5/CE Artical No 3(1) (b) R&TTE Directive
2011/65/CE Directive of the European parliament and of the Council of 8 june 2011 on the
restriction of the use of certain hazardous substances in electrical and elec-
tronic equipment (RoHS)

NERO / NERO INSTANT
Page 4Version 1.4 / January 2018
ТМ
CONTENTS
1.0 GENERAL INFORMATION...............................................................................................................7
1.1 Introduction .................................................................................................................................7
1.2 Terms of use ...............................................................................................................................8
1.3 Conguration options ..................................................................................................................8
1.4 Manufacturer’s warranty .............................................................................................................8
1.5 Vending machine functionality ....................................................................................................9
2.0 TECHNICAL FEATURES.................................................................................................................10
3.0 SAFETY ...........................................................................................................................................11
3.1 Main provision............................................................................................................................ 11
3.2 Service key ................................................................................................................................12
3.3 Temperature...............................................................................................................................12
4.0 TRANSPORTATION, INSTALLATION, COMMISSIONING.............................................................13
4.1 Transportation ............................................................................................................................13
4.2 Installation..................................................................................................................................14
4.3 Commissioning ..........................................................................................................................15
4.3.1 Installation neness of grinding ........................................................................................17
4.3.2 Air ne tuning valve adjustment........................................................................................19
4.3.3 Connecting the vending machine to water supply mains .................................................24
4.3.4 Отключение незадействованных кнопок выбора напитка...........................................26
5.0 THE VENDING MACHINE’S COMPONENTS.................................................................................27
5.1 Appearance................................................................................................................................27
5.2 Internal view (with option FRESH MILK)....................................................................................28
5.3 Internal view (without door cover) ..............................................................................................29
5.4 Back view...................................................................................................................................30
5.5 Containers for instants ingredients and coffee beans................................................................31
5.6 Waste container .........................................................................................................................33
5.7 Autonomous operations kit.........................................................................................................33
5.8 Flot chamber, boiler pump, boiler and steam boiler ...................................................................34
5.9 Espresso group..........................................................................................................................36
5.10 Mixers for instant ingredients ...................................................................................................39
6.0 VENDING MACHINE CONTROL AND MONITORING DEVICES...................................................40
6.1 Main Board (controller) ..............................................................................................................41
6.2 Service keypad ..........................................................................................................................42
6.3 Touch keypad selection (user’s menu).......................................................................................42
6.4 Touch keypad selection (service menu).....................................................................................43
7.0 VENDING MACHINE’S WORKING PRINCIPLE.............................................................................44
7.1 Placement of the cup .................................................................................................................44
7.2 Preparation of drinks..................................................................................................................45
7.3 Dispensing the drink ..................................................................................................................46

NERO / NERO INSTANT
Page 5Version 1.4 / January 2018
ТМ
CONTENTS
8.0 DESCRIPTION USER MENU ..........................................................................................................47
8.1 Home screen..............................................................................................................................47
8.1.1 Drink choice......................................................................................................................47
9.0 DESCRIPTION SERVICE MENU - MENU TECHNICIAN................................................................48
9.1 Menu technician.........................................................................................................................48
9.1.1 System..............................................................................................................................49
9.1.2 Payment system...............................................................................................................54
9.1.3 Time zones .......................................................................................................................60
9.1.4 Printer menu.....................................................................................................................60
9.1.5 GPRS menu .....................................................................................................................61
9.1.6 Prices................................................................................................................................63
9.1.7 Snack 1.............................................................................................................................65
9.1.8 Snack 2.............................................................................................................................65
9.1.9 Hot 1.................................................................................................................................66
10.0 DESCRIPTION SERVICE MENU - MENU OPERATOR................................................................73
10.1 Menu operator..........................................................................................................................73
10.1.1 Status / Errors.................................................................................................................74
10.1.2 Cash ...............................................................................................................................74
10.1.3 Snack 1...........................................................................................................................74
10.1.4 Snack 2...........................................................................................................................74
10.1.5 Hot .................................................................................................................................75
10.1.6 Statistics ........................................................................................................................77
10.1.7 Data ...............................................................................................................................79
10.1.8 Prices .............................................................................................................................80
11.0 GENERAL TECHNICAL SERVICING............................................................................................81
11.1 General requirements ..............................................................................................................81
11.2 Cleaning list..............................................................................................................................82
11.2.1 Daily operations ..............................................................................................................83
11.2.1.1 Espresso group.................................................................................................83
11.2.1.2 Milk system (FRESH MILK option) ...................................................................83
11.2.1.3 Waste containers ..............................................................................................86
11.2.1.4 Drop tray and tray grill ......................................................................................86
11.2.1.5 Cup tray ............................................................................................................86
11.2.1.6 Milk container (for FRESH MILK only)..............................................................86
11.2.2 Daily operations ..............................................................................................................87
11.2.2.1 Milk ow meter (FRESH MILK option) ..............................................................87
11.2.2.2 Check valve (FRESH MILK option) ..................................................................89
11.2.2.3 Containers for soluble ingredients ....................................................................89

NERO / NERO INSTANT
Page 6Version 1.4 / January 2018
ТМ
CONTENTS
11.2.2.4 Coffee container ...............................................................................................90
11.2.2.5 Mixer .................................................................................................................90
11.2.1.6 Cappuccinatore (FRESH MILK option).............................................................91
11.3 Ingredients weighing ................................................................................................................92
12.0 VENDING MACHINE WASHING ...................................................................................................93
13.0 WORKING WITH USB FLASH DRIVE..........................................................................................94
APPENDIX A - HYDRAULIC CIRCUIT FUNCTIONAL CHECK METHOD ...........................................96
APPENDIX B.1 - HYDRAULIC CIRCUIT FOR NERO TOUCH.............................................................98
APPENDIX B.2 - HYDRAULIC CIRCUIT FOR NERO TOUCH (OPTION FRESH MILK).....................99
APPENDIX B.3
- HYDRAULIC CIRCUIT NERO TOUCH (OPTIONS FRESH MILK, MILK FLOW METER) ... 100
APPENDIX B.4 - HYDRAULIC CIRCUIT FOR NERO TOUCH INSTANT ...........................................101

NERO / NERO INSTANT
Page 7Version 1.4 / January 2018
ТМ
1.0 GENERAL INFORMATION
1.1 Introduction
This user manual (hereinafter called the “Manual”) covers drinks vending machines models:
NERO, NERO INSTANT (hereinafter called the ‘‘Machine’’).
The manual contains basic information about the Machine and its software. It includes the information,
necessary for preparation for use, use and technical servicing of the Machine, as well as basic information
about the Machine’s software.
This manual is meant for engineering-technical personnel, who perform technical servicing of vending
machines and are qualied to work with similar electronic and electrical equipment.
This Manual is for the technical and engineering personnel, who provide technical servicing for the Ma-
chine and are permitted to handle electrical units of similar category.
Breach of the requirements of the current Manual can lead to trauma, device damage and renders the
warranty ineffective. You must read and understand the requirements indicated in the current Manual, be-
fore installing and using the Machine, because it contains important information regarding unit safety, and
servicing and usage instructions.
The knowledge of safety requirements is necessary to instruct the users to properly use the Machine.
The Machine buyer is responsible to make sure that the serving personnel had undergone needed
training and was informed properly and that the instructions of the technical documents were fully ob-
served.
The Machine manufacturer carries no responsibility for damage or loss incurred under the following
circumstances:
• In case of unsanctioned modernization;
• In case of improper installation;
• In case of improper connection to the power and / or water supply;
• In case of cleaning and servicing contrary to the requirements;
• In case of improper operations or use of Machine’s equipment;
• In case of use of non-genuine spare parts.
• rejection of the use of food products, designed specically for vending machines.
The manufacturer of the Machine is in no case liable for any possible losses, which might result from
interruption of business due to Machine breakdown.
According to the client’s requirements the vending machine can have additional (optional) functions.
These vending machine should only be used for making and selling drinks!
This operating manual is applicable for models of the Nebo with its graphic display, which uses both
cereal and instant coffee.
While for models that use instant coffee, the word Instant is added to the name (for example, NERO
INSTANT).
In the models Instant - there is no equipment for the preparation of grain coffee (container for coffee
beans, espresso group, coffee grinder and dispenser, etc.).
The numbering of drawings in the manual is given in sections.

NERO / NERO INSTANT
Page 8Version 1.4 / January 2018
ТМ
1.2 Terms of use
This Manual is for a certain version of vending machine software, which is current at the time of printing
of this Manual.
All possible modications, modernizations and/or adaptations, which are effected or will be executed in
future for following sales, do not mandate the manufacturer to conduct similar modernization of software
for the earlier sold Machines, as well as it does not mandate the manufacturer to amend the user docu-
mentation, which is a part of the Machine’s package.
The developer of the Machine and regulatory software have the right to make necessary changes to the
Machine’s structure, software’s ow and in the documentation for its use without notice to the user.
1.3Congurationoptions
NERO NERO INSTANT
1.4 Manufacturer’s warranty
The manufacturer’s warranty during the warranty period covers all vending machine units and assem-
blies,
except for malfunctions, arising from non-observance of current maintenance documentation
requirements by the customer or due to any mechanical failures.
The following components are excluded from the manufacturer’s warranty:
• gaskets;
• fuses;
• control boards batteries;
• mixer impellers;
• hydraulic system tubes.

NERO / NERO INSTANT
Page 9Version 1.4 / January 2018
ТМ
1.5 Vending machine functionality
The vending machine is making various coffee-based drinks (from beans - not INSTANT, and INSTANT),
with the addition of soluble ingredients, and the coffee beans and foamed milk-based drinks (where the
FRESH MILK option is available).
The coffee beans based drinks are made using the espresso process.
The vending machines can be completed with optional equipment (FRESH MILK option, see below).
With the aid of this equipment, the milk is made foam by using steam and air in the milk mixing device
(cappuccinatore).
FRESH MILK option
NERO TOUCH vending machines can be additionally (optionally) completed with the equipment, per-
mitting the making of coffee beans based drinks with the addition of fresh milk made foam by using steam
and air in the mixing device (cappuccinatore) in accordance with the vending machine settings.
In this case, the vending machine has the FRESH MILK inscription in its name.
E.g.:
NERO TOUCH + FRESH MILK option = NERO FRESH MILK TOUCH
This option is agreed with the customer separately when ordering.
This option is not provided for vending machines as standard.
The option includes the installation of the following optional equipment in the standard model of the
vending machine:
steam boiler, circuit board 063V3, a nozzle for foaming milk (cappuccinatore), wire harnesses, hydraulic
tubes, water T-connector, etc.
The vending machines with the FRESH MILK option can be additionally (optionally) completed with the
fresh milk ow meter, which controls the milk consumption.
For vending machines with the FRESH MILK option, it’s recommended to order the milk cooling module
(cooler) from the vending machine manufacturer, which is usually installed on the left side of the vending
machine.
The vending machine may have other optional equipment (payment module, cup heater, etc.), which is
not standard supplied and should be mentioned individually for each order.
When installing the vending machine special pedestals are recommended for use (NERO, NERO TO
GO). NERO TO GO pedestals can also be used for connecting the vending machine to payment modules.
The drink can be selected from the touch screen with the context-sensitive display. To select a drink just
touch the drink icon with your nger. After the drink selection, the vending machine will operate automati-
cally.
All vending machine functions are controlled by the controller (main board).
The touch screen with the interface is controlled by the internal PC.
The vending machine may use a modem for online data transfer.

NERO / NERO INSTANT
Page 10Version 1.4 / January 2018
ТМ
2.0 TECHNICAL FEATURES
Table 1
Parameters NERO NERO INSTANT
Dimensions (H x W x D), maximum 800 x 385 x 495 mm
Weight, maximum 60 kg
Voltage 220 - 230 V
Power frequency 50/60 Hz
Power consumption (max) 1800 W
3200 W*
Water connection
Water pressure 0.5 bar (0.05 MPa) - 8.5 bar (0.85 MPa)
Connection to water supply line G 3/4’’ G 3/4’’
Hardness 0.9 - 1.0 mgeq/l 0.9 - 1.0 mgeq/l
Calcium 18 - 20 mg/l 18 - 20 mg/l
Volume of containers**
Coffee beans 1,0 kg -
Instant coffee -0,7 kg
Powdered milk
/ Granulated milk
1,5 / 0,75 kg 2,2 / 1,1 kg
Chocolate 1,5 kg 2,4 kg
Vanilla 1,0 kg 2,4 kg
Ambient temperature +10...+35 0C, relative humidity 80% (without condensation)
*) With option FRESH MILK.
**) The quantity of ingredients can be different from the one shown depending on the specic weight of the
ingredient.

NERO / NERO INSTANT
Page 11Version 1.4 / January 2018
ТМ
3.0 SAFETY
For safe operation of the vending machine comply with the requirements given in this manual.
3.1 Main provision
• Before putting the vending machine in service always make sure that the operating instructions given
in this manual were read and understood.
• Comply with the instructions given in this manual for vending machine transportation, installation,
maintenance, and service.
• The vending machine is not intended for operation by persons (including children) with physical, sen-
sory or intellectual limitations or without the proper experience and/or knowledge, if only they are not
under the supervision of the person, responsible for their safety, or if only they were trained for the
vending machine operation.
• Damaged power cords should be replaced by the manufacturer only.
• Make sure that the vending machine is installed on a stable horizontal surface.
• Make sure that there’s no less than 80 mm of free space behind the vending machine for air circulation.
• The vending machine is intended for use in dry premises with ambient air temperature no less than 10 °С.
• The vending machine uses hot water. Don’t get too close to the vending machine when making a drink.
• Use only cooled fresh long-storage milk (pasteurized, UHT) with 2.5 - 3.6% fat. The milk should be
stored at a temperature from 3.5 to 7°С. For vending machines with FRESH MILK option only.
• For cleaning of the vending machines use only cleaning agents approved for foodstuff.
• Make sure that the vending machine is cleaned daily to avoid hazards for the consumer.
• The vending machine should be serviced by skilled service technicians only.
• The use of the service key is reserved for skilled service technicians only. When the service key is
inserted in the vending machine, the safety device is switched off. Caution - the danger of injury!
• The power supply plug should be easily accessible.
• Never insert the plug into an outlet if it’s wet or by wet hands.
• Use genuine spare parts only.
• Making changes in the vending machine is prohibited. In such cases, the manufacturer bears no re-
sponsibility for any damages!

NERO / NERO INSTANT
Page 12Version 1.4 / January 2018
ТМ
3.2 Service key
When opening the vending machine door the special breaker automatically de-energizes the vending
machine hardware and units. Any operations, carried out with the door open, should be performed by
skilled technicians.
The technicians are responsible for the service key safety. Never leave the service key in the vending
machine. The service key is intended for use by skilled technicians only.
To apply voltage to the vending machine hardware with the door open insert the service key.
Service key installation
1. Insert the service key into the door trip (see g. 3a) and turn it through 90 deg. clockwise (see g.
3b) until xation.
2. Service key extraction is carried out in the reverse order.
Fig.3а Fig.3b
3.3 Temperature
The vending machine uses a boiler that is lled with hot water. The water temperature exceeds 90°С.
The temperature of water in the boiler gradually decreases after the vending machine is turned off.
DANGER OF BURNS!
Avoid contact with hot water.
The danger is especially high at the drink discharge hole.

NERO / NERO INSTANT
Page 13Version 1.4 / January 2018
ТМ
4.0 TRANSPORTATION, INSTALLATION, COMMISSIONING
4.1 Transportation
Since there’s always water in the vending machine water route, drain the water before the transporta-
tion, long storage or replacing of the hydraulic system individual units. Failure to follow these measures
can lead to vending machine damages! Use an original package for the vending machine transporta-
tion.
Always drain water before the vending machine transportation or storage at ambient
airtemperaturebelow1°С!Failuretofollowthisrequirementcanleadtovendingma-
chine breakdown!
Flushing the vending machine’s water tract
Stop the water supply to the vending machine. Use the suitable container for draining water. To drain
water do the following:
1.Cool down the boiler. For the purpose enter the service menu and select sub-clause [1.9.10 Cooling
the boiler] and start the cooling process by pressing the OK button. After you start the process
the machine will pump sufcient amount of water through the boiler to cool it down to 45 degrees.
This process can be executed for machines with external water supply as well as for machines with
internal water cans.
2.After the boiler has been cooled the machine’s display shows the OK sign, after which you should
disconnect the machine from water supply or you should remove the water supply pipes from the
cans/bottles. It is also necessary to ush water from the pipe, which supplies water from external
water supply valve or autonomous water supply pump, to the oat chamber. For the purpose re-
move the pipe from the valve or pump and direct it to the ush bucket. Make sure that all the water
from the pipe is discharged.
3.After cooling, ush the boiler. For the purpose enter the service menu and select sub-clause [1.9.12
Boiler ush] and start the ushing process by pressing the OK button. The machine will start
pumping out water from the oat chamber and the rest of the water tract, which supplies water to
the boiler.
4.When the given process will be completed, you will see the OK sign on the display. This is when you
should turn the machine OFF.
5.Place a container under the boiler and remove the pipe from the bottom of the boiler by loosening
the xator screw. Then turn the machine ON and wait until all the water would be ushed from the
boiler (until the water stops dripping).
6.Turn OFF the vending machine.
7.Reconnect the pipe to the boiler with the help of the tightening screw.
NOTE: when using internal water supply from cans/bottles it is also necessary to ush the autono-
mous function pump. For the purpose, following the cooling process and removal of supply pipe from the
pump, it is necessary to manually pull down the oat from the oat chamber until the pump starts and hold
the oat for 5-10 seconds. After this you must reinstall the pipe (to the valve or the pump).

NERO / NERO INSTANT
Page 14Version 1.4 / January 2018
ТМ
4.2 Installation
ATTENTION! A short circuit caused by water! Mortal danger! Vending machine damage.
Never clean the vending machine by watering it from the hose.
Note:
• Make sure that power supply parameters coincide with characteristics, shown on the vending ma-
chine nameplate, located on the rear side of the casing.
• The vending machine should be connected to the earthed mains.
• Don’t use extension cords for connecting the vending machine to the mains.
Generalrequirementsforinstallation
• Install and operate the vending machine in dry and well-ventilated premises only.
• The vending machine is not intended for use outdoors.
• Before commissioning the vending machine, make sure that the ambient air temperature in the
premises, where the vending machine will be operated, is no lower than 10 0C.
• When choosing the location for the installation make sure the vending machine will be accessible
for servicing.
• Make sure that the installation surface is at and stable, without vibrations.
• Adjust the vending machine level by using the four support feet.
• The vending machine should be installed on the non slip surface.
• The outlet for the vending machine mains connection should be easily accessible so that the vending
machine power plug could be rapidly disconnected.
• The ambient air temperature for the vending machine normal operation should be from 10 to 35 0С.
• Make sure that the vending machine rear wall is no less than 80 mm away from the wall.
• • Open the vending machine door and visually check the hydraulic circuit tubes and threaded con-
nections (see Appendix A). In the case of the hydraulic circuit tube defect or loose connection is
detected the further vending machine use is possible only after the malfunction repair.
Note:
Make sure there’s enough free space in front of the vending machine for fully opening its door.
Installation conditions: Intervals (recommended)
• The side distance from the objects on the left and right of the vending machine should be no less
than 50 mm (with the exception of the milk cooling module).
• The distance from the vending machine rear wall should be no less than 80 mm.
• The distance from the oor to the vending machine should be no less than 800 mm.
Installation conditions: Water
• Make sure that the vending machine is connected to the cold potable water line (in the case of ex-
ternal water supply)!
• The water line pressure should be from 0.5 to 8.5 bar (0.05 - 0.85 MPa). Pressure exceeding or
lowering is not permitted. If the line pressure is too low or too high, the vending machine will not
operate properly.
• Water temperature at the vending machine inlet should be from 5 to 35 0С.
• The water should satisfy all potable water norms.
• Don’t bend over the water connecting line.

NERO / NERO INSTANT
Page 15Version 1.4 / January 2018
ТМ
Installation conditions: Mains voltage
• Admissible mains voltage: ~220-230 50/60 Hz
Fig.4.1
Vending machine unpacking
Get the vending machine from the package, and remove all pack-
aging. Because the vending machine should be transported only in the
original package, it’s recommended to save the packaging. The packag-
ing should be recycled in accordance with current environmental legisla-
tion.
Fig.4.2
4.3 Commissioning
Note:
Only skilled technicians can install and put the vending machine in service. Before installing and putting
the vending machine in service read and understand the instructions given in this manual.
After removing the vending machine from the packaging:
1. open the vending machine door by using the key (the key is secured by a tie to the cup shelf or the
cup arrester, see g. 5.1).
2. remove the vending machine components, included in the scope of supply, from the waste contain-
ers, located in the lower part of the vending machine, (see g. 4.2).
1
2
3
4
5
6
7
8
1 - Bafe plate (not-INSTANT);
2 - Power cable;
3 - Passport vending machine;
4 - Coffee bean container (not-NSTANT);
5 - Silicone tube with terminal (nozzle);
6 - Service key;
7 - Set of extra (spare) fuses;
8 - Hoffmann clamp (option FRESH MILK).

NERO / NERO INSTANT
Page 16Version 1.4 / January 2018
ТМ
3. Before putting to use please remove the transportation bracket,
which holds the coffee grinder unit, by loosening the not (see g.4.3)
Fig.4.3
1
4. To install the bafe plate, hang it on the bolt (see g.4.4 pos.1),
which is situated on the left inside wall of the vending machine’s body
under the espresso group.
Fig.4.4
If the transportation bracket would not be removed before the start of operations, this
can cause excessive vibration in machine parts, which can cause premature break-
downs and failures!
5. Connect the vending machine to the external or internal water supply in accordance with the manual.
Close the vending machine door.
6. Connect the vending machine to the grounded mains. The mains technical characteristics are shown
on the vending machine nameplate.
7. Switch on the vending machine by turning the switch on the switching unit (see section 4.1) to the (I)
position.
The components and parts, included in the machine’s package are packed in the waste containers,
inside the machine (see g.4.2).

NERO / NERO INSTANT
Page 17Version 1.4 / January 2018
ТМ
4.3.1Installationnenessofgrinding
The coffee beans are crushed using the coffee grinder, which is located underneath the coffee bean
container. When you select a drink, which uses coffee beans, the beans fall into the coffee grinder, where
they are ground using the built-in choppers, going further into the dosing apparatus, which is located in
front of the coffee grinder. From here the coffee is fed into the espresso group.
The quality of grinding of coffee depends on the rotation of the screw, located on the coffee grinder (see
g.4.5 and 4.6 position1). Turn the screw clockwise grind more (smaller particles) or counter clock-
wisetogrindless(largerparticles)–(seeg.4.5).
Set up the grinding of the coffee grinder.
After setting the grinding quality, check the quality of coffee. If needed please set again to achieve the
required level of grinding.
Note: The smaller the particle size the longer will be the extract and the drink will be more satu-
rated.
Settingthegrindingparametersforthersttime:
Turn the regulatory screw clockwise and bring the blades as close as possible (turn all the way). Then
turning the screw counter clockwise loosen the upper disk by 540-630 degrees (one and a half turn or one
and a half + quarter turn).
For more detailed settings of coffee grinder you can carry out the following actions I the given sequence:
change the position of the regulatory screw (to change the position of the upper disk of the coffee grinder
to a certain angle) and then make a drink and taste it.
Fig.4.5
1
2
Fig.4.6
If the level of grinding will be too low (very small particles),
the coffee grinder will not be able to ground sufcient amount of
coffee, which would lead to “Grinder” error and will block the dis-
pensing of coffee. In such case you should increase the level of
grinding. For the purpose you must loosen the upper disk by turn-
ing it counter clockwise.
If the particle size is large the coffee will be less concentrat-
ed (less saturated). The time of working of coffee grinder will be
around 3-4 seconds. The thickness of output jet will be 3-4mm.
in this case you can also cause the leaking of the coffee group,
because very large particles of coffee damage the gasket of the
piston. In such cases you should decrease the particle size – turn
the upper disk clockwise.
The optimum time of grinder functioning is: 5-6 seconds
if coffee dosage is set to position 3 and 6-7 seconds if the
coffee dosage is set to position 4 (see the next section).

NERO / NERO INSTANT
Page 18Version 1.4 / January 2018
ТМ
The ground coffee is fed into the dosing apparatus, which ac-
cumulates ground coffee up to a certain level. When the level is
reached the electromagnetic valve opens and the accumulated
dose of coffee is sent to the espresso group.
The dosing apparatus helps you set the required amount of cof-
fee for the espresso group according to the desired drink. The vol-
ume of coffee is regulated with the help of the dosing apparatus’s
cam (see g.4.6 pos.2 and g.4.7). The positions can be from 1
to 6 (MAXIMUM). At the same time it is prohibited to set the cam
to positions 5 or 6 without increasing the volume of the boiling
chamber (see further)! THIS CAN DAMAGE THE ESPRESSO
GROUP!
Fig.4.7
PLEASE NOTE THAT CHANGES IN LEVEL OF GRINDING AND TASTE ARE NOT NOTICED RIGHT
AWAY. ONLY AFTER 3 CYCLES YOU CAN FEEL THE DIFFERENCE (after changing the grinding
parameters, discard two drinks and taste the third one to feel the differer.
It is highly recommended to change grinding parameters discreetly, turning the coffee grinder’s disk by
10-20 degrees each time.
It is STRICTLY PROHIBITED to set the cam to positions 7 or higher!
The recommended settings for the cam are positions 3 or 4. This means a dose of 6.5-7.5 grams
per portion (per drink).
The weight of the ground coffee inside the dosing apparatus depends on the quality of grinding and type
of coffee.
After each re-setting of dosing apparatus, please weigh the amount of ground coffee according to the
current manual.
Depending on the weight of the coffee, you might need to regulate (adjust) the volume of espresso
group’s chamber

NERO / NERO INSTANT
Page 19Version 1.4 / January 2018
ТМ
4.3.2Airnetuningvalveadjustment
Milkfoamadjustment
To adjust the milk foam on the vending machine do the following:
- Make sure that the milk container is installed in the refrigerator near the vending machine.
- Make sure that the milk is fresh and unspoiled.
- Make sure that the silicone milk supply tube at the vending machine inlet is not pinched.
- Make sure that the vending machine milk system was washed beforehand, and all its parts including
the cappuccinatore are clean. Inspect the tubes for any sour or coagulated milk.
Make sure that all the above items are observed and proceed to the milk foam adjustment by sequen-
tially executing the following operations:
- Open the vending machine door;
- Insert the service key into the door trip;
- Switch the vending machine on (see the manual) and wait for the boiler to heat up to the tempera-
ture specied in settings. To achieve the optimum foam performance the steam boiler temperature
should be set to 130°С;
- Adjust the foam control knob to the middle position (g. 4.8). For doing this turn the control knob all
the way to the left and then all the way to the right. Set the control knob approximately to the middle posi-
tion;
Fig.4.8 - Milk foam adjustment

NERO / NERO INSTANT
Page 20Version 1.4 / January 2018
ТМ
- Select a drink with the addition of fresh milk. As the drink is made, observe the milk ow from the
cappuccinatore adapter. The ow should be uniform, without any "pulsations" or "jerks" (the foam should
be poured into a cup in the form of a smooth stream without any splashes or inating bubbles).
- Observe the cappuccinatore adapter - it's manufactured of transparent plastic to facilitate its contam-
ination level inspection and adjustment process.
Fig.4.9
- At the cappuccinatore and the adapter joint there's a gap (see g. 4.9). The foam shouldn't run out
of the adapter during the operation.
- If there's no foam coming out, but a slightly foamed milk, turn the foam control knob counter-clock-
wise. By doing this you are slightly opening the air delivery tap, and the milk foam should start coming out.
- If the foam is squirting out from the above-mentioned gap, this means that there's too much air sup-
plied. Turn the control knob clockwise.
The optimal foam adjustment:
The foam is streamed out uniformly and without any pulsations. The foam doesn’t overow out-
side the cappuccinatore adapter and should have a ne-porous structure.
When lowering a stirrer to a cup it stands in the foam without declining (the height of the foam
should be higher than the middle of the stirrer).
If having trouble adjusting the foam in accordance with the above instruction, proceed to the following
section: “Offsetting the range of adjustments on the air ne tuning valve” (see below).
This manual suits for next models
1
Table of contents
Other Unicum Vending Machine manuals
Popular Vending Machine manuals by other brands

Multiplex
Multiplex FreshBlender FAQ & Troubleshooting

Westomatic
Westomatic SIGMA Service, parts and schematics

Azkoyen
Azkoyen Argenta Programming guide

Elektral
Elektral Tru-VEND Midi Buffet STD User & maintenance manual

HealthyYOU VENDING
HealthyYOU VENDING HY2100 Machine manual

BIANCHI VENDING
BIANCHI VENDING LEI200 Use and maintenance manual

Jofemar
Jofemar Vision ES-PLUS Technical manual

Vendors Exchange
Vendors Exchange VE CONNECT user manual

Necta
Necta Samba Top Installation operation & maintenance

Westomatic
Westomatic Eco Encore Technical manual

Westomatic
Westomatic EVOLVE Installing

Automatic Products
Automatic Products SNACKSHOP 113 instruction manual