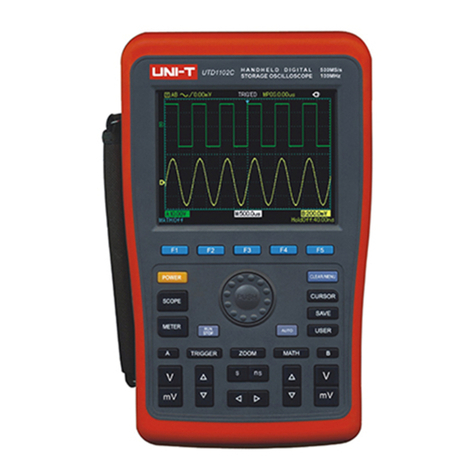
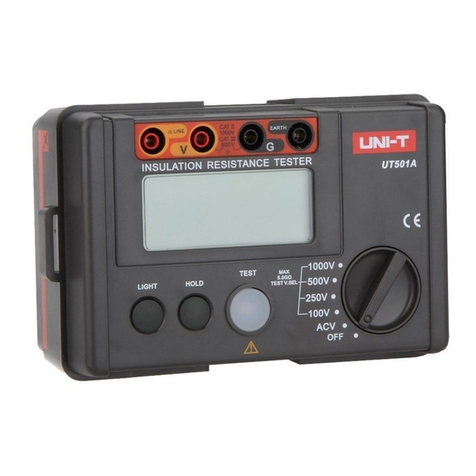
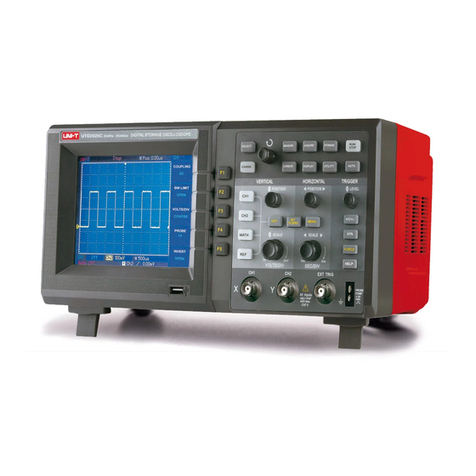
Unit UPO2000CS Series User manual

1

UPO2000CS series User Manua
1
Introduction
Dear Users:
Hello! Thank you for choosing this brand new Uni-Trend device. In order to safely and correctly use this
instrument, please read this manual thoroughly, especially the Safety Notes part.
After reading this manual, it is recommended to keep the manual at an easily accessible place, preferably
close to the device, for future reference.

UPO2000CS series User Manual
2
Copyright and Satement
Copyright Information
•UNl-T Uni-Trend Technology (China) Limited. All rights reserved.
Trademark Information
•UNI-T is the registered trademark of Uni-Trend Technology (China) Limited.
Document Version
UPO2000CS-20160414-EN-V1.3
Statement
· UNI-T products are protected by patent rights in China and foreign countries, including issued and pending
patents.
· UNI-T reserves the rights to any product specification and pricing changes.
· UNI-T reserves all rights. Licensed software products are properties of Uni-Trend and its subsidiaries or
suppliers, which are protected by national copyright laws and international treaty provisions.
· Information in this manual supercedes all previously published versions.
Warranty
UNI-T warrants that the product will be free from defects for a three-year period. If the product is re-sold, the
warranty period will be from the date of the original purchase from an authorized UNI-T distributor. Probes,
other accessories, and fuses are not included in this warranty.
If the product is proved to be defective within the warrenty period, UNI-T reserves the rights to either repair the
defective product without charging of parts and labor, or exchange the defected product to a working
equivalent product. Replacement parts and products may be brand new, or perform at the same specifications
as brand new products. All replacement parts, modules, and products become the property of UNI-T.
The “customer” refers to the individual or entity that is declared in the guarantee. In order to obtain the
warranty service, "customer" must inform the defects within the applicable warranty period to UNI-T, and to
perform appropriate arrangements for the warranty service. The customer shall be responsible for packing and
shipping the defective products to the designated maintenance center of UNI-T, pay the shipping cost, and
provide a copy of the purchase receipt of the original purchaser. If the product is shipped domestically to the
location of the UNI-T service center, UNI-T shall pay the return shipping fee. If the product is sent to any other

UPO2000CS series User Manua
3
location, the customer shall be responsible for all shipping, duties, taxes, and any other expenses.
This warranty shall not apply to any defects or damages caused by acciendental, machine parts’ wear and tear,
improper use, and improper or lack of maintenance. UNI-T under the provisions of this warranty has no
obligation to provide the following services:
a) Any repair damage caused by the installation, repair, or maintenance of the product by non UNI-T service
representatives.
b) Any repair damage caused by improper use or connection to an incompatible device.
c) Any damage or malfunction caused by the use of a power source which does not conform to the
requirements of this manual.
d) Any maintenance on altered or integrated products (if such alteration or integration leads to an increase in
time or difficulty of product maintenance).
This warranty written by UNI-T for this product, and it is used to substitute any other express or implied
warranties. UNI-T and its distributors do not offer any implied warranties for merchatability or applicability
purposes.
For violation of this guarantee, UNI-T is responsible for the repair or replacement of defective products is the
only remedy available to customers. Regardless of whether UNI-T and its distributors are informed that any
indirect, special, incidental, or consequential damage may occur, the UNI-T and its distributors shall not be
responsible for any of the damages.

UPO2000CS series User Manual
4
General Safety Overview
This instrument strictly complies with the safety requirements for electronic measuring instrument GB4793 and
IEC 61010-1 safety standard during design and manufacturing. Please understand the following safety
preventative measures, to avoid personal injury, and to prevent damage to the product or any connected
products. To avoid possible dangers, be sure to use this product in accordance with the regulations.
Only trained personnels can perform the maintenance program.
Avoid fire and personal injury.
Use the correct power line: Only use the dedicated UNI-T power supply appointed to the local region or
country for this product.
Correct Plug: Don't plug when the probe or test wire is connected to the voltage source.
Ground the product: This product is grounded through the power supply ground wire. To avoid electric shock,
grounding conductors must be connected to the ground. Please be sure that the product is properly grounded
before connecting to the input or output of the product.
Correct connection of oscilloscope probe: Ensure that the probe ground and ground potential are correctly
connected. Do not connect ground wire to high voltage.
Check all terminal ratings: To avoid fire and the large current charge, please check all the ratings and the
marks on the product. Please also refer to the product manual for details on the ratings before connecting to
the product.
Do not open the case cover or front panel during operation
Only use fuses with ratings listed in the technical index
Avoid circuit exposure: Do not touch exposed connectors and components after power is connected.
Do not operate the product if you suspect it is faulty, and please contact UNI-T authorized service personnel for
inspection. Any maintenance, adjustment, or replacement of parts must be performed by UNI-T authorized
maintenance personnels.
Maintain proper ventilation
Please do not operate the product in humid conditions
Please do not operate in inflammable and explosive environment
Please keep the product surface clean and dry

UPO2000CS series User Manua
5
Safety Terms and Symbols
The following terms may appear in this manual:
Warning: The conditions and behaviors may endanger life.
Note: The conditions and behaviors may cause damage to the product and other properties.
The following terms may appear on the product:
Danger: Performing this operation may cause immediate damage to the operator.
Warning: This operation may cause potential damage to the operator.
Note: This operation may cause damage to the product and devices connected to the product.
The following symbols may appear on the product:

UPO2000CS series User Manual
6
Preface
This manual introduces the operations of the UPO2000CS series digital oscilloscope, it includes the following
sections:
Chapter 1 – Introduction Guide
Chapter 2 – Vertical channel setup
Chapter 3 – Trigger system setup
Chapter 4 – Level system
Chapter 5 – Mathematical operations
Chapter 6 – Sampling system setup
Chapter 7 – The display system
Chapter 8 – Automatic measurements
Chapter 9 – Cursor measurements
Chapter 10 – Storage and callback
Chapter 11 – Auxiliary settings
Chapter 12 – Additional function keys
Chapter 13 – System and troubleshooting
Chapter 14 – Technical index
Chapter 15 – Appendix
Appendix A: Accessories and options
Appendix B: Maintenance and cleaning
Appendix C: Warranty overview
Appendix D: Contact us

UPO2000CS series User Manua
7
Introduction of UPO2000CS series digital phosphor oscilloscope
UPO2000CS series digital oscilloscopes contains the following 5 models
Model Analog Channels Bandwidth
UPO2104CS 4 100MHz
UPO2074CS 4 70MHz
UPO2102CS 2 100MHz
UPO2072CS 2 70MHz
UPO2202CS 2 200MHz
UPO2000CS series digital oscilloscope is based on UNI-T’s unique Ultra Phosphor technology. A
multi-functional, high performance oscilloscope that is easy to use, with excellent technical specifications, a
perfect combination of many functionalities that can help users to quickly complete testings. UPO2000CS
series is aimed at satisfying the most extensive oscilloscope markets, including communications,
semiconductors, computers, aerospace defense, instrumentation, industrial electronics, consumer electronics,
automotive electronics, field maintenance, R&D, education, etc.
The main features of the UPO2000CS series are:
●200MHz/100MHz/70MHz bandwidth, providing 2-channel and 4-channel models
●Real-time sampling rate of up to 1GS/s, can also observe faster signals
●Standard storage depth of 28Mpts per channel, which allows the oscilloscopes to maintain a high
sampling rate in a wider time base, taking into account the structure and details of the waveform
●Waveform capture rate of up to 50,000wfms/s
●Real-time continuous hardware waveform recording and waveform analysis support waveform recording
up to 65,000 waveforms.
●Multilevel gray scale display
●8-inch WVGA (800 * 480) TFT LCD, ultra widescreen, vivid color, clear display
●Abundant trigger features, including a variety of advanced trigger options
●Standard configuration interface: USB-Host, USB-Device, LAN, and Pass/Fail
●Automatic measurement of 34 waveform parameters
●Supports USB storage and firmware upgrades, one click screen copy function
●Plug and play USB device, can be used to communicate with computer

UPO2000CS series User Manual
8
Table of Content
Copyright and Satement ...................................................................................................................................................2
General Safety Overview...................................................................................................................................................4
Safety Terms and Symbols ...............................................................................................................................................5
Preface ..................................................................................................................................................................................6
Table of Content....................................................................................................................................................................8
Chapter 1 Introduction Guide ..........................................................................................................................................11
1.1 General Inspection ................................................................................................................................................11
(1) Check for Damages caused by Transport .......................................................................................................11
(2) Check Attachment..........................................................................................................................................11
(3) Machine Inspection .......................................................................................................................................11
1.2 Before Use .............................................................................................................................................................11
(1) Connect to the Power Supply ........................................................................................................................11
(2) Boot Check.....................................................................................................................................................11
(3) Connect Probe ...............................................................................................................................................12
(4) Function Check ..............................................................................................................................................12
(5) Probe Compensation .....................................................................................................................................12
1.3 Front Panel ............................................................................................................................................................13
1.4 Rear Panel .............................................................................................................................................................14
1.5 Operation Panels...................................................................................................................................................15
(1)Vertical Control ...............................................................................................................................................15
(2)Level Control...................................................................................................................................................15
(3)Trigger Control ................................................................................................................................................15
(4)Auto Setting ....................................................................................................................................................16
(5)Run/Stop.........................................................................................................................................................16
(6)Single ..............................................................................................................................................................16
(7)Clear................................................................................................................................................................16
(8)Screen Copy ....................................................................................................................................................16
(9)Multipurpose Knob.........................................................................................................................................16
(10)Function Keys................................................................................................................................................16
1.6 User Interface........................................................................................................................................................17
Chapter 2 Vertical Channel Settings.................................................................................................................................19
2.1 Open/Close Analog Channel .................................................................................................................................19
2.2 Channel Coupling ..................................................................................................................................................20
2.3 Bandwidth Limitation............................................................................................................................................20
2.4 Vertical Sensitivity .................................................................................................................................................20
2.5 Probe.....................................................................................................................................................................20
2.6 RP (Reverse Phase)................................................................................................................................................20
2.7 Bias........................................................................................................................................................................21

UPO2000CS series User Manua
9
Chapter 3 Trigger System .................................................................................................................................................22
3.1Trigger System Interpretation ................................................................................................................................22
(1)Trigger Source.................................................................................................................................................22
(2)Trigger Mode ..................................................................................................................................................22
(3)Trigger Coupling..............................................................................................................................................22
(4)Trigger Sensitivity............................................................................................................................................23
(5)Pre-trigger / Delayed Trigger ..........................................................................................................................23
(6)Forced Trigger .................................................................................................................................................23
3.2 Edge Trigger...........................................................................................................................................................23
3.3 Pulse Width Trigger...............................................................................................................................................24
3.4 Video Trigger.........................................................................................................................................................25
3.5 Slope Trigger..........................................................................................................................................................27
3.6 Under-range Trigger ..............................................................................................................................................28
3.7 Beyond-range Trigger ............................................................................................................................................29
3.8 Delayed Trigger......................................................................................................................................................30
3.9 Overtime Trigger ...................................................................................................................................................32
3.10 Duration Trigger ..................................................................................................................................................33
3.11 Setup/Hold Trigger ..............................................................................................................................................34
3.12 N-Edge Trigger.....................................................................................................................................................35
3.12 Code Pattern Trigger ...........................................................................................................................................36
3.13 RS232 Protocol Trigger and Decode (Optional)...................................................................................................37
3.14 I2C Protocol Trigger and Decode (Optional)........................................................................................................41
3.16 SPI Protocol Trigger and Decode( Optional)......................................................................................................45
Chapter 4 Set Level System..............................................................................................................................................50
4.1 ROLL mode ............................................................................................................................................................50
4.2 Extended Window.................................................................................................................................................50
4.2 Independent Time Base ........................................................................................................................................51
4.3 Trigger Release ......................................................................................................................................................51
Chapter 5 Mathematical Operations................................................................................................................................53
5.1 Mathematical Function .........................................................................................................................................53
5.2 FFT.........................................................................................................................................................................53
5.3 Logic Operations....................................................................................................................................................55
5.4 Digital Filter...........................................................................................................................................................56
Chapter 6 Set Sampling System .......................................................................................................................................57
6.1 Sampling Rate........................................................................................................................................................57
(1) Sampling and Sampling Rate .........................................................................................................................57
(2) Low Sampling Rate Effect...............................................................................................................................58
6.2 Acquisition Mode ..................................................................................................................................................58
(1) Normal Sampling ...........................................................................................................................................58
(2) Peak Sampling................................................................................................................................................58

UPO2000CS series User Manual
10
(3) High Resolution..............................................................................................................................................58
(4) Average ..........................................................................................................................................................59
(5) Envelope ........................................................................................................................................................60
6.3 Storage Depth .......................................................................................................................................................60
Chapter 7 Set Display System...........................................................................................................................................61
7.1 XY Pattern..............................................................................................................................................................61
7.2 Application of XY Mode.........................................................................................................................................62
Chapter 8 Automatic Measurement ................................................................................................................................64
8.1 All Parameters Measurement ...............................................................................................................................65
8.2 Voltage Parameters ...............................................................................................................................................65
8.3 Timing Parameters ................................................................................................................................................66
8.4 Delay Parameters ..................................................................................................................................................66
8.5 User Defined Parameters ......................................................................................................................................67
Chapter 9 Cursor Measurement ......................................................................................................................................69
9.1 Time Measurement...............................................................................................................................................69
9.2 Voltage Measurement...........................................................................................................................................69
Chapter 10 Storage and Callback .....................................................................................................................................71
10.1 Storage Setting and Callback...............................................................................................................................71
10.2 Waveform Storage and Callback .........................................................................................................................71
10.3 Screen Copy.........................................................................................................................................................73
Chapter 11 Auxiliary Function Setting .............................................................................................................................74
11.1 Waveform Recording...........................................................................................................................................75
11.2 Pass Test ..............................................................................................................................................................75
(1) Function Introduction ....................................................................................................................................76
(2) Application Example ......................................................................................................................................77
11.3 System Upgrade ..................................................................................................................................................78
Chapter 12 Other Function Keys ......................................................................................................................................80
12.1 Automatic Setting................................................................................................................................................80
12.2 Run/Stop .............................................................................................................................................................80
12.3 Factory Setting ....................................................................................................................................................80
Chapter 13 System Hints and Troubleshooting................................................................................................................82
13.1 System Information Description..........................................................................................................................82
13.2 Trouble Shooting .................................................................................................................................................82
Chapter 14 Technical Index ..............................................................................................................................................84
Chapter 15 Accessories ....................................................................................................................................................89
Appendix A – Accessories and Options .......................................................................................................................89
Appendix B – Maintenance and Cleaning ...................................................................................................................89
Appendix C – Warranty Overview ...............................................................................................................................89
Appendix D – Contact Us.............................................................................................................................................90

UPO2000CS series User Manua
11
Chapter 1 Introduction Guide
This chapter introduces on using the oscilloscope for the first time, the front and rear panels, the user interface,
as well as the built-in help system.
1.1 General Inspection
It is recommended to follow the steps below before using the UPO2000CS series for the first time.
(1) Check for Damages caused by Transport
If the packaging carton or the foam plastic cushions are severely damaged, please contact the UNI-T
distributor of this product immediately.
(2) Check Attachment
Please check Appendix A for the list of accessories. If any of the accessories are missing or damaged, please
contact UNI-T or local distributors of this product.
(3) Machine Inspection
If the instrument appears to be damaged, not working properly, or has failed the functionality test, please
contact UNI-T or local distributors of this product.
If the equipment is damaged due to shipping, please keep the packaging and notify both the transportation
department and UNI-T distributors, UNI-T will arrange maintenance or replacement.
1.2 Before Use
To perform a quick verification of the instrument’s normal operations, please follow the steps below:
(1) Connect to the Power Supply
The power supply voltage range is from 100 VAC to 240 VAC, the frequency range is 45Hz to 440Hz. Connect
the oscilloscope to the power supply line that came with the oscilloscope or any power supply line that meets
the host country standards. Turn the power button on the back of the oscilloscope to ON. Now the soft power
button in the front of the oscilloscope should be lit green.
(2) Boot Check
Press the soft power button and the light should change to yellow. The oscilloscope then will show a boot
animation, and it will enter the normal interface afterwards.

UPO2000CS series User Manual
12
(3) Connect Probe
Take the probe found in the attachment and connect its BNC header to the BNC terminal of the oscilloscope.
Connect the probe’s main alligator clip to the "Calibration terminal" and the ground clip is connected to the
“Ground terminal” shown below. The output of the sensor should be a 3Vp-p square wave, with a 1 kHz
frequency.
Calibration and Ground Terminal
(4) Function Check
Press the AUTO key, a 3Vp-p 1 kHz square wave should appear. Repeat step 3 for all channels. If the output is
not a square wave with the above descriptions, please perform the probe compensation step in the next
section.
(5) Probe Compensation
When the probe is connected to any input channel for the first time, this step might be required in order to
match the probe and the input channel. Please follow the following steps:
①Set the attenuation coefficient in the probe menu and the switch on the probe to 10x, and connect the
probe to CH1. Make sure the probe’s connector is properly connected with the oscilloscope. Connect
the probe’s main clip and ground clip to the oscilloscope’s calibration and ground terminal respectively.
Open CH1 and press the AUTO button.
Observed waveforms
Excessive Compensation Correct Compensation
Insufficient Compensation
②If the displayed waveform does not look like the above “correct compensation” waveform, use a
non-metallic screwdriver to adjust the probe’s variable capacitance until the display matches the
"correct compensation" waveform.
Warning: To avoid electric shock when measuring high voltage using the probe, please ensure that the
probe insulation is in good condition and avoid physical contact with any metallic part of the probe.

UPO2000CS series User Manua
13
1.3 Front Panel
①.Screen display area
②.Copy/print screen
③.Multifunctional knob
④.Function menu
⑤.Automatic setting
⑥.Run/stop
⑦.Single trigger control
⑧.All clear
⑨.Calibration and ground terminal
⑩.Trigger control area
⑪.Horizontal control area
⑫.Analog channel inputs
⑬.Vertical control area
⑭.Control menu
⑮.USB HOST Interface
⑯.Power on/off

UPO2000CS series User Manual
14
1.4 Rear Panel
①.EXT Trig:External trigger input
②.Pass/Fail:Pass/fail test output, also supports Trig_out output
③.WaveGen:Function/arbitrary waveform output (optional)
④.USB Device:USB device interface, can be used to communicate with the PC
⑤.LAN:The oscilloscope can be connected to the LAN network for remote control
⑥.Safety Lock: Optional safety lock (sold separately) can be used for theft prevention
⑦.AC Power Socket:AC power terminal, power supply cord is provided within the accessory package (100 ~
240 V, 45 ~ 440Hz)
⑧.Power Switch: Main power switch, when turned on, press the power on/off button on front panel to turn on
the oscilloscope

UPO2000CS series User Manua
15
1.5 Operation Panels
This section describes the front panel operations to help users to quickly familiarize with the UPO2000CS
series.
(1)Vertical Control
•1 , 2 , 3 , 4 : Open or close the four channels display.
•MATH :Open the mathematical operations menu for add, subtract, multiply,
divide, FFT, filtering, logic, and advanced operations.
•REF:Recall previously stored reference waveforms, can compare currently
measured waveform with reference waveforms.
•Vertical Position Knob: Used to adjust the vertical position of the current channel
waveform. Press this knob to return the channel display back to the midpoint
position.
•Vertical Scale Knob: Used to adjust the vertical scale of the current waveform.
The vertical scale has 1, 2, and 5 steps. Press the knob allows the vertical
adjustment to switch between coarse and fine adjustment mode.
(2)Level Control
•HORI MENU:Displays window extension, independent timing, and holdoff time.
•Horizontal Position Knob:Adjusts the horizontal position of the current channel
waveform. Press this knob to return the channel display back to the midpoint position.
•Horizontal Scale Knob:Used to adjust the vertical scale of the current waveform. The
vertical scale has 1, 2, and 5 steps. Press the knob allows the vertical adjustment to
switch between main and extensible window mode.
(3)Trigger Control
•Trigger Level Knob:Adjusts the currently selected trigger level. Press the knob to return
the trigger level back to the midpoint position.
•TRIG MENU:Press to display the trigger menu.
•FORCE:Press to generate a trigger event once.
•HELP:Displays built-in help system.

UPO2000CS series User Manual
16
(4)Auto Setting
When this key is pressed, the oscilloscope will automatically adjust the vertical scale factor,
timebase, and trigger mode according to the input signals.
(5)Run/Stop
Press the key to "run" or "stop" sampling. RUN state is indicated by green light. STOP state is
indicated by red light.
(6)Single
Set to single trigger mode.
(7)Clear
Clear all waveforms on the screen. If the oscilloscope is in the "RUN" state, it will continue to
display new waveforms.
(8)Screen Copy
Copy the screen to a BMP format image and store it to USB device.
(9)Multipurpose Knob
•During non-menu operations: Turn the knob to adjust display brightness. You can also
press the DISPLAY button and choose the waveform brightness option, then use the
knob to adjust the brightness.
•During menu operations: Turn the knob to select submenu, then press the knob to
confirm selection.
(10)Function Keys
MEASURE: Measure setting menu: can set measure source
to all parameters, custom parameters, perform measurement
statistics, select measurement indicators, etc.
ACQUIRE: Sampling setting menu to set up acquisition mode

UPO2000CS series User Manua
17
and deep storage.
STORAGE: Storage interface can select different types of storage and waveform settings, which can be stored
internally or through USB device.
CURSOR: Cursor measurement menu can measure waveform’s time and voltage manually with cursor.
DISPLAY: Select display settings, such as display type, format, duration, grid brightness, and waveform
brightness.
UTILITY: The utility menu can choose between some less commonly used settings such as self-calibration,
system information, language, menu display, waveform recording, pass test, square wave output, frequency
meter, system upgrades, backlight brightness, output, etc.
DEFAULT: Restore to factory default settings.
1.6 User Interface
①.USB Device Identification: This icon will be displayed when an USB storage device is connected.
②.Trigger Status Identification: Include TRIGED (has been triggered), AUTO, READY, STOP, and ROLL
(rolling)
③.Timing Scale: Indicates the amount of time represented by one square, which can be adjusted by the
horizontal scale knob.
④.Sampling Rate/Acquisition Mode: Indicates the current sampling rate and storage depth.
⑤.Horizontal Displacement: Shows the horizontal displacement, which can be adjusted by turning the

UPO2000CS series User Manual
18
horizontal position knob. Press in the knob returns the displacement back to 0.
⑥.Trigger Status: Displays trigger source, type, slope, coupling, level, etc.
a) Trigger Source: There are seven states: CH1~CH4, AC Line, EXT, and EXT/5. CH1~CH4 will each be
of a different trigger color. For example, is CH1.
b) Trigger Type: The types are edge, pulse width, video, slope, and advanced trigger. For example, is
an edge trigger.
c) Trigger Slope: The types are rising, falling, and rising/falling. For example, is rising.
d) Trigger Coupling: The types are DC, AC, high frequency, low frequency and noise. For example,
indicates DC coupling.
e) Trigger Level: Indicates the current trigger level value, can be adjusted with the trigger level knob.
⑦.CH1 Vertical Identification: Displays CH1 activation state, channel coupling, bandwidth limit, vertical
profile, and probe attenuation coefficient.
a) Channel Activation State:When the background color is consistent
with the channel color, the channel is activated. Press CH1~CH4 to open/close the corresponding
channel.
b) Channel Coupling: Includes DC, AC, and grounding. For example, is DC coupling.
c) Bandwidth Limitation: When the bandwidth limit function is turned on, a BW icon will appear in the
display.
d) Vertical Profile Position: When CH1 is activated, the vertical profile can be adjusted with the vertical
scale knob.
e) Probe Attenuation Factor: Displays CH1 probe attenuation coefficient: 0.001X, 0.01X, 0.1X, 1X, 10X,
100X, and 1000X
⑧.CH2 Vertical Indentification: Same as ○
7, but for CH2
⑨.CH3 Vertical Indentification: Same as ○
7, but for CH3
⑩.CH4 Vertical Indentification: Same as ○
7, but for CH4
⑪.Operation Menu: Displays the current operation menu. Use F1 ~ F5 to navigate through menu contents
⑫.Analog Channels: Displays CH1~CH4 waveforms with matching tag and waveform color.

UPO2000CS series User Manua
19
Chapter 2 Vertical Channel Settings
UPO2000CS provides 4 or 2 analog input channels. The 4 analog channels are CH1~CH4, and the 2 analog
channels are CH1 and CH2. The vertical system settings for all channels are exactly the same.
In this chapter, the vertical channel settings use the 4-channel UPO2XX4CS as example.
2.1 Open/Close Analog Channel
CH1~CH4 contains 3 states: open, activate, and shut down.
a. Open: Allows the corresponding channel waveform to display on the screen.
b. Activation: Only opened state can be activated. In the active state,the vertical menu and the vertical
control knobs (POSITION, SCALE) are for changing activated channel setting. Any of the channels
that have been opened but not activated could be activated by the corresponding channel keys
c. Off: No waveform appears on the display.
The table below describes the channel menu:
Functions Options Description
Coupling
DC AC and DC components of the input signal
AC AC part of input signal only
Ground Displays ground signal with respect to input signal
Bandwidth
Limitation
Off Turns off bandwidth limit function
Open Limits bandwidth to 20MHz to reduce the display noise.
Vertical
Sensitivity
Coarse
Adjustment
The vertical sensitivity of the current channel can be set to 1, 2,
and 5 order.
Fine
Adjustment
Set within the coarse range, adjusts in 1% of the current
amplitude value steps for the channel’s vertical sensitivity.
Probe
A value is automatically selected according to the probe’s
attenuation coefficient, to ensure consistency between the
vertical profile readout and the displayed waveform.
Next page Go to the second page of the channel menu
Reverse
Phase
Off Normal waveform display
On Reverse waveform
Bias
Off Turn off the bias function
On Turn on the bias function
Bias Voltage Adjust with the multipurpose knob, the bias voltage is used to
offset the DC voltage the signal
Return to zero Returns the bias voltage back to 0V
Return Return to the first page of the channel menu
This manual suits for next models
5
Table of contents
Other Unit Test Equipment manuals

Unit
Unit UT590 Series User manual

Unit
Unit UT5300X+ Series User manual

Unit
Unit UT521 User manual

Unit
Unit UPO3000E Series Owner's manual

Unit
Unit utd2000 User manual

Unit
Unit UT712 User manual

Unit
Unit UPO1000 Series User manual

Unit
Unit UT528 User manual

Unit
Unit UPO1000 Series User manual

Unit
Unit UT512 User manual
Popular Test Equipment manuals by other brands

EXFO
EXFO ConnectorMax MFS-12 Quick reference guide

Ametek
Ametek NSG 4070C Quick start guide and safety instructions

PCE Health and Fitness
PCE Health and Fitness PCE-EMF 823 Operation manual

BGS technic
BGS technic 8959 instruction manual

3M
3M FT-30 user manual

IDEAL INDUSTRIES
IDEAL INDUSTRIES LANTEK 6 Basic user manual