VAPamore MP-100 Primo User manual


SAFETY INFORMATION
39. Do not over extend retractable cord past stopping point.
FAILURE TO FOLLOW SAFETY INFORMATION AND WARNINGS MAY
CAUSE PERMANENT DAMAGE AND VOID PRODUCT WARRANTY.
Steam cleaner must be level and on the floor during use.
listed on the label.
supply cord.
!
Do not leave the steam cleaner on and unattended. Always
switch the steam cleaner off and remove plug from wall
outlet when unattended.
use only with a grounded outlet.
Vapamore in order to prevent a fire hazard.
Only use distiled water. Using hard water can cause
calcium or mineral build up and void the warranty.
Never use additives such as perfumes, stain removers, or
other chemicals in the water tank as they will void the
warranty, cause permanent damage, and be dangerous.
Make sure the water tank cap is fully secured before use.
(See cleaning and storage).
Do not pull or drag steam cleaner using the
steam gun and hose.
Drain water tank prior to shipping, transporting.
storage.
37.*To provide continued protection against risk of electrical
shock, connect to properly grounded outlets only.
38. *Not for space heating purposes.
.

10.5lbs
TECHNICAL SPECIFICATIONS
PARTS LIST
PARTS OVERVIEW
2 Extension tubes
Detail adapter
Floor head with triangle brush
19 Floor head carpet slider
20 Water level dipstick
Brass brush

The accessories attach directly to the detail adapter
by pushing the accessory straight on the detail adapter
and then twist to lock in place. (Fig. 3)
Do not use excessive pressure on the
accessory tools. Let the steam do the work with light
scrubbing action used on the accessory tool.
Accessory
compartment
The MR-100 Primo accessory compartment houses
the detail adapter, Jet nozzle attachment, dipstick,
clothes / fabric tool, micro fiber pad, cotton pad
and all brushes. Open the accessory compartment
by pulling the accessory cover back, away from the
machine. Remove the desired accessory from
the accessory compartment and close the accessory
cover. (Fig. 1)
Connect the steam hose to the steam socket on
the front of the steam cleaner. To do this flip down
the dust cover door and push the connector on the
steam hose firmly into the socket until both tabs
click into place. To remove the steam hose, press
in both release tabs located on the left and right side
of the steam hose connector and pull out to release
from the socket. (Fig. 4)
Fig. 1
Fig. 2
Fig. 3
Fig. 4
Fig. 5
Fig. 6
!
STEAM CLEANER ASSEMBLY
Accessories twist lock onto the adapter
The detail adapter MUST BE USED with all accessories.
the detail adapter can be used directly to the steam gun
or to the extension tubes. Attach the detail adapter
by pusing on to the steam gun or extesion tube until the
lock tab clicks in place. (Fig. 2)
STEAM GUN & HOSE
(Fig. 5)
Detail adapter
!

Fig. 7
Fig. 8
The red light will illuminate when the power button is
depressed indicating the unit is heating. The green light
will illuminate indicating the unit is fully heated and
ready for use (approximately 11 minutes). The green
temperature during use. (Fig. 10)
Fig. 9
Fig. 10
Green
light
Red
light
Fig. 11
!
er fill
NOTE:
Do not ov
!
!
!
outlet. Allow steam cleaner to cool down before removing water tank cap. Unscrew the
water tank cap (Fig. 7) by pressing the cap down and simultaneously turning counter
Replace the water tank cap by pressing down on the cap
and simultaneously turning it clockwise. Make sure the
cap is fully tight to prevent any steam from leaking out.
and once cooled down tighten cap further.
Always use the dipstick to check the
Plug the
or
FILLING & OPERATION
Release the locking device (child - proof
device) by sliding the lock down away from the trigger.
(Fig. 11)
Once the green light illuminates the
steamer is ready for use. The green and red light will
continue to use the steamer as you normaly would
!
clockwise. Check the water level with the supplied dipstick. Use the supplied funnel
equal 1400ml /1.4 liters. (Fig. 8)
Dip
stick
1400ml / 1.4 liters. If so turn the machine over and
remove water to adjust water level.
!
Make sure steamer is completely cooled
the cap while the steamer is hot can cause scalding
and severe burns.
(Fig. 9)
The dipstick has
3 marks, F is full 1400ml, apox. 1 hour steam time - H is
half full 700ml, aprox. 30 min steam time - L is low
200ml, aprox. 10 min steam time.

Vapamore
at a
(Fig.12)
Fig.12
the steamer is always
A
WARNING: Hot steam may escape when opening the cap if the machine is not
!
!
!
!
!
OPERATION
Use caution when changing the accessories as they may be hot. Never open
the tank cap while the steamer is pluged in. The tank is hot and under pressure.
slide the
lock up towards the trigger and to release slide the lock down away from the trigger.
the

extension tube (use 1 to 2 tubes as desired). Ensure
Fig.13
Fig.14
Fig.15
Fig.16
OPERATION
cleaning head can be stored (as shown on the cover
page of this instruction manual) by inserting the tab on
of the Vapamore.
!
‘’
CLICK
like tile, stone, wood, vinyl and cement along with any
cloth can be hand or machine washed. *Air dry only, do
not use any fabric softeners. (Fig. 14)
brush attachment that can be used where scrubbing
with grout lines, or any non even surface. To remove
remove the triangle brush. (Fig. 15)
or rugs to sanitize, deodorize, kill allergens, bedbugs
head. Snap on the carpet slider onto the bottom of the
easily slide on the surface of most carpets and rugs.
*The carpet slider is only to be used for carpets and rugs.
Do not use the carpet slider for any other surfaces.
(FIG. 16 - 17)
Carpet
cloth
Fig.17
slider

ACCESSORIES / BRUSHES
There are 4 brushes supplied with the MR-100 Primo.
Suggested uses (brass brush), Oven grills, BBQ grates,
cement stains, machinery, and metal surfaces. (Nylon
medium duty and large nylon brush), used for more
sensitive materials such as blinds, carpet, furniture, air
brush is used for harder less sensitive areas such as
IMPORTANT : With all brushes it is important to not
apply excessive pressure or force. This can cause failure
of the adaptor or related parts. When using the brushes
let the steam do the work and the brush to help agitate
the stain or area being cleaned. (Fig. 19 /20)
OPERATION
Fig. 19
ACCESSORIES / CLOTHES - FABRIC TOOL
ACCESSORIES / SMOOTH SURFACE TOOL
Fig.20
Fig. 21
Fig. 22
Fig. 23
ACCESSORIES / SCRAPER
Sanitize -
counter tops,
tile, stone,
granite, glass,
stainless steel,
walls, etc.
The scraper tool can be used to defrost freezers, on
oven walls and cook top surfaces to remove stuck on
food. This tool is also good for removing wall paper,
paint and shelve paper. (Fig. 21)
Start by installing the supplied cotton cover on the
clothes - fabric / smooth surface tool. Now this tool can
be used for steaming and sanitizing along with
eliminating odors in garments, fabrics, furniture,
curtains, drapes, etc.
Using the clothes - fabric / smooth surface tool without
the cotton cover acts as a squeegee and is great for
sanitizing kitchen and bathroom counter tops chemical
free along with smooth surfaces such as stone, granite,
wood, glass, tile and stainless steel. (Fig. 23)
BEDBUGS AND ALLERGENS
Use this tool on bedding, pillows, and furniture by
applying light pressure and slowly passing it along the
surface to kill Bedbugs, dust mites and other allergens.
(Fig. 22)
The detail adapter must be used with all brushes
scraper tool and angle jet tip tool.

Fig.26
Fig.27
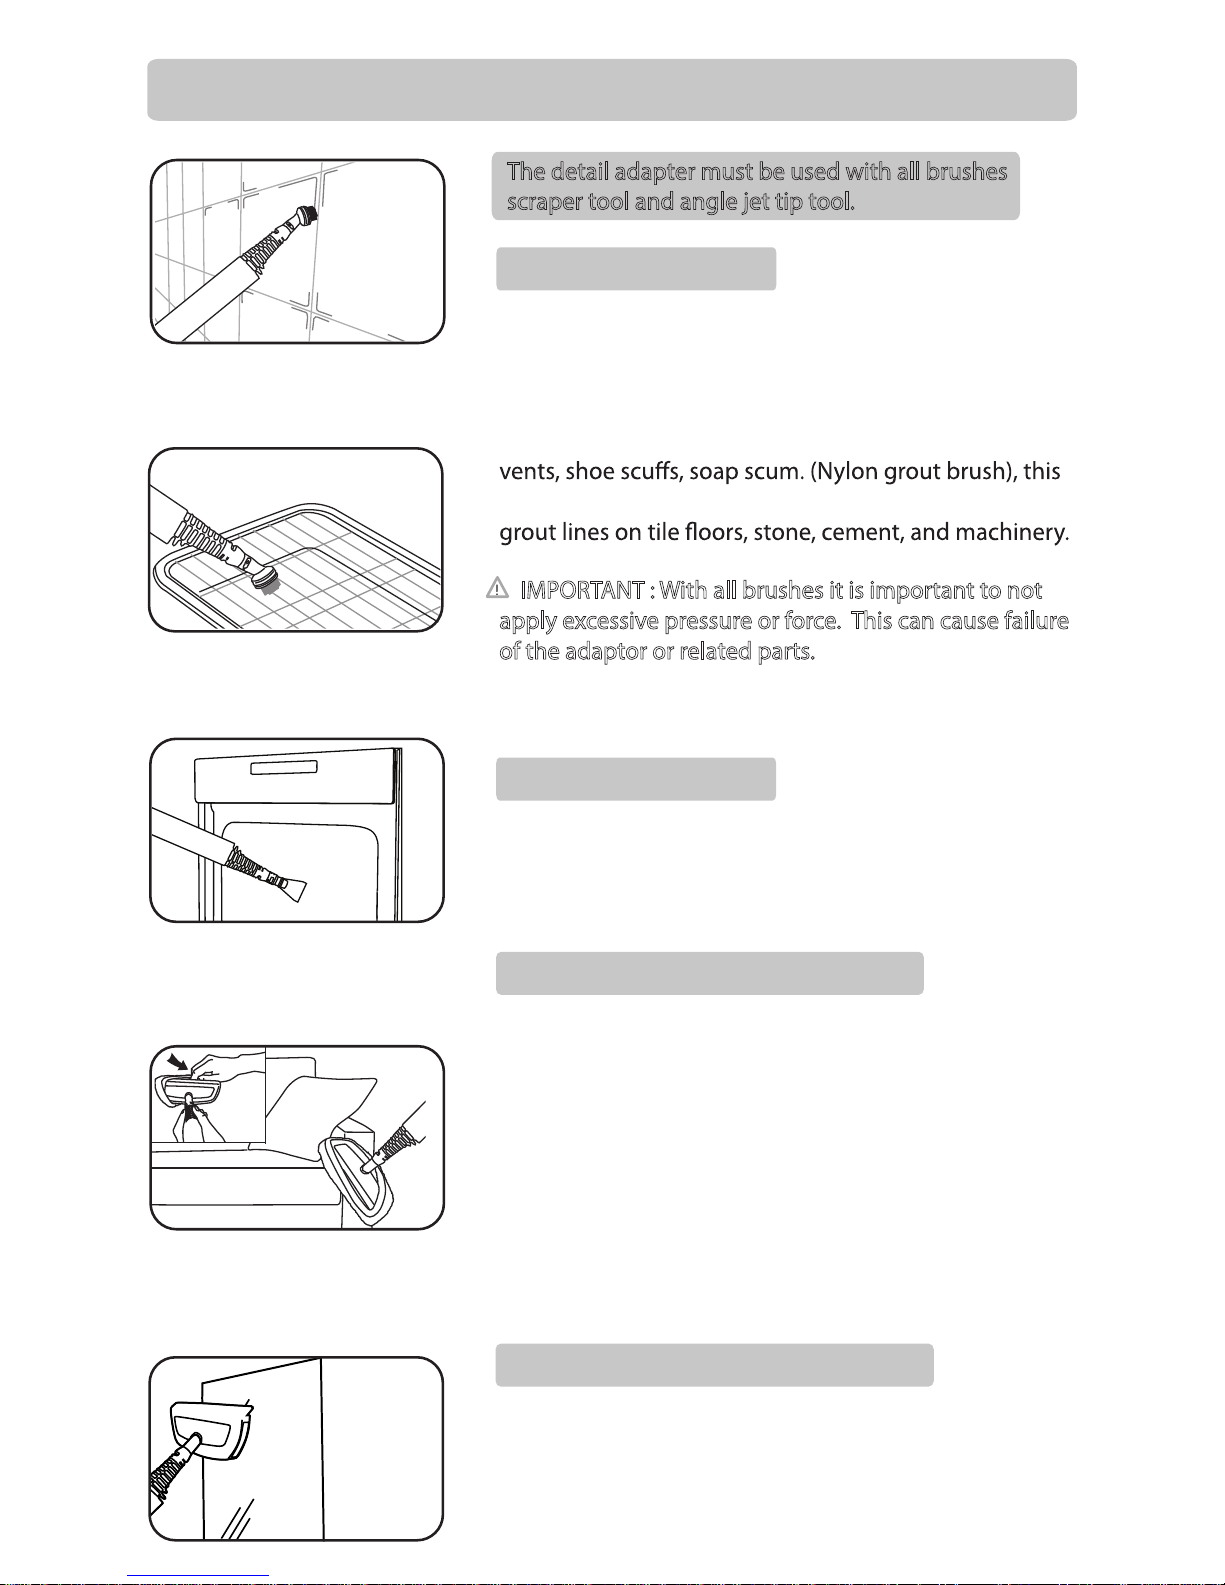
The steam gun with the detal adapter can be used as a
straight jet nozzle tool or along with the 90 degree jet
nozzle attachment. These tools are great for cracks and
crevices. Make sure to concentrate the steam directly on
the area to be treated with as minimal distance as
possible, no more than 1’’ away. The steam will condense
eggs if the jet tip is not directly on the surface being
treated. The 90 degree jet nozzle can be attached directly
to the steam gun or the extension tubes. (Fig. 28 - 29)
BEDBUG - DUST MITES - ALLERGENS
The Vapamore MR-100 Primo produces steam with an output temperature between 210˚
to 220˚ degrees. Pests such as bedbugs, dust mites and other allergens along with their
eggs are killed on contact at a temperature of 180˚ degrees. Using steam is an extremely
other bacteria or viruses without leaving any harmful chemical residue behind. The tools
supplied with the Vapamore MR-100 Primo allow you to treat all areas where these pests
can hide such as bedding, sofas, furniture, pillows, carpet, cracks and crevices that are
ideal hiding places for pests.
BEDDING / FURNITURE
Fig. 25
The clothes / fabric tool with the cotton cover is ideal for
treating bedding, furniture, pillows, and carpet areas
around bed posts and base boards. Start by installing
the supplied cotton cover on the clothes - fabric /
smooth surface tool. Apply light consistent pressure and
slowly pass it along the surface (1”per second) to insure
the area being treated has a chance to come to full
temperature killing pests and their eggs. (Fig. 25)
great for treating large surface areas such as bedding,
furniture, and carpet areas. Start by installing the
head to glide over fabric or carpet. (Fig. 26 - 27)
Apply light consistent pressure and slowly pass it along
the surface (1’’ per second) t
o ensu
re the area being
treated has a chance to come to full temperature killing
pests and their eggs.
Fig.28
cloth
Carpet slider
Detail adapter with steam gun
Detail adapter with ectension tube
Fig.29

CLEANING / MAINTENANCE
Always ensure before cleaning or maintaining the Vapamore MR-100 Primo that it is
switched o and unplugged from the wall outlet. Only clean the outer surface with a
slightly, water moistened cloth. Do not use any cleaning agents, abrasives or alcohol
Fig.24
Lubricate the threads on the water tank cap with light oil or lubricating spray such as
WD-40 once every 3 months or when needed.
R
ACCESSORIES
!
or
The tank should be emptied before storing for any
extended period of time (30 days or more). To empty
the tank, make sure the Vapamore is completely cooled
upside down to drain any remaining water from the tank.
when turned upside down. Water can be stored in the
tank under 30 days as long as its distilled water being
used as instructed. Using / storing hard water will
damage the machine and void the warranty. (Fig. 24)
CLEANING /STORAGE
Parts, extension tubes and accessories can also be stored in the supplied mesh storage
bag.
STORAGE
detergents and wash cycle. *Air dry dry only, do not use any fabric softners as these will
leave a residue on the pad and cause cleaning issues when using the pad.
Fig.25
The steam gun, extension tubes and oor head can be
stored on the storage slot located on the side of the
steamer. Insert the tab lockated on the extesion tube
into the storage slot. See the photo on the instruction
book cover for an example. (Fig. 25)

TIPS
APPLICATIO
N
STEAM VOLUME ATTACHMEN
T
TECHNIQUE
FLOORS / CHEMICAL FREE CLEANING WITH NO RESIDUE LEFT BEHIND
Vinyl Tile Or Vinyl Sheet Medium - High
Floor Cleaning Head +
Micro fiber + Extension
Tubes + Nylon Brush.
Sweep or vacuum first. Steam mop with
floor cleaning head and micro fiber cover.
Corners and baseboards with nylon brush.
Stone Tile, Slate, Ceramic Tile, Grout High
Floor Cleaning Head +
Micro Fiber + Extension
Tubes + Nylon Brush +
Grout Brush + Nylon Brush
Jet Nozzle
Sweep or vacuum first. Steam mop with
floor cleaning head, heavy stains use
without micro fiber cover. Corners and
baseboards with nylon brush. Grout lines
use grout brush and / or jet nozzle. Finish
with floor cleaning head / micro fiber cover.
Smooth Surface Concrete High
Floor Cleaning Head +
Micro Fiber + Extension
Tubes + Grout Brush +
Nylon Brush + Metal Brush +
Jet Nozzle
Sweep or vacuum first. Steam mop with
floor cleaning head, heavy stains use
without micro fiber cover. Corners and
baseboards with nylon brush. Joint lines
use grout or metal brush and / or jet nozzle.
Finish with floor cleaning head / micro fiber.
w - MediumoLdoowdraH
Floor Cleaning Head +
Micro Fiber + Extension
Tubes
Sweep or vacuum first. Steam mop with
floor cleaning head and micro fiber cover.
CARPETS / SPOT TREATMENT
Wall To Wall, Rugs, Spot Care High Nylon Brush + Jet Nozzle +
Paper Or White Cotton Towel
Vacuum area first then steam using brush
or jet. Use towels to blot stain away.
Chemical cleaner can be used prior to
steam treatment.
WALLS, CEILING
S
Painted, Wood Paneling, Wallpaper Low - Medium
Painted, wood paneling, wallpaper walls
are heat sensitive. Always test small area
first and be careful not to over heat finish.
Use Floor Cleaning head with micro fiber
cover or clothes steamer with cotton cover.
Use nylon brush for corners and stains.
hgiHlavomeRrepapllaW
Nylon Brush, Jet Nozzle,
Extension Tubes + Smooth
Surface Tool + Scraper
Use at full power to soften glue and
remove wallpaper. Wallpaper stripper can
be applied first.
hgiH-muideMstneVriA
Nylon Brush, Jet Nozzle,
Extension Tubes, Cotton
Towel
Clean using brush and jet tip. Wipe down
with clean cotton towel.
UPHOLSTERY / SPOT TREATMENT
Vinyl, Synthetic, Cotton Medium - High
Nylon Brush, Jet Nozzle,
Clothes Steamer, Cotton
Cover
,
Cotton Towel
Test a small area first. Some synthetic
materials will not handle high heat. Use
n
y
lon brush with soft
p
ressure for lar
g
er
stains and jet tip for small stains. Blot with
cotton towel. Use clothes steamer with cotton
cloth to go over all surfaces to deoterize.
woLrehtaeL Clothes Steamer, Cotton
Cover, Cotton Towel
Test a small area first. Steam over stained
area and then blot with cotton towel. Use
clothes steamer with cotton cloth to go
over all surfaces to deoterize.
CARPETS / DEOTERIZE + KILL BEDBUGS - DUST MITES AND ALLERGENS
Wall To Wall, Rugs High
Floor Cleaning Head +
Extension tubes + Micro
Fiber + Jet Nozzle
Vacuum area first then steam using floor
cleaning head with micro fiber cover. Pass
slowley over area to allow heat to kill pests.
Use jet nozzle for corners and cracks.
Floor Cleaning Head +
Extension tubes + Micro
Fiber + Nylon Brush +
Clothes / Fabric tool
with cotton cover.
UPHOLSTERY / KILL BEDBUGS - DUST MITES AND ALLERGENS
Vinyl, Synthetic, Cotton Medium - High Jet Nozzle, Clothes
Steamer, Cotton Cover
Test a small area first. Some synthetic
materials will not handle high heat. Use
clothes steamer with cotton cover and
slowley pass over area to allow heat to
kill pests. Use jet nozzle for cracks and
corners.

TIPS
APPLICATIO
N
STEAM VOLUME ATTACHMEN
T
TECHNIQUE
WINDOW BLINDS
Levolor, Venetian, Horizontal, Vertical Low-Medium
Nylon Brush, Jet Nozzle,
Detail Nozzle, Extension
Tubes, Cotton Towel
Dust area first. Thin plastic blinds may not
be able to handle heat from the steam.
Test a small area first. Use jet or detail
nozzle from 4'' away. Wipe off with cotton
towel.
GLASS
muideMsrorriM,swodniW
Smooth Surface Squeegee,
Extension Tubes, Nylon
Brush, Paper Towels
Pre-steam glass from 6'' away to heat
glass. Use brush for edges and bases.
Finish with window cleaner squeegee. Do
not use if temperature is under 32 degrees
to prevent cracking.
Window Screens, Window Frames Medium -High Detail Nozzle, Nylon Brush,
Extension Tubes
Steam area with detail nozzle. Use brush
for edges and corners.
KITCHENS
hgiH-muideMsnevO,spoTevotS
Nylon Brush, Brass Brush,
Extension Tubes, Paper
towels
Use nylon brush over all surfaces and
brass brush for interior oven grates. Wipe
down with paper towels
muideMsecnailppAllamS Nylon Brush, Detail Nozzle,
Paper towels
Use brush over all areas and detail nozzle
for small corners and seems. Wipe down
with paper towels.
Sinks, Faucets, Drains Medium - High Nylon Brush, Detail Nozzle,
Paper towels
Use brush over all areas and detail nozzle
for small corners and seems. Wipe down
with paper towels.
Counter Tops Low- Medium
Smooth Surface Sqeegee,
Nylon Brush, Detail Nozzle,
Paper towels
Use brush over all areas and detail nozzle
for small corners and seems. Use smooth
surace squeege to sanitize counter tops
by slowly passing over area then wipe area
with paper towel for chemical free cleaning.
BATHROOM
hgiH-muideMtuorG,eliT
Floor Cleaning Head +
Micro Fiber + Extension
Tubes + Grout Brush + Jet
Nozzle
Sweep or vacuum first. Steam mop with
floor cleaning head, heavy stains use
without cotton cover. Corners and
baseboards with nylon brush. Grout lines
use grout brush and / or jet nozzle .Finish
with floor cleaning head with micro fiber.
Porcelain Toilets, Chrome Fixtures Medium - High Nylon Brush, Detail Nozzle,
Paper towels
Use brush over all areas and detail nozzle
for small corners, hinges, and seems. Wipe
down with paper towels.
Shower, Tubs, Doors Medium
Nylon Brush, Detail Nozzle,
Extension Tubes, Paper
towels
Use brush over all areas and detail nozzle
for small corners and seems. Wipe down
with paper towels.
AUTO, MOTORCYCLE, MARINE
hgiH-muideMsaerAroiretnI Nylon Brush, Jet Nozzle,
Clothes Steamer, Cotton
Cover, Cotton Towel
Test a small area first. Some synthetic
materials will not handle high heat. Use
nylon brush with soft pressure for larger
stains and jet tip for small stains. Blot with
cotton towel.
Detailing, Exterior, Engine Medium - High Nylon Brush, Detail Nozzle,
Jet Nozzle
Use brush over all areas and detail nozzle
for small detail areas.
(NOTE: HARD WATER AND CALCIUM STAINS CAN ONLY BE REMOVED WITH CHEMICALS.
A vacuum pump is a necessary component on a diesel engine vehicle with vacuum operated components.
Table of contents
Other VAPamore Steam Cleaner manuals

VAPamore
VAPamore MR-750 OTTIMO User manual

VAPamore
VAPamore MR-1000 Forza User manual

VAPamore
VAPamore MR-1000 Forza User manual

VAPamore
VAPamore Primo MR-100 User manual

VAPamore
VAPamore Primo MR-100 manual

VAPamore
VAPamore MR-750 OTTIMO User manual

VAPamore
VAPamore MR-75 Amico User manual

VAPamore
VAPamore MR-75 Amico User manual

VAPamore
VAPamore Primo MR-100 User manual

VAPamore
VAPamore MR-500 Vento User manual