11
4.0. BATTERIES AND CHARGING
BATTERIES
The VELA Blues 100 is equipped with two 12V-24 Ah maintenance-
free and vapour-free batteries. Good quality new batteries provide
the equivalent of three hours of continuous operation. Experience
shows that this covers the daily needs of most users. The batteries
are dimensioned to be fully run down 200 times. Their lifetime will
be extended significantly if they are only partially run down before
charging. Defective batteries must be replaced with batteries of
the same type. We recommend that battery replacement be car-
ried out by a service technician.
NOTE! When installing batteries, extreme care must be taken to
connect + / - correctly. Red wire to the + pole. Incorrect connec-
tion can damage the powerchair’s electronics.
NOTE! Batteries must not be disposed of with ordinary household
rubbish. Used batteries and other electrical equipment must be
deposited at an approved recycling centre according to the marking
on the product.
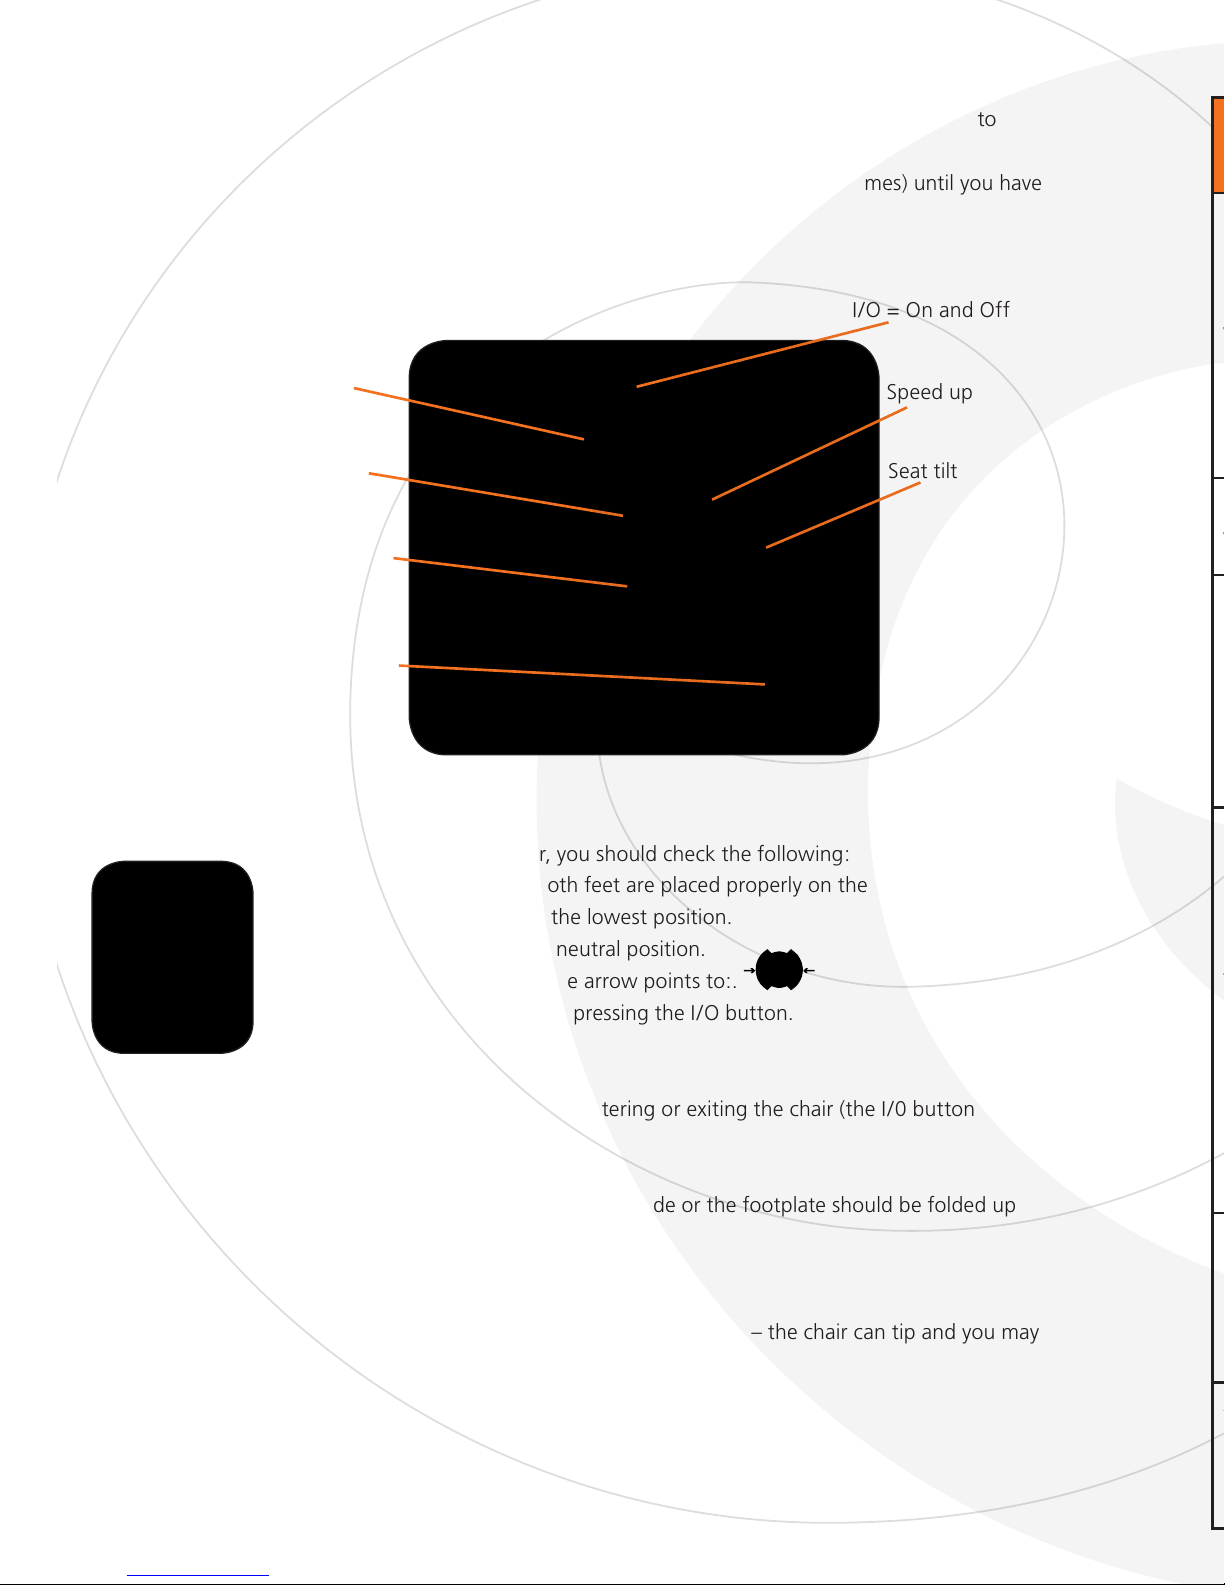
BATTERY CHARGE INDICATOR
The control box has a built in battery indicator. For fully-charged
batteries, three groups of coloured LEDs light up. During use, the
voltage in the batteries falls and the row of lights decreases: one at
a time each light goes off.
• Green signal = DRIVE
• Yellow signal = Recharging needed soon
• Red signal = Recharging needed immediately
The battery indicator will flash to call attention to low battery
power.
BATTERY CHARGING UNIT
Batteries are charged using the accompanying charging unit (e.g.
Classic 8A). The charging time is approx. 8 hours, depending on
the condition of the battery. It is recommended that the batteries
be charged every night. The charging unit is fully automatic and
controls the power and voltage during the charging. When the
batteries are fully charged, power consumption will be minimal, so
you can safely continue to allow the charging unit to be connected
until the next time you use your VELA Blues 100.
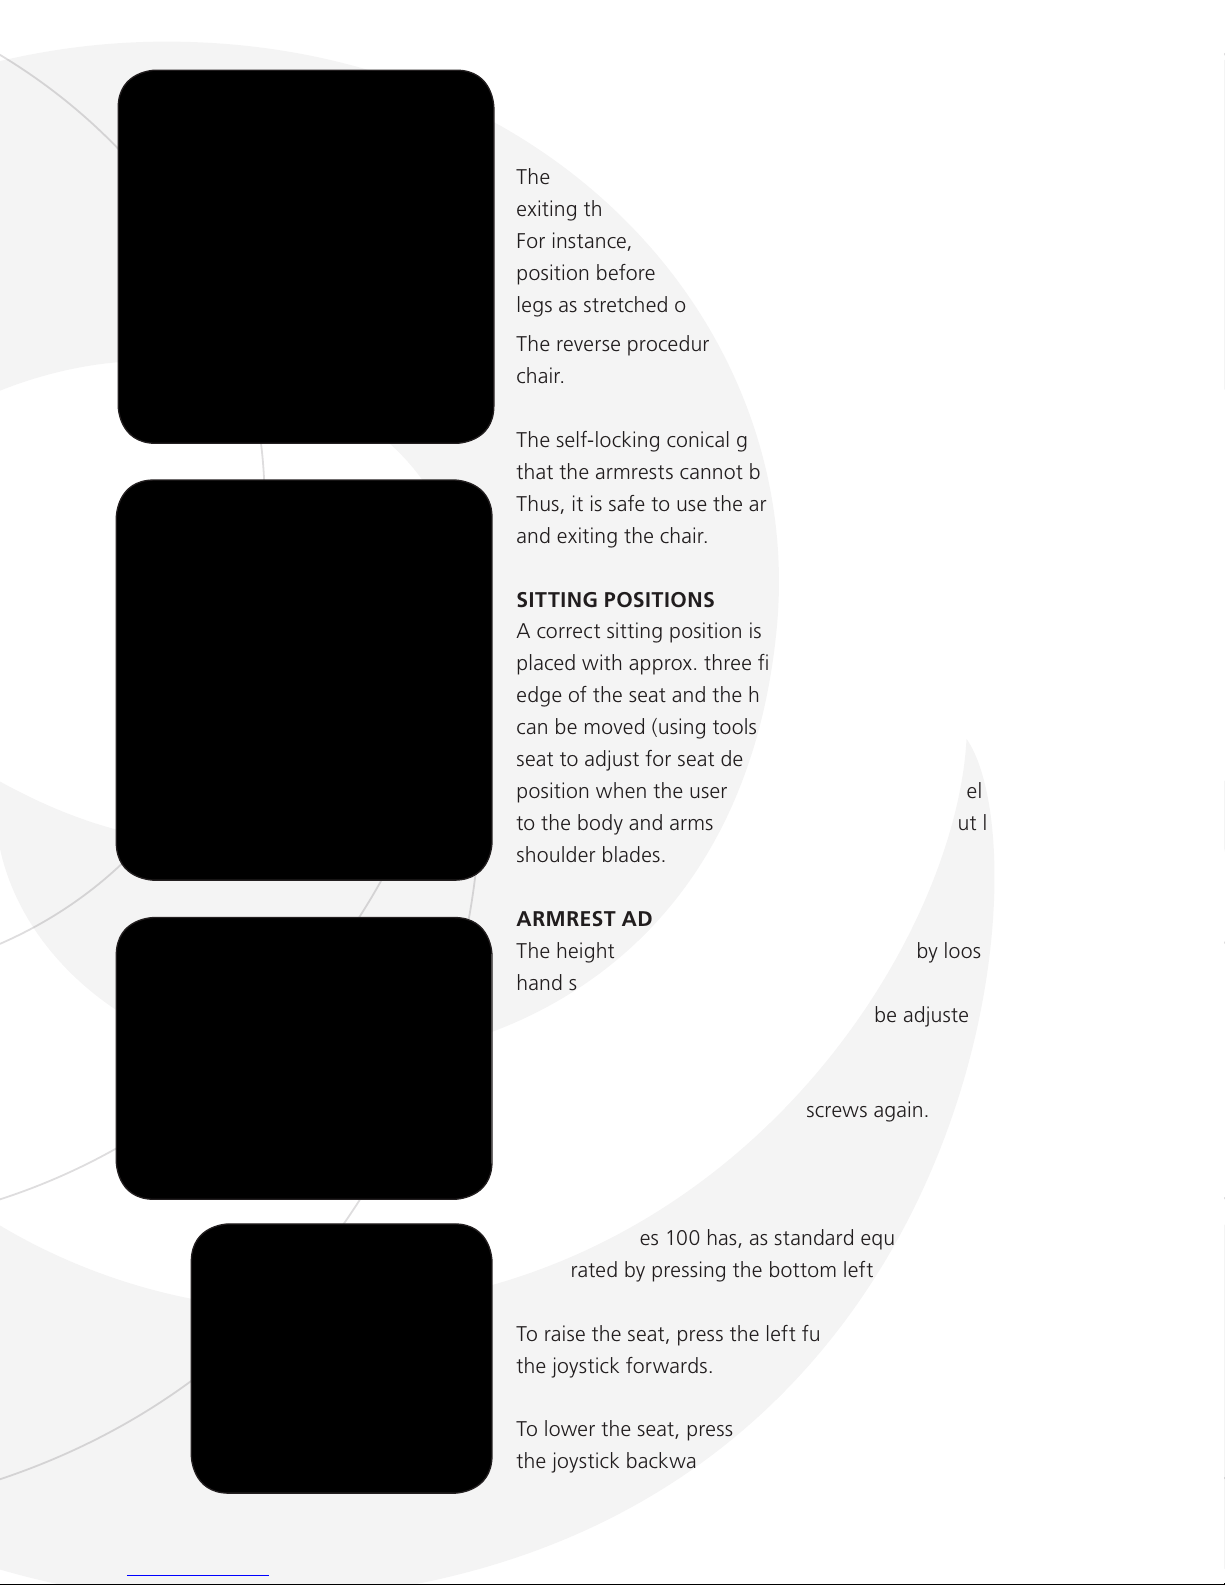
CONTROLLING THE POWERCHAIR
Pushing the joystick forwards, activates both wheels synchronously and the chair moves forwards.
Pushing the joystick backwards, activates both wheels synchronously and the chair moves in the
opposite direction. If the joystick is pushed diagonally in one direction, the speed is distributed
between the two wheels asynchronously (and in some cases in separate directions). This will cause
the chair to move on a path in the right direction.
NOTE! When changing directions, the chair’s swivel wheels should change position: they will swing
on the axel of the front fork until the wheels are pointing in the direction you wish to go. When the
powerchair is standing still before changing direction in this way, a large amount of motor power is
needed to drive the wheels. This power can cause a jolt to the front end (leg supports) or back end
(if the chair is front-wheel drive) of the chair. The effects of this jolt can be minimised by increasing
power gradually and moderately (small movements of the joystick).
Warning! Despite an approved EMC test, we make no guarantee that the powerchair is not
affected by electromagnetic fields from e.g. mobile phones and radio transmitters, or that the
powerchair does not transmit electromagnetic fields that can affect its surroundings, such as e.g.
shop security systems.
NEGOTIATING OBSTACLES
The VELA Blues 100 can handle a difference in surface level of up to 3.5 cm, which makes it possible
to cross e.g. doorsteps and many types of ramps. Always drive as straight as possible when negoti-
ating such obstacles. For abrupt changes in level, it helps to increase the length and speed of your
approach.
Warning! The electric seat lift must be lowered to the lowest position before negotiating obstacles
as a raised seat reduces stability and can cause the chair to tip over!
NEGOTIATING SLOPING SURFACES
The powerchair has enough traction to negotiate standard household ramps.
(Max. gradient with load of 75 kg: 12°). When moving down ramps, the chair must always move
perpendicular to the sloping surface and at a slow speed.
Warning! The electric seat lift must always be lowered to the lowest position before negotiating
sloping surfaces as a raised seat reduces stability and can cause the chair to tip over!
Warning! The chair must never be driven diagonally or sideways across a sloping surface as this
can cause the chair to tip over!
BRAKING
To stop the powerchair, return the joystick to the central position or let go of it.
The VELA Blues 100 is equipped with an electric brake that is activated automatically moments after
the drive motors stop. This brake ensures that the chair is fully locked when entering and exiting,
parking on ramps etc.
6