www.vela.eu
VELA :: Gøteborgvej 8-12 :: 9200 Aalborg SV :: Denmark :: Tlf: (+45) 96 34 76 00 :: [email protected]Monteringsvejledning/Monteringsanvisning/Mounting instructions :: VELA Tango
701.702 © Vermund Larsen A/S
Montering af el-bremsestel VELA Tango El
NORSK
1. Fjern hettene fra bakhjulene, ern gummiproppene på utsiden av bremsehjulene med en skrutrekker, og trekk ut den sekskante-
de akselen ved hjelp av en 8 mm bolt. Bremseakselen og bremsestangen ernes (A samt veiledning 105869).
2. Bor et 8,5 mm hull gjennom topplaten på understellet. Hullet plasseres i midten, ca. 7 cm fra ytterkanten på høyre side (B).
3. Beslaget til gasspatronen monteres under understellet med 6 mm bolter i de to hullene med mutter på oversiden (C og D).
4. Bremseakselen monteres, og den sekskantede akselen monteres gjennom hjul og bremseaksel. Akselen låses ved å montere de
to gummiproppene på yttersiden av hjulene igjen.
5. Aktuatoren monteres med bolter og mutre (sett). Pluggen kobles til kontakten på spiralkabelen, og skyves inn under beslaget (C).
6. Gummigjennomføringen monteres i hullet på understellet, og spiralledningen med molex-kontakt monteres
gjennom hullene (B og C).
7. Demonter batteridekslene, og koble motorstyringen til batteriene. Klipp av de to eksisterende pluggene fra ledningene, og klem
fast de to ledningene i kabelskoene. OBS! Den røde ledningen kobles med rød til plusspolen, og den svarte ledningen kobles
med svart til minuspolen. Monter batteridekslene (F) på igjen.
8. Minifit-kontaktene monteres på spiralkabelen, og kobles til den andre minifit-kontakten fra motorstyringen (G og H).
9. Spiralkabelen fra motorstyringen trekkes opp til armleneputen, og jackpluggen settes i fôringen på enden av
armleneputen. Motorstyringen monteres på siden av bæreplaten med borrelås (I).
Viktig: +/- poler skal settes riktig vei. Hvis de monteres motsatt vei vil motorstyringen ødelegges.
SVENSKA
1. Ta bort kåporna från bakhjulen, använd skruvmejsel för att ta bort gummipropparna på bromshjulens utsida och dra ut den sex-
kantiga axeln med hjälp av en 8mm-skruv. Ta bort bromsaxel och bromsstång (A samt anvisning 105869).
2. Borra ett 8,5mm hål genom underredets topplatta. Hålet ska sitta i mitten, ca7cm från ytterkanten på höger sida (B).
3. Montera beslagen för gaspatronen under underredet med 6mm-skruvar i de två hålen. Muttrarna ska sitta på
ovansidan (C och D).
4. Montera bromsaxeln, och montera den sexkantiga axeln genom hjul och bromsaxel. Lås axeln genom att sätta tillbaka de två
gummipropparna på utsidan av hjulen.
5. Montera ställdonet med skruvar och muttrar (sats). Anslut kontakten till stickpropp från spiralsladd och skjut in den under beslaget (C).
6. Montera gummigenomföringen i hålet på underredet, och montera spiralsladden med molex-kontakt genom hålet (B och C).
7. Ta bort batterilocken och anslut motorstyrningen till batterierna. Kapa befintliga kontakter från ledningarna. Placera de två
ledningarna i kabelskorna och kläm samman. OBS! Röd ledning med röd går till pluspolen och svart ledning med svart går till
minuspolen. Sätt tillbaka batterilocken (F).
8. Montera minikontakten på spiralkabeln och koppla ihop med den andra minikontakten från motorstyrningen (G och H).
9. Dra spiralkabeln från motorstyrningen upp till armstödsdynan och placera kontakten i bussningen i änden av dynan. Montera
motorstyrningen på sidan av stödplattan med kardborreband (I).
Viktigt: +/- polerna måste vara korrekt orienterade. Motorstyrningen påverkas om den är inverterad.
ENGLISH
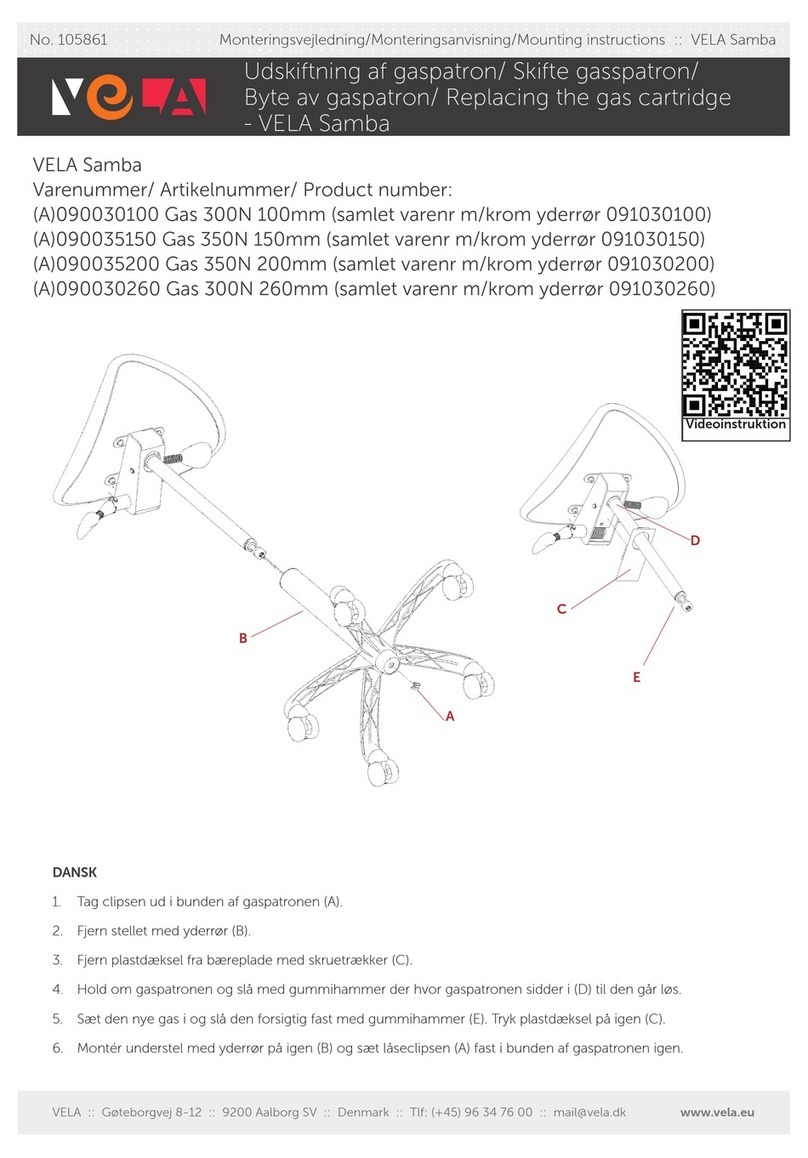
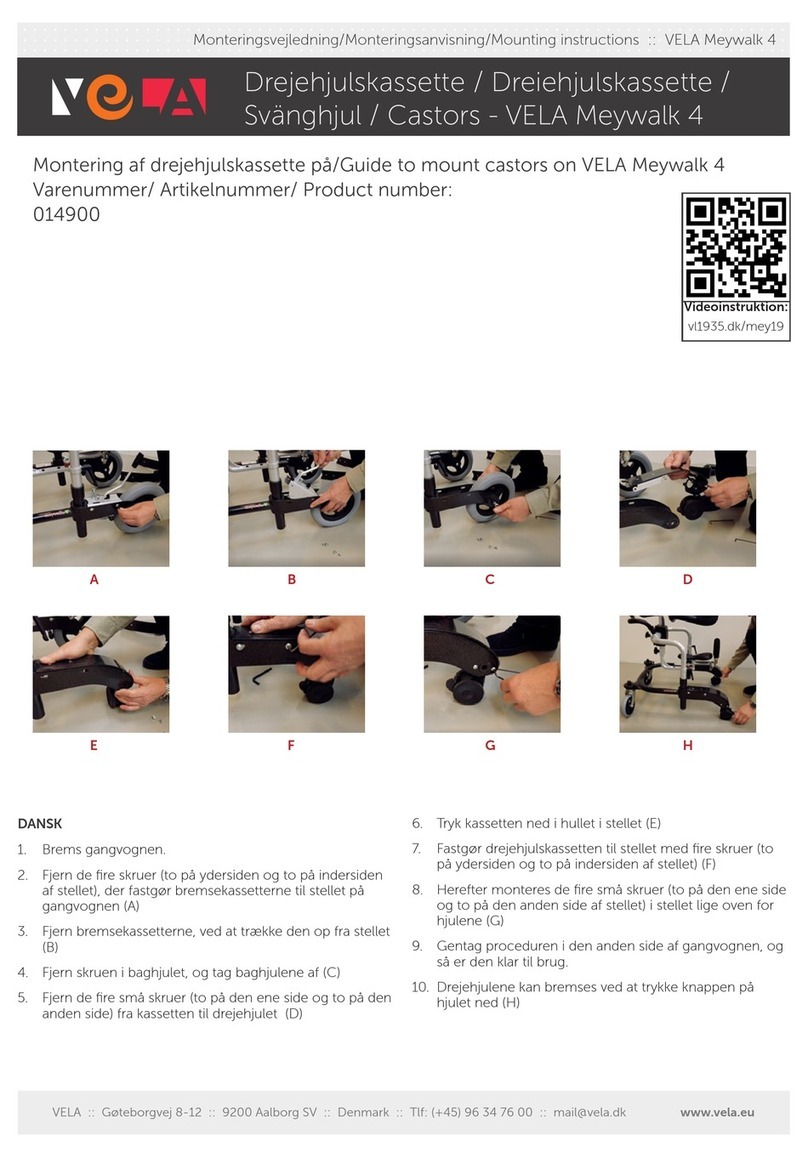
1. Remove the covers from the back wheel. Remove the rubber plugs from the outside of the brake wheel with a screwdriver, and
pull out the hexagonal axle by using an 8 mm bolt. Remove the brake shaft and brake stick (A and instruction 105869).
2. Drill an 8.5 mm hole through the top plate of the underframe. Position the hole in the centre, approximately 7 cm from the
outer edge on the right-hand side (B).
3. Mount the fitting for the gas cartridge under the frame with a 6 mm bolt in the two holes with the clasp on the top side (C and D).
4. Mount the brake shaft and hexagonal axle through the wheel and brake shaft. Lock the axle by mounting the two rubber plugs
on the outside of the wheels once again.
5. Mount the actuator with bolts and clasps (kit). Assemble the plug from spiral cable and push it in under the fitting (C).
6. Mount the rubber feed plug in the hole on the frame, and insert the spiral wire with molex plug through the hole (B and C).
7. Remove the battery covers and connect the motor control to the batteries. Clip the existing plug o the wires, and connect and
clamp the two wires together in the cable shoes. NB: Connect the red wire with red to the plus pole, and connect the black
wire with black to the minus pole. Re-attach the battery covers (F).
8. Connect the Mini-Fit plug to the spiral cable, and connect this cable to the other Mini-Fit plug from the motor
control (G and H).
9. Pull up the spiral cable from the motor control to the armrest cushion, and set the jack plug in the bushing at the end of the
armrest cushion. Mount the motor control on the side of the seat support with velcro (I).
Important: +/- poles must be correctly oriented. The motor control is damaged if it is installed inverted.
Montering af el-bremse/ Montering av el-brems/
Montering av elbroms/ Mounting the electric brake
- VELA Tango


