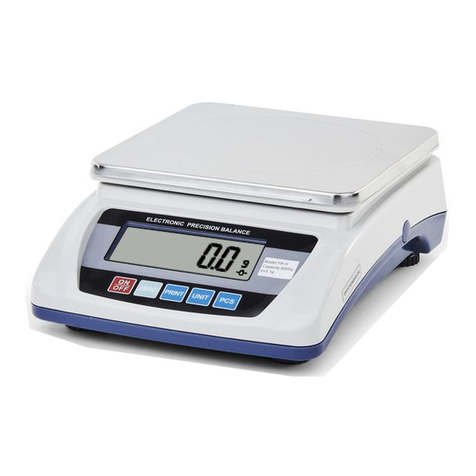
Vetek LPWN-1530 User manual

ANVÄNDAR INSTRUKTION Bordsvåg LPWN
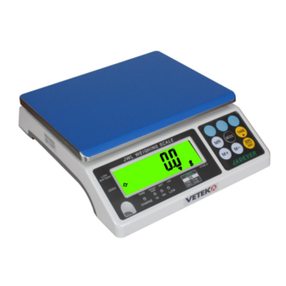
Räknevågar för vägning av det mesta. För normalt bruk räcker det med sida 1 och
2 i instruktionen. Om komplett information
önskas kan den kompletta instruktionen
laddas hem från www.vetek.se eller
rekvireras från Vetek AB.
SPECIFIKATIONER
Typ LPWN-150 LPWN-3075 LPWN-1530 LPWN-7515 LPWN-
1530K
Kapacitet 150g 0.02g~300g
300.05g~750g
0.1g~1500g
1500.2g~3000g
0.5g~7.5kg
7501g~15kg
1 g~15kg
15002g~30
kg
Gradering 0.01g /0.02g
0.02g
0.05g
0.1g
0.2g
0.5g
1g
1g
2g
Vägningsenheter g, kg, lb, oz, lb-oz, pcs, %.
Vågplatta Ø125 mm Ø 150 mm 235 x 178 mm
Display 5 LCD-siffror med bakgrundsbelysning.
Egen vikt 4.5 kg
Dimension 280 (B) x 250 (D) x 100 (H) mm
Matning 110, 220 VAC , 50/60 HZ eller uppladdningsbart batteri 6V/4Ah, 120 timmars drift
Battery Life 120 hours
Max fuktighet 85% R.H, icke kondenserande.
Arbetstem-
peratur -5° ~ 40° C
Option RS-232 (Option)
Allmänt
a. Vågen är utrustad med nivå libell under vågplåten samt fyra justerbara fötter. Var noga med att justera
”bubblan” till centrum av den inre ringen.
c. Vågen bör alltid användas i en miljö som är så fri som möjligt från temperaturvariationer, damm,
vibrationer, drag, fukt eller i korrosiv miljö. Dessa faktorer påverkar hållbarhet och tillförlitlighet.
d. För kontinuerlig drift anslut vågen till nätet med nätadaptern. Vi rekommenderar att inte maskiner, tex
borrmaskiner, används på samma säkring. Vi rekommenderar att vågen ansluts till ett vägguttag som
står inkopplat hela dygnet. Undvik att ansluta vågen till nät som är strömlöst över natten, om så är
nödvändigt rekommenderar vi att autopower off funktionen aktiveras.
e. För högsta noggrannhet bör vågen stå på 15 minuter innan den används.
f. En mekanisk transportsäkring till lastcellen är placerad på undersidan av vågen (markerad med etikett).
Lossa skruvarna och förvara dom för eventuell framtida transport av vågen.
g. Finns tveksamhet om hur vågen ska monteras eller om komplett information önskas finns utförlig
information i den kompletta instruktionen. Den kan laddas hem på www.vetek.se.
Instruktion-LPWN Rev 1.2005 Utskrift 2005-12-01 Användarmanual
Vetek AB Box 79, Industriv. 3 760 40 Väddö Tel 0176 208 920 Fax 0176 208 929

Tryckknappar
ON/OFF Till / Från
ZERO Nollställning av vågen när vågplattan är obelastad (lasten måste vara <+-2% av max
kapaciteten). Viktdisplayen visar ZERO längst ned till vänster när den är stabil.
TARE Lagrar taravikten i minnet när man lägger på ett emballage eller t.ex. en skål. Vågen visar
sedan nettovikten. Viktdisplayen visar NET/TARE längst ned till vänster.
MODE Val av enhet kg, g, lb, lb-oz, pcs, %.
PRINT Ger printkommando till skrivare. OBS Vågen måste ha option RS232 utgång.
Strömförsörjning
•I normal läge ansluts vågen till 230 VAC.
•Blybatteriet räcker för ca 120 timmars drift och det tar ca 8 timmar att ladda det. När laddning
pågår lyser dioden i fönstret CHARGE röd, när batteriet är fullt lyser dioden grön.
•En symbol visas när batteriet har låg kapacitet.
”Vanlig vägning”
Nollställning & Tara.
1. Närhelst det visas ett värde i fönstret med vågskålen obelastad, går det att nollställa vågen genom att
trycka på ZERO.
2. Lagring av Tara i minnet. Placera en tom behållare på vågskålen, tryck på TARE, ordet Tare skall då bli
synligt i det nedre vänstra fönstret (intill lysdioden) vikten på behållaren är nu lagrad i vågens minne.
3. Lägg önskat material i behållaren, vågen visar nu nettovikten.
4. Om ni nu tar bort behållaren med innehåll, visas behållarens vikt så som negativt värde. Tryck TARE
för att återställa vågen.
Att räkna småsaker
Detta är en våg för ”vanlig vägning” men den har även en enkel räknefunktion.
Räkna enheter
Vågen är utrustad med genomsnitt beräkning, Denna funktion kompenserar för mindre viktskillnader i
provvikterna. Provvikterna bör väga minst 0,8 x vågensgradering. Är vikterna för små för att räknas med
bra noggrannhet piper vågen.
1. Tryck på MODE tills displayen visar 0 PCS
2. Tryck på TARE en gång, displayen visar CAL.
3. Lägg på 25, 50 eller 100 provvikter på vågen, ju fler ju noggrannare blir räkningen. Tryck på TARE tills
displayen visar det valda antalet.Vänta en liten stund tills displayen visar antalet
4. Vågen visar nu antalet enheter på vågplattan.
% Vägning
1. Tryck på MODE tills displayen visar 0 %
2. Tryck på TARE en gång, displayen visar CAL.
3. Lägg på den provvikt som ska motsvara 25, 50 eller 100%. Tryck på TARE tills displayen visar det
valda %-värdet. Vänta en liten stund tills displayen visar detta värde.
4. Vågen visar nu i %.
Ett tips:
Det går inte att tarera bort en tom ask eller låda innan dessa funktioner aktiveras. Men man kan ställa på
denna ”dödvikt” om det inte väger för mycket innan man startar vågen.
Instruktion-LPWN Rev 1.2005 Utskrift 2005-12-01 Användarmanual
Vetek AB Box 79, Industriv. 3 760 40 Väddö Tel 0176 208 920 Fax 0176 208 929

I. INTRODUCTION
Thank you for your purchase of Vetek high precision electronic weighing scale, which enables you to
measure both quantity and weight. The scale is easy to operate, precise, stable and with fast display
reaction. It is applicable in the electronic, hardware, plastic, medicine, textile and various other industries.
It is useful for packaging, inventory and various production and quality control cases. It will help you save
your time, labor, money, and reduce material waste, lower cost, improve your work efficiency, thus to
achieve maximum return on investment.
II. FEATURES
1. The microprocessor in this scale features
(1) Zero point tracking function.
(2) Tare and pre-tare function.
2. Easy operating and water-resistant membrane keypad.
3. Easy to read LCD display.
4. Counting function is applicable, with backlight function.
5. Tare range is unlimited.
6. The case shell is made of ABS shockproof plastics; stainless steel weighing pan is used for long-term
operation.
III. ASSEMBLY
A. Models LPWN-1530LPWN-7515LPWN-1530K
1. Remove the protection copper screw [2], and then screw out the protection copper screw [1];
2. Align the three-hole aluminum column [6] and center of the three round holes on the scale support
[5] with the corresponding hole on the “-”shaped iron piece inside hole [7]. Then fix the three-hole
aluminum column [6] and scale support [5] on the “-”shaped iron piece of the scale by tightening
the M5 Allen screw [4] using an Allen wrench;
3. Put the stainless steel weighing pan [3] on the scale support [5].
Instruktion-LPWN Rev 1.2005 Utskrift 2005-12-01 Användarmanual
Vetek AB Box 79, Industriv. 3 760 40 Väddö Tel 0176 208 920 Fax 0176 208 929

B. Model LPWN-3075
1. Remove the protection copper screw [2], and then screw out the protection copper screws [1] &
[3];
2. Screw in the round weighing pan clockwise and downwards.
C. Model LPWN-150
1. Place the round weighing pan directly onto the scale support.
D. Wind Shield
Note: Always reinstall the transportation protection device before transporting the scale, lest the precision
sensor should be damaged due to bumping and falling during transportation.
IV. PRECAUTIONS
1. Full charge the battery after unpacking the scale.
Recharge the battery: When battery symbol appears on the LCD display, charge the battery with AC power cord plug in,
the indicator of charge will light up in red; when it becomes green means charge completed. (It takes about 8 hours to full
charge the battery.)
2. Install the equipment on a level and stable surface.
3. Do not install the equipment near the air conditioning or a vibrating machine.
4. Install the equipment in an environment with steady temperature (0~40), avoid rapid temperature
changes.
5. Independent AC outlet for this equipment is recommended, check the voltage before plug in.
6. Warm up the equipment for 15 minutes before use.
Instruktion-LPWN Rev 1.2005 Utskrift 2005-12-01 Användarmanual
Vetek AB Box 79, Industriv. 3 760 40 Väddö Tel 0176 208 920 Fax 0176 208 929

V. KEYPAD
1.“PRINT”
Press PRINT key, RS-232 will print data, when negative value is shown on the screen, the printing
function is prohibited.
2.“MODE”
Press MODE key for selecting weighing unit.
3.“TARE”
Press TARE key for deduction of current weight on the weighing pan. After removing the weight on
the weighing pan, press TARE key to cancel the original tare.
Note: This operation can only be performed in the stable mode.
4.“ZERO”
Press ZERO key and the screen will show zero 0.0000, press ZERO key in the tare mode, the tare will
be cancelled; if the weight on the weighing pan is within the zero adjustment range, the scale will be
reset to zero.
5. “ON/OFF”
Power switch.
Instruktion-LPWN Rev 1.2005 Utskrift 2005-12-01 Användarmanual
Vetek AB Box 79, Industriv. 3 760 40 Väddö Tel 0176 208 920 Fax 0176 208 929

Cross reference list of keys in Chinese and English
¶}
Ã
ö
¦© -«
Âk¹s
¦C¦L
Âà´
«
³æ¦ì
ENGLISH ON/
OFF
TARE
ZERO
PRINT
MODE
VI. FUNCTION SETTING
LCD Display Function Selection Reference
CAL Model display Page 4, Item 1
↓
UON Weighing unit ON/OFF Page 5, Item 2
↓
Init Initial unit Kg/g/lb/lb-oz/Taiwan jin/HK
jin, etc. Page 5, Item 3
↓
Fil Filter 1/2/3/4 Page 5, Item 4
↓
Auto Auto power off OFF/5/10/30/60 Page 5, Item 5
↓
Ligh Backlight OFF/ON/AUT Page 5, Item 6
↓
Lit Zero point range 0/1/2/3/4/5 Page 5, Item 7
↓
Baud RS-232 baud rate 2400/4800/9600 Page 5, Item 8
↓
rS232 Printing mode Co/St/ Pr Page 5, Item 9
↓
Print External device PC /SH/EZ Page 5, Item 10
↓
Stabl Printing stability Yes/No Page 5, Item 11
Instruktion-LPWN Rev 1.2005 Utskrift 2005-12-01 Användarmanual
Vetek AB Box 79, Industriv. 3 760 40 Väddö Tel 0176 208 920 Fax 0176 208 929

Instruktion-LPWN Rev 1.2005 Utskrift 2005-12-01 Användarmanual
1. Power on while holding down MODE key. The scale will enter into function setting mode and CAL
appears on the LCD display. Press PRINT key, the LCD display will show the scale model e.g. 3 kg .
2. Press MODE key once again, the LCD display will show UON , which means the scale enters into
weighing unit setting mode. Press PRINT key to select unit, press TARE key to enable (ON) or disable
(OFF) the weighing unit. If the display shows ON kg , it means the unit shown will be used; OFF kg
means the unit shown will not be used. Press MODE key once again, the LCD display will show Init
,which means the scale enters into initial weighing unit setting mode; press TARE key to select initial unit
setting.
3. If the LCD display shows Init g , it means “g” is the initial weighing unit when power on. Available
units: kg, g, lb, lb-oz, jin, HK jin, Taiwan jin.
4. Press MODE key once again, the LCD display will show Fil , which means the scale enters into
filter setting mode; press down TARE , the display will show Fil 2 , press TARE key again to switch the
filter degree as 1, 2, 3 or 4. Level 4: Reaction is slower, effect on filtering is higher.
5. Press MODE key once again, the LCD display will show Auto ,which means the scale enters into
auto power off setting mode; press TARE key to select the time of auto power off. 5, 10, 30, or 60 minutes
means the lasting time value when the scale is at the non-tare zero point. In such mode, the scale will be
powered off automatically after elapse of the set time.
6. Press MODE key once again, the LCD display will show Ligh , which means the scale enters into
backlight setting mode. Press TARE key to select setting, if the display shows OFF , it means the
backlight is off; ON means the backlight is on; Auto means auto backlight is on.
7. Press MODE key once again, the LCD display will show Lit , press TARE key, d1
will appear on the display, press TARE key again to select zero tracking range. 0, 1, 2, 3, 4 or 5 can be
selected (the bigger the number is, the larger zero tracking range is).
8. Press MODE key once again, the LCD display will show BAud , which means the scale enters into
baud rate setting mode; press TARE key to select the transmission rate of 2400, 4800, or 9600.
9. Press MODE key once again, the LCD display will show RS232 ,which means the scale enters into
printing mode setting mode, press TARE to select Prt Co , Prt St , or Prt Pr (Pr means data sent
when key pressed; St means data sent automatically when stable symbol shown; Co means data sent
continuously).
10. Press MODE key once again, the LCD display will show Print , which means the scale enters into
printing mode setting mode, press TARE to select PC , SH ,or EZ .
11. Press MODE key once again, the LCD display will show StAbl , which means the scale enters into
printing stability judgement setting mode, press TARE key to select setting, YES means the data can be
printed out by pressing PRINT key only in the stable mode; No means the stable mode will not be
detected. Press MODE key to reset each function. Press ZERO key anytime when a function setting is
completed. This will make the scale return to normal weighing mode.
Vetek AB Box 79, Industriv. 3 760 40 Väddö Tel 0176 208 920 Fax 0176 208 929

VII. Operation (after normal power-on)
Counting: (simple counting function)
Press MODE key, the LCD display will show 0 PCS , press TARE key, CAL will appear, put the
samples on the weighing pan, press TARE key again to select the counting standard needed (25, 50, 100);
wait until automatic sampling by the scale, and new number is shown on the display, it is ready for
counting operation.
Percentage:
Press MODE key until the LCD display shows 0 % , press TARE key, CAL will appear; put the
samples on the weighing pan, press TARE key again to select the counting standard needed (25, 50, 100);
wait until automatic sampling by the scale, and new number is shown on the display, it is ready for
percentage counting operation.
VIII. WEIGHING UNIT CONVERSION
1 kg = 1000 g 1 = 500g
1 HK jin = 16 HK ounce 1 HK ounce = 37.799375g
1 Taiwan ounce = 37.49995g 1 Taiwan jin = 16 Taiwan ounce
1 lb = 453.59237g 1 oz = 28.3495231g
IX. FACTORY SETTING
A. LINEAR CALIBRATION
1. Power on while holding down TARE key, the display will show Line .
2. Press MODE key to enter into automatic factory calibration mode, the display will show On0 , put
weight of 1/3 full load on the weighing pan when On1 appears, press TARE key until On2 appears,
put weight of 2/3 full load on the weighing pan, press TARE again, On3 will appear on the display,
press TARE after putting weight of full load on the weighing pan and wait until PASS appears.
3. Take off the weight, press ZERO key to return to weighing mode.
B. SINGLE-POINT CALIBRATION
1. Power on while holding down MODE key to enter into setting mode, the display shows CAL .
2. Press TARE key to enter into single-point calibration mode, the display will show On0 , wait until
CAP appears.
3. Press MODE key to select calibration weight, the display will show in turn CAP 1 , CAP2 , and
CAP3 ; put corresponding weights of 1/3, 2/3 or full load on the weighing pan, then press TARE key to
enter into single-point calibration mode, wait until the display shows PASS .
4. Take off the weights, press ZERO key to return to weighing mode.
C. PRECISION SETTING- (Only applicable for version 2.0 and above)
1. Power on while holding down PRINT key to enter into setting mode, the display will show SEnC .
2. Press TARE key to select SEnC1 or SEnC2 .
3. SEnC1 means precision 15000, SenC2 means precision 6000 (7500).
4. After setting is completed, press ZERO key to return to weighing mode.
Instruktion-LPWN Rev 1.2005 Utskrift 2005-12-01 Användarmanual
Vetek AB Box 79, Industriv. 3 760 40 Väddö Tel 0176 208 920 Fax 0176 208 929
APPENDIX 1:
ERROR MESSAGE
1. Error message
Err. Msg. Problem
Err2 Initial zero point over ±10% (take 10% as the benchmark)
Err3 Over or below A/D resolution range FFFFF
Err4 EEPROM Chksum error
Err5 Overload (max. capacity +9e)
Err6 Wrong calibration weight
Battery
symbol Low battery
2. Troubleshooting
When Err. Msg. Troubleshooting
Power on Err2 Check and remove any object from weighing pan or malfunction of LOAD CELL
Power on Err3 Check if A/D or LOAD CELL malfunctions
Power on Err4 Beep alert. Switch power off and power on again, or perform calibration
Power on Battery symbol Charge the battery with power on
Operating at
normal
weighing
mode
Err5
Checking if the weighing object is over the max. capacity +9e
Calibrating Err6 Change weight
Instruktion-LPWN Rev 1.2005 Utskrift 2005-12-01 Användarmanual
Vetek AB Box 79, Industriv. 3 760 40 Väddö Tel 0176 208 920 Fax 0176 208 929
APPENDIX 2:
RS-232 OUTPUT FORMAT
Baud Rate 2400, 4800, 9600
Data Bit 8
Parity N ( None )
Stop Bit 1
Code ASCII
Bit Format
LSB MSB
0 1 2 3 4 5 6 7 8
Start
Bit
Parit
y
Stop
Bit
Data Format
1. kg
G/
N . W . +/- kg
C
R LF
weight
Example:
N.W. + 1.1375kg
T.W. + 0.0180kg
G.W. + 1.1555kg
2. g
G/
N . W . +/- g
C
R LF
weight
Example:
N.W. + 1137.5g
T.W. + 18.0g
G.W. +1155.5g
3. lb
G/
N . W . +/- lb
C
R LF
weight
Example:
N.W. +2.508lb
T.W. + 0.040lb
G.W. +2.548lb
4. lb-oz
G/
N . W . +/
- - lb oz
C
R
L
F
weight lb Weight oz
Example:
Instruktion-LPWN Rev 1.2005 Utskrift 2005-12-01 Användarmanual
Vetek AB Box 79, Industriv. 3 760 40 Väddö Tel 0176 208 920 Fax 0176 208 929

N.W. +2lb 8.12oz
T.W. + 0lb 0.64oz
G.W. +2lb 8.76oz
5. Jin
G/
N . W . +/
- C-Jing
C
R
L
F
weight
Example:
N.W. +2.275jin
T.W. + 0.037jin
G.W. +2.312jin
6. HK jin
G/
N . W . +/
- _ G-tl.H
C
R
L
F
weight
Example:
N.W. +1-14.08G-tl.H
T.W. +0-0.48G-tl.H
G.W. +1-14.56G-tl.H
7. Taiwan jin
G/
N . W . +
/_ G
-
-t l . T
C
R
L
F
weight
Example:
N.W. +1-14.32G-tl.T
T.W. +0-0.48G-tl.T
G.W. +1-14.80G-tl.T
8. pcs
T o t a l +/- pcs
C
R
L
F
pcs
Example:
Total+ 0 pcs
9. %
+/- %
C
R
L
F
Example:
+ 0 %
G = GROSS
N = NET
T = TARE
Instruktion-LPWN Rev 1.2005 Utskrift 2005-12-01 Användarmanual
Vetek AB Box 79, Industriv. 3 760 40 Väddö Tel 0176 208 920 Fax 0176 208 929
Printer and output format (example: kg)
SH-24 EZ2-S
N.W.:+1.6025 kg
T.W.:+0.0000 kg
G.W.:+1.6025 kg
N.W.:+ 1.1375 kg
T.W.:+ 0.0180 kg
G.W.:+ 1.1555 kg
RS-232 Connector/ Signal Output
Instruktion-LPWN Rev 1.2005 Utskrift 2005-12-01 Användarmanual
Vetek AB Box 79, Industriv. 3 760 40 Väddö Tel 0176 208 920 Fax 0176 208 929
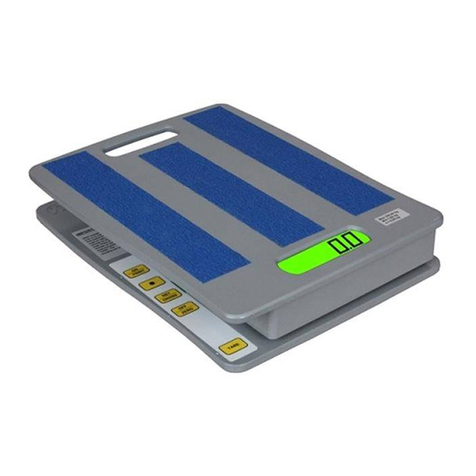
This manual suits for next models
2
Table of contents
Other Vetek Scale manuals

Vetek
Vetek XA Series User manual

Vetek
Vetek CW263BT User manual

Vetek
Vetek OCS-XZ-003 User manual

Vetek
Vetek JKD 250 User manual

Vetek
Vetek WLC 1/A2 User manual

Vetek
Vetek OCS-M User manual

Vetek
Vetek WTC/S User manual

Vetek
Vetek SELL User manual

Vetek
Vetek VB2 Series User manual

Vetek
Vetek FR-MS User manual

Vetek
Vetek AS Series User manual

Vetek
Vetek BABY 630 User manual

Vetek
Vetek VRB-20 User manual

Vetek
Vetek FR-H-100 User manual

Vetek
Vetek VRH-300 User manual

Vetek
Vetek VB2 Series User manual

Vetek
Vetek VC Series User manual

Vetek
Vetek VRS-300 User manual

Vetek
Vetek JWL-1 User manual

Vetek
Vetek OCS-P Series User manual