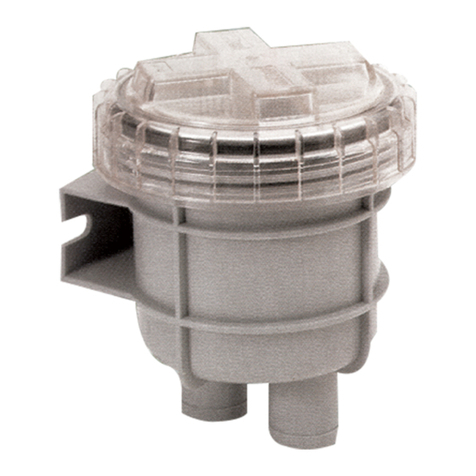
Vetus FTR470 User manual

Copyright © 2013 Vetus b.v. Schiedam Holland
Installatieinstructies 2
Installation instructions 4
Installationsanleitung 6
Instructions d’installation 8
Instrucciones de instalación 10
Istruzioni per l’installazione 12
Koelwaterlters
Cooling water strainers
Kühlwasserlter
Filtres à eau froide
Filtros de agua de enfriamiento
Filtri per acqua di rareddamento FTR470

2 030506.01 Cooling water strainer model 470
1 Inleiding
De belangrijkste eigenschappen van de Vetus
koelwaterlters type 470 zijn:
• Eenvoudig te inspecteren: hebben een
doorzichtig deksel, hetgeen inspectie van
het lter mogelijk maakt zonder het te ope-
nen.
• Eenvoudig te openen: om het lter te kun-
nen reinigen dient alleen de centrale knop
te worden losgeschroefd; dit kan zonder ge-
reedschap.
• Weinig onderhoud: dankzij het grote ac-
tieve oppervlak behoeft het lterelement
zelden schoongemaakt te worden.
• Eenvoudig te installeren: met de aparte
montagebeugel en de klemband is het lter
eenvoudig te installeren. Ook kan het lter
360° gedraaid worden om de slangaanslui-
tingen in de gewenste positie te zetten.
In de standaard opstelling (zie‘Installatie-voor-
beelden’, tek. 1) heeft het lter een capaciteit
zoals in de tabel op blz. 15 is aangegeven; de
capaciteit is afhankelijk van de afmeting van de
aansluiting.
Parallel aansluiten
Door 2 waterlters parallel aan elkaar aan te
sluiten (zie ‘Installatievoorbeelden’, tek. 2) kan
een grotere capaciteit worden verkregen.
Door 2 waterlters met 2 extra afsluiters paral-
lel aan elkaar aan te sluiten (zie ‘Installatievoor-
beelden’, tek. 3) kan tevens elk lter afzonder-
lijk worden schoongemaakt terwijl de motor
draait.
2 Installatie
• Monteer het waterlter altijd boven de wa-
terlijn. Bevestig het waterlter tegen een
vertikaal schot.
• Installeer op het waterinlaatschepje altijd
een buitenboordafsluiter!
• Pas voor beide verbindingen, waterinlaat-
schepje naar waterlter en waterlter naar
motor, altijd exibele slang toe.
• Gebruik uitsluitend water en/of zeep, dus
geen vet- of oliehoudende producten, om
het monteren van de slang op de slangaan-
sluitingen te vereenvoudigen.
• Monteer elke slangverbinding met 2 roest-
vaststalen slangklemmen!
Let op de stroomrichting door het lter!

030506.01 3
Cooling water strainer model 470
3 Gebruik en onderhoud
• Inspecteer het lterelement regelmatig op
vervuiling. N.B. Het deksel behoeft hiervoor
niet te worden verwijderd.
• Reinig het lterelement indien hier zich vuil
heeft opgehoopt.
• Sluit de buitenboordafsluiter.
• Draai de centrale knop los, draai het deksel
een kwart slag en verwijder het deksel.
• Neem het lterelement uit het huis en spoel
het uit.
• Plaats het lterelement terug, vet de O-ring
in met b.v siliconen-olie of teon spray en
monteer het deksel weer.
N.B. Draai de centrale knop altijd met de
hand los of vast. Gebruik hiervoor nooit ge-
reedschap.
Let op:
Controleer na het monteren van het deksel de
afdichting van het deksel op het lterhuis. Bij
een niet goed afgedicht deksel zuigt de buiten-
waterpomp van de motor tevens lucht aan; dit
kan leiden tot een te hoge motortemperatuur.
Om kapot vriezen van het waterlter, tijdens
vorst gedurende de winter, te voorkomen dient
of het water te worden afgetapt of de installa-
tie met anti-vries te worden gevuld.
Om af te tappen dienen de slangverbindingen
te worden losgenomen; het lterhuis is niet
voorzien van een aftap.
Bij het vullen met anti-vries dient er voor te
worden gezorgd dat dit niet in het buitenwater
terecht komt. Anti-vries is giftig!
4 Technische gegevens
Materiaal
- huis : Polypropeen GF
- lterelement : HD Polyethyleen
- deksel : Polycarbonaat
- montagebeugel : Polypropeen GF / RVS
Gewicht : 0,45 kg
Max. omgevings-
temperatuur : 75 °C
Max. water-
temperatuur : 55 °C
Max. overdruk : 0,5 bar
(50 kPa, 0,5 kgf/cm2)
NEDERLANDS

4 030506.01 Cooling water strainer model 470
1 Introduction
The most important characteristics of the Vetus
cool water lter type 470 are:
• Easy to inspect: the transparent lid makes
inspecting the lter possible without open-
ing the unit.
• Easy to open: simply unscrew the central
button, (no tools required), to open the unit
and clean the lter.
• Low maintenance: thanks to the large active
surface area, the lter element requires infre-
quent cleaning.
• Easy to install: thanks to the separate assem-
bly bracket and the clamping strip, the lter
is easy to install. It can also be rotated 360°,
allowing the hose connections to be prop-
erly positioned.
In a standard installation situation (see‘Installa-
tion examples’, drawing 1) the capacity is as per
table at page 15, the capacity depends of the
diameter of the hose connection.
Parallel connection
By connection of 2 water strainers in parallel
(see ‘Installation examples, drawing 2) a larger
capacity can be obtained.
By connection of 2 water strainers in parallel
with the use of 2 extra valves (see ‘Installation
examples, drwg 3) it is possible, while the en-
gine is running, to clean each lter separately.
2 Installation
• Install the water strainer always above the
waterline. Mount the strainer against a verti-
cal bulkhead.
• Install always a sea-cock on the water inlet
scoop!
• Use for both connections, water scoop to
strainer and strainer to engine, always ex-
ible hose.
• Use only water and/or soap to ease tting
the hoses to the hose pillars and never prod-
ucts containing grease or oil.
• Fit each hose connection with 2 stainless
steel hose clamps.
Pay attention to the ow direction through
the lter!

030506.01 5
Cooling water strainer model 470
ENGLISH
3 Use and maintenance
• Inspect the strainer element regularly for
contaminents. N.B. The lid doesn’t need to be
removed for inspection.
• Clean the strainer element if dirt has accu-
mulated.
• Close the seacock.
• Twist and loosen the central button, rotate
the lid 90° and remove it.
• Remove the strainer element out of the hous-
ing and ush the strainer with clean water.
• Re-install the strainer element, grease the
O-ring and the thread with e.g. silicone oil or
teon based spray and reinstall the lid.
Note: Always loosen or fasten the central but-
ton by hand. Never use tools to do so.
Caution:
Check the seal between lid and housing after
cleaning and re-assembling the strainer. An im-
properly sealed lid will result in air sucked in by
the sea water pump of the engine which again
will result in overheating of the engine.
To prevent damage of the water strainer, dur-
ing frost in the winter time, either the water
must be drained or the installation must be
lled with anti-freeze.
Remove the hoses to drain the strainer; the
housing is not equipped with a drain plug.
Take care that during lling with anti-freeze no
anti-freeze is spilled into the waterway. Anti-
freeze is poisonous.
4 Technical data
Material
- housing : Polypropylene GF
- strainer element : HD Polyethylene
- lid : Polycarbonate
- mounting bracket : Polypropylene GF /
stainless steel
Weight : 0.45 kg (1 lb)
Max. ambient
temperature : 75 °C (167°F)
Max. water
temperature : 55 °C (131°F)
Max. pressure : 0,5 bar (50 kPa, 7 psi)

6 030506.01 Cooling water strainer model 470
1 Einführung
Die wichtigsten Eigenschaften des Kühlwasser-
lters Typ 470 von Vetus sind folgende:
• Einfache Kontrolle: Wegen seines durchsich-
tigen Deckels kann der Filter kontrolliert wer-
den, ohne geönet zu werden.
• Einfaches Önen: Zum Reinigen des Filters
muss lediglich der mittlere Knopf losge-
schraubt werden. Dies ist ohne Werkzeug
möglich.
• Pegeleicht: Dank der großen aktiven Ober-
äche braucht das Filterelement nur selten
gereinigt zu werden.
• Einfache Installation: Der Filter lässt sich
mit dem separaten Montagebügel und dem
Klemmband ganz leicht installieren. Der
Filter lässt sich um 360° drehen, sodass die
Schlauchanschlüsse leicht in die gewünschte
Position gebracht werden können.
In der Standardaufstellung (siehe‘Installations-
beispiele’, Abb. 1) hat der Filter die in derTabelle
auf Seite 15 angegebene Kapazität. Die Kapa-
zität hängt vom Durchmesser des Schlauchan-
schlusses ab.
Parallel anschließen
Indem 2 Wasserlter parallel zueinander ange-
schlossen werden (siehe Installationsbeispiele,
Abb. 2), ist es möglich eine höhere Leistung zu
erzielen, siehe ‘technische Daten’.
Werden 2 Wasserlter mit 2 zusätzlichen Ab-
sperrventilen parallel zueinander angeschlos-
sen (siehe Installationsbeispiele, Abb. 3), ist es
zudem möglich, auch wenn der Motor läuft,
jeden Filter einzeln zu reinigen.
2 Installation
• Der Wasserlter ist immer oberhalb der Was-
serlinie zu montieren und an einem senk-
rechten Schott zu befestigen.
• Am Wassereinlaßügelrad stets ein Außen-
bordabsperrventil anbringen!
• Für beide Verbindungen, also vom Wasse-
reinlaßügelrad zum Wasserlter und vom
Wasserlter zum Motor, immer einen exib-
len Schlauch verwenden.
• Keine fett- oder ölhaltigen Produkte, son-
dern ausschließlich Wasser und/oder Seife
benutzen, um den Schlauch leichter an die
Schlauchanschlüsse montieren zu können.
• Alle Schlauchverbindungen mit Hilfe von 2
Schlauchklemmen aus rostfreiem Stahl be-
festigen.
Achten Sie auf die Fließrichtung im Filter!

030506.01 7
Cooling water strainer model 470
DEUTSCH
3 Betrieb und Wartung
• Das Filterelement regelmäßig auf Ver-
schmutzung hin kontrollieren. Anmerkung:
Es ist nicht erforderlich, den Deckel dafür zu
entfernen.
• Das Filterelement reinigen, wenn sich dort
Schmutz angesammelt hat.
• Das Außenbordabsperrventil schließen.
• Schrauben Sie den mittleren Knopf auf und
entfernen Sie den Deckel mit einer Viertel-
drehung.
• Das Filterelement aus dem Gehäuse nehmen
und ausspülen.
• Das Filterelement wieder anbringen, sowohl
Dichtungsring als Gewinde mit beispielswei-
se Silikonöl oder Teonspray schmieren und
den Deckel wieder festdrehen.
Hinweis: Den mittleren Knopf immer mit der
Hand lösen oder festdrehen und kein Werk-
zeug verwenden.
Achtung:
Nach dem Anbringen des Deckels die Dich-
tung des Deckels am Filtergehäuse überprüfen.
Schließt der Deckel nicht gut, so saugt die Au-
ßenwasserpumpe des Motors auch Luft an, was
zu einer Überhitzung des Motors führen kann.
Um zu vermeiden, daß während der Wintermo-
nate Frostschäden am Wasserlter auftreten,
ist das Wasser abzuzapfen oder die Anlage mit
Frostschutzmittel zu füllen.
Zum Abzapfen sind die Schlauchverbindungen
zu lösen, da das Filtergehäuse mit keinem Ab-
zapfhahn ausgestattet ist.
Beim Füllen mit einem Frostschutzmittel ist da-
rauf zu achten, daß dieses nicht in das Außen-
wasser gelangen kann. Frostschutzmittel sind
giftig!
4 Technische Daten
Material
- Gehäuse : Polypropylen GF
- Filterelement : HD Polyäthylen
- Deckel : Polykarbonat
- Installationshalter : Polypropylen GF /
Edelstahl
Gewicht : 0,45 kg
Max. Außentemperatur : 75°C
Max. Wassertemperatur : 55°C
Max. Überdruck : 0,5 bar (50 kPa,
0,5 kp/cm2)

8 030506.01 Cooling water strainer model 470
1 Introduction
Les principales caractéristiques des ltres à eau
de refroidissement Vetus de type 470 sont :
• Inspection facile : sont dotés d’un couvercle
transparent permettant l’inspection du ltre
sans avoir à l’ouvrir.
• Ouverture facile : an de pouvoir nettoyer le
ltre, il sut de dévisser l’écrou central ; cette
opération ne nécessite pas d’outil.
• Entretien facile : grâce à sa grande surface
active, le système de ltrage a rarement be-
soin d’être nettoyé.
• Installation facile : le ltre est facile à instal-
ler grâce à la plaque de xation séparée et à
la bande de serrage. Le boîtier peut égale-
ment pivoter de 360°, ce qui permet d’ajuster
les connexions selon ses besoins.
En conguration standard (voir‘Exemples d’ins-
tallation’, plan 1) la capacité du ltre est celle in-
diquée sur le tableau de la page 15. La capacité
dépend du diamètre du raccord exible.
Raccordement en parallèle
On peut augmenter la capacité de ltre en
branchant ensemble deux ltres à eau en paral-
lèle (voir‘Exemples d’installation’, plan 2).
Le branchement de 2 ltres à eau en paral-
lèle avec 2 obturateurs supplémentaires (voir
‘Exemples d’installation’, plan 3) permet égale-
ment de nettoyer les ltres indépendamment
pendant que le moteur tourne.
2 Installation
• Monter toujours le ltre à eau au-dessus de la
ligne de ottaison. Fixer le ltre à eau contre
une paroi verticale.
• Installer toujours un obturateur d’eau de mer
sur le dispositif d’admission d’eau !
• Pour les deux connexions, l’admission d’eau
vers le ltre à eau et le ltre à eau vers le
moteur, utiliser toujours des tuyaux exibles.
• Utiliser uniquement de l’eau et du savon,
donc pas de produits gras ni huileux, pour fa-
ciliter le montage des tuyaux sur les raccords.
• Fixer chaque connexion exible avec 2 col-
liers en acier inoxydable.
Faites attention à la direction de l'écoulement
par le ltre !

030506.01 9
Cooling water strainer model 470
FRANÇAIS
3 Emploi et entretien
• S’assurer régulièrement que l’élément de
ltre n’est pas encrassé. N.B. Pour ce faire il
n’est pas nécessaire d’enlever le couvercle.
• Nettoyer l’élément de ltre si des saletés s’y
sont accumulées.
• Fermer l’obturateur d’eau de mer.
• Dévisser l’écrou central, tourner le couvercle
d’un quart de tour et retirer le couvercle.
• Sortir l’élément de ltre de son logement et
le rincer.
• Replacer l’élément de ltre, graisser la ron-
delle et le letage avec par exemple de
l’huile au silicone ou du téon en bombe
puis remettre le couvercle.
N.B.Toujours visser ou dévisser l’écrou central
à la main. Ne jamais utiliser d’outil.
Attention :
Après avoir monté le couvercle, vérier son
étanchéité avec le logement du ltre. Si le
couvercle n’est pas parfaitement hermétique,
la pompe à eau de mer du moteur aspirera de
l’air ce qui pourrait entraîner une surchaue du
moteur.
Pour éviter que le ltre à eau ne soit détérioré
par le gel pendant l’hiver, il faut soit vidanger
l’eau soit mettre de l’antigel dans l’installation.
Pour faire la vidange il est nécessaire de déta-
cher les raccords exibles; le boîtier du ltre ne
possède pas de vidange.
En versant l’antigel veiller à ne pas le répandre
dans l’eau de mer. L’antigel est un produit
toxique !
4 Spécications techniques
Matériau
- du corps : Polypropylène GF
- du ltre : Polyéthylène HD
- du couvercle : Polycarbonate
- moulinet de montage : Polypropylène GF /
inox
Poids : 0,45 kg
Température
ambiante max. : 75°C
Température de l’eau
max. : 55°C
Pression max. : 0,5 bar (50 kPa,
0,5 kgf/cm2)

10 030506.01 Cooling water strainer model 470
1 Introducción
Las principales características del ltro de agua
Vetus tipo 470 son:
• Fácil de revisar: la tapa transparente permite
revisar el ltro sin abrirlo.
• Fácil de abrir: sólo hay que desatornillar el
botón central (no son necesarias herramien-
tas) para abrir y limpiar el ltro.
• Poco mantenimiento: gracias a su amplia
área de supercie activa, el ltro necesita
muy poca limpieza.
• Fácil de instalar: el conjunto de abrazadera
de montaje independiente y la banda de su-
jeción hacen que el ltro sea fácil de instalar.
Se puede girar 360°, lo que permite colocar
correctamente las conexiones de manguera.
En la disposición estándar (véanse los‘Ejemplos
de instalación’, guras 1 ) el ltro tiene la capa-
cidad indicada en la tabla en la pág. 15, la capa-
cidad va en función del tamaño de la conexión.
Conectar en paralelo
Al conectar en paralelo 2 ltros de agua (véan-
se los ‘Ejemplos de instalación’, g. 2) se puede
obtener una mayor capacidad.
Al conectar en paralelo 2 ltros de agua con 2
válvulas adicionales (véanse los ‘Ejemplos de
instalación’, g. 3), además se podrá limpiar
cada ltro por separado, mientras está en mar-
cha el motor.
2 Instalación
• Montar el ltro de agua siempre por encima
de la línea de otación. Fijar el ltro de agua
en un tabique vertical.
• ¡Instalar siempre una válvula fuera borda en
la cuchara de admisión de agua!
• Aplicar siempre para ambas conexiones, de
la cuchara de admisión de agua al ltro de
agua y del ltro de agua al motor, una man-
guera exible.
• Utilizar exclusivamente agua y/o jabón, o
sea, no usar productos que contienen grasas
o aceite, para facilitar el montaje de la man-
guera en las conexiones para ésta.
• Montar cada conexión de manguera con 2
abrazaderas de manguera de acero inoxida-
ble.
¡Preste atención a la dirección de la corriente
a través del ltro!

030506.01 11
Cooling water strainer model 470
ESPAÑOL
3 Uso y mantenimiento
• Inspeccionar con frecuencia si se ha ensucia-
do el elemento de ltración. Nota. Para ello
no es necesario retirar la tapadera.
• Limpiar el elemento de ltración cuando lle-
va suciedad acumulada.
• Cerrar la válvula de fuera borda.
• Gire y aoje el botón central, gire la tapa 90°
y retírela.
• Sacar el elemento de ltración de la caja y
enjuagarlo.
• Volver a colocar el elemento de ltración, en-
grasar el anillo en O y la rosca con, por ejem-
plo, aceite de siliconas o un pulverizador te-
on, véase y volver a montar la tapadera.
Nota: Aojar y apretar el botón central siem-
pre a mano. No usar nunca herramientas.
Precaución:
Después de montar la tapadera controlar el
aislamiento de la tapadera en la caja del ltro.
Cuando la tapadera no está bien cerrada, la
bomba de agua exterior del motor aspira tam-
bién aire; lo cual puede llevar a una temperatu-
ra excesiva del motor.
Para evitar roturas por heladas del ltro de
agua, durante heladas o en el invierno, es pre-
ciso bien vaciar el agua o bien llenar la instala-
ción con una sustancia anticongelante.
Para vaciar se soltarán las conexiones de man-
guera; la caja del ltro no está equipada con un
grifo de drenaje.
Al llenar con la sustancia anticongelante asegu-
rar que ésta no se derrame en el agua exterior.
¡Las sustancias anticongelantes son tóxicas!
4 Especicaciones técnicas
Material
- caja : Polipropileno GF
- elemento de
ltración : HD Polietileno
- tapadera : Polycarbonate
- abrazadera de
instalación : Polipropilene GF /
acero inoxidable
Peso : 0,45 kg
Temperatura ambiente
máxima : 75°C
Temperatura de agua
máxima : 55°C
Sobrepresión máxima : 0,5 bar (50 kPa,
0,5 kgf/cm2)

12 030506.01 Cooling water strainer model 470
1 Introduzione
Le caratteristiche principali dei ltri Vetus tipo
470 per l’acqua di rareddamento sono le se-
guenti:
• Facili da ispezionare: grazie al tappo traspa-
rente, è possibile ispezionare i ltri senza bi-
sogno di aprirli.
• Facili da aprire: per aprire e pulire il ltro è
suciente svitare la manopola centrale; per
quest'operazione non vi è bisogno di alcun
attrezzo.
• Manutenzione ridotta al minimo: grazie
all’elevata supercie ltrante, il ltro necessi-
ta di pulizie meno frequenti.
• Facili da installare: il ltro è anche molto fa-
cile da installare, grazie alla staa e alla fascia
per il montaggio. Il ltro può inoltre ruotare a
360°, permettendo così di portare gli attacchi
per i tubi nella posizione desiderata.
Nella sua sistemazione standard (vd. ‘esempi di
installazione’, disegni 1), il ltro ha una capacità
corrispondente a quella descritta nella tabella a
pag. 15 e dipendente dal diametro del tubo di
collegamento.
Collegamento in parallelo
Tramite collegamento in parallelo tra due ltri
(vd. ‘esempi di installazione’, disegno 2), si può
ottenere una maggiore capacità.
Collegando due ltri in parallelo con due chiu-
sure extra (vd.‘esempi di installazione’, disegno
3) è inoltre possibile pulire ciascun ltro separa-
tamente, mentre il motore è in funzione.
2 Installazione
• Montare il ltro dell’acqua sempre al di so-
pra del livello dell’acqua. Assicurare il ltro
dell’acqua ad un divisorio verticale.
• Installare in ogni caso un sistema di chiusura
esterno sulla valvola di immissione dell’ac-
qua.
• Collegare sempre un tubo essibile sia per il
collegamento tra valvola di immissione e l-
tro dell’acqua che per quello tra quest’ultimo
ed il motore.
• Usare esclusivamente acqua e/o sapone, e
non prodotti contenenti grasso o olio, per
semplicare l’operazione di collegamento
del tubo alla sua connessione.
• Aggiungere a ciascuna connessione del tubo
due pinze apposite in acciaio inossidabile.
Attenzione alla direzione di usso all’interno
del ltro!

030506.01 13
Cooling water strainer model 470
ITALIANO
3 Uso e manutenzione
• Ispezionare di frequente l’elemento ltrante
per vericarne il grado di pulizia. N.B. Non
occorre a tale scopo rimuovere il coperchio.
• In caso di accumulo di sporcizia, pulire l’ele-
mento ltrante.
• Chiudere la chiusura esterna.
• Per aprire il ltro, svitare la manopola centra-
le di un quarto di giro e sollevare il coperchio.
•
• Prelevare l’elemento ltrante dall’alloggia-
mento e lavarlo.
• Rimetterlo quindi al suo posto, applica-
re all’anello ad O e alla lettatura della vite
ad esempio olio-silicone o teon in spray e
montare nuovamente il coperchio.
N.B. La manopola centrale deve essere avvi-
tata e svitata unicamente a mano. Non usare
alcun attrezzo a questo scopo.
Attenzione:
Dopo il montaggio del coperchio, controllare
che esso aderisca perfettamente all’alloggia-
mento. In caso contrario, la pompa esterna
dell’acqua del motore aspirerà aria; ciò può dar
luogo ad un innalzamento eccessivo della tem-
peratura del motore.
Col gelo invernale, allo scopo di evitare rottu-
re del ltro dell’acqua dovute a congelamento,
occorre svuotare la condotta idrica o, altrimen-
ti, riempire l’impianto con antigelo.
Per lo svuotamento è necessario staccare i tubi,
poichè l’alloggiamento del ltro non dispone di
un sistema di scarico.
Se si aggiunge antigelo, bisogna evitare che
esso raggiunga l’acqua esterna. L’antigelo è ve-
lenoso!
4 Dati tecnici
Materiale
- dell’alloggiamento : polipropilene GF
- elemento ltrante : HD polietilene
- del coperchio : Policarbonato
- supporto di
installazione : polipropilene GF /
acciaio inossidabile
Peso : 0,45 kg
Temperatura max.
ambiente : 75°C
Temperatura max.
dell’acqua : 55°C
Sovrappressione max. : 0,5 bar (50 kPa,
0,5 kgf/cm2)

14 030506.01 Cooling water strainer model 470
Hoofdafmetingen
Overall dimensions
Hauptmaße
Dimensions pricipales
Dimensions generales
Misure pricipali
150 (5
7
/
8
”)
98 (3
7
/
8
”) 146 (5
3
/
4
”)
ø 141 (5
9
/
16
”)
L
D
66 ÷ 92 (2
5
/
8
” ÷ 3
5
/
8
”)
69 (2
11
/
16
”)
D L
12.7 (1/2") 27 (1 1/16")
15.9 (5/8") 27 (1 1/16")
19.1 (3/4") 29 (1 1/8")
25.4 (1") 29 (1 1/8")
31.8 (1 1/4") 37 (1 7/16")
38.1 (1 1/2") 37 (1 7/16")

030506.01 15
Cooling water strainer model 470
Type Aansluiting voor slang Aanbevolen capaciteit tijdens normaal gebruik
Model Connection for hose Recommended capacity in normal use
Typ Anschluß für schlauch Empfohlene Kapazität bei normalem Betrieb
Type Raccord pour tuyau Capacité recommandée dans les conditions nor-
males de fonctionnement
Tipo Conexión de tubo Capacidad recomendada urante uso normal
Tipo Collegamento tubo Capacità consigliata massima durante il normal uso
l/min Imp (UK) gal/
min US gal/min
FTR470/13 13 mm (1/2”) 23 5.1 6.1
FTR470/16 16 mm (5/8”) 35 7.7 9.2
FTR470/19 19 mm (3/4”) 51 11.2 13.5
FTR470/25 25 mm (1”) 91 20 24
FTR470/32 32 mm (1 1/4”) 143 31.5 37.8
FTR470/38 38 mm (1 1/2”) 200 44 53

16 030506.01 Cooling water strainer model 470
Installatievoorbeelden
Installation examples
Installationsbeispiele
Exemples d’installation
Ejemplos de instalación
Esempi di installazione
WL
min. 15 cm
(6”)
1

030506.01 17
Cooling water strainer model 470
WL
min. 15 cm
(6”)
2
WL
min. 15 cm
(6”)
3

18 030506.01 Cooling water strainer model 470
1
2
FTR470 Service onderdelen Service parts
pos. qty part benaming description
1 1 FTR47001 Dekseleenheid Cover unit
2 1 FTR47002 Afdichtring (2 stuks) Sealing ring (2 pcs)

030506.01 19
Cooling water strainer model 470
90°
PTFE GREASE
90°
4x
123
456
7 8
Reinigen Cleaning Reinigung Nettoyage Limpieza Pulizia
4x
9

Printed in the Netherlands
030506.01 2013-09
FOKKERSTRAAT 571 - 3125 BD SCHIEDAM - HOLLAND - TEL.: +31 10 4377700
Table of contents
Languages:
Other Vetus Water Filtration System manuals
Popular Water Filtration System manuals by other brands

Sharp
Sharp FZ-S63MF Operation manual

DH Instruments
DH Instruments 1-2 IN. FILTER KIT instruction sheet

Koganei
Koganei iB-Cyclone iBSeries Handling Instructions and Precautions

Trotec
Trotec VA5-2 operating instructions

US Water Systems
US Water Systems Flexx Oxi-Gen FX-150 owner's manual

GE
GE GNSV70RBL Owner's manual and installation instructions