manuals.online logo
Brands
  1. Home
  2. •
  3. Brands
  4. •
  5. Viabizzuno
  6. •
  7. Outdoor Light
  8. •
  9. Viabizzuno big feet Instruction Manual

Viabizzuno big feet Instruction Manual

Viabizzuno
big feet
205
280
320
200
big feet
F9.004.07
F9.004.08
F9.002.08
IP67 FF
KK
Peraluman vetro trasparente
Peraluman transparent glass
Peraluman transparentes Glas
Peraluman verre transparent
Peraluman cristal transparente
Peraluman vetro sabbiato
Peraluman frosted glass
Peraluman Mattes Glas
Peraluman Verre mat
Peraluman cristal arenado
alette frangiluce orientabili
adjustable louver
Schwenkbaren Lamellen
ailettes brise-lumière orientables
aletas antideslumbramiento orientables
280
ATTENZIONE:
La sicurezza dell'apparecchio è garantita solo rispettando queste istruzioni sia in
fase di installazione che di impiego.
Fitting safety is only guaranteed if the following instructions are strictly observed
bothduringinstallationanduse.
ACHTUNG:
Für die Sicherheit des Geräts kann nur dann die Garantie übernommen werden,
wenn die in den vorliegenden Anweisungen enthaltenen Hinweise sowohl bei der
Installation als auch beim Betrieb beachtet werden.
ATTENTION:
La sécurité de l'appareil n'est assurée que lorsque les consignes portées sont
respectées, tant lors de l'installation que durant l'utilisation de l'appareil.
ATENCIÓN:
La seguridad del aparato está garantizada sólo si se respetan estas instrucciones
durante la fase de instalación y de empleo.
WARNING:
I
GB
D
F
E
AVVERTENZE:
ä
ß
ADVERTENCIA:
Durante la instalación, y cada ve que se interviene sobre la lámpara, asegurarse
que la alimentación haya sido desconectada.
All’atto dell’installazione, ed ogni volta che si interviene sulla lampada, assicurarsi
chesiastatatoltalatensionedialimentazione.
WARNING:
When installing fixture and during unkeep take care that the mains voltage is
switchedoff.
HINWEISE:
W hrendderInstallationundbeiallennachfolgendenArbeitenaufderLampesollte
sichergestelltwerden,da dieVersorgungsspannungvorherabgenommenwurde.
AVVERTISSEMENTS:
Lors de l’installation et à chaque fois que l’on fait un entretien sur la lampe,
s’assurerquelatensiond’alimentationaitétécoupée.
I
GB
D
F
E
classe 1 (solo isolamento fondamentale; inoltre le parti conduttrici accessibili sono
collegate ad un conduttore di terra. Messa a terra tassativa).
class1 (only basic insulation, accessible conductors are earthed. Earthing compulsory).
Klass 1 (Grundisolation leitenden; berührbare Metallteile sind mit Schutzerdung
verbunden. Schtzerdung vorgeschriben)
class 1 (seulement isolation de base, les partes condutrices acessibles sont reliées à un
conducteur terre. Mise à la terre obligatorie).
Apparecchi idonei al montaggio diretto su superfici normalmente infiammabili
Luminaries suitable for direct mounting on flamable surfaces
Geeignet fuer direkt Einbau auf entzuenlichen Oberflaechen
Appareil predisposè à un montage direct sur une superficie normalment inflamable
Aparatos adecuados para el montaje directo sobre superficies normalmente
inflamables
Kit di cablaggio escluso
Wiring kit not included
Verkabelungskit mitgeliefert
non fournie kit de câblage
Kit de cableado excludido
Apparecchio totalmente protetto contro la polvere e stagno all’immersione.
Dust-tight and watertight.
prodotto conforme alle direttive europee
produced in compliance with EC directives
Gebaut gemaeß EG-Vorschriften
produit conforme aux Directives de la Comunautè Européenne
Producto conforme con las directivas europeas
Clase I (sólo aislamiento fundamental; además, las partes conductoras accesibles
están conectadas a un conductor de tierra. Puesta a tierra indispensable).
Gerät staubdicht und geschützt gegen das Untertauchen.
Appareil totalement protégé contre la poussière et étanche.
Aparato totalmente protegido contra el polvo y estanco a la sumersión.
I
GB
D
F
E
I
GB
D
F
E
I
GB
D
F
E
I
GB
D
F
E
I
GB
D
F
E
FF
K
IP67
F4.002.10 alluminio peraluman
aluminium peraluman
peraluman-Alulegierung
peraluman aluminium
peraluman aluminio
Viabizzuno
istruzioni di montaggio
installing instructions
Gebrauchsanweisung
instructions de montage
instrucciones de montaje
ATTENZIONE: l’apparecchio non va montato in giornate particolarmente umide
o di pioggia.
Mantenere sempre pulita la superficie del vetro; per le successive pulizie
utilizzare un panno morbido leggermente inumidito, non utilizzare prodotti
abrasivi o solventi.
1 Inserire il cavo di alimentazione del kit nell’apposito passacavo situato sul corpo
e serrare quest’ultimo.
D
I
I
ATTENTION: the lighting fixture should not be fitted in particularly humid or
rainy days.
Always keep the glass surface clean; for later cleaning procedures use a
smooth and slightly wet cloth, do not use any abrasive or solvent materials.
ACHTUNG: Dieser Artikel darf an Tagen mit besonders hoher Luftfeuchtigkeit bzw.
an Regentagen nicht montiert werden.
Das Glas immer sauber halten; zum Reinigen ein weches, leicht angefeuchtetes
Tuch benutzen; keine Scheuermittel oder Lösemittel verwenden.
ATENCIÓN : el aparato no tiene que montarse durante días especialmente
húmedos o de lluvia.
Mantener siempre limpia la superficie del cristal; para la limpieza posterior
utilizar un paño suave ligeramente humedecido; no emplear materiales
abrasivos ni solventes.
Insert the power cable of the kit into the relevant cable slot located on the body
and tighten this last one.
ie Stromkabel durch den auf dem Körper vorgesehenen Kabeldurchlass führen
und festziehen.
ntroduire le câble d'alimentation dans le passe-fil situé sur le corps, en le
serrant.
ntroducir el cable de alimentación en el guíacable situado sobre el cuerpo,
apretándolo.
ATTENTION: l'appareil ne doit pas être monté lorsqu'il fait particulièrement
humide ou lorsqu'il pleut.
La surface du verre doit toujours être propre ; pour les nettoyages successifs,
utiliser un chiffon doux légèrement mouillé, ne pas utiliser de produits abrasifs
ou solvants.
I
GB
D
F
E
I
GB
D
F
E
I
GB
D
F
E
Viabizzuno
2 Inserire il kit scelto nel corpo seguendo le relative istruzioni.
Per il collegamento alla rete elettrica dell’apparecchio utilizzare un collegamento
fisso (da pozzetto, scatola di derivazione, o altro).
Non utilizzare spine di alcun tipo. Rispettare le normative impianti vigenti.
Accendere l’apparecchio lasciando la lampadina accesa per almeno 15 minuti
prima di chiudere il corpo, in modo da eliminare l’umidità interna.
Insert the chosen kit in the fixture looking its instructions.
3 Montare il coperchio (A) con l’apposita guarnizione (B) e, se presenti, le
alette frangiluce (C), sul corpo (D) assicurandosi che il tutto sia perfettamente
pulito da polvere, cemento, ecc.
L’inclinazione delle alette frangiluce può essere regolata: è consentito aprirle
maggiormente, ma non chiuderle rispetto alla posizione iniziale.
ATTENZIONE: l’uso delle alette frangiluce non è previsto con la lampada
alogena R7s.
A
For the connection to the fixture's power supply use a fixed connection (from pit,
connector block, or else).
Do not use any plug. Comply with the current installation regulations.
Die bestehenden Normen in Bezug auf Anlagen beachten.
Introduire le kit choisi en suivant les instructions correspondantes.
Pour le branchement au réseau électrique de l'appareil, utiliser un branchement
fixe (d'un puits, d'une boîte de dérivaiton, ou autre).
Ne pas utiliser de fiches. Respecter les normes installations en vigueur.
Allumer l'appareil et laisser l'ampoule allumée pendant au moins 15 minutes
avant de fermer le corps, de manière à éliminer l'humidité interne.
Respetar
las normativas vigentes sobre las instalaciones.
Monter le couvercle (C) avec le joint (D) et les ailettes coupe-lumière (E), si elles
sont présentes, sur le corps, après avoir éliminé toute trace de poussière, ciment,
etc.
L'inclinaison des ailettes coupe-lumière peut être réglée : il est possible de les
ouvrir davantage mais pas de les fermer par rapport à la position d'origine.
ATTENTION: l'utilisation des ailettes coupe-lumière n'est pas prévue avec la
lampe halogène R7s.
Turn the fixture on, thus leaving the bulb on for at least 15 minutes before
closing the body, in such a way to eliminate moisture inside.
Zum Anbringen des gewählten Bausatzes die entsprechende Anleitung befolgen.
Zum Anschließen an das Stromnetz einen festen Anschluss benutzen (Schacht,
Abzweigdose, o. ä.).
Keinerlei Stecker verwenden.
Das Gerät einschalten und mindestens 15 Minuten eingeschaltet lassen; erst
danach schließen, damit keine Feuchtigkeit im Inneren bleibt.
Introducir el juego elegido siguiendo las instrucciones correspondientes.
Para la conexión a la red eléctrica del aparato utilizar una conexión fija (pozo,
caja de empalmes, u otro). No utilizar clavijas macho de ningún tipo.
Encender el aparato dejando la bombilla encendida durante al menos 15
minutos antes de cerrar el cuerpo, de modo de eliminar la humedad interior.
ssemble the cover (A) with his gasket (B) and, if any, the adjustable louvres
(C) on the fixture, be sure that this components are clean.
The angle of louvres can be adjusted: it can be increased further, but it cannot
be decreased beyond the initial position.
ATTENTION: no adjustable louvres are required with the R7s halogen lamp.
Den Deckel (C) mit der dazu passenden Dichtung (D), und, sofern vorhanden, die
das Licht brechenden Lamellen (E) am Korpus montieren; alle Teile müssen
vollkommen sauber, und frei von Staub und Zement sein.
Die Neigung der das Licht brechenden Lamellen kann eingestellt werden: Sie
können weiter geöffnet, jedoch nicht mehr geschlossen werden.
ACHTUNG: Bei der Halogenlampe R7s sind die das Licht brechenden Lamellen
nicht vorgesehen.
Montar la tapa (C) con la junta correspondiente (D) y, si están, las lamas
difusoras (E) en el cuerpo, asegurándose de que todo esté perfectamente limpio
de polvo, cemento, etc.
La inclinación de las lamas difusoras puede regularse: está permitido abrirlas
más, pero no cerrarlas respecto a la posición inicial.
ATENCIÓN : el empleo de las lamas difusoras no está previsto con la lámpara
halógena R7s.
I
GB
D
F
E
I
GB
D
F
E
D
A
B
C
Viabizzuno
4 Avvitare in modo graduale il coperchio lasciando acceso per altri 15 minuti
prima di serrare completamente le viti in modo da evitare condense.
ATTENZIONE: la procedura corretta del serraggio delle viti è la seguente:
eseguire in maniera sequenziale, come indicato dai numeri del disegno, il 60%
della corsa della vite, ripetere la procedura avvitando la rimanente corsa, poi
serrare in maniera decisa.
Gradually screw up the cover by letting the lamp on for another 15 minutes
before tightening the screws completely, in such a way to avoid condensate
formation.
ATTENTION: the correct screw tightening procedure is the following:
follow the procedure sequentially, as indicated by the numbers of the drawing,
60% of the screw travel, repeat the procedure by screwing up completely and
firmly tightening.
Den Deckel allmählich festschrauben, und das Gerät weitere 15 Minuten
eingeschaltet lassen; erst danach die Schrauben ganz anziehen, damit kein sich
kein Kondenswasser bilden kann.
Die Schrauben werden wie folgt korrekt angezogen: Der Nummerierung auf der
Zeichnung folgend nacheinander bis 60 Prozent des Schraubenhubes anziehen,
und danach nochmals von vorne beginnen, und alle Schrauben nacheinander
nicht zu fest anziehen.
Enroscar de modo gradual la tapa dejando la bombilla encendida durante al
menos 15 minutos antes de apretar totalmente los tornillos, de modo de evitar
la formación de condensación.
El procedimiento correcto de apriete de los tornillos es el siguiente: efectuar de
modo secuencial, como indicado por los números del dibujo, un 60% de la
carrera del tornillo, repetir el procedimiento enroscando la parte que queda de la
carrera sin apretar, apretar de forma decidida.
Visser graduellement le couvercle en laissant allumé pendant 15 minutes avant
de serrer complètement les vis, de manière à éviter la condensation.
La procédure correcte du serrage des vis est la suivante: effectuer de manière
séquentielle, comme indiqué par les numéros du dessin, 60% de la course de la
vis, répéter la procédure en vissant le reste de la course sans serrer, puis serrer
fort.
I
GB
D
F
E
12
8
3
5
746

Other Viabizzuno Outdoor Light manuals

Viabizzuno minima terra Instruction Manual

Viabizzuno

Viabizzuno minima terra Instruction Manual

Viabizzuno m44 Instruction Manual

Viabizzuno

Viabizzuno m44 Instruction Manual

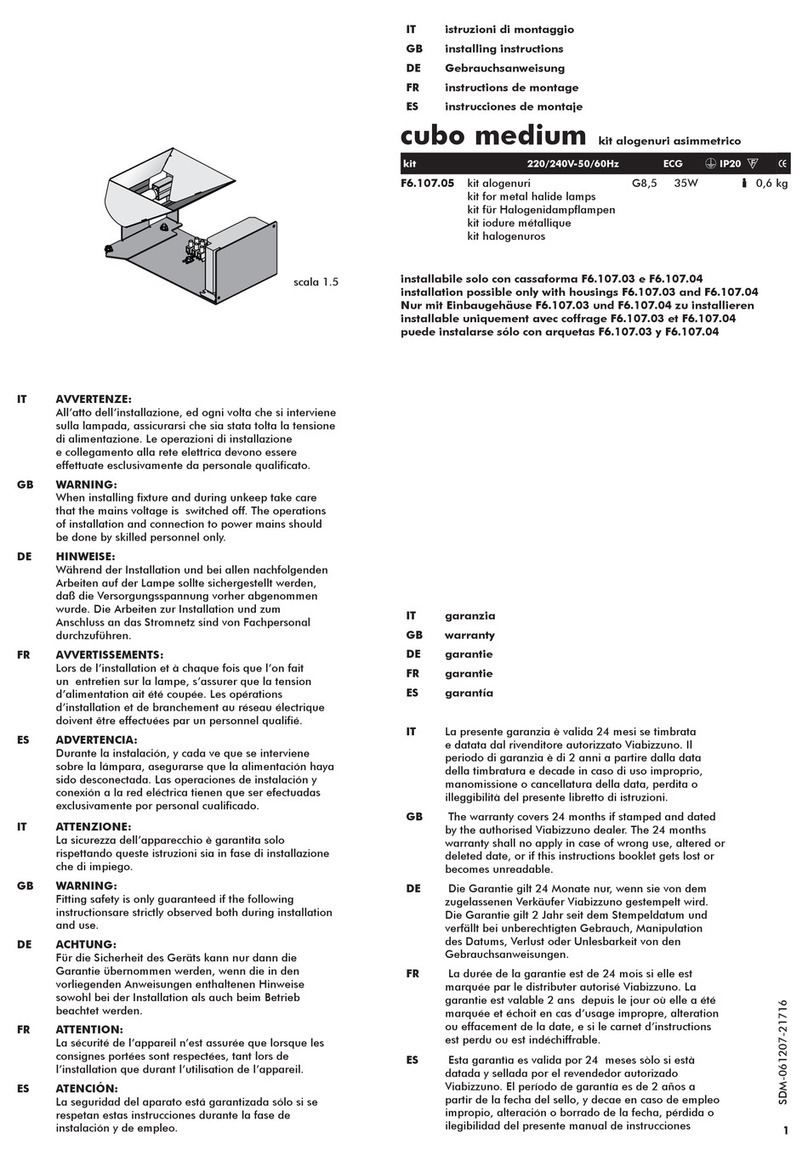
Viabizzuno cubo medium Instruction Manual

Viabizzuno

Viabizzuno cubo medium Instruction Manual

Viabizzuno minima ta mn02 Instruction Manual

Viabizzuno

Viabizzuno minima ta mn02 Instruction Manual

Viabizzuno concrete 1 User manual

Viabizzuno

Viabizzuno concrete 1 User manual

Viabizzuno XXI secolo Instruction Manual

Viabizzuno

Viabizzuno XXI secolo Instruction Manual

Viabizzuno lanterna massima palo Instruction Manual

Viabizzuno

Viabizzuno lanterna massima palo Instruction Manual

Viabizzuno maxxi poppy terra Instruction Manual

Viabizzuno

Viabizzuno maxxi poppy terra Instruction Manual

Viabizzuno giraeFFe palo 1 Instruction Manual

Viabizzuno

Viabizzuno giraeFFe palo 1 Instruction Manual

Viabizzuno Cilindro S70 User manual

Viabizzuno

Viabizzuno Cilindro S70 User manual

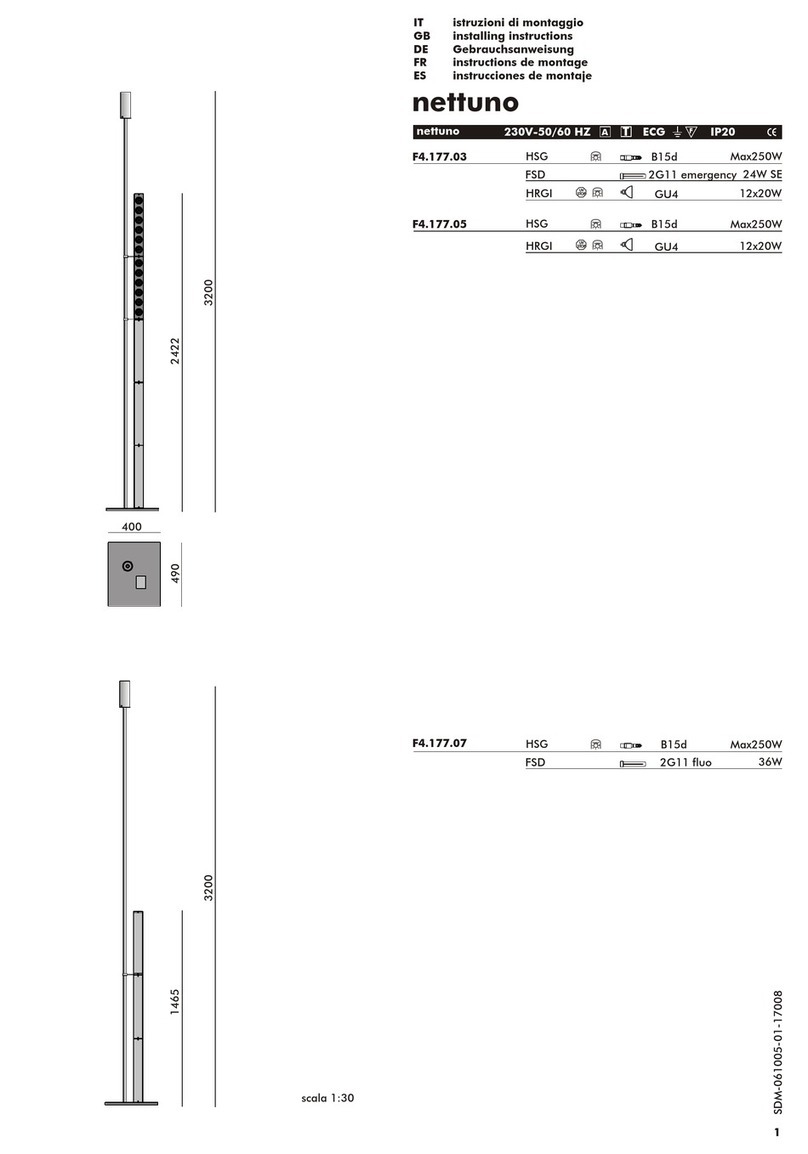
Viabizzuno nettuno F4.177.03 Instruction Manual

Viabizzuno

Viabizzuno nettuno F4.177.03 Instruction Manual

Viabizzuno palo B Instruction Manual

Viabizzuno

Viabizzuno palo B Instruction Manual

Viabizzuno ombrella Instruction Manual

Viabizzuno

Viabizzuno ombrella Instruction Manual

Viabizzuno Mon amour Instruction Manual

Viabizzuno

Viabizzuno Mon amour Instruction Manual

Viabizzuno PALO MARTINO Instruction Manual

Viabizzuno

Viabizzuno PALO MARTINO Instruction Manual

Viabizzuno Lanterna massima Vb4.553.01 Instruction Manual

Viabizzuno

Viabizzuno Lanterna massima Vb4.553.01 Instruction Manual

Viabizzuno F9.211.75 Instruction Manual

Viabizzuno

Viabizzuno F9.211.75 Instruction Manual

Popular Outdoor Light manuals by other brands

CONCORD Pathe G/DD Series quick start guide

CONCORD

CONCORD Pathe G/DD Series quick start guide

LIGMAN ODESSA 2 OD-21025 installation manual

LIGMAN

LIGMAN ODESSA 2 OD-21025 installation manual

DecaLED Orpheus 85000013 quick start guide

DecaLED

DecaLED Orpheus 85000013 quick start guide

Quoizel LDG8408K Assembly instruction sheet

Quoizel

Quoizel LDG8408K Assembly instruction sheet

WAC Lighting MODERN FORMS 716 Series Installation instruction

WAC Lighting

WAC Lighting MODERN FORMS 716 Series Installation instruction

CREE LIGHTING Traveyo Series manual

CREE LIGHTING

CREE LIGHTING Traveyo Series manual

Trio FREDDY 4248101 Series quick start guide

Trio

Trio FREDDY 4248101 Series quick start guide

Urban Electric CAY Assembly and mounting instructions

Urban Electric

Urban Electric CAY Assembly and mounting instructions

LIGMAN NAT-20002 installation manual

LIGMAN

LIGMAN NAT-20002 installation manual

Philips 17437 P7 Series user manual

Philips

Philips 17437 P7 Series user manual

Lights LampLust Elloway installation instructions

Lights

Lights LampLust Elloway installation instructions

V-TAC VT-762-2 instruction manual

V-TAC

V-TAC VT-762-2 instruction manual

Clas Ohlson LS7H01-UK instruction manual

Clas Ohlson

Clas Ohlson LS7H01-UK instruction manual

BEGA 84 299 Installation and technical information

BEGA

BEGA 84 299 Installation and technical information

LUCIDE MALOTO 45586/20/62 installation manual

LUCIDE

LUCIDE MALOTO 45586/20/62 installation manual

Kanlux ZARA HR-40 manual

Kanlux

Kanlux ZARA HR-40 manual

LIGMAN VANCOUVER 10 installation manual

LIGMAN

LIGMAN VANCOUVER 10 installation manual

Elan 83335 Assembly instructions

Elan

Elan 83335 Assembly instructions

manuals.online logo
manuals.online logoBrands
  • About & Mission
  • Contact us
  • Privacy Policy
  • Terms and Conditions

Copyright 2025 Manuals.Online. All Rights Reserved.