Virutex PB83E User manual

Plantilla para Colocar Cercos y Tapajuntas
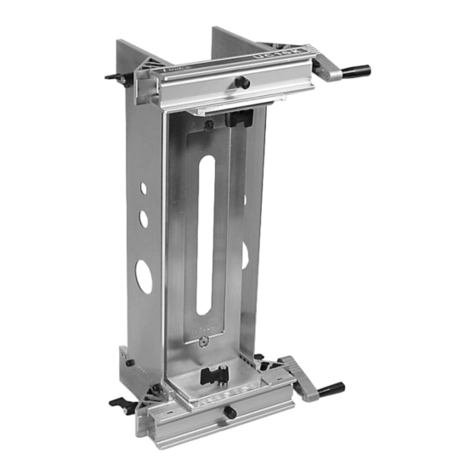
Template for Mounting Jambs and Architraves
Gabarit pour Placer Dormants et Couvrejoints
Schablone zum Anbringen von Zargen und Abdeckleisten
Sagoma per Collocare Telai e Modanature
Molde para Colocar Cercos e Tapa-Juntas
PB83E
MANUAL DE INSTRUCCIONES
OPERATING INSTRUCTIONS
MODE D’ EMPLOI
GEBRAUCHSANWEISUNG
MANUALE D’ISTRUZIONI
MANUAL DE INSTRUÇÕES

2
A
H
D
E
H
E
B
D
VISTOPORDELANTE
FRONT VIEW
VU DE DEVANT
VONVORNE GESEHEN
VISTA ANTERIORE
VISTA FRONTAL
VISTO POR DELANTE
FRONT VIEW
VU DE DEVANT
VON VORNE GESEHEN
VISTA ANTERIORE
VISTA FRONTAL
VISTO POR DETRÁS
REAR VIEW
VU DE DERRIÈRE
VON HINTEN GESEHEN
VISTA POSTERIORE
VISTA TRASEIRA
F
F
G
J
I
G
F
K
L
I
FL
K
Fig. 1 Fig. 2
ESPAÑOL Plantilla para Colocar Cercos y Tapa Juntas PB83E
5
ENGLISH PB83E Template for Mounting Jambs and Architraves
7
FRANÇAIS Gabarit pour Placer Dormants et Couvre-Joints PB83E
9
DEUTSCH Schablone zum Anbringen von Zargen und Abdeckleisten PB83E
11
ITALIANO Sagoma per Collocare Telai e Modanature PB83E
13
PORTUGUÉS Molde para Colocar Cercos e Tapa-Juntas PB83E
15
página/page
seite/pagina
MANUAL DE INSTRUCCIONES
OPERATING INSTRUCTIONS
MODE D'EMPLOI
GEBRAUCHSANWEISUNG
MANUALE D'ISTRUZIONI
MANUAL DE INSTRUÇÕES

3
F
F
C
C
C
A
B
C
C
C
ESPUMA DE PO-
LIURETANO*
* POLYURETHANE FOAM
MOUSSE DE POLYURÉTHANE
POLYURETHANSCHAUM
POLIURETANO ESPANSO
ESPUMA DE POLIURETANO
Fig. 3 Fig. 4

7
de medidas especiales.
Anchura de 1240 a 1640 mm.
9. GARANTIA
Todos los productos VIRUTEX tienen una garantía
válida para 12 meses a partir del día de su suministro,
quedando excluidas todas las manipulaciones o daños
ocasionados por manejos inadecuados o por degaste
natural del producto.
Para cualquier reparación dirigirse al servicio oficial de
asistencia técnica VIRUTEX.
VIRUTEX se reserva el derecho de modificar sus productos
sin previo aviso.
ENGLISH
TEMPLATE FOR MOUNTING JAMBS
AND ARCHITRAVES
TECHNICAL CHARACTERISTICS
Minimum template aperture.....................1905x620x35 mm
Maximum template aperture.......................2160 x1020 mm
Maximum jamb width................................................200 mm
Package dimensions.........................1895 x 675 x 108 mm
Weight........................................................................12.9 kg
1. PURPOSE OF THE TEMPLATE
This template is for PERFECT mounting of jambs and
architraves on inner frames for doors and serves to
secure them with polyurethane foam onto both new
and existing construction.
This template allows you to use the existing doors on
unlined jambs as you are able to cut back and line the
jambs and then replace the same door.
2. BASIC INFORMATION
Firstly, establish the dimensions of the door (height, width
and depth) and check on the chart that it is within the
maximum and minimum limits.
SIZES OF FLAT WOODEN DOORS TO UNE 56802
Door Type Height mm. Width mm. Depth mm.
Internal 625 35
door 2030 725 40
825 45
External 2030 825 40
front door 45
The template PB83E is designed for work with the
following recommended door sizes:
HEIGHT: (max. 2160 mm) (min. 1905 mm)
WIDTH: (max. 1020 mm) (min. 620 mm)
DEPTH: (max. 45 mm) (min. 35 mm)
3. UNPACKING
Inside the packing box you will find the following
material: (Fig. 4)
Letter Name Quantity
Mounted template 1
A Set with architrave stops and feet 1
B Set with architrave stops and feet 1
C Safety plug 6
And the following documents:
- Instruction manual
- Guarantee
4. MOUNTING THE TEMPLATE
1.- Fit feet "A" and "B" in their positions following the
(Fig. 4) diagram
2.- Secure the architrave stops with the safety plug "C"
and the template is now ready for use.
5. PREPARING THE TEMPLATE
5.1.1. HEIGHT
Adjust the height of the template using feet "A" and "B"
using the millimeter rules which determine the height of
the door, and stop it with the knobs "D" (Fig. 1)
5.1.2. WIDTH
Adjust the width of the template using the guides along
the millimeter rules which determine the width of the
door (Fig. 1) and stop it using knobs "E".
When carrying out these two operations,
take into consideration the play for width
and height required between the door
and the jamb.
5.2. PREPARING THE JAMBS AND ARCHITRAVES
5.2.1. JAMBS
Mitre cut the jambs according to the measurements
marked on the template.
Remember that the measurements are between gains
(rebates).
5.2.2. ARCHITRAVES (Inner and outer)
Cut the architraves (moldings) according to the sizes to
which the jambs have been cut.
Examples of cut:
- Jamb size between gains: 620 mm width x 2030 height

8
- Size of upper inner architrave: 620 + 16 = 636
- Size of upper outer architrave: 620 + 6 = 626
- Size of side inner architraves: 2030 + 8 = 2038
- Size of side outer architraves: 2030 + 3 = 2033
We recommend you make the cuts with a tolerance +
1 mm - 0 mm
These sizes are suitable for jambs of 20
mm width. For other jamb sizes and cha-
mfered jambs the measurements should
be taken in situ.
6. METHOD OF USE
6.1.1. MOUNTING JAMBS AND
NEW DOORS ON EXISTING CONSTRUCTION
Mounting precut jambs on the template (see tem-
plate preparation)
1.- Fit the header piece onto the upper part of the
template (Fig. 2) and stop it using clamps "F" and secure
it with knobs "G".
2.- Fit the two side pieces into their respective places
ensuring that the vertical drop is lined up with the
header piece. (Fig. 2) Stop it using clamps "F" and secure
it with knobs "G".
3.- Start hollowing out the jamb (old frame) in order to
mount the template with the previously fitted jambs.
To do this, use the width and height formula indicated
in the table for examples of use. The inner frame should
be cut using an electric chain saw or jig saw with no
concern for any splintering or poor finish.
Mounting the template with jambs in the prepared
opening.
4.- Insert the template into the opening and level it
up with the wall.
5.- Adjust the template using knobs "H" (Fig. 1) to obtain
a perfect vertical drop with the help of the levels on
the side pieces.
6.- Fill the existing openings with polyurethane foam
to secure it in place, making sure that the clamps "F"
are left free. (Fig. 2 and Fig. 3)
7.- Mount the architrave stops "I" (Fig. 2) and fix them
with knob "J". For architraves mounted on jambs more
than 20mm thick you need to adjust the architrave
stop supplements (L) (included in the template) to the
required size. If there is any difference in size between
the upper joint limiters (I) and the sides with respect to
the architraves (K) this can be corrected using the joint
limiter extensions (L).
8.- Insert polyurethane foam in the outer architraves
and mount them using the architrave stops as reference.
Secure them using nails, clips or pins etc.
9.- Remove clamps "F" (Fig. 2) and fill in the openings
they leave using the same polyurethane foam and then
mount the inner architrave in the same way described
above in point 8. Use the outer sides of the template
as reference and secure them in place in the same way
as for the outer architraves.
10.- Leave the polyurethane foam to set properly. During
this time the next door can be prepared, starting at
point 3 in section 6.1.1.
Removing the template
Having checked that the mounting is correctly secured
you can now remove the template.
11.- Loosen knobs "J" (Fig. 2), separate the lower the
architrave stops "I".
12.- Remove the template by moving it towards the
opening side of the door with no need for readjustment,
as it can then be used to mount the next door to the
same sizes as the previous one.
6.1.2. MOUNTING A NEW JAMB USING
THE EXISTING DOOR
1.- Remove the door and the fittings left on the jamb.
Check the gain to see there is no remai-
ning paint, nails, varnish etc.
2.- Insert the template in the jamb and adjust it for
width and height and incline that it might have using
the adjustment knobs.
This way all the possible defects existing on the jamb
are copied so that the door can then be replaced in the
same position.
To mount the new jambs follow the instructions from
point 3 in section 6.1.1.
7. RECOMMENDATIONS
We recommend that the doors, jambs and architraves are
cut and adjusted in the workshop, as well as the slots for
hinges, locks and bolts. This considerably reduces the time
needed for mounting and gives a better quality finish.
8. ACCESSORIES
Double door kit ref.8345175. Extension for mounting

9
jambs and architraves on inner frames for double doors
or special sizes.
Width from 1240 to 1640 mm.
9. WARRANTY
All VIRUTEX products are guaranteed for 12 months
from the date of purchase, excluding any damage which
is a result of incorrect use or of natural wear and tear
on the machine.
All repairs should be carried out by the official VIRUTEX
technical assistance service.
VIRUTEX reserves the right to modify its products wi-
thout prior notice.
FRANÇAIS
GABARIT POUR PLACER DORMANTS
ET COUVRE-JOINTS
CARACTÉRISTIQUES TECHNIQUES
Ouverture minimum de gabarit................1905x620x35 mm
Ouverture maximum de gabarit...................2160x1020 mm
Largeur maximum de dormant................................200 mm
Dimension d’emballage.........................1895x675x108 mm
Poids..........................................................................12,9 Kg
1. BUT DU GABARIT
Le but de ce gabarit, c'est de placer PARFAITEMENT
les dormants (battants) et les couvre-joints (moulures)
dans les pré-dormants de portes et leur fixation avec
de la mousse de polyuréthane, sur des constructions
nouvelles ou anciennes.
Avec ce gabarit, on peut utiliser la porte déjà placée
dans des dormants sans garnitures, en pouvant couper
et garnir le dormant et ensuite placer la même porte.
2. CONNAISSANCES DE BASE
Tout d'abord, il faut savoir les dimensions de la porte
(hauteur, largeur, épaisseur) et voir sur le graphique si
elle entre dans les limites des dimensions (maximum-
minimum).
DIMENSIONS DE PORTES PLATES EN BOIS
NORME UNE 56802
T. Porte Hauteur mm. Largeur mm. Épais. mm.
Porte 625 35
Intérieure 2030 725 40
825 45
Porte 2030 825 40
entrée à 45
appart. ext.
Le gabarit PB83E est préparé pour contenir les suivantes
dimensions de porte recommandées:
HAUTEUR: (max. 2160 mm) (min. 1905 mm)
LARGEUR: (max. 1020 mm) (min. 620 mm)
ÉPAISSEUR: (max. 45 mm) (min. 35 mm)
3. DÉBALLAGE
A l'intérieur de l'emballage, se trouve le matériel sui-
vant (Fig.4):
Lettre Dénomination Quant.
Gabarit monté 1
A Groupe avec butées couvre-joints
et base 1
B Groupe avec butées couvre-joints
et base 1
C Bouchon de sécurité (plast.) 6
Et la documentation suivante:
- Manuel d'instructions
- Garantie
4. ASSEMBLAGE DU GABARIT
1.- Monter les groupes "A" et "B" dans leurs logements,
selon ce qu’indique le dessin d'ASSEMBLAGE.
2.- Fixer les butées couvre-joints avec le bouchon de
sécurité "C", et le gabarit sera ainsi prêt à fonctionner.
5. PRÉPARATION DU GABARIT
5.1.1. HAUTEUR
Régler la hauteur du gabarit, à l'aide des bases "A" et "B",
avec les règles millimétrées qui déterminent la hauteur
de la porte, en le bloquant avec les manettes "D" (Fig. 1).
5.1.2. LARGEUR
Régler la largeur du gabarit à l'aide des guides avec les
règles millimétrées qui déterminent la largeur de la porte
(Fig. 1), en le bloquant avec les manettes "E".
Il faut tenir compte en effectuant ces
deux opérations des jeux de largeur et
de hauteur que l'on souhaite laisser entre
la porte et le dormant.
5.2. PRÉPARATION DES
DORMANTS ET DES COUVRE-JOINTS
5.2.1. DORMANTS
Couper les dormants (battants) à onglets, en fonction
des dimensions données au gabarit.
Il faut tenir compte du fait que les dimensions sont
entre les feuillures (délardements).

18
20
Cerco o batiente
NORMAL (A)
10
Jamb (frame)•Dormant
(battant)•Zarge
(Rahmenschenkel)•Telaio
(battenti)•Cerco (batente)
30
Cerco o batiente
"KIT-BLOCK" (B)
20
Jamb (frame)•Dormant
(battant)•Zarge
(Rahmenschenkel)•Telaio
(battenti)•Cerco (batente)
625 665 685
725 765 785
825 865 885
ANCHURA (mm)
2030 2050 2060
2110 2130 2140
ALTURA (mm)
Hoja* A B
A: Luz puertas NORMAL
B: Luz puertas "KIT-BLOCK"
Luz de puerta•Door opening•Baie de porte•Lichte Weite der Tür•Luce
della porta•Vão da porta
Luz de puerta•Door opening•Baie de porte•Lichte Weite der Tür•Luce
della porta•Vão da porta
WIDTH•LARGEUR•BREITE
LARGHEZZA•LARGURA
HEIGHT•HAUTEUR•HÖHE
ALTEZZA•ALTURA
Hoja* A B
(*) Door leaf opening•Baie du battant•Öffnung für das
Türblatt•Vano della porta•Concavidade da folha
MEDIDAS Y LUCES DE PRECERCOS
Door opening and Inner frames Sizes • Dimensions et Baie de porte de Pré-dormant
Masse und Litchte Weite der Tür von Innenrahmen (Blockrahmen)
Dimensioni e Luce della porta de Inssi • Medidas e Vao da porta de Pré-cerco

Virutex, S.A.
Antoni Capmany, 1
08028 Barcelona (Spain)
www.virutex.es
8396144 052013
http://www.virutex.es/registre
Acceda a toda la información técnica.
Access to all technical information.
Accès à toute l’information technique.
Zugang zu allen technischen Daten.
Accedere a tutte le informazioni tecniche.
Aceso a todas as informações técnicas.
Dostęp do wszystkich informacji technicznych.
Доступ ко всей технической информации.
Other manuals for PB83E
2
Other Virutex Tools manuals
Virutex
Virutex RA17D User manual
Virutex
Virutex WEGOMA DF550VG User manual
Virutex
Virutex SVE500 User manual
Virutex
Virutex eb25 User manual
Virutex
Virutex SVN500 User manual
Virutex
Virutex PFE60 User manual
Virutex
Virutex SPR770T User manual
Virutex
Virutex PM11D User manual
Virutex
Virutex PMT111 User manual
Virutex
Virutex MEB50 User manual
Popular Tools manuals by other brands
Bostitch
Bostitch 651 SERIES Operation and maintenance manual
Black & Decker
Black & Decker PROJECT PAL 71-045 instruction manual
RAMMER
RAMMER R01P Operator's manual
Hitachi
Hitachi DA300E Handling instructions

SUHNER ABRASIVE
SUHNER ABRASIVE LSB 70-TOP Technical document
Greenlee
Greenlee JRF-4EPR instruction manual
