Virutex MEB50 User manual

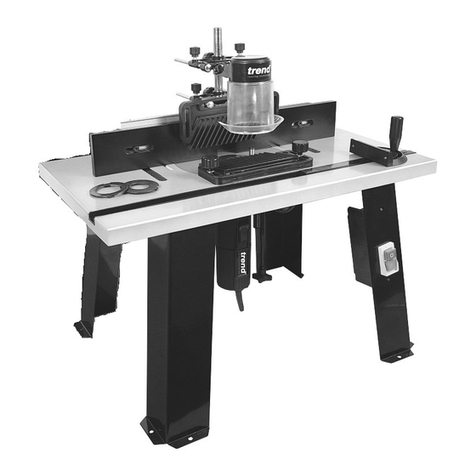
Mesa para uso estacionario
Table for edgebander
Table pour plaqueuse de chants
Tisch für Kantenleimmaschinen
Tavolo per bordatrice
Mesa para orladora
Стол кромкооблицовочный
Stolik do okleiniarki
MEB50 / MEB150
MANUAL DE INSTRUCCIONES
OPERATING INSTRUCTIONS
MODE D’ EMPLOI
GEBRAUCHSANWEISUNG
MANUALE D’ISTRUZIONI
MANUAL DE INSTRUÇÕES
ИНСТРУКЦИЯ ПО ЭКСПЛУАТАЦИИ
INSTRUKCJA OBSŁUGI

2
MANUAL DE INSTRUCCIONES
OPERATING INSTRUCTIONS
MODE D'EMPLOI
GEBRAUCHSANWEISUNG
MANUALE D'ISTRUZIONI
MANUAL DE INSTRUÇÕES
ИНСТРУКЦИЯ
ПО
ЭКСПЛУАТАЦИИ
INSTRUKCJA OBSŁUGI página/page
Seite/pagina
страница/strona
ESPAÑOL Mesa para uso estacionario MEB50/MEB150
2
ENGLISH MEB50/MEB150 Table for edgebander
4
FRANÇAIS Table pour plaqueuse de chants MEB50/MEB150
7
DEUTSCH Tisch für Kantenleimmaschinen MEB50/MEB150
9
ITALIANO Tavolo per bordatrice MEB50/MEB150
12
PORTUGUÉS Mesa para orladora MEB50/MEB150
14
РУССКИЙ Стол кромкооблицовочный MEB50 /MEB150
17
POLSKA Stolik do okleiniarki MEB50/MEB150
20
ESPAÑOL
MESA PARA USO ESTACIONARIO MEB50/
MEB150
1. INSTRUCCIONES DE SEGURIDAD PARA EL
MANEJO DE LA MESA MEB50/MEB150, PARA
APLACADORA DE CANTOS PORTÁTIL DE COLA
CALIENTE PEB50/PEB150
AntesdeutilizarlamesaMEB50/MEB150,
debe leer el manual de la Encoladora
PEB50/PEB150 y asegurarse de haberlo
comprendido.
Lea a continuación atentamente éste
MANUAL DE INSTRUCCIONES y el FO-
LLETO DE INSTRUCCIONES GENERALES
DE SEGURIDAD que se adjuntan.
Conservelosmanualesenunlugaraccesi-
ble para posibles consultas posteriores.
Fije la Mesa MEB50/MEB150 sobre el
banco de trabajo, por los agujeros (K
Fig.1) de las patas.
2. CARACTERISTICAS
Medidasdelabase...............................................860x350mm
Longitud del plano de trabajo......................800 mm
Altura al plano de trabajo..................................195 mm
Peso......................................................................................17 kg
3. EQUIPO ESTANDAR
- Rodillo de presión auxiliar.
- Guías de apoyo a la entrada y a la salida de la pieza.
- Guía de apoyo posterior extensible hasta 500 mm.
- Prensor desmontable en guía de apoyo posterior.
• Al abrir la caja de embalaje de la MEB50/MEB150
encontrará en su interior:
• 1 Mesa MEB50/MEB150 para aplacadora PEB50/
PEB150.
• 1 Guía apoyo posterior extensible desmontada en las
siguientes piezas:
1 Regle de apoyo posterior (A, Fig. 1)
2 Arandelas (B, Fig. 1)
2 Tornillos Allen M.8x35 (C, Fig. 1)
2 Sujetadores de los brazos (D, Fig. 1)
2 Brazos (E, Fig. 1)
1 Conjunto prensor (F, Fig. 1)
• 1 Bolsa conteniendo 3 Tornillos (J, Fig. 3) para el Montaje
de la PEB50/PEB150; 2 Suplementos máquina (T y U, Fig.
3) y 18 Suplementos de mesa (S, Fig. 3), para el aplacado
de piezas circulares; y 5 Suplementos posteriores (V, Fig.
3) para el aplacado de formas curvilíneas.
4. ACCESORIOS OPCIONALES
1645916 - Porta-rollos para MEB50/MEB150. (Fig. 4)
5045753 - Soporte de 2 ventosas SFV50. (Fig. 5 y 6)
5045833 - Soporte de 1 ventosa SFV150. (Fig. 5)
5046266 - Conjunto cortador canto RC50T

3
5. MONTAJES
5.1 MONTAJES DE LA GUIA
APOYO POSTERIOR
Introducir un brazo (E, Fig. 1), en cada una de las dos
guías (G, Fig. 1) adosadas a los laterales de la mesa.
Extraer los tornillos (C, Fig. 1) y las arandelas (B, Fig. 1)
de los brazos (E, Fig. 1).
Situar el regle apoyo posterior (A, Fig. 1) sobre los brazos
E, y fijarlo a los sujetadores (D, Fig. 1), con los tornillos
(C, Fig. 1) y las arandelas (B, Fig. 1).
Desplazar la guía apoyo posterior montada, hacia el
interior de las guías (G Fig. 1), hasta hacer tope con el
regle (H, Fig. 1) de la mesa.
Fijar la guía apoyo posterior en esta posición, con las
manecillas (I, Fig. 1) de los dos lados.
Aflojar los tornillos (C, Fig. 1); enrasar las superficies
del regle apoyo posterior (A, Fig. 1) con la del regle (H
Fig. 1) de la mesa y apretar los tornillos (C, Fig. 1) en
esta posición.
5.2 MONTAJE DE LA APLACADORA PEB50/
PEB150 EN LA MESA
Colocar la aplacadora PEB50/PEB150 en la mesa MEB50/
MEB150 en la posición de la (Fig. 2) y fijarla con los tres
tornillos (J Fig. 2).
6. PREPARACIÓN DE LA APLACADORA PEB50/
PEB150
Siga escrupulosamente los pasos que se indican en el
Manual de la aplacadora PEB50/PEB150, hasta dejarla
lista para el aplacado del primer canto.
A título recordatorio los pasos a seguir son cronológi-
camente los siguientes:
• Conectar la aplacadora PEB50/PEB150 a la corriente
eléctrica.
• Accionar el interruptor general (IG, Fig. 2) para iniciar
el calentamiento.
• Cortar la tira de canto, a la medida del tablero que
va a aplacar.
• Ajustar la altura de la guía del canto.
No deje la tira en las guías, retírela al
terminar el ajuste.
• CUANDO LA LUZ DEL INTERRUPTOR DE AVANCE (IA,
Fig. 2) SE ENCIENDA:
- Comprobar que tiene cola suficiente en el depósito
de la máquina.
- Comprobar que el ajuste del paso de cola es el
apropiado.
• La aplacadora está ahora lista para comenzar a
aplacar cantos.
7. APLACADO DE PIEZAS RECTAS
Ajustes previos:
Comprobar que las guías de apoyo (M y L, Fig. 1) están
en su lugar:
• La guía de apoyo de salida (M, Fig. 7) debe estar ali-
neada con los dos rodillos (P y N, Fig. 7), de no estarlo
podrá alinearla aflojando los tornillos (R, Fig. 2) que
la sujetan.
• Para comprobar la posición correcta de la guía de
entrada (L Fig. 7), ponga un trozo de la tira con la que
va a aplacar, contra los rodillos (P y N, Fig. 7), presiónela
con un panel recto contra éstos y vea que la guía de
entrada (L, Fig. 7) esté alineada con el canto limpio del
panel. Si no lo está deberá alinearla aflojando los tornillos
(R, Fig. 2) que la sujetan.
Situar el prensor (F, Fig. 7):
Si desea aplacar ayudándose del prensor (F, Fig. 7), deberá
regular la posición de la guía de apoyo posterior (A, Fig.
7), para que el prensor ejerza una cierta presión sobre el
canto externo del panel y fijar la guía en ésta posición
con las manecillas (I, Fig. 1).
Para aplacar paneles de anchura mayor de 500 mm, en los
que no es posible usar el prensor, podemos desmontarlo
muy facilmente y montarlo en posición invertida para
que no se extravíe.
Aplacado:
Si la aplacadora PEB50/PEB150 está lista para aplacar
cantos, como se ha explicado en el apartado 6, siga los
pasos siguientes para aplacar un tablero:
Accionar el interruptor de avance (IA, Fig. 7) que se
encuentra en la empuñadura de la máquina.
Esperar unos segundos para que ascienda la cola desde
el depósito al rodillo encolador.
Introducir el canto a través de las guías hasta alcanzar el
rodillo de avance, el cual transportará el canto debidamente
encolado, hasta su salida sobre el rodillo de presión.
Avanzar el tablero al encuentro del canto a su salida
sobre el rodillo de presión.
Presionar el tablero contra el canto situado sobre el rodillo
de presión, de modo que el movimiento de giro de éste, nos
marque la velocidad de avance del tablero y acompañarlo
con ambas manos hasta el final del aplacado.
Detener el interruptor de avance (IA, Fig. 7).
Si ha terminado de trabajar con la máquina, detener
también el interruptor general (IG, Fig. 2).
8. APLACADO DE PIEZAS CIRCULARES
Ajustes previos:
Elevar la aplacadora PEB50/PEB150 para que el canto
encolado salga a ras de la mesa:
• Para aplacar tableros circulares deberá montar apla-
cadora PEB50/PEB150 en la posición de la (Fig. 2), pero
colocando los suplementos (T y U, Figs. 3, 8 y 9) bajo la
màquina para elevarla.

4
Colocar suplementos mesa:
• Debe repartir algunos suplementos mesa (S, Fig.
10) en las posiciones convenientes, para que pueda
apoyarse el tablero mientras lo aplacamos, sin que
el sobrante de canto inferior tropiece con ellos, al ir
rodando el tablero.
Retirar las guías de apoyo:
• Debe retirar de la mesa las guías de entrada y salida
(M y L, Fig. 2), aflojando los tornillos (R, Fig. 2).
Retirar el Prensor:
• Para aplacar tableros circulares no es posible usar el
Prensor (F, Fig. 1). Deberá desmontarlo y montarlo en
posición invertida para que no se extravíe.
Aplacado:
Si la aplacadora PEB50/PEB150 está lista para aplacar
cantos, como se ha explicado en el apartado 6, siga los
pasos siguientes para aplacar un tablero circular:
• Accionar el interruptor de avance (IA, Fig. 11) que se
encuentra en la empuñadura de la máquina.
• Esperar unos segundos para que ascienda la cola desde
el depósito al rodillo encolador.
• Situar el tablero sobre los suplementos mesa (S, Fig.
10) y frente al rodillo de presión.
• Introducir el canto a través de las guías hasta alcanzar el
rodillo de avance, el cual transportará el canto debidamente
encolado, hasta su salida sobre el rodillo de presión.
• Presionar el tablero contra el canto situado sobre el
rodillo de presión, de modo que el movimiento de giro de
éste, nos marque la velocidad de avance del tablero.
• Acompañar el tablero hasta el segundo rodillo y aplacar
el resto del tablero haciéndolo rodar entre los dos rodillos
(Fig. 11), hasta el final del aplacado.
• Detener el interruptor de avance (IA, Fig. 11).
• Si ha terminado de trabajar con la máquina, detener
también el interruptor general.
9. APLACADO DE PIEZAS PEQUEÑAS CON RA-
DIOS Y FORMAS.
Deberemos efectuar los mismos ajustes que para el
aplacado de piezas circulares y además:
Ajustes adicionales:
Retirar el rodillo de presión auxiliar y su eje:
• Con la ayuda de un destornillador, retirar el tornillo
(P, Fig. 2) que retiene el rodillo.
• Retirar también el eje del rodillo, desenroscándolo con
la ayuda de una varilla de 4 mm que deberá introducir
en el agujero del mismo.
Colocar suplementos posteriores:
• En algunas piezas puede ser necesario colocar algu-
nos suplementos posteriores (V, Fig. 2, 3 y 12), en la
parte trasera de salida del tablero y en las posiciones
convenientes, para que se pueda apoyar mientras lo
aplacamos, sin que el sobrante de canto inferior tropiece
con ellos al avanzar.
Aplacado:
Si la aplacadora PEB50/PEB150 está lista para aplacar
cantos, como se ha explicado en el apartado 6, siga los
pasos siguientes para aplacar un tablero pequeño con
radios y formas:
• Accionar el interruptor de avance (IA, Fig. 12) que se
encuentra en la empuñadura de la máquina.
• Esperar unos segundos para que ascienda la cola desde
el depósito al rodillo encolador.
• Situar el tablero sobre los suplementos mesa (S, Fig.
12) y frente al rodillo de presión.
• Introducir el canto a través de las guías hasta alcanzar el
rodillo de avance, el cual transportará el canto debidamente
encolado, hasta su salida sobre el rodillo de presión.
• Presionar el tablero contra el canto situado sobre el
rodillo de presión, de modo que el movimiento de giro
de éste, nos marque la velocidad de avance del tablero y
acompañarlo con ambas manos, siguiendo su contorno
hasta el final del aplacado.
• Detener el interruptor de avance (IA, Fig. 12).
• Si ha terminado de trabajar con la máquina, detener
también el interruptor general.
10. GARANTÍA
Todas las máquinas VIRUTEX, tienen una garantía válida de
12 meses a partir del día de suministro, quedando excluidas
todas las manipulaciones o daños ocasionados por manejos
inadecuados o por desgaste natural de la máquina.
Para cualquier reparación, dirigirse al Servicio de Asis-
tencia Técnica VIRUTEX.
VIRUTEX se reserva el derecho de modificar sus productos
sin previo aviso.
ENGLISH
MEB50/MEB150 TABLE FOR EDGEBANDER
1. SAFETY INSTRUCTIONS FOR USING THE
MEB50/MEB150 WORKTOP FOR THE PEB50/
PEB150 PORTABLE HOT GLUE EDGEBANDER.
Before using the MEB50/MEB150 wor-
ktop, read the manual for the PEB50/
PEB150 Glue Applicator and ensure you
have understood it.
Then read these OPERATING INSTRUC-
TIONSandtheattachedGENERALSAFETY
INSTRUCTIONS LEAFLET carefully before
using the machine.
Keep manuals within easy reach for
possible consultation later on.
Fix the MEB50/MEB150 worktop to the
workbench through the holes (K Fig. 1)
in the legs.

5
2. SPECIFICATIONS
Base measurements......................................860 x 350 mm
Work surface length.................................................800 mm
Work surface height..................................................195 mm
Weight..........................................................................17 kg
3. STANDARD EQUIPMENT
- Auxiliary pressure roller.
- Support guides for inserting and removing the
piece.
- Rear support guide which can be extended up to
500 mm.
- Removable clamp on rear support guide.
• You will find the following inside the box of the
MEB50/MEB150:
• 1 MEB50/MEB150 Worktop for PEB50/PEB150 ed-
gebander.
• 1 rear, extendible support guide, disassembled into
the following parts:
1 rear support bar (A, Fig. 1)
2 Washers (B, Fig. 1)
2 M.8x35 allen screws (C, Fig. 1)
2 Arm supports (D, Fig. 1)
2 Arms (E, Fig. 1)
1 Clamp assembly (F, Fig. 1)
• 1 Bag containing 3 screws (J, Fig. 3) for assembling
the PEB50/PEB150; 2 machine attachments (T and
U, Fig. 3) and 18 worktop attachments (S, Fig. 3), for
edgebanding round pieces; and 5 rear attachments (V,
Fig. 3) for edgebanding curved shapes.
4. OPTIONAL ACCESSORIES
1645916 – Roll-holder for MEB50/MEB150. (Fig. 4)
5045753 - SFV50 stand with 2 suction pads. (Fig. 5 and
6)
5045833 - SFV50 stand with 1 suction pad. (Fig. 5)
5046266 - RC50T Tape Cutter
5. FITTING
5.1 FITTING THE REAR GUIDE PLATE
Insert an arm (E, Fig. 1) in each of the two guides (G,
Fig. 1) attached to the sides of the worktop.
Remove the screws (C, Fig. 1) and the washers (B, Fig.
1) from the arms (E, Fig. 1).
Mount the rear support bar (A, Fig. 1) on the arms E,
and fix it to the supports (D, Fig. 1) using the screws (C,
Fig. 1) and the washers (B, Fig. 1).
Move the rear guide plate into the guides (G, Fig. 1) until
it touches the bar (H, Fig. 1) of the worktop.
Fix the rear support guide in this position with the Levers
(I, Fig. 1) on both sides.
Loosen the screws (C, Fig.1); make the surfaces of the
rear support bar (A, Fig. 1) flush with the bar (H, Fig.
1) on the worktop and tighten the screws (C, Fig. 1) in
this position.
5.2 FITTING EDGEBANDER PEB50/PEB150 TO
THE WORKTOP
Place edgebander PEB50/PEB150 on worktop MEB50/
MEB150 in the position shown in (Fig. 2) and fix it in
place using the three screws (J, Fig. 2).
6. PREPARING EDGEBANDER PEB50/PEB150
Follow the steps indicated in the PEB50/PEB150 ed-
gebander manual exactly to prepare it for gluing the
first edging.
The steps to take in chronological order are listed below
as a reminder:
• Connect the PEB50/PEB150 edgebander to the power
source.
• Turn on the main switch (IG, Fig. 2) to start heating
it up.
• Cut the edging strip to the measurement of the board
to be glued.
• Adjust the edging guide height.
Do not leave the strip in the guides.
temove it when you have finished the
adjustments.
• WHEN THE ADVANCE SWITCH LIGHT (IA, Fig. 2)
COMES ON:
- Check there is enough glue in the machine tank.
- Check the glue flow setting is correct.
• The edgebander is now ready to start gluing ed-
gings.
7. EDGEBANDING STRAIGHT PIECES
Prior adjustments:
Ensure that the support guides (M and L, Fig. 1) are in
the right position:
• The exiting support guide (M, Fig. 7) should be in
line with the two rollers (P and N, Fig. 7). If it is not,
you can align it by loosening the screws (R, Fig. 2) that
hold it in place.
• To check that the intake guide (L, Fig. 7) is positioned
correctly, place a piece of the strip you are going to
edgeband against the rollers (P and N, Fig. 7). Press a
straight panel against these and ensure that the intake
Guide (L, Fig. 7) is in line with the clean edge of the
panel. If it is not, align it by loosening the screws (R,
Fig. 2) that hold it in place.
Place the clamp (F, Fig. 7) in position:
If you wish to edgeband with the help of the clamp (F,

6
Fig. 7), you will have to adjust the position of the rear
support guide (A, Fig. 7) so that the clamp exerts some
force on the outer edge of the panel, and fix the guide
in this position with the Levers (I, Fig. 1).
To edgeband panels wider than 500 mm, on which it is
not possible to use the clamp, it can easily be removed
and placed upside down so that it does not get lost.
Edgbanding:
If the PEB50/PEB150 edgebander is ready to glue edges,
as explained in section 6, follow the steps below to
edgeband the board:
Turn on the advance switch (IA, Fig. 7) located on the
handle of the machine.
Wait a few seconds for the glue to rise from the tank
to the gluing roller.
Push the edging though the guides until it reaches
the advance roller, which will transport the duly glued
edging until it exits over the pressure roller.
Push the board forward to meet the edging when it
comes out of the pressure roller.
Press the board against the edging located on the pressure
roller, so that the rotating movement of the latter sets
the board advance speed, and keep both hands on it
until the end of the edgebanding process.
Turn off the advance switch (IA, Fig. 7).
If you have finished working with the machine, turn off
the main switch (IG, Fig. 2).
8. EDGEBANDING CIRCULAR PIECES
Prior adjustments:
Lift the PEB50/PEB150 edgebander so that the glued
edging comes out flush with the worktop:
• To edgeband circular boards, place the PEB50/PEB150
edgebander in the position shown in (Fig. 2), but put
the attachments (T and U, Figs. 3, 8 and 9) under the
machine to raise it.
Place the worktop attachments in position:
• Some worktop attachments (S, Fig. 10) should be
arranged in the desired positions, so that the board is
supported while edgebanding, without the excess lower
edging hitting them when the board is moving.
Remove the support guides:
• Remove the intake and exit guides from the worktop
(M and L, Fig. 2), by loosening the screws (R, Fig. 2).
Remove the Clamp:
• When edgebanding circular boards, it is not possible
to use the clamp (F, Fig. 1). It should be removed and
placed upside down so that it does not get lost.
Edgbanding:
If the PEB50/PEB150 edgebander is ready to glue edges,
as explained in section 6, follow the steps below to
edgeband a circular board:
• Turn on the advance switch (IA, Fig. 11) located on
the handle of the machine.
• Wait a few seconds for the glue to rise from the tank
to the gluing Roller.
• Place the board on the worktop attachments (S. Fig.
10) and in front of the pressure roller.
• Push the edging through the guides until it reaches
the advance roller, which will transport the duly glued
edging until it exits over the pressure roller.
• Press the board against the edging located on the
pressure roller, so that the rotating movement of the
latter sets the board advance speed.
• Push the board to the second roller and edgeband the
rest of the board by moving it between the two rollers
(Fig. 11), until the edgebanding process is finished.
• Turn off the advance switch (IA, Fig. 11).
• If you have finished working with the machine, turn
off the main switch.
9. EDGBANDING SMALL PIECES WITH RADII
AND SHAPES
Make the same adjustments as for edgebanding circular
pieces, as well as:
Additional adjustments:
Remove the auxiliary pressure roller and its shaft:
• Use a screwdriver to remove the screw (P, Fig. 2) that
holds the roller in position.
• Remove the roller shaft as well, unscrewing it by
inserting a 4 mm rod in the hole.
Place the rear attachments in position:
• On some pieces it may be necessary to place some rear
attachments (V, Fig. 2, 3 and 12) at the bottom of the
board exit point and in the desired positions, so that
it is supported during edgebanding, and without the
excess edging hitting them as it advances.
Edgbanding:
If the PEB50/PEB150 edgebander is ready to glue edges,
as explained in section 6, follow the steps below to
edgeband a small board with radii and shapes:
• Turn on the advance switch (IA, Fig. 12) located on
the handle of the machine.
• Wait a few seconds for the glue to rise from the tank
to the gluing roller.
• Place the board on the worktop attachments (S, Fig.
12) and in front of the pressure roller.
• Push the edging through the guides until it reaches
the advance roller, which will transport the duly glued
edging until it exits over the pressure roller.
• Press the board against the edging located on the
pressure roller, so that the rotating movement of the
latter sets the board advance speed, keeping both
hands on it and following its shape until the end of the
edgebanding process.
• Turn off the advance switch (IA, Fig. 12).
• If you have finished working with the machine, turn

7
off the main switch as well.
10. WARRANTY
All VIRUTEX machines are guaranteed for 12 months
from the date of supply, excluding any interference or
damage resulting from incorrect use or natural wear
and tear on the machine.
All repairs should be carried out by the VIRUTEX technical
assistance service.
VIRUTEX reserves the right to modify its products with
out prior notice.
FRANÇAIS
TABLE POUR PLAQUEUSE DE CHANTS
MEB50/MEB150
1. CONSIGNES DE SÉCURITÉ POUR LE MANIE-
MENT DE LA TABLE MEB50/MEB150, POUR
PLAQUEUSE DE CHANTS PORTATIVE À BAC À
COLLE PEB50/PEB150
Avantd’utiliserla tableMEB50/MEB150,
ilfautlirelemoded’emploidel'encolleuse
PEB50/PEB150et s’assurerdebien l’avoir
compris.
Puis il faut lire attentivement ce
MODE D’EMPLOI et la BROCHURE
D’INSTRUCTIONS GÉNÉRALES DE SÉCU-
RITÉ, ci-jointe.
Conserver les modes d’emploi dans un
endroit accessible pour de futures con-
sultations.
FixerlatableMEB50/MEB150au bancde
travail en la vissant au travers des trous
(K, Fig. 1) situés aux pieds.
2. CARACTÉRISTIQUES
Dimensions de la base..................................860 x 350 mm
Longueur du plan de travail.....................................800 mm
Hauteur du plan de travail......................................195 mm
Poids................................................................................17 kg
3. ÉQUIPEMENT STANDARD
- Rouleau de pression auxiliaire.
- Guides d’appui à l’entrée et à la sortie de la pièce.
- Guide d’appui arrière extensible jusqu’à 500 mm.
- Presseur démontable sur guide d’appui arrière.
• La boîte d’emballage de la MEB50/MEB150 contient
les éléments suivants:
• 1 table MEB50/MEB150 pour plaqueuse PEB50/
PEB150.
• 1 guide d’appui arrière extensible comprenant les
éléments suivants:
1 règle d’appui arrière (A, Fig. 1)
2 rondelles (B, Fig. 1)
2 vis six pans M 8 x 35 (C, Fig. 1)
2 éléments de fixation des bras (D, Fig. 1)
2 bras (E, Fig. 1)
1 unité de pression (F, Fig. 1)
• 1 sachet contenant 3 vis (J, Fig. 3) pour le montage
de la PEB50/PEB150, 2 accessoires machine (T et U, Fig.
3), 18 accessoires de table (S, Fig. 3), pour le placage
de pièces circulaires, et 5 accessoires arrière (V, Fig. 3)
pour le placage de formes curvilignes.
4. ACCESSOIRES EN OPTION
1645916 – Porte-rouleaux pour MEB50/MEB150.
(Fig. 4)
5045753 - Support à 2 ventouses SFV50. (Fig. 5 et 6)
5045833 - Support à 1 ventouse SFV150. (Fig. 5).
5046266 - Appareil de coupe pour chants RC50T.
5. MONTAGES
5.1 MONTAGE DU GUIDE D’APPUI ARRIÈRE
Introduire un bras (E, Fig. 1) dans chacun des deux guides
(G, Fig. 1) se trouvant sur les côtés de la table.
Retirer les vis (C, Fig. 1) et les rondelles (B, Fig. 1) des
bras (E, Fig. 1).
Poser la règle d’appui arrière (A, Fig. 1) sur les bras E, et
la fixer aux éléments de fixation (D, Fig. 1) avec les vis
(C, Fig. 1) et les rondelles (B, Fig. 1).
Déplacer le guide d'appui arrière monté vers l'intérieur
des guides (G, Fig. 1), jusqu’à ce qu’il bute contre la règle
(H, Fig. 1) de la table.
Fixer le guide d’appui arrière dans cette position à l’aide
des manettes (I, Fig. 1) situées des deux côtés.
Dévisser les vis (C, Fig. 1), mettre la surface de la règle
d’appui arrière (A, Fig. 1) au même niveau que celle de
la règle de la table (H, Fig. 1) et serrer les vis (C, Fig. 1)
dans cette position.
5.2MONTAGEDELA PLAQUEUSEPEB50/PEB150
SUR LA TABLE
Poser la plaqueuse PEB50/PEB150 sur la table MEB50/
MEB150 dans la position de la (Fig. 2) et la fixer à l’aide
des trois vis (J, Fig. 2).
6. PRÉPARATION DE LA PLAQUEUSE PEB50/
PEB150
Pour préparer la plaqueuse PEB50/PEB150 au placage du
premier chant, suivre minutieusement le mode d’emploi
point par point.

8
Pour rappel, la marche à suivre est chronologiquement
la suivante:
• Brancher la plaqueuse PEB50/PEB150 sur le secteur.
• Actionner l’interrupteur général (IG, Fig. 2) pour mettre
l’appareil en chauffe.
• Couper la bande de chant à la dimension du panneau
à plaquer.
• Régler la hauteur du guide du chant.
Ne pas laisser la bande dans les guides, la
retirer quand le réglage est terminé.
• QUAND LE VOYANT DE L’INTERRUPTEUR D’AVANCE
(IA, Fig. 2) S’ALLUME:
- Vérifier qu’il y a suffisamment de colle dans le bac
de la machine.
- Vérifier que le réglage du dosage de la colle est
correct.
• La plaqueuse est alors prête pour commencer le
placage de chants.
7. PLACAGE DE PIÈCES DROITES
Réglages préalables:
Vérifier si les guides d’appui (M et L, Fig. 1) sont bien
à leur place:
• Le guide d’appui de sortie (M, Fig. 7) doit être aligné
sur les deux rouleaux (P et N, Fig. 7), si ce n’est pas le
cas, il faut l’aligner en dévissant les vis (R, Fig. 2) qui
le fixent.
• Pour vérifier la position correcte du guide d’entrée (L,
Fig. 7), mettre un morceau de la bande à plaquer contre
les rouleaux (P et N, Fig. 7), la pousser avec un panneau
droit contre ceux-ci et vérifier si le guide d’entrée (L,
Fig. 7) est aligné sur le chant propre du panneau. Si ce
n’est pas le cas, il faut l’aligner en dévissant les vis (R,
Fig. 2) qui le fixent.
Installer le presseur (F, Fig. 7):
Pour plaquer en se servant du presseur (F, Fig. 7), il faut
régler la position du guide d’appui arrière (A, Fig. 7) de
sorte que le presseur exerce une certaine pression sur
le chant externe du panneau, puis fixer le guide dans
cette position avec les manettes (I, Fig. 1).
Pour plaquer des panneaux d’une largeur supérieure à 500
mm, pour lesquels il est impossible d’utiliser le presseur,
on peut très facilement démonter celui-ci et le remonter
en position inverse pour éviter qu’il se perde.
Placage:
Quand la plaqueuse PEB50/PEB150 est prête pour le
placage des chants, comme cela est expliqué au pa-
ragraphe 6, la marche à suivre pour plaquer un panneau
est la suivante:
Actionner l’interrupteur d’avance (IA, Fig. 7) qui se trouve
sur la poignée de la machine.
Attendre quelques secondes pour que la colle monte du
bac jusqu’au rouleau encolleur.
Introduire le chant entre les guides jusqu'à ce qu’il
atteigne le rouleau d’avance qui entraînera le chant
correctement encollé jusqu’à sa sortie sur le rouleau
de pression.
Faire avancer le panneau jusqu’à ce qu’il atteigne le
chant à sa sortie sur le rouleau de pression.
Pousser le panneau contre le chant situé sur le rouleau
de pression de façon à ce que le mouvement de rotation
de celui-ci marque la vitesse d’avance du panneau et
l’accompagner avec les deux mains jusqu’à la fin du
placage.
Fermer l’interrupteur d’avance (IA, Fig. 7).
Si le travail avec la machine est terminé, fermer également
l’interrupteur général (IG, Fig. 2).
8. PLACAGE DE PIÈCES CIRCULAIRES
Réglages préalables:
Surélever la plaqueuse PEB50/PEB150 pour que le chant
encollé sorte au ras de la table:
• Pour plaquer des panneaux circulaires, il faut monter
la plaqueuse PEB50/PEB150 dans la position de la (Fig.
2), mais en posant les accessoires (T et U, Fig. 3, 8 et 9)
sous la machine pour la surélever.
Poser les accessoires de table:
• Il faut convenablement répartir certains accessoires
de table (S, Fig. 10) pour pouvoir appuyer le panneau
pendant le placage, sans que l’excédent de chant inférieur
ne bute contre ceux-ci lors de l'avance du panneau.
Retirer les guides d’appui:
• Il faut retirer les guides d’entrée et de sortie (M et L,
Fig. 2) de la table, en dévissant les vis (R, Fig. 2).
Retirer le presseur:
• Le presseur (F, Fig. 1) ne doit pas être utilisé pour
plaquer des panneaux circulaires. Il faut le démonter
et le remonter en position inverse pour éviter qu’il
se perde.
Placage:
Quand la plaqueuse PEB50/PEB150 est prête à plaquer
des chants, comme cela est expliqué au paragraphe 6,
la marche à suivre pour plaquer un panneau circulaire
est la suivante:
• Actionner l’interrupteur d’avance (IA, Fig. 11) qui se
trouve sur la poignée de la machine.
• Attendre quelques secondes pour que la colle monte
du bac jusqu’au rouleau encolleur.
• Poser le panneau sur les accessoires de table (S, Fig.
10) et face au rouleau de pression.
• Introduire le chant entre les guides jusqu'à ce qu’il at-
teigne le rouleau d’avance qui entraînera le chant dûment
encollé jusqu’à sa sortie sur le rouleau de pression.
• Pousser le panneau contre le chant situé sur le rouleau
de pression de façon à ce que le mouvement de rotation

9
de celui-ci marque la vitesse d’avance du panneau.
• Accompagner le panneau jusqu’au second rouleau et
plaquer le reste du panneau en le faisant rouler entre les
deux rouleaux (Fig. 11) jusqu’à la fin du placage.
• Fermer l’interrupteur d’avance (IA, Fig. 11).
• Si le travail avec la machine est terminé, fermer
également l’interrupteur général.
9. PLACAGE DE PETITES PIÈCES AUX FORMES
CURVILIGNES.
Il faut faire les mêmes réglages que pour le placage de
pièces circulaires mais aussi:
Réglages supplémentaires:
Retirer le rouleau de pression auxiliaire et son axe:
• À l'aide d’un tournevis, retirer la vis (P, Fig. 2) qui
retient le rouleau.
• Retirer également l’axe du rouleau, en le dévissant
à l’aide d’une tige de 4 mm que l’on introduit dans le
trou de celui-ci.
Poser les accessoires arrière:
• Pour certaines pièces, il peut être nécessaire de poser
certains accessoires arrière (V, Fig. 2, 3 et 12), dans la
partie arrière de sortie du panneau et aux positions
convenables pour pouvoir l'appuyer pendant le placa-
ge, sans que l'excédent de chant inférieur bute contre
ceux-ci en avançant.
Placage:
Quand la plaqueuse PEB50/PEB150 est prête à plaquer
des chants, comme cela est expliqué au paragraphe 6,
la marche à suivre pour plaquer un petit panneau aux
formes curvilignes est la suivante:
• Actionner l’interrupteur d’avance (IA, Fig. 12) qui se
trouve sur la poignée de la machine.
• Attendre quelques secondes pour que la colle monte
du bac jusqu’au rouleau encolleur.
• Poser le panneau sur les accessoires de table (S, Fig.
12) et face au rouleau de pression.
• Introduire le chant entre les guides jusqu'à ce qu’il at-
teigne le rouleau d’avance qui entraînera le chant dûment
encollé jusqu’à sa sortie sur le rouleau de pression.
• Pousser le panneau contre le chant situé sur le rouleau
de pression de façon à ce que le mouvement de rotation
de celui-ci marque la vitesse d’avance du panneau et
l’accompagner avec les deux mains en suivant son contour
jusqu’à la fin du placage.
• Fermer l’interrupteur d’avance (IA, Fig. 12).
• Si le travail avec la machine est terminé, fermer
également l’interrupteur général.
10. GARANTIE
Toutes les machines VIRUTEX ont une garantie valable 12
mois à partir de la date de fourniture, tous les dommages
ou réparations causés par un maniement incorrect ou par
une usure naturelle de la machine étant exclus.
Pour toute réparation, s’adresser au Service d’Assistance
Technique de VIRUTEX.
VIRUTEX se réserve le droit de modifier ses produits
sans avis préalable.
DEUTSCH
TISCH FÜR KANTENLEIMMASCHINEN
MEB50/MEB150
1. SICHERHEITSHINWEISE FÜR DIE BEDIENUNG
DES TISCHS MEB50/MEB150 FÜR DAS MOBILE
KANTENANLEIMGERÄT PEB50/PEB150.
LesenSievorInbetriebnahmedesMEB50/
MEB150 bitte aufmerksam die Bedie-
nungsanleitung des Kantenanleimgeräts
PEB50/PEB150 durch und versichern
Sie sich, dass Sie alle Punkte verstanden
haben.
Lesen Sie bitte vor Inbetriebnahme der
MaschinedieseBEDIENUNGSANLEITUNG
und die beiliegenden ALLGEMEINEN
SICHERHEITSHINWEISE aufmerksam
durch.
BewahrenSiedieBedienungsanleitungen
zur eventuellen späteren Einsicht an
zugänglicher Stelle auf.
BefestigenSiedenTischMEB50/MEB150
durch die Öffnungen an den Füßen (K,
Abb. 1) auf der Werkbank.
2. TECHNISCHE DATEN
Abmessungen der Auflage..........................860 x 350 mm
Länge der Arbeitsfläche............................................800 mm
Höhe der Arbeitsfläche............................................195 mm
Gewicht...........................................................................17 kg
3. STANDARDAUSSTATTUNG
- Andruckrolle
- Führungsschiene am Ein- und Ausgang des Werks-
tücks
- hintere Führungsschiene, ausziehbar auf 500 mm
- abnehmbarer Greifarm an hinterer Führungsschiene
• Verpackungsinhalt des Tischs MEB50/MEB150:
• 1 Tisch MEB50/MEB150 für das Kantenanleimgerät
PEB50/PEB150
• 1 ausziehbare Führungsschiene, in folgende Einzel-
teile zerlegt:

10
1 hintere Auflageleiste (A, Abb. 1)
2 Unterlegscheiben (B, Abb. 1)
2 Sechskantschrauben M8x35 (C, Abb. 1)
2 Halterungen für die Arme (D, Abb. 1)
2 Arme (E, Abb. 1)
1 Anpresseinheit (F, Abb. 1)
• 1 Beutel mit folgendem Inhalt: 3 Schrauben (J, Abb. 3)
für die Befestigung des PEB50/PEB150; 2 Geräteaufsätze
(T und U, Abb. 3) und 18 Tischaufsätze (S, Abb. 3), zum
Leimen von runden Teilen; und 5 hintere Aufsätze (V,
Abb. 3) zum Anleimen an gerundeten Werkstücken.
4. OPTIONALES ZUBEHÖR
1645916 - Rollenhalter für MEB5/MEB150 (Abb. 4)
5045753 - Auflage mit 2 Saugnäpfen SFV50 (Abb. 5 und
6)
5045833 - Auflage mit 1 Saugnapf SFV150 (Abb. 5)
5046266 - Kantenschneidmaschine RC50T
5. MONTAGE
5.1 MONTAGE DER HINTEREN FÜHRUNGS-/
AUFLAGESCHIENE
Jeweils einen Arm (E, Abb. 1) in die beiden, an den Tisch-
seiten befestigten Schienen (G, Abb. 1) einsetzen.
Die Schrauben (C, Abb. 1) und die Unterlegscheiben (B,
Abb. 1) von den Armen (E, Abb. 1) abnehmen.
Die hintere Auflageleiste (A, Abb. 1) auf die Arme E
auflegen und mit den Schrauben (C, Abb. 1) und den
Unterlegscheiben (B, Abb. 1) an den Halterungen (D,
Abb. 1) befestigen.
Die vormontierte hintere Führungsschiene bis zum
Anschlag an der Leiste (H, Abb. 1) des Tischs in die
Führungen (G, Abb. 1) schieben.
Die hintere Führungsschiene in dieser Position mit den
Griffen (I, Abb. 1) auf beiden Seiten befestigen.
Die Schrauben (C, Abb. 1) lösen; die Flächen der hinteren
Auflageleiste (A, Abb. 1) zur Leiste des Tischs (H, Abb.
1) ausrichten und die Schrauben (C, Abb. 1) in dieser
Position anziehen.
5.2 MONTAGE DES KANTENANLEIMGERÄTS
PEB50/PEB150 AM TISCH
Das Kantenanleimgerät PEB50/PEB150 wie gezeigt in
der Abb. 2 auf den Tisch MEB50/MEB150 stellen, und
mit den drei Schrauben (J, Abb. 2) befestigen.
6.VORBEREITUNGDES KANTENANLEIMGERÄTS
PEB50/PEB150
Befolgen Sie genau alle Schritte, die in der Bedie-
nungsanleitung des Kantenanleimgeräts PEB50/PEB150
aufgeführt sind, bis das Gerät zum Anleimen der ersten
Kante bereit ist.
Die Schritte müssen in der hier aufgeführten Reihenfolge
durchgeführt werden:
• Das Kantenanleimgerät PEB50/PEB150 an die
Stromversorgung anschließen.
• Den Netzschalter (IG, Abb. 2) einschalten, damit das
Gerät vorgeheizt wird.
• Den Kantenstreifen auf die Maße der Platte zuschnei-
den, an die er angeleimt werden soll.
• Die Höhe der Kantenführung einstellen.
Den Streifen nicht in der Führung lassen.
Nach der Einstellung wieder herausne-
hmen.
• WENN DIE LAMPE DES VORLAUFSCHALTERS (IA, Abb.
2) AUFLEUCHTET:
- Überprüfen, ob sich ausreichend Leim im Leimbehälter
des Geräts befindet.
- Überprüfen, dass der passende Leimdurchsatz ein-
gestellt wurde.
• Das Kantenanleimgerät ist jetzt betriebsbereit.
7. ANLEIMEN AN GERADEN WERKSTÜCKEN
Erforderliche Einstellungen
Überprüfen, ob die Führungsschienen (M und L, Abb. 1)
in der richtigen Position stehen:
• Die Führungsschiene am Ausgang (M, Abb. 7) muss zu
den beiden Rollen (P y N, Abb. 7) ausgerichtet sein. Ihre
Position kann durch Lösen der Befestigungsschrauben
(R, Abb. 2) eingestellt werden.
• Zur Kontrolle der korrekten Position der Eingangs-
führung (L, Abb. 7) einen Kantenstreifen an die Rollen
(P und N, Abb. 7) halten und mit einer geraden Leiste
anpressen. Auf diese Weise erkennt man, ob die Ein-
gangsführung (L, Abb. 7) mit der sauberen Plattenkante
abschließt. Sollte dies nicht der Fall sein, kann die Po-
sition durch Lösen der Befestigungsschrauben (R, Abb.
2) eingestellt werden.
Einstellung der Anpresseinheit (F, Abb. 7)
Wenn beim Anleimen die Anpresseinheit (F, Abb. 7)
verwendet werden soll, muss die hintere Führung (A,
Abb. 7) so eingestellt werden, dass die Anpresseinheit
einen gewissen Druck auf die Außenkante der Platte
ausübt; die Führung muss dann mit den Griffen (I, Abb.
1) in dieser Position befestigt werden.
Zum Anleimen an Platten mit einer Breite über 500
mm, bei denen die Anpresseinheit nicht verwendet
werden kann, kann sie abgenommen und in umgeke-
hrter Position wieder befestigt werden, damit sie nicht
verloren geht.
Kantenanleimen
Sobald das Kantenanleimgerät PEB50/PEB150 entspre-
chend der Beschreibung im Abschnitt 6 betriebsbereit
ist, können die Kanten wie folgt an einer Platte ange-
leimt werden:

11
Den Vorlaufschalter (IA, Abb. 7) am Gerätegriff be-
tätigen.
Ein paar Sekunden warten, bis der Leim aus dem Leim-
behälter zur Anleimrolle nach oben steigt.
Die Kante über die Führungen bis zur Vorlaufrolle ein-
führen. Die Rolle fördert die mit Leim versehene Kante
bis zum Ausgang über der Andruckrolle.
Die Platte vorlaufen lassen, bis die Kante über der
Andruckrolle erreicht ist.
Die Platte gegen die Kante auf der Andruckrolle pressen.
Dabei bestimmt die Drehbewegung der Rolle die Vor-
laufgeschwindigkeit der Platte. Die Platte bis zum Ende
des Leimvorgangs mit beiden Händen halten.
Den Vorlaufschalter (IA, Abb. 7) ausschalten.
Wenn nicht mehr mit dem Gerät gearbeitet werden soll,
auch den Netzschalter (IG, Abb. 2) ausschalten.
8. KANTENANLEIMEN AN RUNDEN
WERKSTÜCKEN
Erforderliche Einstellungen
• Das Kantenanleimgerät PEB50/PEB150 in erhöhte
Stellung bringen, so dass die geleimte Kante auf Höhe
des Tischs herausläuft.
Zum Kantenanleimen an runden Werkstücken das Kan-
tenanleimgerät PEB50/PEB150 in der in Abb. 2 gezeigten
Stellung montieren, und die Aufsätze (T und U, Abb. 3, 8
und 9) zum Anheben unter das Gerät stellen.
Installation der Tischaufsätze
• Einige Tischaufsätze (S, Abb. 10) an den passenden
Stellen anbringen, damit die Platte beim Kantenanleimen
darauf aufliegt, ohne dass das Übermaß der Kante beim
Anleimen um die Platte dagegen stößt.
Führungen abnehmen
• Die Führungen am Ein- und Ausgang (M und L, Abb.
2) abnehmen. Dazu die Befestigungsschrauben (R, Abb.
2) lösen.
Anpresseinheit abnehmen
• Bei runden Platten kann die Anpresseinheit (F, Abb.
1) nicht eingesetzt werden. Deshalb die Anpresseinheit
abmontieren und in umgekehrter Position wieder fes-
tmachen, damit sie nicht verloren geht.
Kantenanleimen
Sobald das Kantenanleimgerät PEB50/PEB150 entspre-
chend der Beschreibung im Abschnitt 6 betriebsbereit
ist, können die Kanten wie folgt an einer runden Platte
angeleimt werden:
• Den Vorlaufschalter (IA, Abb. 11) am Gerätegriff
betätigen.
• Ein paar Sekunden warten, bis der Leim aus dem
Leimbehälter zur Anleimrolle nach oben steigt.
• Die Platte auf die Tischaufsätze (S, Abb. 10) gegenüber
der Andruckrolle auflegen.
• Die Kante über die Führungen bis zur Vorlaufrolle
einführen. Die Rolle fördert die mit Leim versehene Kante
bis zum Ausgang über der Andruckrolle.
• Die Platte gegen die Kante auf der Andruckrolle
pressen. Dabei bestimmt die Drehbewegung der Rolle
die Vorlaufgeschwindigkeit der Platte.
• Das Brett bis zur zweiten Rolle führen und die Kan-
ten an der restlichen Platte anleimen. Dabei die Platte
zwischen den beiden Rollen (Abb. 11) führen, bis die
Kanten angeleimt sind.
• Den Vorlaufschalter (IA, Abb. 11) ausschalten.
• Wenn nicht mehr mit dem Gerät gearbeitet werden
soll, auch den Netzschalter ausschalten.
9. KANTENANLEIMEN AN KLEINEREN WERKS-
TÜCKEN MIT RUNDUNGEN UND FORMEN
Es müssen dieselben Einstellungen vorgenommen werden
wie beim Kantenanleimen bei runden Werkstücken.
Zusätzliche Einstellungen
Andruckrolle und deren Achse abnehmen
• Mit einem Schraubenzieher die Befestigungsschraube
(P, Abb. 2) der Rolle herausdrehen.
• Ebenfalls die Rollenachse abnehmen. Dazu eine 4 mm
Gewindestange in die Achsbohrung schrauben.
Hintere Aufsätze anbringen
• Bei bestimmten Werkstücken müssen auf der Hin-
terseite des Plattenausgangs die Aufsätze (V, Abb. 2, 3
und 12) an den passenden Stellen angebracht werden,
damit die Platte beim Kantenanleimen aufliegen kann,
ohne dass das Übermaß der Kante beim Anleimen um
die Platte dagegen stößt.
Kantenanleimen
Sobald das Kantenanleimgerät PEB50/PEB150 entspre-
chend der Beschreibung im Abschnitt 6 betriebsbereit
ist, können die Kanten wie folgt an einer kleinen Platte
mit Biegungen und Formen angeleimt werden:
• Den Vorlaufschalter (IA, Abb. 12) am Gerätegriff
betätigen.
• Ein paar Sekunden warten, bis der Leim aus dem
Leimbehälter zur Anleimrolle nach oben steigt.
• Die Platte auf die Tischaufsätze (S, Abb. 12) gegenüber
der Andruckrolle auflegen.
• Die Kante über die Führungen bis zur Vorlaufrolle
einführen. Die Rolle fördert die mit Leim versehene Kante
bis zum Ausgang über der Andruckrolle.
• Die Platte gegen die Kante auf der Andruckrolle
pressen. Dabei bestimmt die Drehbewegung der Rolle
die Vorlaufgeschwindigkeit der Platte. Die Platte bis zum
Ende des Leimvorgangs mit beiden Händen entlang der
Formen führen.
• Den Vorlaufschalter (IA, Abb. 12) ausschalten.
• Wenn nicht mehr mit dem Gerät gearbeitet werden
soll, auch den Netzschalter ausschalten.
10. GARANTIE

12
Für alle VIRUTEX-Maschinen wird eine 12-monatige
Gewährleistung ab Lieferdatum gewährt. Alle Eingriffe
durch unbefugtes Personal bzw. Schäden, die auf unsa-
chgemäße Handhabung oder auf natürlichen Verschleiß
der Maschine zurückzuführen sind, werden durch diese
Gewährleistung nicht abgedeckt.
Zur Durchführung von Reparaturen wenden Sie sich
bitte an den VIRUTEX-Kundendienst.
VIRUTEX behält sich das Recht vor, die Produkte ohne
vorherige Ankündigung zu verändern.
ITALIANO
TAVOLO PER BORDATRICE
MEB50/MEB150
1.NORME DISICUREZZAPER L'USODEL TAVOLO
MEB50/MEB150, PER BORDATRICE PORTATILE A
COLLA CALDA PEB50/PEB150.
Prima di utilizzare il tavolo MEB50/
MEB150, leggere il manuale
dell'Incollatrice PEB50/PEB150 e accer-
tarsi di averne compreso il contenuto.
Dopo leggere attentamente questo
MANUALE DI ISTRUZIONI e IL FOGLIO
CONLENORME GENERALI DISICUREZZA
allegato.
Conservare i manuali in un luogo ac-
cessibile per eventuali consultazioni
successive.
Fissare il Tavolo MEB50/MEB150 sul
banco da lavoro attraverso i fori (K, Fig.
1) dei piedini.
2. CARATTERISTICHE TECNICHE
Misure della base..............................................860 x 350 mm
Lunghezza del piano di lavoro..............................800 mm
Altezza del piano di lavoro.........................................195 mm
Peso....................................................................................17 kg
3. APPARECCHIATURA STANDARD
- Rullo di pressione ausiliario.
- Guide di appoggio in ingresso e uscita del pezzo.
- Guida di appoggio posteriore estensibile fino a 500
mm.
- Pressore smontabile sulla guida di appoggio poste-
riore.
• All'interno della confezione della MEB50/MEB150 sono
presenti i seguenti componenti:
•1 Tavolo MEB50/MEB150 per bordatrice PEB50/
PEB150.
• 1 Guida di appoggio posteriore estensibile smontata
nei seguenti pezzi:
1 Asse di appoggio posteriore (A, Fig. 1)
2 Rondelle (B, Fig. 1)
2 Viti Allen M.8x35 (C, Fig. 1)
2 Sostegni dei bracci (D, Fig. 1)
2 Bracci (E, Fig. 1)
1 Gruppo pressore (F, Fig. 1)
• 1 Sacchetto contenente 3 Viti (J, Fig. 3) per il montaggio
della PEB50/PEB150; 2 supplementi della macchina (T e
U, Fig. 3) e 18 supplementi del tavolo (S, Fig. 3), per la
bordatura di pezzi circolari; e 5 supplementi posteriori
(V, Fig. 3) per la bordatura di forme curvilinee.
4. ACCESSORI OPZIONALI
1645916 - Portarotoli per MEB50/MEB150. (Fig. 4)
5045753 - Supporto a 2 ventose SFV50. (Fig. 5 e 6)
5045833 - Supporto a 1 ventosa SFV150. (Fig. 5)
5046266 - Utensile per il taglio dei bordi RC50T
5. MONTAGGIO
5.1 MONTAGGIO DELLA GUIDA DI APPOGGIO
POSTERIORE
Inserire un braccio (E, Fig. 1) in ciascuna delle due guide
(G, Fig. 1) poste sui fianchi del tavolo.
Estrarre le viti (C, Fig. 1) e le rondelle (B, Fig. 1) dai
bracci (E, Fig. 1).
Sistemare l'asse di appoggio posteriore (A, Fig. 1) sui
bracci E e fissarla ai sostegni (D, Fig. 1), con le viti (C,
Fig. 1) e le rondelle (B, Fig. 1).
Spostare la guida di appoggio posteriore, montata, verso
l'interno delle guide (G, Fig. 1), fino a toccare l'asse (H,
Fig. 1) del tavolo.
Fissare la guida di appoggio posteriore in questa posizione
con le manopole (I, Fig. 1) poste su entrambi i lati.
Allentare le viti (C, Fig. 1); livellare la superficie dell'asse
di appoggio posteriore (A, Fig. 1) con quella dell'asse (H,
Fig. 1) del tavolo e serrare le viti (C, Fig. 1) in questa
posizione.
5.2 MONTAGGIO DELLA BORDATRICE PEB50/
PEB150 SUL TAVOLO
Sistemare la bordatrice PEB50/PEB150 sul Tavolo MEB50/
MEB150 nella posizione indicata nella Fig. 2 e fissarla
con le tre viti (J, Fig. 2).
6. PREPARAZIONE DELLA BORDATRICE PEB50/
PEB150
Seguire scrupolosamente le indicazioni riportate nel
manuale della bordatrice PEB50/PEB150, fino a predis-
porla per l'applicazione del primo bordo.

13
Si ricorda che, in ordine cronologico, le operazioni da
svolgere sono le seguenti:
• Collegare la bordatrice PEB50/PEB150 alla corrente
elettrica.
• Azionare l'interruttore generale (IG, Fig. 2) per iniziare
il riscaldamento.
• Tagliare la striscia del bordo sulla misura del pannello
da bordare.
• Regolare l'altezza della guida del bordo.
Non lasciare la striscia tra le Guide. Ulti-
mata la regolazione, toglierla.
• QUANDO LA SPIA DELL'INTERRUTTORE DI AVANZA-
MENTO (IA, Fig. 2) SI ACCENDE:
- Verificare che il serbatoio della macchina contenga
colla a sufficienza.
- Verificare che la regolazione del passaggio della colla
sia adeguata.
• A questo punto la bordatrice è pronta per iniziare
l'applicazione di bordi.
7. BORDATURA DI PEZZI DRITTI
Regolazioni preliminari:
Verificare che le guide di appoggio (M e L, Fig. 1) siano
in posizione:
• La guida di appoggio in uscita (M, Fig. 7) deve essere
allineata con i due rulli (P e N, Fig. 7); qualora non lo sia,
allinearla allentando le viti (R, Fig. 2) di fissaggio.
• Per verificare la corretta posizione della guida d’ingresso
(L, Fig. 7), sistemare un pezzo della striscia che si utilizzerà
per bordare contro i rulli (P e N, Fig. 7), premerla contro
di essi utilizzando un pannello dritto e accertarsi che
la guida d’ingresso (L, Fig. 7) sia allineata al bordo del
pannello. In caso contrario allinearla allentando le viti
(R, Fig. 2) di fissaggio.
Sistemare il pressore (F, Fig. 7):
Se si desidera bordare con l'aiuto del pressore (F, Fig. 7),
regolare la posizione della guida di appoggio posteriore
(A, Fig. 7) in modo tale che il pressore eserciti una certa
pressione sul bordo esterno del pannello e fissare la guida
in questa posizione agendo sulle manopole (I, Fig. 1).
Per bordare pannelli di larghezza superiore a 500 mm,
che non consentono l'utilizzo del pressore, smontarlo
e rimontarlo in posizione capovolta per evitare di
smarrirlo.
Bordatura:
Se la bordatrice PEB50/PEB150 è stata predisposta per
l'applicazione di bordi, come spiegato al punto 6, per bor-
dare un pannello effettuare le seguenti operazioni:
Azionare l'Interruttore di avanzamento (IA, Fig. 7) posto
sull'impugnatura della macchina.
Attendere alcuni secondi affinché la colla salga dal
serbatoio al rullo incollatore.
Inserire il bordo attraverso le guide fino a raggiun-
gere il rullo di avanzamento che trasporterà il bordo
opportunamente incollato fino all'uscita sopra il rullo
di pressione.
Far avanzare il pannello verso il bordo nel punto in cui
esce sopra il rullo di pressione.
Premere il pannello contro il bordo posizionato sul
rullo di pressione, in modo tale che il movimento di
rotazione del rullo scandisca la velocità di avanzamento
del pannello, e accompagnarlo con entrambe le mani
fino al termine della bordatura.
Spegnere l'interruttore di avanzamento (IA, Fig. 7).
Se il lavoro con la macchina è terminato, spegnere anche
l'Interruttore generale (IG, Fig. 2).
8. BORDATURA DI PEZZI CIRCOLARI
Regolazioni preliminari:
Sollevare la bordatrice PEB50/PEB150 in modo tale che
il bordo incollato esca rasente al tavolo:
• Per bordare pannelli circolari montare la bordatrice
PEB-50 nella posizione della Fig. 2, ma sistemando i
supplementi (T e U, Figg. 3, 8 e 9) sotto la macchina
per sollevarla.
Sistemare i supplementi del tavolo:
• Distribuire alcuni supplementi del tavolo (S, Fig. 10)
nelle posizioni appropriate, in modo tale che fungano
da appoggio per il pannello durante la bordatura, senza
che l'eccedenza di bordo inferiore urti contro di essi
mentre il pannello ruota.
Togliere le guide di appoggio:
• Togliere dal tavolo le guide d’ingresso e di uscita (M
e L, Fig. 2), allentando le Viti (R, Fig. 2).
Togliere il Pressore:
• Il pressore (F, Fig. 1) non è utilizzabile per la bordatura
di pannelli circolari. Smontarlo e rimontarlo in posizione
capovolta per evitare di smarrirlo.
Bordatura:
Se la bordatrice PEB50/PEB150 è stata predisposta per
l'applicazione di bordi, come spiegato al punto 6, per
bordare un pannello circolare effettuare le seguenti
operazioni:
• Azionare l'interruttore di avanzamento (IA, Fig. 11)
posto sull'impugnatura della macchina.
• Attendere alcuni secondi affinché la colla salga dal
serbatoio al rullo incollatore.
Sistemare il pannello sui supplementi del tavolo (S, Fig.
10) e davanti al rullo di pressione.
Inserire il bordo attraverso le guide fino a raggiun-
gere il rullo di avanzamento che trasporterà il bordo
opportunamente incollato fino all'uscita sopra il rullo
di pressione.
Premere il pannello contro il bordo posizionato sul
rullo di pressione, in modo tale che il movimento di

14
rotazione del rullo scandisca la velocità di avanzamento
del pannello.
Accompagnare il pannello fino al secondo rullo e bordare
il resto del pannello facendolo ruotare tra i due rulli (Fig.
11), fino al termine della bordatura.
Spegnere l'interruttore di avanzamento (IA, Fig. 11).
Se il lavoro con la macchina è terminato, spegnere anche
l'interruttore generale.
9. BORDATURA DI PICCOLI PEZZI CON RAGGI
E SAGOME
Effettuare le stesse regolazioni necessarie per la borda-
tura di pezzi circolari; inoltre:
Regolazioni supplementari:
Togliere il rullo di pressione ausiliario e il relativo
asse:
• Utilizzando un cacciavite, estrarre la vite (P, Fig. 2)
che trattiene il rullo.
• Togliere anche l'asse del rullo, svitandolo avvalendosi
di un'asta di 4 mm da inserire nell'apposito foro.
Sistemare i supplementi posteriori:
• Con certi pezzi potrebbe essere necessario siste-
mare alcuni supplementi posteriori (V, Fig. 2, 3 e 12)
nella parte posteriore di uscita del pannello e nelle
posizioni appropriate, in modo tale che fungano da
appoggio per il pannello durante la bordatura senza
che l'eccedenza di bordo inferiore urti contro di essi
durante l'avanzamento.
Bordatura:
Se la bordatrice PEB50/PEB150 è stata predisposta per
l'applicazione di bordi, come spiegato al punto 6, per
bordare un piccolo pannello con raggi e sagome effet-
tuare le seguenti operazioni:
• Azionare l'interruttore di avanzamento (IA, Fig. 12)
posto sull'impugnatura della macchina.
• Attendere alcuni secondi affinché la colla salga dal
serbatoio al rullo incollatore.
• Sistemare il pannello sui supplementi del tavolo (S,
Fig. 12) e davanti al rullo di pressione.
• Inserire il bordo attraverso le guide fino a raggiun-
gere il rullo di avanzamento che trasporterà il bordo
opportunamente incollato fino all'uscita sopra il rullo
di pressione.
• Premere il pannello contro il bordo posizionato sul rullo
di pressione, in modo tale che il movimento di rotazione
del rullo scandisca la velocità di avanzamento del panne-
llo, e accompagnarlo con entrambe le mani seguendone
il contorno fino al termine della bordatura.
• Spegnere l'interruttore di avanzamento (IA, Fig. 12).
• Se il lavoro con la macchina è terminato, spegnere
anche l'interruttore generale.
10. GARANZIA
Tutte le macchine VIRUTEX godono di una garanzia di 12
mesi a partire dalla data di fornitura, eccezion fatta per
le eventuali manomissioni o i danni causati da un uso
improprio o dalla normale usura della macchina.
Per qualsiasi riparazione, rivolgersi al Servizio di Assis-
tenza Tecnica VIRUTEX.
La VIRUTEX si riserva il diritto di modificare i propri
prodotti senza preaviso.
PORTUGUÉS
MESA PARA ORLADORA
MEB50/MEB150
1. INSTRUCÇÕES DE SEGURANÇA PARA A
UTILIZAÇÃO DA MESA MEB50/MEB150, PARA
ORLADORA PORTÁTIL DE COLA QUENTE PEB50/
PEB150
Antesdeutilizara mesaMEB50/MEB150,
develeromanualdaMáquinadeColagem
PEB50/PEB150 e assegurar-se de que
compreendeu o seu conteúdo.
Leia atentamente este MANUAL DE INS-
TRUÇÕES e o FOLHETO DE INSTRUÇÕES
GERAIS DE SEGURANÇA fornecidos.
Conserve os manuais num local acessível
para possíveis consultas posteriores.
Fixe a Mesa MEB50/MEB150 sobre a
bancadadetrabalho, através dos buracos
(K Fig.1) das pernas.
2. CARACTERÍSTICAS TÉCNICAS
Medidas da base.........................................860 x 350 mm
Comprimento do plano de trabalho..................800 mm
Altura do plano de trabalho..................................195 mm
Peso................................................................................17 kg
3. EQUIPAMENTO STANDARD
- Rolo prensador auxiliar.
- Guias de apoio à entrada e à saída da peça.
- Guia de apoio posterior extensível até 500 mm.
- Prensor desmontável na guia de apoio posterior.
• Ao abrir a caixa da embalagem da MEB50/MEB150,
encontrará no seu interior:
• 1 Mesa MEB50/MEB150 para orladora PEB50/
PEB150.
• 1 Guia de apoio posterior extensível desmontada nas
seguintes peças:
1 Régua de apoio posterior (A Fig. 1)

15
2 Anilhas (B, Fig. 1)
2 Parafusos sextavados M.8x35 (C, Fig. 1)
2 Fixadores dos braços (D, Fig. 1)
2 Braços (E, Fig. 1)
1 Conjunto prensador (F, Fig. 1)
• 1 Saco contendo: 3 parafusos (J, Fig. 3) para a montagem
da PEB-50; 2 suplementos da máquina (T e U, Fig. 3) e
18 suplementos da mesa (S, Fig. 3), para a aplicação de
orlas em peças circulares; e 5 suplementos posteriores
(V, Fig. 3) para a aplicação de orlas em peças de formas
curvilíneas.
4. ACESSÓRIOS OPCIONAIS
1645916 - Porta-rolos para MEB50/MEB150. (Fig. 4)
5045753 -Suporte de 2 ventosas SFV50. (Fig. 5 e 6)
5045833 -Suporte de 1 ventosa SFV150. (Fig. 5)
5046266 - Cortador de orlas RC50T
5. MONTAGENS
5.1 MONTAGENS DA GUIA DE APOIO POS-
TERIOR
Introduzir um braço (E, Fig. 1) em cada uma das duas cal-
has (G, Fig. 1) encostadas às partes laterais da mesa.
Extrair os parafusos (C, Fig. 1) e as anilhas (B, Fig. 1) dos
braços (E, Fig. 1).
Colocar a régua de apoio posterior (A, Fig. 1) sobre os
braços E e imobilizá-la com os fixadores (D, Fig. 1), com
os parafusos (C, Fig. 1) e com as anilhas (B, Fig. 1).
Deslocar a guia de apoio posterior montada no interior
das calhas (G, Fig. 1), até a encostar à régua (H, Fig. 1)
da mesa.
Fixar a guia de apoio posterior nesta posição, com as
manetes (I, Fig. 1) de ambos os lados.
Afrouxar os parafusos (C, Fig. 1); nivelar as superfícies
da régua de apoio posterior (A, Fig. 1) com a da régua
(H, Fig. 1) da mesa e apertar os parafusos (C, Fig. 1)
nesta posição.
5.2 MONTAGEM DA ORLADORA PEB50/PEB150
NA MESA
Colocar a orladora PEB50/PEB150 na mesa MEB50/
MEB150 na posição da Fig. 2 e fixá-la com os três
parafusos (J, Fig. 2).
6. PREPARAÇÃO DA ORLADORA PEB50/
PEB150
Siga escrupulosamente os passos indicados no manual
da orladora PEB50/PEB150, até estar pronta para a
aplicação da primeira orla.
Lembramos que deverá cumprir os seguintes passos
por esta ordem:
• Ligar a orladora PEB50/PEB150 à corrente eléctrica.
• Accionar o interruptor geral (IG, Fig. 2) para iniciar
o aquecimento.
• Cortar a orla à medida do tabuleiro que vai orlar.
• Ajustar a altura da guia do lado.
Nãodeixeaorla nasguias;retire-aquando
terminar o ajuste.
• QUANDO ACENDER A LUZ DO INTERRUPTOR DE
AVANÇO (IA, Fig. 2):
- Verificar se tem cola suficiente no depósito da má-
quina.
- Verificar se o ajuste da passagem da cola é adequa-
do.
• A orladora está agora pronta para começar a aplicar
orlas.
7. APLICAÇÃO DE ORLAS EM PEÇAS RECTAS
Ajustes prévios:
Verificar se as guias de apoio (M e L, Fig. 1) estão no
respectivo sítio:
• A guia de apoio de saída (M, Fig. 7) deve estar alin-
hada com os dois rolos (P e N, Fig. 7); se não estiver,
poderá alinhá-la afrouxando os parafusos (R, Fig. 2)
que a seguram.
• Para verificar a posição correcta da guia de entrada
(L, Fig. 7), ponha um pedaço da tira com que vai orlar
contra os rolos (P e N, Fig. 7), pressione-a contra os rolos
com um painel direito e verifique se a guia de entrada
(L, Fig. 7) está alinhada com o lado limpo do painel. Se
não estiver, deverá alinhá-la afrouxando os parafusos
(R, Fig. 2) que a seguram.
Colocar o prensor (F, Fig. 7):
Se desejar orlar com o prensor (F, Fig. 7), deverá regular
a posição da guia de apoio posterior (A, Fig. 7), para
que o prensor exerça uma certa pressão sobre o lado
externo do painel e fixar a guia nesta posição com as
manetes (I, Fig. 1)
Para orlar painéis de largura superior a 500 mm em que
não seja possível usar o prensor, poderá desmontá-lo
muito facilmente e montá-lo na posição invertida para
que não se solte.
Aplicação de orlas:
Se a orladora PEB50/PEB150 estiver pronta para aplicar
as orlas, como explicado no ponto 6, siga os passos
seguintes para orlar um tabuleiro:
Accionar o interruptor de avanço (IA, Fig. 7) que se
encontra no punho da máquina.
Esperar uns segundos para que a cola suba do depósito
até ao rolo aplicador.
Introduzir o lado através das guias até alcançar o rolo
de avanço que transportará o lado devidamente colado,
até sair sobre o rolo prensador.
Avançar o tabuleiro sobre o lado a colar quando estiver
a sair sobre o rolo prensador.

16
Pressionar o tabuleiro contra o rolo prensador, de modo
a que o movimento de rotação deste determine a velo-
cidade de avanço do tabuleiro, acompanhando-o com
ambas as mãos até ao final da aplicação da orla.
Desligar o interruptor de avanço (IA, Fig. 7).
Se tiver acabado o trabalho com a máquina, desligue
também o interruptor geral (IG, Fig. 2).
8. APLICAÇÃO DE ORLAS EM PEÇAS CIRCU-
LARES
Ajustes prévios:
Elevar a orladora PEB50/PEB150 para que o lado colado
saia rente à mesa:
• Para aplicar orlas em tabuleiros circulares, deverá
montar a orladora PEB50/PEB150 na posição da Fig.
2, colocando os suplementos (T e U, Figs. 3, 8 e 9) por
baixo da máquina para a elevar.
Colocar suplementos da mesa:
• Deverá colocar alguns suplementos da mesa (S, Fig. 10)
nas posições convenientes, para poder apoiar o tabuleiro
enquanto se aplica a orla, sem que o restante lado inferior
esbarre neles, enquanto vai rodando o tabuleiro.
Retirar as guias de apoio:
• Deve retirar da mesa as guias de entrada e saída (M e
L, Fig. 2), afrouxando os parafusos (R, Fig. 2).
Retirar o Prensor:
• Não é possível usar o prensor para orlar tabuleiros
circulares (F, Fig. 1). Deverá desmontá-lo e montá-lo
na posição invertida para que não se solte.
Aplicação de orlas:
Se a orladora PEB50/PEB150 estiver pronta para aplicar
as orlas, como explicado no ponto 6, siga os passos
seguintes para orlar um tabuleiro circular:
• Accionar o interruptor de avanço (IA, Fig. 11) que se
encontra no punho da máquina.
• Esperar uns segundos para que a cola suba do depósito
até ao rolo aplicador.
• Colocar o tabuleiro sobre os suplementos da mesa (S,
Fig. 10) contra o rolo prensador.
• Introduzir o lado através das guias até alcançar o rolo
de avanço que transportará o lado devidamente colado,
até sair sobre o rolo prensador.
• Pressionar o tabuleiro contra o rolo prensador, de
modo a que o movimento de rotação deste determine
a velocidade de avanço do tabuleiro.
• Acompanhar o tabuleiro até ao segundo rolo e aplicar
a orla no resto do tabuleiro fazendo-o rodar entre os
dois rolos (Fig. 11), até ao final da aplicação.
• Desligar o interruptor de avanço (IA, Fig. 11).
• Se tiver acabado o trabalho com a máquina, desligue
também o Interruptor geral.
9. APLICAÇÃO DE ORLAS EM PEÇAS PEQUENAS
COM RAIOS E FORMAS
Para além dos ajustes efectuados para a aplicação de
orlas em peças circulares, são ainda necessários os
seguintes ajustes:
Ajustes adicionais:
Retirar o rolo prensador auxiliar e o eixo:
• Com a ajuda de uma chave de parafusos, retirar o
parafuso (P, Fig. 2) que retém o rolo.
• Retirar também o eixo do rolo, desenroscando-o com
a ajuda de uma vareta de 4 mm que deverá introduzir
no respectivo buraco.
Colocar suplementos posteriores:
• Em algumas peças pode ser necessário colocar suple-
mentos posteriores (V, Fig. 2, 3 e 12), na parte traseira
da saída do tabuleiro e nas posições convenientes, para
poder apoiar o tabuleiro enquanto se aplica a orla, sem
que o restante lado inferior esbarre neles ao avançar.
Aplicação de orlas:
Se a orladora PEB50/PEB150 estiver pronta para aplicar
as orlas, como explicado no ponto 6, siga os passos
seguintes para orlar um tabuleiro pequeno com raios
e formas:
• Accionar o interruptor de avanço (IA, Fig. 12) que se
encontra no punho da máquina.
• Esperar uns segundos para que a cola suba do depósito
até ao rolo aplicador.
• Colocar o tabuleiro sobre os suplementos da mesa (S,
Fig. 12) contra o rolo prensador.
• Introduzir o lado através das guias até alcançar o rolo
de avanço que transportará o lado devidamente colado,
até sair sobre o rolo prensador.
• Pressionar o tabuleiro contra o rolo prensador, de
modo a que o movimento de rotação deste determine
a velocidade de avanço do tabuleiro, acompanhando-o
com ambas as mãos, seguindo o seu contorno até ao
final da aplicação da orla.
• Desligar o interruptor de avanço (IA, Fig. 12).
• Se tiver acabado o trabalho com a máquina, desligue
também o interruptor geral.
10. GARANTIA
Todas as máquinas VIRUTEX gozam de uma garantia válida
pelo prazo de 12 meses a partir da data do seu forneci-
mento, excluindo-se desta garantia todas as utilizações
ou danos causados por uma utilização desadequada ou
pelo desgaste natural da máquina.
Para qualquer reparação, dirija-se ao Serviço de Assis-
tência Técnica VIRUTEX.
A VIRUTEX reserva para si o direito de poder modificar os
seus productos, sin a necessidade de aviso prévio.

17
РУССКИЙ
СТОЛ КРОМКООБЛИЦОВОЧНЫЙ
MEB50/MEB150
1. ИНСТРУКЦИЯ ПО
ТЕХНИКЕ БЕЗОПАСНОСТИ
Перед использованием
кромкооблицовочного стола MEB50/
MEB150, прочитайте инструкцию по
эксплуатации кромкооблицовочной
ручной машины PEB50/PEB150
и убедитесь в том, что Вы ее
поняли. После этого внимательно
прочитайте данную ИНСТРУКЦИЮ
ПО ЭКСПЛУАТАЦИИ и ОБЩУЮ
ИНСТРУКЦИЮ ПО ТЕХНИКЕ
БЕЗОПАСНОСТИ. Сохраните
вышеуказанную документацию для
обращения к ней в будущем.
Закрепите кромкооблицовочный стол
MEB50 на рабочей поверхности через
отверстия (K Рис. 1) в ножках стола.
2. ТЕХНИЧЕСКИЕ ХАРАКТЕРИСТИКИ
Габаритные размеры..................860 x 350 мм
Длина рабочей поверхности................800 мм
Ширина рабочей поверхности................195 мм
Вес.............................................................17 кг
3. СТАНДАРТНАЯ КОМПЛЕКТАЦИЯ
- Прижимной ролик.
- Направляющие для подачи и удаления
заготовок.
- Расширитель рабочей поверхности (до 500
мм).
- Прижимная пластина расширителя рабочей
поверхности.
• В комплект поставки MEB50/MEB150
входит:
• 1 MEB50/MEB150 кромкооблицовочный стол
для PEB50/PEB150.
• 1 расширитель рабочей поверхности в
разобранном состоянии, состоящий из
следующих деталей:
1 планка передняя (A Рис. 1)
2 Шайбы (B Рис. 1)
2 винта с внутренним шестигранником
M.8x35 (C Рис. 1)
2 цилиндрические гайки (D Рис. 1)
2 опорные штанги (E Рис. 1)
1 прижимная пластина (F Рис. 1)
• 1 Пакет содержащий: 3 винта (J, Рис. 3) для
установки PEB50/PEB150; 2 установочные
пластины (T и U, Рис. 3); 18 опор (S, Рис.
3), для обработки круглых деталей; 5 опор
(V, Рис. 3) для обработки криволинейных
деталей.
4. ДОПОЛНИТЕЛЬНАЯ КОМПЛЕКТАЦИЯ
1645916 - держатель рулонных материалов
для MEB50/MEB150. (Рис. 4)
5045753 - SFV50 стол с двумя вакуумными
струбцинами. (Рис. 5 и 6)
5045833 - SFV50 стол с одной вакуумной
струбциной. (Рис. 5)
5046266 - RC50T
5. СБОРКА
5.1 СБОРКА РАСШИРИТЕЛЯ РАБОЧЕЙ
ПОВЕРХНОСТИ
Вставьте опорные штанги (E, Рис.1) в их
посадочные гнезда (G, Рис.1), расположенные
на боковых поверхностях кромкооблицовочного
стола.
Выверните винты (C, Рис.1) с шайбой (B,
Рис.1) из опорной штанги (E, Рис.1).
Установите переднюю планку (A, Рис.1) на
опорные штанги E, и закрепите при помощи
цилиндрической гайки (D, Рис.1) используя
винты (C, Рис.1) и шайбы (B, Рис.1).
Передвиньте расширитель рабочей
поверхности в гнездах (G, Рис.1) до его
соприкосновения с направляющей (H, Рис.1)
на рабочей поверхности стола.
Зафиксируйте расширитель рабочей
поверхности в этом положении при помощи
фиксаторов (I, Рис.1) с обеих сторон.
Отпустите винты (C, Рис.1); установите
направляющую на передней планке (A, Рис.1)
в одной плоскости с направляющей (H, Рис.1)
на рабочей поверхности стола и затяните
винты (C, Рис.1) в этом положении.
5.2 УСТАНОВКА КРОМКООБЛИЦОВОЧНОЙ
МАШИНЫ PEB50/PEB150
Перед проведением монтажных и
настроечных операций убедитесь в том,
что инструмент отключен от электросети.
Установите кромкооблицовочную машину
PEB50/PEB150 в посадочное место
кромкооблицовочного стола MEB50/MEB150
как показано на Рис.2 и закрепите его при
помощи трех винтов (J, Рис. 2).

18
6. ПОДГОТОВКА КРОМКООБЛИЦОВОЧНОЙ
МАШИНЫ PEB50/PEB150
Следуя инструкциям по эксплуатации
кромкооблицовочной машины PEB50/PEB150,
подготовьте машину к приклейке кромочного
материала, выполнив следующие шаги:
• Подключите кромкооблицовочную машину
PEB50/PEB150 к внешней питающей
электросети.
• Включите нагревательные элементы при
помощи основного выключателя (IG, Рис. 2).
• Отрежьте полосу кромочного материала
требуемой длины.
• Отрегулируйте направляющую кромочного
материала по ширине кромочного материала.
Не оставляйте кромочный
материал в направляющей.
Удалите его после окончания
настроечных операций.
• КОГДА СВЕТОВОЙ ИНДЕКАТОР
ВЫКЛЮЧАТЕЛЯ (IA, Рис.2) ЗАГОРИТЬСЯ:
- Убедитесь в том, что в клеевой ванне
достаточно клея-расплава.
- Убедитесь в том, что настройка толщины
клеевого слоя выполнена правильно.
• Теперь кромкооблицовочная машина готова
к приклейке кромочного материала.
7. ОБЛИЦОВЫВАНИЕ ПРЯМЫХ ЗАГОТОВОК
Предварительные настройки:
Убедитесь, что продольные направляющие
(M и L, Рис. 1) находятся в правильном
положении:
• Выходная продольная направляющая
(M, Рис. 7) должна быть на одной линии с
двумя роликами (P и N, Рис. 7). Если это
не так, Вы можете выполнить настройку,
освободив винты (B, Рис. 2), удерживающие
направляющую.
• Для проверки правильности положения
входной продольной направляющей (L, Рис.
7), приложите кромочный материал, который
Вы будете приклеивать, к роликам (P и N,
Рис. 7). Прижмите кромочный материал
прямой панелью и убедитесь, что входная
направляющая (L, Рис. 7) находится в
соприкосновении с торцом панели (без
кромочного материала). Если это не так,
выполните настройку, освободив винты (R,
Рис. 2), удерживающие направляющие.
Установите прижимную пластину (F, Рис. 7):
Если Вы хотите выполнить облицовывание
кромочными материалами при помощи
прижимной пластины (F, Рис. 7),
отрегулируйте положение расширителя
рабочей поверхности (A, Рис. 7) таким
образом, чтобы прижим оказывал прижимное
усилие на противоположную обрабатываемой
поверхность заготовки. Закрепите
расширитель рабочей поверхности при
помощи фиксаторов (I, Рис. 1).
Для панелей шириной более 500 мм,
использование прижимной пластины
невозможно и она может быть легко снята. Во
избежание потери пластины или крепежных
элементов рекомендуется установить
прижимную пластину на свое место, но
рабочей стороной вниз.
Облицовывание кромкой:
Если кромкооблицовочная машина PEB50/
PEB150 подготовлена к приклейке кромки, как
указано в разделе 6, выполните следующие
шаги для облицовывания кромочными
материалами:
Включите выключатель (IA, Рис.7)
расположенный на рукоятке машины.
Подождите несколько секунд для подъема
клея-расплава из клеевой ванны на
клеенаносящий валик.
Подайте кромочный материал через
направляющую кромочного материала до его
захвата подающим роликом, который подаст
кромочный материал через клеенаносящий
валик до прижимного валика.
Подайте обрабатываемую заготовку до
ее контакта с кромочным материалом на
прижимном валике.
Прижмите заготовку к прижимному валику,
его вращательное движение обеспечит
требуемую скорость подачи кромочного
материала и заготовки. Сохраняйте
прижимное усилие до окончания
облицовывания заготовки.
Выключите выключатель (IA, Рис. 7).
Если Вы закончили работу с машиной,
выключите ее при помощи основного
выключателя (IG, Рис. 2).
8. ОБЛИЦОВЫВАНИЕ КРУГЛЫХ ЗАГОТОВОК
Предварительные настройки:
Приподнимите кромкооблицовочную машину
PEB50/PEB150 относительно плоскости
рабочей поверхности:
• Для обработки круглых деталей установите
кромкооблицовочную машину PEB50/PEB150
как показано на Рис. 2, но с использованием
установочных пластин (T и U, Рис. 3, 8 и 9)

19
под машиной для ее поднятия.
Установка дополнительных опор:
• Установите требуемое количество опор
(S, Рис. 10) в соответствующие гнезда,
для поддержки детали в процессе
облицовывания кромочным материалом.
Убедитесь, что деталь не будет
«проваливаться» при ее перемещении в
процессе обработки.
Демонтаж продольных направляющих:
• Удалите входную и выходную продольные
направляющие (M и L, Рис. 2) с рабочей
поверхности кромкооблицовочного стола,
для чего отверните винты (R и В, Рис. 2).
Демонтаж прижимной пластины:
• При обработке круглых заготовок,
прижимная пластина (F, Рис. 1) не
используется. Во избежание потери пластины
или крепежных элементов рекомендуется
установить прижимную пластину на свое
место, но рабочей стороной вниз.
Облицовывание кромкой:
Если кромкооблицовочная машина PEB50/
PEB150 подготовлена к приклейке кромки, как
указано в разделе 6, выполните следующие
шаги для облицовывания кромочными
материалами:
• Включите выключатель (IA, Рис. 7)
расположенный на рукоятке машины.
• Подождите несколько секунд для подъема
клея-расплава из клеевой ванны на
клеенаносящий валик.
• Поместите заготовку на опорах (S.Рис. 10)
напротив прижимного валика.
• Подайте кромочный материал через
направляющую кромочного материала до его
захвата подающим роликом, который подаст
кромочный материал через клеенаносящий
валик до прижимного валика.
• Подайте обрабатываемую заготовку до
ее контакта с кромочным материалом на
прижимном ролике, его вращательное
движение обеспечит требуемую скорость
подачи кромочного материала и заготовки.
• Прижмите заготовку к прикатывающему
валику и обрабатывайте оставшуюся часть
детали, вращая ее между прижимным и
прикатывающими валиками (Рис. 11)
• Выключите выключатель (IA, Рис. 11).
• Если Вы закончили работу с машиной,
выключите ее при помощи основного
выключателя (IG, Рис. 2).
9. ОБЛИЦОВЫВАНИЕ КРИВОЛИНЕЙНЫХ
ЗАГОТОВОК
Выполните настройки, описанные в разделе
«Облицовывание круглых заготовок», а также:
Дополнительные настройки:
Удалите прикатывающий ролик и его ось:
• При помощи отвертки удалите винт (P, Рис.
2), затем снимите ролик.
• Выверните ось ролика при помощи стержня
D 4 мм.
Установка дополнительных опор:
• В некоторых случаях может быть
необходимо использование дополнительных
опор (V, Рис. 2, 3 и 12) на задней части
рабочей поверхности стола для исключения
«провалов» заготовки в процессе
облицовывания кромочными материалами.
Облицовывание кромкой:
Если кромкооблицовочная машина PEB50/
PEB150 подготовлена к приклейке кромки, как
указано в разделе 6, выполните следующие
шаги для облицовывания кромочными
материалами:
• Включите выключатель (IA, Рис. 12)
расположенный на рукоятке машины.
• Подождите несколько секунд для подъема
клея-расплава из клеевой ванны на
клеенаносящий валик.
• Поместите заготовку на опорах (S.Рис. 12)
напротив прижимного валика.
• Подайте кромочный материал через
направляющую кромочного материала до его
захвата подающим роликом, который подаст
кромочный материал через клеенаносящий
валик до прижимного валика.
• Подайте обрабатываемую заготовку до
ее контакта с кромочным материалом на
прижимном ролике, его вращательное
движение обеспечит требуемую скорость
подачи кромочного материала и заготовки.
Сохраняйте прижимное усилие до окончания
обработки.
• Выключите выключатель (IA, Рис. 12).
• Если Вы закончили работу с машиной,
выключите ее при помощи основного
выключателя (IG, Рис. 2).
10. ГАРАНТИЙНЫЕ ОБЯЗАТЕЛЬСТВА
Все электроинструменты фирмы Viru-
tex имеют гарантию 12 месяцев со дня
покупки. Гарантия не распространяется
на те случаи, когда повреждение явилось
результатом неправильной эксплуатации или
естественного износа. При необходимости
ремонта обращайтесь в пункты
техобслуживания или уполномоченным

20
представителям фирмы Virutex
Компания VIRUTEX оставляет за собой
право вносить изменения в конструкцию
или стандартный комплект поставки без
предварительного уведомления.
РOLSKA
STOLIK DO OKLEINIARKI
MEB50/MEB150
1. WYTYCZNE BEZPIECZEŃSTWA ODNOŚNIE
ZA-STOSOWANIA STOLIKA MEB50/MEB150 DO
PRZENOŚNEJ OKLEINIARKI PEB50/PEB150 NA
KLEJ TERMOTOPLIWY
Przed przystąpieniem do pracy ze
stolikiem MEB50/MEB150, należy
dokładnie przeczytać instrukcję obsługi
do okleiniarki PEB50/PEB150 i upewnić
się, że jest ona zrozumiała. Następnie
przeczytaj niniejszą INSTRUKCJĘ
OBSŁUGI oraz załączoną INSTRUKCJĘ
BEZPIECZEŃSTWA. Należy się upewnić,
że wszystkie informacje zostały zrozu-
miane przed użyciem urządzenia po
raz pierwszy. Należy zachować obie
instrukcje w razie konieczności użycia
ich w przyszłości.
Zamocuj stolik MEB50/MEB150 do stołu
roboczego za pośrednictwem otworów
(K Rys. 1) w nogach.
2. DANE TECHNICZNE
Wymiary podstawy........................860 x 350 mm
Długość powierzchni roboczej...............800 mm
Wysokość powierzchni roboczej..................195 mm
Waga.............................................................17 kg
3. STANDARDOWE WYPOSAŻENIE
- Dodatkowy wałek dociskowy.
- Prowadnice wspierające do wkładania i
wyjmowania elementu.
- Przednia prowadnica wspierająca, która może
być przedłużona do 500 mm.
- Zdejmowalny zacisk przedniej prowadnicy
wspierającej.
• W opakowaniu MEB50/MEB150 znajdują się
następujące artykuły:
• 1 stolik MEB50/MEB150 do okleiniarki PEB50/
PEB150.
• 1 przednia, przedłużalna prowadnica
wspierająca, rozmontowana na poszczególne
elementy:
1 Ramię prowadnicy wspierającej (A Rys. 1)
2 Podkładki (B Rys. 1)
2 M.8x35 śrubki imbusowe (C Rys. 1)
2 Wsporniki ramienia (D Rys. 1)
2 Ramiona (E Rys. 1)
1 Zestaw zacisku (F Rys. 1)
• 1 Torba zawierająca 3 śrubki (J, Rys. 3) do
zamontowania PEB50/PEB150; 2 podkładki (T i
U, Rys. 3) oraz 18 zaślepek do stolika (S, Rys.
3), do oklejania okrągłych elementów; a także
5 zaślepek przednich (V, Rys. 3) do oklejania
elementów zakrzywionych.
4. AKCESORIA DODATKOWE
SFV50 stolik z 2 przyssawkami (Rys. 5 i 6)
5045753
SFV150 stolik z 1 przyssawką (Rys. 5) 5045833
1645916 – ramię-podajnik na obrzeże do
MEB50/MEB150 (Rys. 4)
5046266 - RC50T
5. MONTAŻ
5.1 MONTAŻ PRZEDNIEJ PŁYTY PROWADNICY
Włóż ramiona (E, Rys. 1) w każdą z dwóch
prowadnic (G, Rys. 1) znajdujących się po bokach
stolika.
Usuń śruby (C, Rys. 1) i podkładki (B, Rys. 1) z
ramion (E, Rys. 1). Zamocuj ramię prowadnicy
wspierającej (A, Rys. 1) na ramionach E, i zamo-
cuj całość na wspornikach (D, Rys. 1), za pomocą
śrub (C, Rys. 1) oraz podkładek (B, Rys. 1). Wsuń
przednią prowadnicę wspierającą w prowadnice
(G, Rys. 1) aż dotknie płyty (H, Rys. 1) na stoliku.
Zamocuj prowadnicę wspierającą w tej pozycji, za
pomocą dźwigni (I, Rys. 1) po obu stronach. Po-
luzuj śruby (C, Rys.1); wypoziomuj powierzchnię
górną prowadnicy wspierającej (A, Rys. 1) równo
z powierzchnią płyty (H, Rys. 1) i dokręć śruby (C,
Rys. 1).
5.2 MOCOWANIE OKLEINIARKI PEB50/PEB150
DO STOLIKA
Umieść okleiniarkę PEB50/PEB150 na stoliku
MEB50/MEB150 w pozycji przedstawionej na
Rys. 2 oraz zamocuj ją na miejscu za pomocą
trzech śrub (J, Rys. 2).
6. PRZYGOTOWANIE OKLEINIARKI PEB50/
PEB150
Postępuj według wskazówek przedstawio-nych
This manual suits for next models
2
Table of contents
Languages:
Other Virutex Tools manuals
Virutex
Virutex PMT111 User manual
Virutex
Virutex eb25 User manual
Virutex
Virutex PM11D User manual
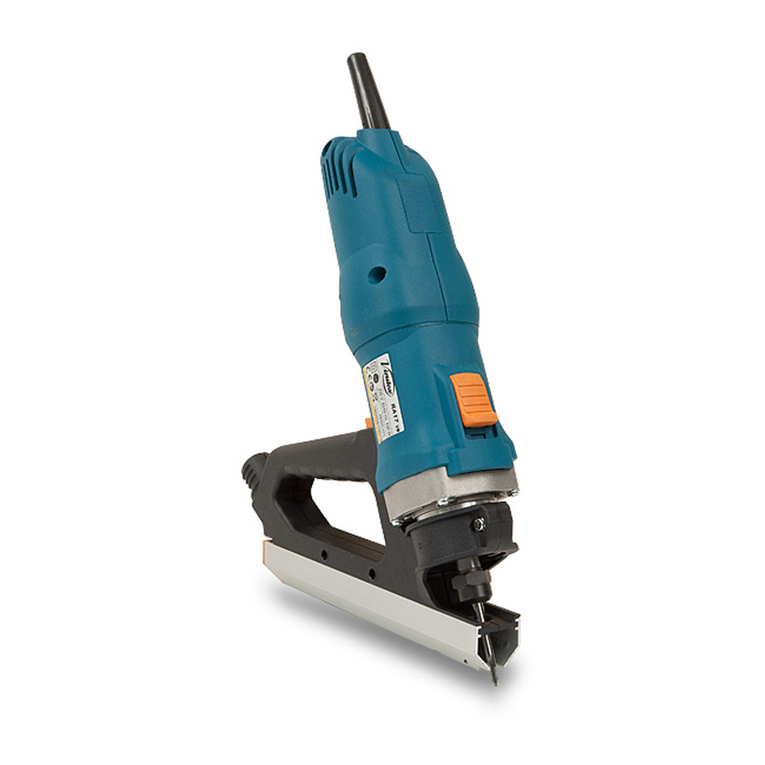
Virutex
Virutex RA17D User manual
Virutex
Virutex PE60 User manual
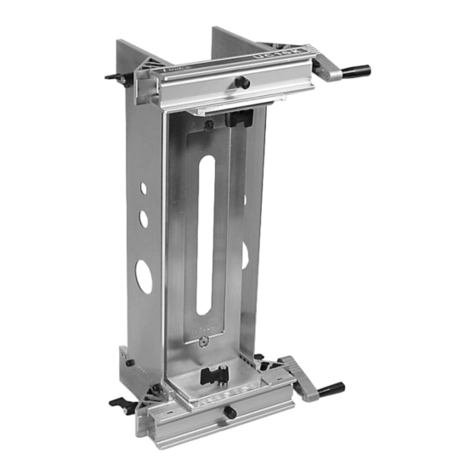
Virutex
Virutex UC16K User manual
Virutex
Virutex PB83E User manual
Virutex
Virutex SVN500 User manual

Virutex
Virutex UCP90 User manual
Virutex
Virutex SVN250 User manual
