10
Scherblocks, sowie den
Klingenantrieb (Abb. , 7).
- Setzen Sie den Scherkopf auf seinen
Platz zurück, schließen Sie ihn mit
dem Schutzdeckel und räumen Sie
den Rasierer weg.
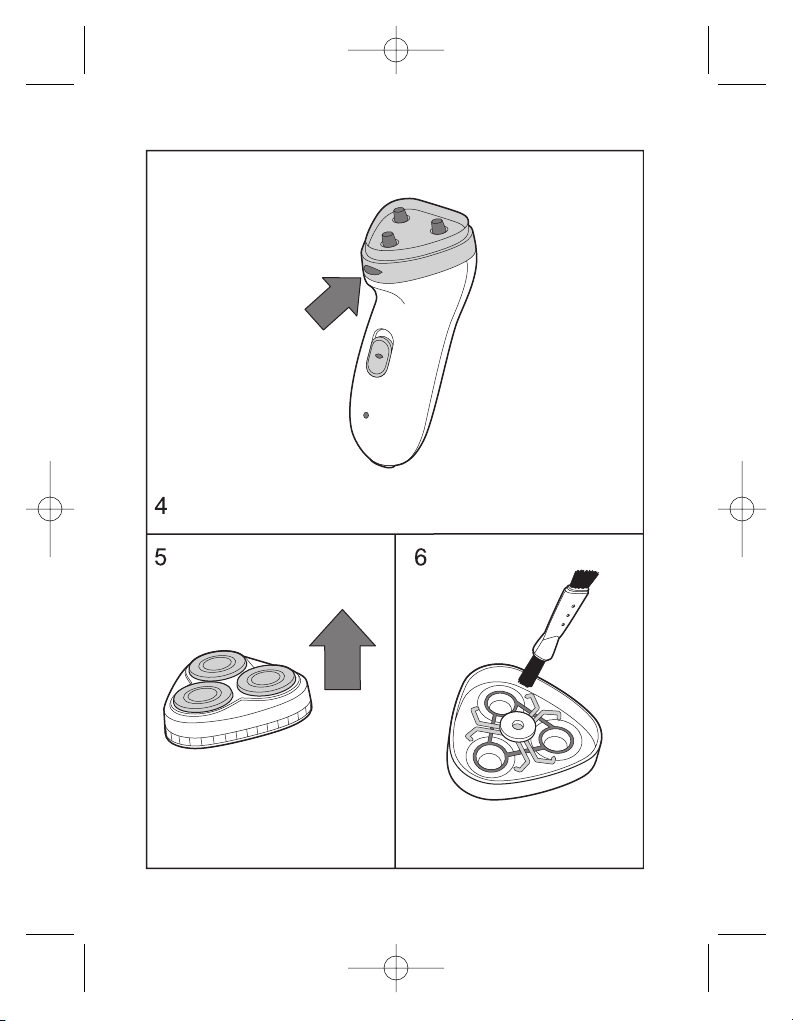
Es wird empfohlen die Scherköpfe
jede zwei Monate zu reinigen (Abb. 9,
0)
- Schalten Sie den Elektrorasierer ab.
- Pressen Sie die Fixiertaste (4) und
nehmen Sie den Scherblock ab.
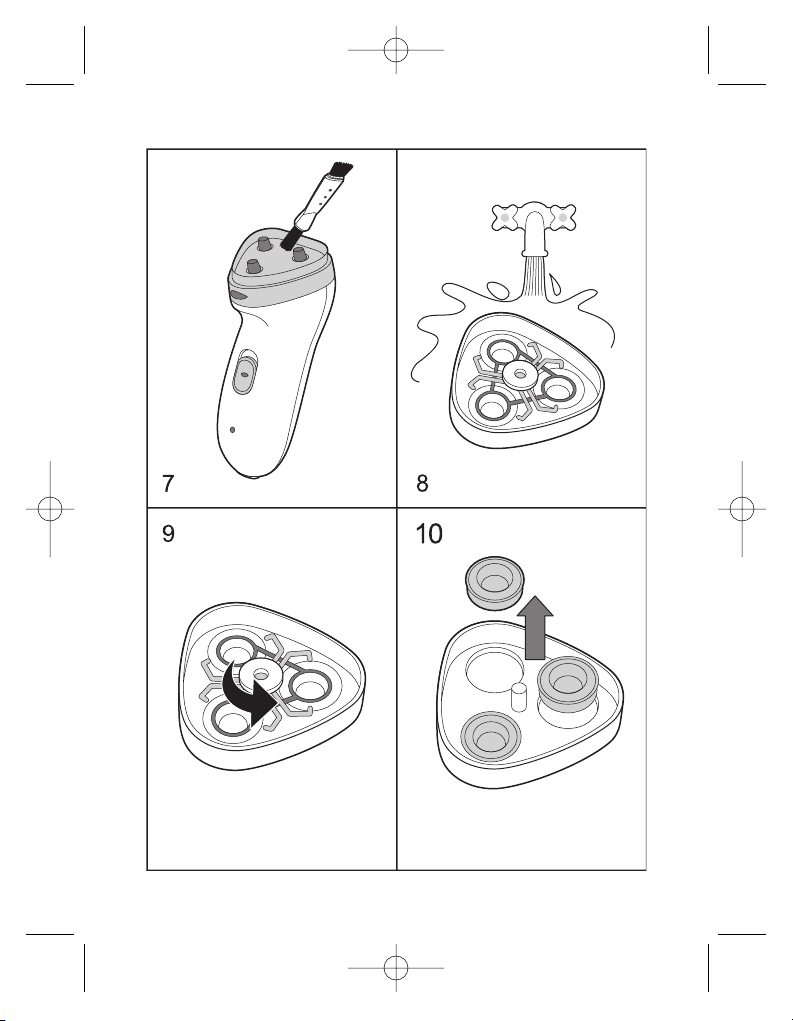
- Drücken Sie leicht auf das Rädchen,
drehen Sie es gegen den
Uhrzeigersinn und nehmen Sie das
Fixierrähmchen ab.
- Nehmen Sie die Scherköpfe ab und
reinigen Sie sie (die rotierenden und
die feststehenden Messer sind sepa-
rat zu säubern). Verwechseln Sie die
rotierenden und die feststehenden
Messer nicht. Das ist wichtig, da die
rotierenden und die feststehenden
Messer jedes Scherkopfes aneinan-
der angepasst sind, was die optimalen
Betriebswerte jedes Klingenpaares
gewährt. Wenn Sie die Messersets
zufällig verwechselt haben sollten,
kann es einige Wochen dauern, bis
sich das optimale Rasurergebnis
wieder einstellt.
- Reinigen Sie das rotierende Messer
mit dem Pinsel. Verwenden Sie dazu
die Pinselseite mit den kurzen
Borsten.
- Reinigen Sie das feststehende
Messer mit dem Pinsel.
- Setzen Sie die Scherköpfe in den
Scherblock ein, setzen Sie das
Fixierrähmchen auf und drehen Sie
das Rädchen im Uhrzeigersinn.
- Setzen Sie den Scherblock zurück auf
den Elektrorasierer auf.
Achtung!
Der Scherblock darf unter fließendem
warmem Wasser ausgewaschen werden
(Abb. 8). Lassen Sie den Scherblock voll-
ständig trocknen, bevor Sie ihn wieder
aufsetzen, vermeiden Sie das Gelangen
von Wasser in das Gehäuse des
Elektrorasierers. Schmieren Sie nach
dem Auswaschen des Scherblocks die
Mittelstücke der feststehenden Messer
mit Nähmaschinenöl oder mit Schmieröl
für Haarschneidemaschinen ein.
Dadurch wird die Abnutzung der
Scherköpfe vermieden.
Trimmer
- Reinigen Sie den Trimmer nach jeder
Anwendung.
- Schalten Sie den Elektrorasierer ab.
- Reinigen Sie den Trimmer mit dem
mitgelieferten Pinsel (9).
- Schmieren Sie den Trimmer alle sechs
Monate mit einem Tropfen Öl für
Nähmaschinen oder
Haarschneidemaschinen.
Auswechseln der Scherköpfe (Abb.
9, 0)
Um optimale Ergebnisse beim Rasieren
zu erhalten, sollten Sie die Scherköpfe
alle zwei Jahre auswechseln.
- Schalten Sie den Elektrorasierer aus.
- Pressen Sie die Fixiertaste (4) und
nehmen Sie den Scherblock ab.
- Drücken Sie leicht auf das Rädchen,
drehen Sie es gegen den
Uhrzeigersinn und nehmen Sie das
Fixierrähmchen ab.
- Wechseln Sie die Scherköpfe aus,
setzen Sie den Fixierrahmen wieder
auf und drehen Sie das Rädchen im
Uhrzeigersinn.
- Setzen Sie den Scherblock auf den
Elektrorasierer auf.
DEUTSCH