Vitek VT-8149 User manual

1
VT-8149
3
7
12
16
Vacuum cleaner
Пылесос
20
IM VT-8149.indd 1 8/17/20 11:06 AM
IM VT-8149.indd 2 8/17/20 11:06 AM
3
ENGLISH
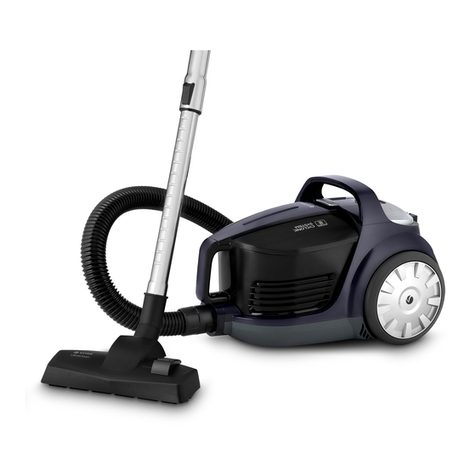
VACUUM CLEANER VT-814 9
The vacuum cleaner is intended for room dry cleaning.
DESCRIPTION
1.
Universal brush with the “FLOOR/CARPET” switch
2.
“FLOOR/CARPET” mode switch
3.
Telescopic pipe clamp
4.
Telescopic extension pipe
5.
Manual suction power control
6.
Flexible hose handle
7.
Flexible hose
8.
Flexible hose ending
9.
Flexible hose ending clamp
10.
Air inlet
11.
Dust bin
12.
ON/OFF button
13.
Vacuum cleaner foldable carrying handle
14.
Suction power control
15.
Horizontal brush storage
16.
Power cord
17.
Power cord winding button
18.
Outlet air filter
19.
Outlet filter grid
20.
Outlet filter grid lock
21.
Motor protection filter
Dust bin (11)
22.
Dust bin lid lock button
23.
Dust bin handle
24.
HEPA filter lid
25.
Dust bin release button
26.
HEPA filter
27.
Mesh filter of the HEPA filter
28.
Dust bin lid
29.
Furniture brush
30.
Combined attachment
31.
Vertical brush storage
SAFETY MEASURES
Read this instruction manual carefully before using the
unit and keep it for the whole operation period.
Use the unit for its intended purpose only, as speci-
fied in this manual. Mishandling of the unit may lead to
its breakage and cause harm to the user or damage to
his/her property.
To avoid the risk of fire, electric shock and to prevent
injury, observe the following safety measures.
•
Before connecting the unit to the mains, make sure
that the voltage specified on the unit corresponds to
your home mains voltage.
•
To avoid fire, do not use adapters for connecting the
unit to the mains.
•
Do not leave the plugged in vacuum cleaner unat-
tended. Always unplug the vacuum cleaner from
the mains if it is not being used, before changing
attachments or before unit maintenance.
•
To prevent the risk of electric shock, do not use the
vacuum cleaner outdoors, do not use it for collect-
ing water or any other liquids (do not use the vac-
uum cleaner on wet surfaces).
•
Carry the vacuum cleaner holding it by the carry-
ing handle only.
•
Do not use the power cord for carrying the vacuum
cleaner, do not close the door if the power cord runs
through the doorway, do not let the power cord come
in contact with sharp corners or edges of furniture,
and with hot surfaces. Do not run over the power
cord with the vacuum cleaner while room cleaning
as this can damage it. Always first switch the vacuum
cleaner off with the ON/OFF button and only after
that take the power plug out of the mains socket.
•
When unplugging the unit, pull the plug but not cord.
•
Do not touch the plug or the body of the vacuum
cleaner with wet hands.
•
Hold the winding cord with hand to avoid the plug
hitting against the floor.
•
Do not cover the unit outlet with any objects.
•
Do not switch the unit on if any of its openings are
blocked.
•
Keep hair, free hanging clothes, fingers and other
parts of your body away from the vacuum cleaner
air inlets.
•
Be especially cautious while cleaning the stair land-
ings.
•
Do not use the vacuum cleaner for collecting such
highly inflammable liquids as gasoline and solvents,
do not use the vacuum cleaner in places where
such liquids are stored.
•
Do not use the vacuum cleaner for collecting water
and other liquids, burning or smoking cigarettes,
matches, cinders as well as fine dust, for example,
of plaster, concrete, flour or ashes.
•
Do not use the vacuum cleaner if:
–
the dustbag is not installed or installed improp-
erly;
–
the inlet and outlet filters are not installed.
•
Do not immerse the unit body into water or other
liquids.
•
Use only the accessories and attachments sup-
plied.
•
Clean the vacuum cleaner regularly.
•
Keep the vacuum cleaner in a dry cool place.
•
Do not use the vacuum cleaner to clean pets.
•
Close supervision is necessary when children or
disabled persons are near the operating unit.
•
This unit is not intended for usage by children.
During the unit operation and breaks between oper-
ation cycles, place the unit out of reach of children.
•
The unit is not intended to be used by people
with physical, sensory or mental disabilities (includ-
ing children) or by persons lacking experience or
knowledge if they are not under supervision of a
person who is responsible for their safety or if they
are not instructed by this person on the usage of
the unit.
•
Do not leave children unattended to avoid them
using the unit as a toy.
•
For children safety reasons do not leave polyethyl-
ene bags, used as packaging, unattended.
Attention! Do not allow children to play with polyethyl-
ene bags or packaging film. Danger of suffocation!
IM VT-8149.indd 3 8/17/20 11:06 AM

4
ENGLISH
•
Regularly check the power plug and power cord
integrity for damages.
•
Never use the unit if the power cord or the power
plug is damaged, if the unit works improperly or
after it was dropped.
•
Do not attempt to repair the unit. Do not disas-
semble the unit by yourself, if any malfunction is
detected or after it was dropped, unplug the unit
and apply to any authorized service center from the
contact address list given in the warranty certificate
and on the website www.vitek.ru.
•
Transport the unit in the original package only.
•
Keep the unit out of reach of children and disabled
persons.
THIS UNIT IS INTENDED FOR HOUSEHOLD USE ONLY.
ITS COMMERCIAL USAGE AND USAGE IN PRODUC-
TION AREAS AND WORK SPACES IS PROHIBITED.
BEFORE THE FIRST USE
After unit transportation or storage at low temper-
ature keep it for at least three hours at room tem-
perature before switching on.
–
Unpack the unit, remove any stickers and pack-
age materials that can prevent the vacuum cleaner
operation.
–
Check the unit for damages; do not use it in case
of damages.
–
Before switching the unit on, make sure that your
home mains voltage corresponds to the unit oper-
ating voltage.
ASSEMBLING THE VACUUM CLEANER
Attaching and removing the flexible hose
•
Insert the flexible hose ending (8) into the air inlet
(10).
•
Insert the hose with a slight effort until locking.
•
If you need to remove the flexible hose, press the
lock (9) and detach the hose.
Attaching the telescopic pipe
and the attachments
•
Attach the telescopic extension pipe (4) to the han-
dle of the flexible hose (6).
•
Extend the lower part of the telescopic extension
pipe to the required length, having preliminary
pressed the clamp (3).
•
Choose the necessary attachment – universal floor/
carpet brush (1), furniture brush (29) or combined
attachment (30) – and attach it to the telescopic
extension pipe (4).
•
If necessary, you can attach the attachments (29,
30) directly to the flexible hose handle (6).
•
During the operation hold the unit by the handle (6).
USING THE BRUSH ATTACHMENTS
Universal brush with
the “FLOOR/CARPET” switch (1)
Set the switch (2) on the brush (1) to the required
position (depending on the type of the surface being
cleaned).
Combined attachment (30)
The combined attachment is intended not only
for cleaning radiators, crevices, corners or space
between cushions, but for collecting dust from fur-
niture surface as well, the pile on the brush (30)
prevents damage of polished furniture surface.
During the operation set the brush to the required
position.
Attachment (29)
Use the attachment (29) to clean the furniture uphol-
stery.
Dust bin (11)
The dust bin (11) is equipped with the cyclonic filter
which eliminates garbage and dust from the air, and
the foam (18) and HEPA (26) filters retain the finest dust
particles. The mesh filter (27) protects the HEPA filter
from garbage and large dust particles.
Note:
–
provide that the foam (18) and HEPA filters (26) are
always clean, because the overall performance of
the vacuum cleaner depends on it.
USING THE VACUUM CLEANER
Safety measures
•
Do not use the vacuum cleaner near hot surfaces,
such as ashtrays and in places where inflammable
liquids are stored.
•
Take sharp objects away from the floor before
cleaning to prevent unit damage.
• If the suction power of the vacuum cleaner
decreases rapidly while cleaning, switch it off
immediately and check the telescopic pipe (4)
and the flexible hose (7) for obstruction. Switch
the vacuum cleaner off, then unplug it, remove
the obstruction and only after that continue
cleaning.
USING THE VACUUM CLEANER
ATTENTION! You may switch the vacuum cleaner
on only with the dust bin (11) and the HEPA filter
(26) and the mesh filter (27) installed in the dust bin,
and with the outlet air filter (18) and the motor pro-
tection filter (21) installed. Always make sure that
the filters (18, 21, 26) and the mesh filter (27) are
installed properly.
•
Before using the unit, unwind the power cord (16)
to the required length and insert the power plug into
the mains socket.
•
The yellow mark on the power cord indicates the
maximum cord length. Do not unwind the power
cord further than the red mark.
•
Press the on/off button (12) to switch the vacuum
cleaner on.
• During the operation you can control the suc-
tion power using the power control (14) and the
manual suction power control (5) on the flexible
hose handle (6). After room cleaning switch the
vacuum cleaner off by pressing the on/off button
(12) and unplug the unit.
IM VT-8149.indd 4 8/17/20 11:06 AM

5
ENGLISH
•
To wind the power cord (16), press the button (17),
hold the winding cord with your hand to avoid its
whipping and damage.
•
During the breaks you can place the brush (1) in the
horizontal brush storage (15).
Note: before replacing the brush (1) or the attach-
ments (29, 30) or cleaning the dust bin (11) switch the
vacuum cleaner off and take the power plug out of the
mains socket.
HEPA CLEANING SYSTEM
Cyclonic vacuum cleaner operates without dust bag.
Intake dirt is pushed into the dust bin by force of the
air flow. The air is cleaned with the reusable washable
HEPA filter (26) inside the dust bin, the motor protec-
tion filter (21) and the outlet air filter (18).
Attention!
Do not use the vacuum cleaner without the filter or if
the filter is damaged. The intake dust can get into the
unit and damage the motor.
Motor safety valve
The unit is equipped with the safety valve. If the dust
bin is full, the HEPA filter is blocked or the air vent is
blocked, the safety valve will switch on automatically
to prevent the motor overheating prolonging its ser-
vice life.
CLEANING AND CARE
Cleaning the dust bin (11)
Easy to clean the dust bin from garbage and dust.
Easy to control the filling of transparent dust bin.
In order to avoid foreign smell from dust and garbage it
is recommended to remove the dust and garbage from
the dust bin (11) after every room cleaning.
–
Switch the vacuum cleaner off and unplug it.
–
Holding the handle (13), press the release button
(25) and remove the dust bin (11) from the vacuum
cleaner body pulling upwards.
–
Place the dust bin above the trash bin and press
the lid (28) lock button (22), the lid will open auto-
matically and you can remove the dust and garbage
from the dust bin (11).
–
Close the lid (28) and make sure that it is fixed
properly.
–
Install the dust bin (11) back to its place.
Cleaning the HEPA filter (26)
Regularly clean the HEPA filter (26) and the mesh fil-
ter (27). It’s better to clean them while cleaning the
dust bin.
–
Remove the dust bin (11) from the vacuum cleaner
body as described in the previous chapter.
–
Take the dust bin handle (23), carefully turn the lid
(24) counterclockwise and open the dust bin. Then
turn the HEPA filter counterclockwise and remove it
from the lid (24).
–
Remove the mesh filter (27) from the HEPA filter (26).
–
Now wash the HEPA filter, the mesh filter and the
dust bin intself under a warm water jet and let them
dry.
Attention!
–
Wash the filter only with clean water, do not use
soap or detergent. It will damage the filter.
–
Do not wash the filter in a dishwashing machine.
–
Do not dry the HEPA filter with a hairdryer.
–
Put the mesh filter (27) on the HEPA filter (26).
–
Install the HEPA filter (26) back into the lid (24) and
turn it clockwise until clicking.
–
Insert the lid (24) with the installed HEPA filter into
the dust bin (11) and turn it clockwise until it is fixed
properly. There are corresponding marks on the lid
and the container for proper installation.
Note: before installing the dust bin into the vacuum
cleaner body, check the condition of the motor
protection filter (21). If it is dirty, remove it, wash
and clean in the similar manner and install it back
to its place.
–
Install the dust bin (11) into the vacuum cleaner
body until clicking.
ATTENTION!
Before installing the dust bin (11) into the vacuum
cleaner body make sure that all filters are dry and there
is no moisture inside the dust bin (11).
Cleaning the outlet air filter (18)
The outlet air filter cleans the air at the final stage
before releasing it from the vacuum cleaner. You can
clean the outlet filter in the following manner:
•
Switch the vacuum cleaner off and unplug it.
•
Remove the outlet filter grid (19) by pressing the
lock (20).
•
Remove the outlet air filter (18).
For easy removing, there are corresponding ledges on
the plastic frame of the outlet air filter.
•
Remove the foam filter from the frame, wash it
under a lukewarm water jet and let it dry. Wash
the filter only with clean water, do not use soap or
detergent. It can damage the filter.
•
Install the foam filter back into the frame, install it
into the vacuum cleaner body and cover with the
grid (19).
Cleaning the vacuum cleaner body
–
Wipe the vacuum cleaner body with a soft, slightly
damp cloth and then wipe it dry.
–
Do not immerse the body of the vacuum cleaner,
the power cord and the power plug of the unit into
water or other liquids. Provide that no liquid gets
inside the vacuum cleaner body.
–
Never use solvents or abrasives to clean the surface
of the vacuum cleaner.
STORAGE
•
Before taking the vacuum cleaner away for long
term storage, clean its body, the dust bin (11) and
the filters (18, 21, 26).
•
For easy storing use the horizontal (15) or the verti-
cal (31) brush storage on the vacuum cleaner body
bottom.
•
Keep the vacuum cleaner in a dry cool place out of
reach of children and disabled persons.
IM VT-8149.indd 5 8/17/20 11:06 AM
Table of contents
Languages:
Other Vitek Vacuum Cleaner manuals

Vitek
Vitek Hippo VT-1814 GD User manual

Vitek
Vitek VT-8129 User manual

Vitek
Vitek VT-1838 R User manual

Vitek
Vitek VT-8112 BK User manual

Vitek
Vitek VT-1803 User manual

Vitek
Vitek VT-1898 BK User manual

Vitek
Vitek VT-8123 R User manual

Vitek
Vitek VT-1829 User manual

Vitek
Vitek VT1832 R/B User manual

Vitek
Vitek VT-8119 User manual

Vitek
Vitek VT-8130 BK User manual

Vitek
Vitek VT-8100 CM User manual

Vitek
Vitek VT-1814 R User manual

Vitek
Vitek VT 1838 Series User manual

Vitek
Vitek VT-1835 B User manual

Vitek
Vitek VT-8107 User manual

Vitek
Vitek VT-8127 User manual

Vitek
Vitek VT-1819 User manual

Vitek
Vitek VT-1801 Simple manual

Vitek
Vitek VT-8117 BK User manual