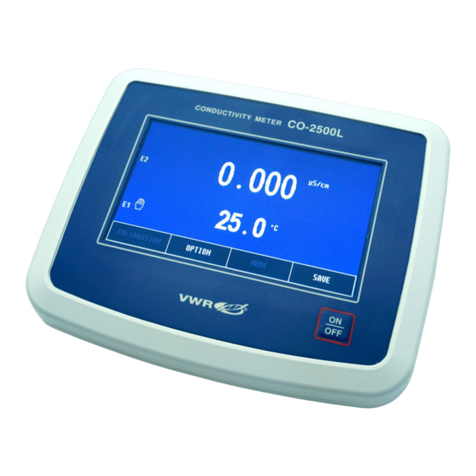
VWR PH-130 User manual

Instruction manual
VWR® pH METER PH-130
EU Catalogue Number: 662-2351
Version: 1.0
Issued: 1, December, 2020

Legal Address of Manufacturer
VWR International bv
Researchpark Haasrode 2020
Geldenaaksebaan 464
B-3001 Leuven
+ 32 16 385011
www.vwr.com
Country of origin: Poland

CONTENTS
I. Introduction 1
1. Package content 2
2. Exploitation notices 2
3. Characteristics of the meter 2
4. The outside view 3
5. The meter‘s maintenance 5
6. Switching the meter on and off 6
6.1. Choosing the measurement function 7
6.2. Stabilised reading 8
7. Preparation to work 9
7.1. Choosing the kind of the temperature compensation 9
II. pH measurement 10
8. Preparation of the pH electrode 11
9. The pH measurement parameters 11
9.1. Calibration points and date 11
9.2. Calibration validity date 11
10. Calibration 12
10.1. Calibration in buffer solutions 13
10.2. Calibration with manual temperature compensation 14
11. Checking the electrode condition 15
12. pH measurement 16
12.1. Measurement with automatic temperature compensation 16
12.2. Measurement with manual temperature compensation 17
III. Redox potential and temperature measurement 18
13. Setting the redox potential parameters 19
13.1. Relative measurement 19
13.2. Reference voltage 20
14. Redox potential measurement 20
15. Setting the temperature measurement parameters 21
15.1. Unit 21
15.2. Temperature of the manual compensation 21
16. Temperature measurement 22
IV. Options 23
17. Options screen 24
17.1. Functions 24
17.2. Memory 24
17.3. Miscellaneous 24
17.4. Info 26
18. Memorising readings, memory readout 27
18.1. Entering readings into the memory 27
18.2. Viewing and deleting readings 28
19. Power, replacing the rechargeable batteries 29
20. Technical data 30
21. Ordering information 31
22. Technical service 32
23. Warranty 32
24. Equipment disposal 33


I. INTRODUCTION

- 2 -
VWR Collection PH-130 pH-meter instruction manual v1.0x
1. PACKAGE CONTENT
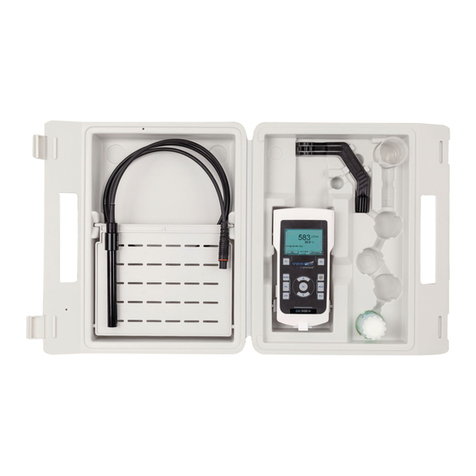
1. PH-130 pH meter.
2. Combination pH electrode with temperature probe.
3. pH 4,00 , pH 7,00, pH 10,00 buffer solution, 50 ml each.
4. Electrolyte – saturated KCl – 50 ml.
5. Plastic case.
6. 5V/1000mA power adapter.
2. EXPLOITATION NOTICES
Dear User!
We recommend a careful reading of the manual, in other case some of
the features may stay unused or using the meter may be troublesome.
Using electrodes of good quality and replacing them after a suitable time
ensures obtaining high measuring accuracy.
Clean electrode membrane is the main condition of correct readings. After
each measurement the membrane should be rinsed with distilled water. Oil,
pastes, grease, etc., sholud be removed according to the instructions
provided in the electrode’s manual.
We wish a pleasant and trouble-free work with our meter.
3. CHARACTERISTICS OF THE METER
Two kinds of power source: the rechargeable battery and the power adapter,
enable work in the field and long-lasting measurements in laboratory. The
meter’s memory is independent from power supply. Waterproof housing
enables working in difficult conditions. Minimised size and weight facilitate
field work.
The most important features of PH-130 are:
- high accuracy and stability;
- automatic and manual temperature compensation;
- automatic recognition of pH buffers;
- default values of buffer solutions;
- information about the pH electrode condition (buffer & slope value);
- storing of the calibration date and parameters of the electrode;
- possibility of introducing the time of calibration validity and signallisation of
its expiry;
- signalising of the reading stabilisation;
- storing measurement results with time, date and temperature;
- large LCD backlit display with brightness control and touchscreen;
- real time clock with date;
- automatic switch off after time set by the user.

- 3 -
4. THE OUTSIDE VIEW
On the front wall of the meter there is a graphic LCD placed (Pic. 1), which
displays the following readings:
- pH measurement or mV measurement in mV units;
- temperature measurement.
At the top of the LCD the current time and date are displayed.
Choosing particular functions is described in the chapter 17.1. Symbols of the
units are displayed next to the reading.
Pic. 1.
The automatic temperature compensation is signalised by the symbol, the
manual compensation – by the symbol (next to the temperature reading).
The exclamation symbol (Pic. 1.) is displayed on the left in the following
situations marked with the colours:
yellow - electrode efficiency loss detected during the last calibration or
the calibration validity date expired (see the chapter 11);
red - characteristic erase, the electrode calibration necessary.
The rechargeable battery condition is signalised by the symbol.

- 4 -
VWR Collection PH-130 pH-meter instruction manual v1.0x
The button (Pic. 2) placed below the display is used for switching the
meter on and off.
In case of recording readings, the button is locked until the recording
process is stopped or finished.
In the upper wall of the meter connectors are placed with the symbols given
below:
F-BNC-50 input for connecting the combination pH or redox
electrode;
t-Chinch (RCA) input to connect the temperature probe;
P- input for connecting the power adapter.
Pic. 2.

- 5 -
5. THE METER‘S MAINTENANCE
The meter is equipped with a graphic touchscreen. The maintenance
consists in pressing particular keys and windows which appear on the
screen. Grey captions in the windows and keys inform that these elements
are not active in this particular operating mode. Particular keys, connected
with the measurement function (i.e. or ) become active after
selecting the chosen function. To select, press the screen in a freely chosen
spot of the chosen function. Around this spot a frame will be displayed. To
deselect, press the spot again. If the chosen function has a possibility of
calibration, the key becomes active. If it has additional parameters,
the key also becomes active. The key is the only key in the
meter that responds exclusively to a long press (about 2 sec.). It prevents
from accidental erase of the electrode calibration data.
Entering incorrect value, attempt of calibration when the meter doesn‘t
recognise the standard are signalised by a triple warning sound, irrespective
of the chosen sound settings.

- 6 -
VWR Collection PH-130 pH-meter instruction manual v1.0x
6. SWITCHING THE METER ON AND OFF
After switching the meter on with the button, the memory test proceeds.
If the test ends successfully, the meter enters the measurement screen with
settings entered before switching it previously off. In case of detecting the
manufacturer‘s calibration data loss, the following information will appear:
Pressing the button accepts standard manufacturer‘s calibration
parameters and enters the measurement screen. Such situation will be
repeating each time the meter is switched on and requires sending the meter
to the manufacturer for servicing.
In case of the user‘s data loss (i.e. the pH electrode characteristic), the
following information will appear:
Pressing the button accepts and records in the memory the standard
pH electrode characteristic and enters the measurement screen. In such
case, calibration of the pH electrode is necessary. Analogical situation occurs
in case of other measuring functions. Repeating of the situation after
switching the meter on again informs about the EEPROM memory
malfunction and requires sending the meter to the manufacturer for servicing.
Switch the meter off by pressing the button. If the meter is powered only
by the rechargeable battery, it turns off after the time of non-use set by the
user (description in the chapter 17.3). This function is deactivated during
calibration, while memorising results or when work with the power adapter.

- 7 -
6.1. Choosing the measurement function
The user may choose the function (pH measurement or redox potential
measurement in mV) to be displayed on measurement screen.
To choose, on the measurement screen press the button, the options
screen will display with the FUNCTIONS tab open containing the previously set
configuration (Pic. 3A).
A B
Pic. 3
Choose the function by pressing the relevant window, next to the chosen
window the marking symbol will appear (Pic. 3B).
Return to the measurement screen by pressing the button.

- 8 -
VWR Collection PH-130 pH-meter instruction manual v1.0x
6.2. Stabilised reading
The stabilised reading signalisation is active only for the reading marked with
a frame. If the measured value meets the criterium of the stabilised reading, it
is signalised by green colour of the frame and additionally with a sound, if it
has been activated. In this mode the meter does not record changes of the
measured value in a certain range and does not display them. The meter
leaves the stabilised reading mode after exceeding this range, the frame
changes its colour to white and the meter displays the current measurement
value.
To choose the stabilised reading signalisation, on the measurement screen
press the button, the options screen will display with the FUNCTIONS
tab open containing the previously set configuration (Pic. 4A).
A B
Pic. 4
The window for choosing the stabilised reading signalisation mode is placed
below (Pic. 4B):
- the stabilised reading signalisation is off;
- the stabilised reading signalised with changing the frame
colour from white to green (only for reading marked with a
frame);
- the stabilised reading signalised by colour change and a
sound.
Return to the measurement screen by pressing the button.

- 9 -
7. PREPARATION TO WORK
Before starting measurements:
- connect prepared combination pH electrode or redox electrode to the F
(BNC-50) input;
- connect the temperature probe to the t (Chinch/RCA) temperature input;
- if work with power adapter is planned, connect it to the P input;
- switch the meter on by pressing the button.
7.1. Choosing the kind of the temperature compensation
The meter switches itself to the automatic or manual temperature
compensation mode. Connecting the temperature probe switches the
automatic temperature compensation on. Next to the reading the symbol is
displayed. After disconnecting the probe the meter enters the manual
temperature compensation mode. Instead of the symbol the is displayed.
In case of the manual temperature compensation the temperature value is
set on the temperature measurement parameters screen.

- 10 -
VWR Collection PH-130 pH-meter instruction manual v1.0x
II. pH MEASUREMENT

- 11 -
8. PREPARATION OF THE pH ELECTRODE
The electrode should be prepared to work according to the manufacturer’s
instructions. It is crucial to keep the electrode’s membrane clean, wash it
accurately with distilled water after each measurement and gently dry with
tissue paper.
9. THE pH MEASUREMENT PARAMETERS
Enter the pH measurement parameters screen by pressing the pH
measurement result (a frame displays on it - Pic. 5A), and next the
button. The screen (Pic. 5B) enables viewing the buffer solution values and -
after pressing the button - (Pic. 5C) the used calibration points and
calibration validity time.
A B C
Pic. 5
Return to the measurement screen by pressing the button.
9.1. Calibration points and date
After pressing the button the following parameters are displayed
(Pic. 5C): the electrode condition, calibration points, validity time and date of
the last calibration. Markers next to the calibration points windows inform that
the last calibration was performed in these particular solutions.
9.2. Calibration validity date
The meter stores the calibration validity time for the electrode. Expiry of this
time is signalised with a yellow symbol. To set the calibration validity time,
press the VALIDITY window, the numerical keyboard will appear to enter the
number of days and confirm it with the button.

- 12 -
VWR Collection PH-130 pH-meter instruction manual v1.0x
10. CALIBRATION
Before starting measurement with a new electrode or before making
measurements, which require high accuracy, the electrode connected with
the meter should be calibrated. Results of the measurements made without
the calibration will be burdened with a significant error. Calibration is made in
buffer solutions of strictly defined values. It is based on comparing the
buffer’s value with the value displayed by the meter and next in automatic
introduction of correction which is taken into consideration during next
measurements. Calibration should be periodically repeated because the
electrode’s parameters may change during exploitation, what influences the
accuracy. The frequency of this procedure depends on the demanded
accuracy, the number of the measurements carried out, conditions in which
the electrode was used, temperature and value of the measured solutions. In
order to obtain good calibration results, the values of the applied buffers
should be compliant with the default values in the meter. During the
calibration process, after inserting the pH electrode and the temperature
probe into the buffer, the meter detects the buffer’s value.
When the highest accuracy is required, it is recommended to use fresh and
certified buffer solutions.
The temperature affects the buffer solutions pH value. In order to provide pH
buffer value corresponding to the default value in the meter, during the
calibration process the buffer’s temperature has to be equal 20 oC.
If the electrode symbol turns yellow after the calibration is finished, it informs
that the electrode lost its efficiency and will have to be replaced soon. An
additional information is shown on the electrode calibration points screen
(description in the chapter 11).
Calibration in one solution does not guarantee high accuracy. If the accuracy
requirements are not very high and the measurement is made in the whole
measuring range one-point calibration should be made with use of 7.00 pH
buffer solution. Thanks to this the error connected with the offset of the
electrode will be eliminated.
At the rest of the points standard electrode’s slope parameters from the
meter’s memory will be adopted. This slope corresponds to the theoretical
efficiency of pH electrode. In case of accurate measurements in the whole
range we recommend three-point calibration. In case of measurements in
acids calibration in 2 buffer solutions: 4.00 and 7.00 pH is recommended, in
case of alkali measurements calibration in 7.00 and 10.00 pH buffers is
advisable. In PH-130 the electrode characteristic is approximated linearly
between the calibration points.
Entering the calibration mode erases the stored electrode’s
characteristic.
The erased characteristic is signalised by the red colour of the symbol.

- 13 -
10.1. Calibration in buffer solutions
When the electrode is prepared for the measurement, start the calibration in
the buffer solutions. The buffers may be applied randomly.
To start calibration:
- connect the pH electrode and temperature probe to the F and t connector
respectively (Pic. 2);
- enter the calibration mode: on the measurement screen mark the pH result
with a frame, press and hold the button until the background turns
red (Pic. 6.A). The previous electrode characteristic is erased;
- put the pH electrode and temperature probe into the solution; do not touch
the vessel‘s walls and bottom. It is advisable to use an electrode holder.
The meter will mark the detected buffer‘s value with frame;
- wait until the reading stabilises (it will be probably slightly different than the
calibration point value).
When the reading stabilises, press the button. Next to the detected
buffer value an indicator will appear, what informs that the calibration value
has been recorded. Simultaneously, the measurement value will be adjusted
to the detected buffer value (Pic. 6.B). If the reading is still different than the
solution value, wait until the reading stabilises and press the button
again.
A B C
Pic. 6.

- 14 -
VWR Collection PH-130 pH-meter instruction manual v1.0x
If the meter does not detect the buffer‘s value, it will signalise an error after
pressing the button with a tripple warning sound. In such case check
the solution value or the electrode as it may be broken.
Only the pH buffers values detected during calibration are calculated, the
other values recorded earlier do not influence the reading.
After finishing calibration in the first buffer rinse the electrode and
temperature probe (if used) in distilled water and start calibration in next
buffers repeating the last point of the activities described above.
10.2. Calibration with manual temperature compensation
In case of the temperature probe breakdown, calibration with manual
temperature compensation may be proceeded. To start this calibration,
disconnect the temperature probe. It switches the meter to manual
compensation. Next to the entered (not measured) temperature value instead
of the symbol the symbol will appear. Entering the temperature value for
the manual compensation is described in the point 15.2. Than act identically
as in case of calibration with automatic temperature compensation, excluding
the temperature probe connection.
In order to enter the temperature value, press the window and in the
open screen press the MANUAL TEMP. window, the numerical keyboard will
appear to enter the value and confirm with the button.

- 15 -
11. CHECKING THE ELECTRODE CONDITION
After pH electrode calibration the meter calculates its parameters: offset in
pH units and slope defined as efficiency in percents.
The electrode offset may be defined in pH or mV units.
An ideal electrode immersed in the 7.00 pH buffer before calibration should
indicate 7.00 pH which equals 0.00 mV. If the reading is different, it informs
that the electrode has an offset, which may be reduced by calibration.
The SEM parameter may be also checked by immersing the electrode in 7.00
pH buffer and switching the meter to measurement in mV.
When the electrode is calibrated, its condition may be checked. To check,
enter the calibration points screen according to description in the point 9.1. At
the top of the screen (Pic. 5C) two parameters, determined during the last
calibration are displayed: (zero offset in pH) and (condition in %).
In case of the electrode condition loss, the zero and condition parameter are
displayed in yellow; in case of calibration validity date expiry if the last
calibration date is also displayed in yellow.
In case of one-point calibration, only the zero offset parameter is displayed.

- 16 -
VWR Collection PH-130 pH-meter instruction manual v1.0x
12. pH MEASUREMENT
Before starting the measurement the meter and the pH electrode have to be
prepared for work (chapters 7 and 8 respectively). Good condition of the
electrode is crucial for obtaining the correct readings.
12.1. Measurement with automatic temperature compensation
- turn the meter on by pressing the button;
- connect the temperature probe and the combination pH electrode to the
F and t connectors respectively (Pic. 2), the symbol will be displayed;
- immerse the electrode and the temperature probe in the measured
solution. During measurements in vessels don’t touch the bottom and the
walls with the electrode. It is advisable to use an electrode stand;
- after stabilisation read the result.
Accurate laboratory measurements require using of a magnetic stirrer.
NOTE: exceeding the measurement range is signalised with red colour of the
displayed pH value; exceeding the temperature compensation range – with
yellow colour.
This manual suits for next models
1
Table of contents
Other VWR Measuring Instrument manuals

VWR
VWR DO210 User manual

VWR
VWR MD 8000 L User manual

VWR
VWR TRACEABLE User manual

VWR
VWR Avantor MU 6100 L User manual

VWR
VWR pH 1100 H User manual

VWR
VWR avantor PH-2500L User manual

VWR
VWR avantor CO 3100 H User manual

VWR
VWR MD 8000 H User manual

VWR
VWR 304 Series User manual

VWR
VWR CO 3100 L User manual