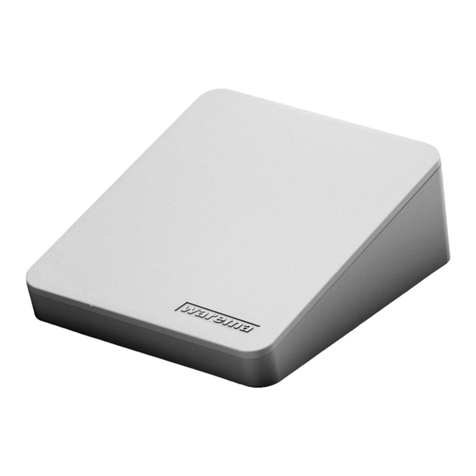
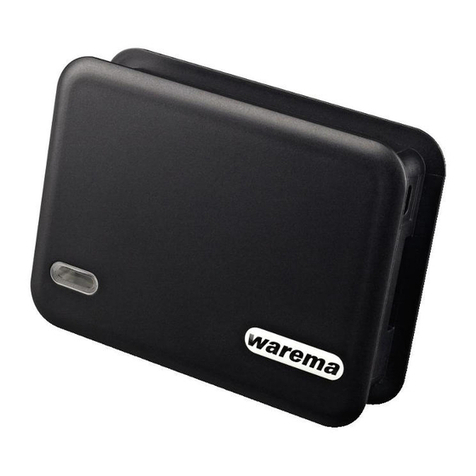
WAREMA climatronic WebControl User manual

WAREMA climatronic WebControl
Manual
(Keep for future use)
Valid from 01 December 2015
2011980_d
Sun. Light. WAREMA.
Photo: Habermaass GmbH

2011980_d•en•2015-12-01
We reserve the right to make technical changes
2
WAREMA climatronic® WebControl
General information
The publication of this document supersedes all previous corresponding doc-
umentation. We reserve the right to make changes in the interest of technical
progress. Particular care was taken in producing the text and graphics in this
documentation. In spite of this, we cannot accept liability for any existing er-
rors or the consequences thereof.
Legal information
Operating instructions, manuals and software are protected by copyright.
All rights to the software are specified in the license agreement included.
WAREMA climatronic is a registered trademark of WAREMA Renkhoff SE.
WAREMA and the WAREMA logo are trademarks of WAREMARenkhoff SE.
All other brand or product names included in this document are trademarks
or registered trademarks of their respective owners.
Contact
Customer Center Control Systems
Sales, order processing and applied engineering for the following sales re-
gions:
North (Hamburg, Hannover)
Tel. +49 9391 20-3760 • Fax -3769
steuerungssysteme.nord@warema.de
East (Berlin, Limbach-Oberfrohna, Dresden)
Tel. +49 9391 20-3770 • Fax -3779
steuerungssyst[email protected]
West (Düsseldorf, Hagen, Cologne)
Tel. +49 9391 20-3750 • Fax -3759
steuerungssysteme.west@warema.de
Central (Frankfurt, Gießen, Marktheidenfeld)
Tel. +49 9391 20-3750 • Fax -3759
steuerungssysteme.mitte@warema.de
South (Nuremberg, Munich)
Tel. +49 9391 20-3780 • Fax -3789
steuerungssyst[email protected]
Southwest (Karlsruhe, Stuttgart, Villingen, Freiburg)
Tel. +49 9391 20-3780 • Fax -3789
steuerungssysteme.suedwest@warema.de
International
Tel. +49 9391 20-3740 • Fax -3749
controlsystems.international@warema.de
Control Systems Helpline
Tel. +49 9391 20-6760 • Fax -6769
Building system technology sales
Dillberg 33, 97828 Marktheidenfeld
Tel. +49 9391 20-3720 • Fax -3719
© 2015, WAREMA Renkhoff SE

2011980_d•en•2015-12-01 We reserve the right to make technical changes 3
Contents
1 Safety instructions........................................................................................... 4
1.1 Meanings of symbols and pictographs ...........................................................4
1.2 Intended use .........................................................................................................4
1.3 Target group .........................................................................................................5
1.4 Additional documents ..........................................................................................5
1.5 Tested browsers....................................................................................................5
2 Introduction ...................................................................................................... 6
2.1 Functions ................................................................................................................6
2.2 Scope of delivery ..................................................................................................6
2.3 Connection diagram.............................................................................................6
2.4 Wiring diagram ......................................................................................................7
2.5 Connections and LEDs........................................................................................8
3 User interfaces ................................................................................................. 9
3.1 Dynamic interfaces...............................................................................................9
3.2 Configuration menu........................................................................................... 10
3.3 Operation menu ................................................................................................. 11
3.4 System menu...................................................................................................... 12
4 Commissioning .............................................................................................. 13
4.1 USB / RS 485 port............................................................................................ 13
4.2 Access through a browser............................................................................... 13
4.3 Password use ..................................................................................................... 15
4.4 Creating and editing rooms ............................................................................. 16
4.4.1 Assigning channels/groups/scenes to a room ..................................... 17
4.4.2 Copying channels/groups/scenes to an existing room....................... 18
4.4.3 Manual synchronisation.............................................................................. 19
5 Operation of channels, groups, scenes....................................................... 20
5.1 Operating channels and groups ..................................................................... 20
5.2 Operating scenes............................................................................................... 21
6 Settings ........................................................................................................... 23
7 System ............................................................................................................ 25
7.1 SD memory card................................................................................................ 25
7.1.1 Loading firmware updates ......................................................................... 25
7.2 Resetting the device to the factory settings.................................................. 26
8 DHCP disabled ............................................................................................... 27
9 External access to WAREMA climatronic® WebControl via the Internet .. 28
9.1 What is VPN?...................................................................................................... 28
10 Connecting with the WAREMA climatronic® WebControl App .................. 29
11 Technical data ................................................................................................ 30
12 Troubleshooting ............................................................................................. 31
Table of contents
2011980_d•en•2015-12-01
We reserve the right to make technical changes
4
WAREMA climatronic® WebControl
1 Safety instructions
We have developed and tested the WAREMA products and this software in
compliance with basic safety requirements.
Residual risks nevertheless remain!
For this reason, please read this manual before commissioning and operat-
ing the controls.
It is very important that you adhere to the safety instructions listed in this
section and the warning information contained in this manual. Failure to
do so will void any warranty claims against the manufacturer.
Keep this manual for future use.
WARNING
The electrical installation must be performed by a certified electrician
in accordance with the electrical installation regulations published
by the Association of German Electrical Engineers (VDE 0100) or the
standards and legal requirements of the country in which the device is
being installed. The electrician must observe the installation instructions
included with the electrical devices.
1.1 Meanings of symbols
and pictographs
The safety information contained in these instructions is marked with warning
symbols.
CAUTION
Reminder to be careful.
Failure to comply may result in property damage.
NOTE The term NOTE designates important information and helpful tips.
The square indicates an instruction or a prompt for action. Perform the de-
scribed step.
The triangle denotes an event or the result of a preceding action.
The black triangle is a bullet point for lists or selections.
1.2 Intended use
WAREMA climatronic WebControl allows you to control different devices,
such as sun shading products, lighting, HVAC equipment and window drives,
using the channels on your existing WAREMA climatronic control system.
Safety
instructions

2011980_d•en•2015-12-01 We reserve the right to make technical changes 5
1.3 Target group
These instructions are intended for persons who wish to operate their sun
shading products using an app or browser.
1.4 Additional documents
These instructions provide all of the information necessary to configure the
WAREMA climatronic WebControl. The following documents are available in
addition to these instructions:
Document Number
WAREMA climatronic 2.0 installation instructions 2003869
WAREMA climatronic 2.0 operation instructions 2003868
WAREMA climatronic studio software 890674
1.5 Tested browsers
Browsers:
Internet Explorer 11
Firefox 35
Google Chrome 40
Safari 8
Notes

2011980_d•en•2015-12-01
We reserve the right to make technical changes
6
WAREMA climatronic® WebControl
2 Introduction
With the WAREMA climatronic WebControl, you can comfortably operate
your sun shading system from home on your own WLAN network using your
web browser or mobile devices (laptops, smartphones, tablets).
An app is available for Android devices.
Users can operate other smartphone operating systems, such as iOS devic-
es, using browsers.
NOTE Up to three browsers can connect to the WebControl at one time.
2.1 Functions
You can create up to 64 rooms and assign custom names. You can also
copy channels and scenes and save them to selected rooms (maximum of
10 entries per room, i.e. channels, groups or scenes).
The project data is stored directly on the device.
With the WAREMA climatronic control panel, you can edit
1-64 channels
1-64 groups
1-16 scenes
Control modes and
absent mode
can be completely switched on or off.
An SD card slot allows you to create a backup copy of the project and up-
load a firmware update (Chapter 7.1.1 on page 25).
2.2 Scope of delivery
Fig. 1
WAREMA climatronic WebControl and included LAN cable for the LAN con-
nection between WAREMA climatronic WebControl and the WLAN router.
2.3 Connection diagram
power supply unit
24V DC 2,5A
climabus
LAN (network)
controlbus
WLAN
230V/AC
WAREMA climatronic® switch actuators
climatronic
WebControl®
Fig. 2 Connecting WAREMA climatronic WebControl
Introduction

2011980_d•en•2015-12-01 We reserve the right to make technical changes 7
The WAREMA climatronic WebControl is connected to the WAREMA cli-
matronic control panel via the controlbus. Power must be supplied to the
WAREMA climatronic WebControl from the WAREMA climatronic power
supply unit.
The WAREMA climatronic WebControl is also connected to your existing
configured router via the included LAN cable.
(One WAREMA climatronic WebControl can be connected per router.)
"DHCP" must be enabled on the router in order for the IP address to be as-
signed automatically. If this is not possible, please read the information pro-
vided under "DHCP" (Chapter 8 on page 27).
The second connection on your control panel is where the climabus and its
switch actuators and sensors are located.
The router uses the LAN to communicate with the PC or laptop and the
WLAN to communicate with mobile devices such as tablets or smartphones.
2.4 Wiring diagram
X5 X6
JY(St)Y 4x2x0.8 mm ∅
Bus A
Bus B
0 V
24 V DC to other
bus devices
climabus
Bus A
Bus B
controlbus
terminating resistance120Ω
120Ω per terminating restistance
Ethernet
max. line length 200 m
X7
WH
YE
RD
BK
OG
BU
WH
YE
OG
BU
Fig. 3 Wiring diagram
Introduction

2011980_d•en•2015-12-01
We reserve the right to make technical changes
8
WAREMA climatronic® WebControl
2.5 Connections and LEDs
terminating resistance120Ω
Fig. 4
Connections and LEDs on the WAREMA climatronic WebControl (front, bottom)
Pos. Function
Mode button
Resets device to the factory settings (see 7.2 on page 26)
Reset button
Short press (< 1 s): restarts device (power reset)
Long press (> 5 s): loads firmware (see Chapter 7.1.1 on page 25).
Status LED
Lights up briefly in orange after switching on, then red.
LED shines steady red: IP address not acquired, no router connection
LED shines steady green: IP address acquired, project available
LED flashes green: IP address acquired, no project loaded yet.
controlbus LED
Shines or flashes to indicate communication between the WAREMA clima-
tronic and the WAREMA climatronic WebControl.
SD card slot
Storage option for backup copies of the project and loading projects and
firmware/application updates (see Chapter 7.1.1 on page 25).
control bus connection
The WAREMA climatronic WebControl is connected to the WAREMA clima-
tronic via the orange/blue terminals.
A 120 terminating resistor is premounted between the terminals.
climabus connection
The power supply is connected using the yellow/white terminals.
RJ45 socket, yellow LED
Flashes when there is data traffic between the WAREMA climatronic Web-
Control and the IP router.
RJ45 socket, green LED
Remains lit when the physical connection between the WAREMA climatronic
WebControl and the IP router is functional.
NOTE If an IP address is not assigned after 1min., the status LED flashes red. To
acquire an IP address in this case, see Chapter8 on page 27.
Introduction

2011980_d•en•2015-12-01 We reserve the right to make technical changes 9
3 User interfaces
3.1 Dynamic interfaces
Depending on which format you use for displaying your WAREMA climatron-
ic WebControl (tablet, PC or smartphone), you will automatically be provid-
ed with different interfaces.
The positioning of the user interfaces is adjusted accordingly. As a result of
the different views, these interfaces may have a slightly different appearance
than the images contained in this manual. Our images show a laptop view.
Below are two other examples of view sizes on Android devices:
Fig. 5 User interface on a tablet Fig. 6 User interface on a smartphone
NOTE The illustrated product positions do not correspond to their actual positions.
User interfaces

2011980_d•en•2015-12-01
We reserve the right to make technical changes
10
WAREMA climatronic® WebControl
3.2 Configuration menu
①
②
③
⑤
⑥⑦
④
⑧⑨
Fig. 7 Interface of the WAREMA climatronic WebControl, Configuration menu
Change password
Synchronise*
Create rooms
Manage channels, groups and scenes
Edit rooms
( icon: assign names or rename
icon: delete rooms,
icon: copy rooms)
Assign channels, groups and scenes
Activated list symbol: move channels / groups / scenes using drag
and drop
Create rooms
Activated list symbol: move rooms using drag and drop
NOTE *The "Synchronise" button only works "in one direction", i.e. you can only
synchronise the WAREMA climatronic WebControl with your WAREMA
climatronic control panel, but not the other way round. Rooms etc. that you
have created in your app/browser can NOT be transferred to the control pan-
el by pressing "Synchronise".
User interfaces

2011980_d•en•2015-12-01 We reserve the right to make technical changes 11
3.3 Operation menu
① ②
③
④
⑤
⑥
⑦ ⑧ ⑨
⑩
Fig. 8 Interface of the WAREMA climatronic WebControl, Operation menu
Selection of rooms
Selection of channels, groups and scenes
Slider for changing the inclination angle of slat products
(e.g. external venetian blinds)
The grey degrees value indicates a possible inclination angle of the
sun shading product.
Slider for changing the position of sun shading products
The white percentage value indicates the new setpoint position of the
sun shading product
Up button moves the sun shading product upwards/inwards
Stop button stops the movement
Down button moves the sun shading product downwards/outwards
Start button moves the sun shading product after the position is
changed using one of the sliders.
User interfaces

2011980_d•en•2015-12-01
We reserve the right to make technical changes
12
WAREMA climatronic® WebControl
3.4 System menu
①
②
③
④
⑤
⑥
⑦
⑧
⑨
⑪⑩
Fig. 9 Interface of the WAREMA climatronic® WebControl, System menu
Display of:
DHCP "ON" (default) or "OFF" (see Chapter 8 on page 27)
IP address (assigned to the WAREMA climatronic WebControl
by the router) in DHCP
Subnet (assigned to the WAREMA climatronic WebControl
by the router) in DHCP
Gateway (assigned to the WAREMA climatronic WebControl
by the router) in DHCP
Project name (the name of the project is always "Projekt.bin")
Software version of the application (menu display in browser)
Firmware version
Bootloader version
Drop-down list for language selection (de, en)
Saves project on SD card
Loads project from SD card
User interfaces

2011980_d•en•2015-12-01 We reserve the right to make technical changes 13
4 Commissioning
Before you commission the WAREMA climatronic WebControl, you will need
to have an existing project on your WAREMA climatronic system. Follow the
instructions provided here to complete the commissioning process. Use the
Wizard, which guides you through the menu, or the comfortable WAREMA
climatronic studio software.
4.1 USB / RS 485
port
There are two types of ports on your WAREMA climatronic control panel: in
the WAREMA climatronic menu illustrated below, you can choose to enable
the USB port on the left side of the control panel or, alternatively, the RS 485
port on the back of the panel:
Fig. 10 WAREMA climatronic menu for selecting the correct port type
To enable use of the WAREMA climatronic WebControl, the RS485 port on
the back of the WAREMA climatronic control panel must be selected.
(The USB port is required for connecting a PC with the WAREMA climatronic
studio and is not needed in this case).
4.2 Access through a
browser
You can commission the WAREMA climatronic WebControl using your
browser or the free app (see Chapter 10 on page 29).
The following description illustrates how to commission the WebControl from
a laptop using a browser.
Once you have connected the WAREMA climatronic WebControl, open your
browser.
If you are using a PC operating system, type "http://webcontrol-c" in your
browser's address bar.
If you are using a MAC operating system, type "webcontrol-c.local" in the ad-
dress bar.
The screen interface jumps to the "Operation" menu item.
Commissioning

2011980_d•en•2015-12-01
We reserve the right to make technical changes
14
WAREMA climatronic® WebControl
NOTE If this procedure cannot be successfully completed on your smartphone and/
or PC, the web address of the WAREMA climatronic WebControl was not
recognised by your router. In this case, open the DHCP client list of your IP
router (using your router manual). It contains the IP addresses associated
with the WAREMA climatronic WebControl (it will look something like this:
192.168.178.20).
Then enter the number in the address bar of your browser.
Fig. 11 Start window for the WAREMA climatronic WebControl
NOTE Another method of determining the access data for your router is to use oth-
er software programs, such as the free "FING" app. After you download this
app, you can use it to search your network for users. Your WAREMA clima-
tronic WebControl is listed under the name "Microchip Technology". This will
help you quickly find the required IP address.
Fig. 12
"Fing" shows the IP address of the WAREMA climatronic WebControl (Micro-
chip Technology); view on an Android mobile (l) and iOS smartphone (r).
Commissioning

2011980_d•en•2015-12-01 We reserve the right to make technical changes 15
4.3 Password use
Because a project does not yet exist when you access the system for the first
time, you will need to click on the "Configuration" menu.
You will then be prompted to enter a password. For initial access, please use
the following preset password:
5858
You can change the password at any time. To do so, click the "Change pass-
word" button in the "Configuration" menu. You can assign a browser pass-
word with up a maximum of 10 characters. Please remember the password
you have assigned.
NOTE ONLY use letters and numbers for your password; do NOT use special char-
acters.
Fig. 13 Changing the password
NOTE If the system is not used for > 1 hour, the assigned password must be en-
tered again.
NOTE Assigning a password is not mandatory. If you do not wish to use a pass-
word, leave the password field blank and click the "Accept" button.
Commissioning

2011980_d•en•2015-12-01
We reserve the right to make technical changes
16
WAREMA climatronic® WebControl
4.4 Creating and editing
rooms
To create rooms, click the "+" button next to "Room".
A window appears in which you can enter the name of your room (for exam-
ple, "Kitchen").
Click "Create".
The room is then created and appears in the left column of the menu.
Fig. 14 Creating rooms
The room "Kitchen" now appears in orange, which means that is selected.
When a room is selected, you can edit it using the icon. For example, you
can change the name.
The icon can be used to delete the room.
To create another room, click the next to the .
A new room is created.
The icon activates a mode in which the created rooms can be moved.
To rearrange the rooms, move the mouse onto the corresponding room in
the list view and press and hold the left mouse button to drag and drop the
room into the desired location.
Fig. 15 Moving rooms using drag and drop
NOTE A newly created scene (Kitchen scene 1) will be displayed in the menu.
The orange line always denotes a scene.
Commissioning

2011980_d•en•2015-12-01 We reserve the right to make technical changes 17
4.4.1 Assigning channels/
groups/scenes to a room
For the room that you created and highlighted in orange in the overview, you
can then assign different preset channels provided by the WAREMA clima-
tronic(for sun shading products such as roller shutters, external venetian
blinds, etc., but also for light).
Fig. 16 Assigning channels
To assign a channel, click the "+" button next to "Channel/Group/Scene" in
the right column of the overview.
A window then appears as illustrated in Fig. 16.
Select what you wish to assign and click "Create".
The selected channel is copied to the room in which you are currently locat-
ed on the left side (in orange font).
Commissioning

2011980_d•en•2015-12-01
We reserve the right to make technical changes
18
WAREMA climatronic® WebControl
4.4.2 Copying channels/groups/
scenes to an existing
room
On the right side, click a channel, group or scene.
The channel is now highlighted orange, and the and icons, which you
are already familiar with form the room creation menu, will appear.
Click the icon.
All the room names on the left side now also have an icon.
The highlighted channel will then be copied to the room that you click.
The icon activates a mode in which you can move channels that have
been created. The process here is same as for moving rooms (see also Fig.
15).
Select the room you would like to edit by clicking on it.
To move a channel, move the mouse onto the corresponding channel in
the list view and press and hold the left mouse button to drag and drop the
channel into the desired location.
NOTE The configuration you have created (kitchen, roller shutter...) will appear in
the app on your Android device and on the "Operation" page of your browser
the next time you open either one.
The commissioning process is now complete.
NOTE We recommend saving the project created in your WAREMA climatronic®
WebControl on an SD card once you have successfully completed the com-
missioning process (see Chapter 7.1 on page 25).
Commissioning

2011980_d•en•2015-12-01 We reserve the right to make technical changes 19
4.4.3 Manual synchronisation
If you wish to make subsequent changes on the WAREMA climatronic con-
trol panel, you will need to then synchronise these changes with the WARE-
MA climatronic WebControl.
To do this, go to the "Configuration" menu and press the "Synchronisation"
button. This loads the current designations from the WAREMA climatronic
control panel and updates the corresponding text in the user interface.
NOTE Synchronisation only ever occurs in one direction: from the WAREMA clima-
tronic control panel to the WAREMA climatronic WebControl.
NOTE Theoretically, it is possible to manually operate the WAREMA climatronic
control panel and the WAREMA climatronic WebControl simultaneously. In
this case, however, the latter of the two actions will have priority.
NOTE If a channel, group or scene is deleted on the WAREMA climatronic control
panel, the WAREMA climatronic WebControl will recognise this after manual
synchronisation and indicate it by displaying an "!" in a red warning triangle
next to the WAREMA logo (in the "Configuration" menu and in the "Operation"
menu). Clicking on the "!" opens a window displaying the deleted items.
These channels should be deleted in the "Configuration" menu so that the
WAREMA climatronic WebControl does not erroneously continue to display
them (since they no longer have any function).
Fig. 17 Info symbol appears at top left
The Info window displays a list and allows you to also delete those objects
from the WAREMA climatronic WebControl which have already been deleted
on the WAREMA climatronic control panel ("Configuration" menu).
Commissioning

2011980_d•en•2015-12-01
We reserve the right to make technical changes
20
WAREMA climatronic® WebControl
5 Operation of
channels, groups,
scenes
5.1 Operating channels
and groups
NOTE The channels, groups or scenes used are read from the WAREMA climatron-
ic and have the same designations as they do on the control panel.
On the WAREMA climatronic WebControl, you can also create rooms and
assign descriptive names to them (for example, Kitchen, Living Room, Chil-
dren's Room 1 or 2), which makes assigning channels, groups and scenes a
clear and easy process.
To use this functionality, open your browser. If you are using a PC operating
system, type "http://webcontrol-c" in your browser's address bar. If you are
using iOS/OSX, enter "webcontrol-c.local". (See also Chapter 4.2 on page
13).
Fig. 18 Menu for operating the channels
Then switch to the "Operation" menu.
Choose a room (left column) and channel (right column) by highlighting the
desired selections.
In this case, an example for a possible position of your channel (here, for
instance, Kitchen, External venetian blind kitchen) is shown shaded in grey in
the right column.
To change the position of the unit (roller shutter, external venetian blind, ...),
for example by lowering it, drag the slider to the desired setpoint position
while keeping the mouse button pressed.
The desired position you set is displayed as a percentage in white. This per-
centage shows you the new setpoint position.
Press the "" symbol for "play" and start the process. The " " stop button
allows you to stop the product's movement at any time, even before the prod-
uct reaches the defined position.
The spinning wheel indicates that the selected channel is moving, and that
the move command is being sent to the WAREMA climatronic (the product's
movement time is not visible in the display).
Operation
Table of contents
Other WAREMA Control Unit manuals

WAREMA
WAREMA GA Kompakt User manual

WAREMA
WAREMA MSE Compact 2 REG User manual

WAREMA
WAREMA WMS Splitter UP User manual

WAREMA
WAREMA Uniswitch ZL User manual

WAREMA
WAREMA MSE Haustechnik ZL User manual

WAREMA
WAREMA WMS WebControl pro User manual

WAREMA
WAREMA GA Kompakt User manual

WAREMA
WAREMA GA Kompakt User manual

WAREMA
WAREMA WMS WebControl User manual

WAREMA
WAREMA Omnexo User manual