manuals.online logo
Brands
  1. Home
  2. •
  3. Brands
  4. •
  5. WAREMA
  6. •
  7. Control Unit
  8. •
  9. WAREMA GA Kompakt User manual

WAREMA GA Kompakt User manual

816835_c•en•12.07.2011We reserve the right to carry out improvements1
Operating and installation instructions
GA Kompakt
Keep for future use!
Valid from 20 July 2011
General
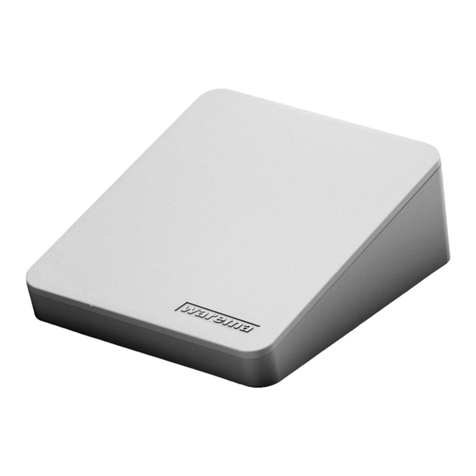
Fig. 1 GA Kompakt REG
The floor distribution control (GA) enables the central
control of the motor control units of a floor. The control
signals from the sun shading control system are forwarded
to all motor control units of a floor. The sunshade drives
of this floor can be distributed to up to four facades via
the GA and controlled separately. In addition, four facade
push buttons can be connected to the GA, which enables
the connected motor control units to be jointly operated for
each facade.
Intended use
The device was developed to control sun shading sys-
tems. The approval of the manufacturer must be obtained
for uses outside of the purposes listed in these instruc-
tions.
Safety instructions
ARNINGW
The electrical installation must be per-
formed by a certified electrician in accord-
ance with the electrical installation regula-
tions published by the Association of Ger-
man Electrical Engineers (VDE 0100) or the
standards and regulations of the country
in which the device is being installed. The
specialist must observe the installation
instructions included with the electrical
device.
ARNINGW
If hazard-free operation cannot be
assumed, the device may not be started or
must be deactivated. This assumption is
justified
 If the housing or the supply lines show signs
of damage,
 The device is no longer working
ARNINGW
It is important to comply with the follow-
ing instructions in the interest of personal
safety!
■ Do not allow children to play with the operating elements of the control or remote control. Store the remote controls out of range of children.■ Make sure that no persons or objects are in the range of movement of the driven parts (blinds, window, etc.).■ Disconnect the device from the supply voltage if cleaning or other maintenance work must be performed.Function
Move commands from the local facade push buttons are
forwarded to the connected motor control units via the
GA Kompakt. After the button is pressed, the sun shad-
ing system moves in the corresponding direction and
stops after two seconds. If the button is pressed for more
than two seconds, the control will stay activated automati-
cally. The button may then be released. The sun shading
system moves until the fixed run time of three minutes has
expired. In order to clear the locked state and stop the
motor, briefly press the button for the opposite direction of
movement. The move commands from a sun shading con-
trol system have priority over the move commands from
the facade push buttons and are directly forwarded to the
motor control units. Operation via the facade push button
is blocked during a central command.
Installation
The motor control unit is, depending on the selected meth-
od of installation, designed for surface mounting (AP) or
for installation in a distributor (REG).
 AP: Insert a slotted screwdriver
(recommendation: 3.0 - 4.0mm blade) into
the respective cover opening (see Fig. 4)
and carefully pry the folding cover open.
Repeat the procedure for the second
opening of the cover. The cover can be
folded up when both catches have been
released. The second cover can be opened
in the same manner. Alternatively, the
surface-mounted variant can be mounted
on a DIN rail (TH 35-15 as per EN 60715:
2001).
 AP IP54: This device type is suitable for use in damp
locations. After the enclosure is mounted,
remove the two blue transport protectors
(foam inside the enclosure).
816835_c•en•12.07.2011We reserve the right to carry out improvements2  REG: When installing the device in a distributor,
clip it onto a symmetrical DIN rail (TH35as
per EN 60715: 2001). To ease connect-
ing the device, the terminal covers can be
removed (see Fig. 2). One of the terminal
covers can be removed to connect the
network.
Remove the terminal covers:
Insert a suitable screwdriver
into the notch!
Fig. 2 Removing the terminal covers (REG variant)
 The electrical connection of the motor
control unit is established according to the
wiring diagram on the back (see Fig. 6).
Electrical installation
An on-site overload current protection device (fuse) and a
disconnecting and isolating switch to switch off the entire
system must be provided.
The device meets the EMC directives for use in residential
and commercial areas.
Commissioning
The device is operational after the installation has been
completed and the supply voltage applied.
Maintenance
There are no parts within the device that require mainte-
nance.
Liability
Failure to comply with the product information in these
instructions and use of the device in a manner that con-
travenes its intended use and purpose may result in the
manufacture refusing to honour warranty claims for prod-
uct damage. In this case, liability for consequential harm
to persons or damage to property will also be excluded.
Follow also the instructions in the operating manual of
your sun shading system. The automatic or manual opera-
tion of the sun shading system when it is iced over, and
use of the sun shading system during severe weather, may
cause damage and must be prevented by the user by tak-
ing suitable precautions..
Disposal
After its use, the device must be disposed off according to
legal regulations or returned to your local recycling centre.
Technical data
GA Kompakt Min. Typ. Max. Unit
Supply 230 V AC
Operating voltage198 230253V ACCurrent consumption, primary1214 16 mAFloating output
DC switching voltage per facade2436 V DCAC switching voltage per facade230253V AC
Switching capacity per fa-
cade 230 V AC/cos ϕ =0.6
700VASwitching capacity per facade72W
Control per facade
Central voltage active82436 V DCCentral current active0.211.5mACentral voltage inactive–0.501.5V DCLocal voltage active82436 V DCLocal current active11.52mALocal voltage inactive-0.501.5V DCRun time, up/down3minEnclosure
DimensionsSee Fig. 3, 4, 5Degree of protection/safety class
Degree of protection (AP housing) IP 54IP54Degree of protection (REG/AP housing)IP30Safety classIConformity
Available at www.warema.de
Ambient conditions
Operating temperature-5 2040°CStorage temperature-202080°CHumidity (not condensing)104085 %RH
Miscellaneous
Automatic operation Type 1Software classAConnection
All connectionsScrewed terminalsTerminals
All terminals0.5 ... 2.5 mm2Test standards
Product standardDIN EN 60730-1: 2002-01EMC basic standardsDIN EN 61000-6-1:2002-08DIN EN 61000-6-3: 2002-08DIN EN 50366: 2003-11
3
816835_c•en•12.07.2011We reserve the right to carry out improvements
254
190
63
23
23
120
180
Fig. 3 AP housing
GA Kompakt Min. Typ. Max. Unit
Miscellaneous
Automatic operation Type 1Software classALocation of use
Clean environment
Article number
GA Kompakt in AP hous-
ing1002 743GA Kompakt in AP hous-
ing IP541002 629GA Kompakt in REG housing1002 628WAREMA Renkhoff SE Hans-Wilhelm-Renkhoff-Strasse 2 D-97828 Marktheidenfeld210 mm 180 mm
60 mm
119 mm
184 mm
-
Fig. 4 REG housing
60 mm
95 mm
90 mm
210 mm / 12 TE
Fig. 5 REG housing
816835_c•en•12.07.2011We reserve the right to carry out improvements4
PE
0V
0V
+
+
Fassade 1
Fassade 1
Fassade 2
Fassade 2
Fassade 3
Fassade 3
Fassade 4
Fassade 4
Facade 1
Facade 1
Facade 2
Facade 2
Facade 3
Facade 3
Facade 4
Facade 4
P
PE
Facade1 Central
PE NLL
91 876543912 8765439128765439128765432
192345678 1923467198234678 123465
X1
X7
N
N
L
PE
L
N
Power line provided
by customer
230V AC / 50Hz/16A
3x1,5mm
2
Power line provided
by customer
230V AC / 50Hz/16A
3x1,5mm
2
To next
GA Kompakt
Push button facade 1
To next
GA Kompakt
To next
MSE Kompakt
GA
Kompakt
Attention! Connectioon „0“ and „+“ of
terminal strip X7 must be looped through
to each GA.
PE
- Facade 1 --2Facade-Network
X3
- Single
operation-
-- 0V - terminals --
X5
0V 0V 0V 0V 0V 0V
X6
All push button lines
JY(St)Y 2x2x0,8 mm ø
Loop cable
Central control
JY(St)Y 8x2x0,8 mm ø
21
P
0
21
P
0
21
P
0
PE PE
- Facade 3 --Facade 4 -
PE
+24V
0V
To next
MSE Kompakt I
JY(St)Y 4x2x0,8 mmø
Power line provided
by customer
230V AC / 50Hz/10A
3x1,5mm
2
0V +P
X8
0V +P
X9
0V +P
X10
0V
+
PE
N
L1
00++ P
NPE NN L1
0V +24V
MSE
Kompakt I
3,15 AT
PE
N
L1
+24V
Power line provided
by customer
230V AC / 50Hz/16A
3x1,5mm
2
To next
MSE Standard
To next
MSE Standard
JY(St)Y 4x2x0,8 mmø
E
0
PE
N
L1
00 EE P
NPE NN L1
MSE
Standard
Power supply
unit Universal
3,15 AT
PE
N
L1
E
L1
N
1243
4312
L1
N
L1
N
PE PE
control
Facade 2 Central
control
- Single
operation-
Facade 3 Central
control
- Single
operation-
Facade 4 Central - Single
operation-
Push button facade 2 Push button facade 3 + 4
Fig. 6 Connection example of the floor distribution control with MSE Kompakt I and MSE Standard. For additional wiring diagrams,
see "Wiring diagrams for MSE, power supply units and GA", art. no. 816345.

Other WAREMA Control Unit manuals

WAREMA Uniswitch ZL User manual

WAREMA

WAREMA Uniswitch ZL User manual

WAREMA WMS WebControl User manual

WAREMA

WAREMA WMS WebControl User manual

WAREMA GA Kompakt User manual

WAREMA

WAREMA GA Kompakt User manual

WAREMA Omnexo User manual

WAREMA

WAREMA Omnexo User manual

WAREMA WMS Splitter UP User manual

WAREMA

WAREMA WMS Splitter UP User manual

WAREMA MSE Compact 1 UP User manual

WAREMA

WAREMA MSE Compact 1 UP User manual

WAREMA MSE Compact 2 REG User manual

WAREMA

WAREMA MSE Compact 2 REG User manual

WAREMA Minitronic Dialog User manual

WAREMA

WAREMA Minitronic Dialog User manual

WAREMA WMS WebControl pro User manual

WAREMA

WAREMA WMS WebControl pro User manual

WAREMA climatronic WebControl User manual

WAREMA

WAREMA climatronic WebControl User manual

WAREMA GA Kompakt User manual

WAREMA

WAREMA GA Kompakt User manual

WAREMA MSE Haustechnik ZL User manual

WAREMA

WAREMA MSE Haustechnik ZL User manual

Popular Control Unit manuals by other brands

Emerson White-Rodgers 36H Series installation instructions

Emerson

Emerson White-Rodgers 36H Series installation instructions

ritm Contact GSM-5-2 quick start guide

ritm

ritm Contact GSM-5-2 quick start guide

Harvia CG170T manual

Harvia

Harvia CG170T manual

Omnitronic ALT-105 user manual

Omnitronic

Omnitronic ALT-105 user manual

EFD 736HPA installation guide

EFD

EFD 736HPA installation guide

DURAG D-ISC 100 2 Series operating manual

DURAG

DURAG D-ISC 100 2 Series operating manual

Novar Trend 2VID installation instructions

Novar

Novar Trend 2VID installation instructions

AUDAC EPA104 user manual

AUDAC

AUDAC EPA104 user manual

Hayward OmniPL HLPRO4NSW installation manual

Hayward

Hayward OmniPL HLPRO4NSW installation manual

Edwards LCPV16EKA instruction manual

Edwards

Edwards LCPV16EKA instruction manual

Rotex 30308 Installation, operating,  & maintenance instructions

Rotex

Rotex 30308 Installation, operating, & maintenance instructions

Cooper Menvier Scantronic 9651 user guide

Cooper Menvier

Cooper Menvier Scantronic 9651 user guide

Dorot S100 quick start guide

Dorot

Dorot S100 quick start guide

CST Crydom HDC Series Installation sheet

CST

CST Crydom HDC Series Installation sheet

SHEN JIZHUO TECHNOLOGY JZ861 user manual

SHEN JIZHUO TECHNOLOGY

SHEN JIZHUO TECHNOLOGY JZ861 user manual

Crane D1088 Installation, operating and maintanance instructions

Crane

Crane D1088 Installation, operating and maintanance instructions

Land Pride 380-152A installation instructions

Land Pride

Land Pride 380-152A installation instructions

NOVA Swiss NV Series Repair instructions

NOVA Swiss

NOVA Swiss NV Series Repair instructions

manuals.online logo
manuals.online logoBrands
  • About & Mission
  • Contact us
  • Privacy Policy
  • Terms and Conditions

Copyright 2025 Manuals.Online. All Rights Reserved.