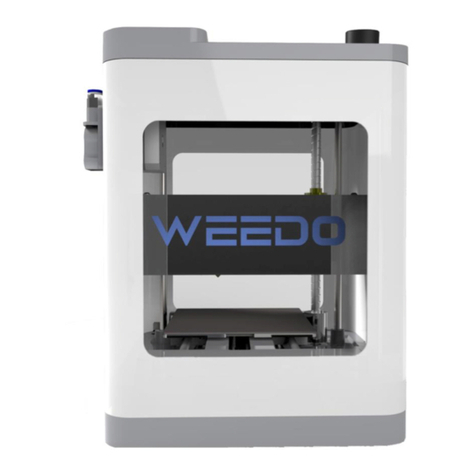
WEEDO M2 User manual

USER MANUAL
3D PRINTER

T
ABLE OF CONTENTS
USER MANUAL
1.Aenons
1.1 About The Instrucon Book
1.2 Safety Aenons
1.3 Prinng Consumable Items
1.4 Environmental Requirements
2.Printer Brief Introducon
2.1 Appearance Introducon
2.2 Technical Parameters
3. Installaon of Soware
3.1. The Installaon of Cura WEEDO Special
Use Version
4. Print the First Model
4.1. Linked with Power Supply
4.2. Assembly of Filament
4.3. Prinng Preparaon
4.4. Prinng Model
4.5. Removing Model
1
2
2
3
3
4
5
7
8
9
11
12
13
14
15
16

T
ABLE OF CONTENTS
USER MANUAL
5. Cura Soware Detailed Introducon
5.1. Basic Interface
5.2. Model Conversion
6. Operaon Panel Seng
6.1. Operaon Panel Introducon
6.2. Operaon Panel Menu
6.3. The Common Operaon on the
Operaon Panel
7. Daily Repair and Maintenance
7.1. Printer Daily Maintenance Guide
7.2. Prinng Nozzle Maintenance and
Replacement
8.Frequently Asked Quesons and
Troubleshoong (FAQ)
17
18
22
28
29
30
31
39
40
46
50

Applicaon Noces
Applicaon Noces
01

Applicaon Noces
02
1.1 About The Instrucon Book
This instrucon book contains 3D printer’s installaon, use, maintenance,
common problems and other important informaon. Please read this
instrucon book carefully before use 3D printer. For 3D printer damage and
other damages caused by violaon of safety maers and operaon
procedures given in the instrucon book, it will be borne by the user.
1.2 Safety Aenons
1、In the prinng or just aer prinng of 3D printers, as nozzle temperature
reach up to 200℃, it is forbidden to touch the prinng head directly at this
moment.
2、3D printer is equipped with acve air filtraon system; it can handle the
most irritang gases emied aer heang of filaments in prinng. But if
prinng is needed for long me, please use the printer under the
well-venlated environment.
3、As 3D printer is complicated for its structure, if there is fault, please refer
to the instrucon book to eliminate the faults. If the fault sll can’t be solved,
please contact the aer-sales department of company. To the printer
maintained by user without authorizaon, the company would not guarantee
maintenance.
4、As 3D printer is equipped with high voltage inside, it is forbidden to
disassemble the printer by the non-professional staff. To any consequence
caused by violaon of this maer, it would be borne by users.
5、Please use the electric wire to connect and USB data connecng line
provided by company. Any printer’s faults and other consequences caused by
use connecng line or USB data connecng line provided by the third-party, it
would be borne by users.
6、When 3D printer power supply is connected, please insert the power cord
into the flat three holes socket in compliance with internaonal standard. It is
not allowed to insert the power cord to the two holes socket. One line of
ground wire in the power socket must be well grounded, and should not be
suspended. The mechanic fault other accidents caused by that 3D printer is
not well grounded, the company would not be responsible.
7、The default input voltage of 3D imprinter is 220V. If 3D printer is used in
the areas out of China mainland, please contact the company aer-sales, the
company technician staff would provide you soluons.
8、When the accident power outage occurs at your area, please equip the
UPS power supply of 3D printer.
1.3 Prinng Consumable Items
Use the printer, please use the prinng consumable items provided by the
company. The prinng consumable sold in the retail market is of different
specificaons and quality levels, it is very easy to block the printer nozzle and
damage the nozzle and electrical machine. For the printer faults caused by
use the consumables of third party, our company would not guarantee to
repair.
1.4 Environmental Requirements
The 3D printer is applied with fully enclosed structure, strongly adapve to
the environment temperature, and can work normally in the 5℃ to 40℃
environment. If the environment temperature exceeds this range, the prinng
quality of finished product will be dropped accordingly.
Aer the prinng consumableis opened with its package, if they are not used
for a long me, please seal it by sealed package. Especially to the PLA
consumables, it would absorb the moisture in the air to affect the quality of
prinng finished products aer long me exposure to air.

Applicaon Noces
03
1.1 About The Instrucon Book
This instrucon book contains 3D printer’s installaon, use, maintenance,
common problems and other important informaon. Please read this
instrucon book carefully before use 3D printer. For 3D printer damage and
other damages caused by violaon of safety maers and operaon
procedures given in the instrucon book, it will be borne by the user.
1.2 Safety Aenons
1、In the prinng or just aer prinng of 3D printers, as nozzle temperature
reach up to 200℃, it is forbidden to touch the prinng head directly at this
moment.
2、3D printer is equipped with acve air filtraon system; it can handle the
most irritang gases emied aer heang of filaments in prinng. But if
prinng is needed for long me, please use the printer under the
well-venlated environment.
3、As 3D printer is complicated for its structure, if there is fault, please refer
to the instrucon book to eliminate the faults. If the fault sll can’t be solved,
please contact the aer-sales department of company. To the printer
maintained by user without authorizaon, the company would not guarantee
maintenance.
4、As 3D printer is equipped with high voltage inside, it is forbidden to
disassemble the printer by the non-professional staff. To any consequence
caused by violaon of this maer, it would be borne by users.
5、Please use the electric wire to connect and USB data connecng line
provided by company. Any printer’s faults and other consequences caused by
use connecng line or USB data connecng line provided by the third-party, it
would be borne by users.
6、When 3D printer power supply is connected, please insert the power cord
into the flat three holes socket in compliance with internaonal standard. It is
not allowed to insert the power cord to the two holes socket. One line of
ground wire in the power socket must be well grounded, and should not be
suspended. The mechanic fault other accidents caused by that 3D printer is
not well grounded, the company would not be responsible.
7、The default input voltage of 3D imprinter is 220V. If 3D printer is used in
the areas out of China mainland, please contact the company aer-sales, the
company technician staff would provide you soluons.
8、When the accident power outage occurs at your area, please equip the
UPS power supply of 3D printer.
1.3 Prinng Consumable Items
Use the printer, please use the prinng consumable items provided by the
company. The prinng consumable sold in the retail market is of different
specificaons and quality levels, it is very easy to block the printer nozzle and
damage the nozzle and electrical machine. For the printer faults caused by
use the consumables of third party, our company would not guarantee to
repair.
1.4 Environmental Requirements
The 3D printer is applied with fully enclosed structure, strongly adapve to
the environment temperature, and can work normally in the 5℃ to 40℃
environment. If the environment temperature exceeds this range, the prinng
quality of finished product will be dropped accordingly.
Aer the prinng consumableis opened with its package, if they are not used
for a long me, please seal it by sealed package. Especially to the PLA
consumables, it would absorb the moisture in the air to affect the quality of
prinng finished products aer long me exposure to air.

Printer Brief Introducon
04
Printer Brief Introducon
The printer is applied with FDM (Fused Deposion Modelin) theory, which
performs the slicing conversion for the STL 3D model, and then prints out the
real finished product one by one. The printer is of metal frame, fully closed
structure, removable prinng plaorm, acve air filtraon system and one
series of innovave design, and is characterized of high prinng speed, high
quality finished products, easy maintenance, and supports the high strength
connecng line prinng.

Printer Brief Introducon
05
2.1 Appearance Introducon
The Front View of Printer
①
②
③
④ ⑤ ⑥
⑦
⑧
①Up Cover
②Front Doors
③Le Side Door
④Power Switch
⑤LCD display screen
⑥Control Panel
⑦Removable Prinng Plaorm
⑧Prinng Nozzle

Printer Brief Introducon
06
The Right View and Back View of Printer
①
②③④
⑤
⑥
①Right Side Door
②SD Card Socket
③USB Line Socket
④Power Socket
⑤Host Fan
⑥Air Filtraon Fan

Printer Brief Introducon
07
2.2 Technical Parameters
Printing Parameters Machine Parameters
Print Size 200*150*150mm Display
Screen Model
English
Layer
Thickness
0.1~0.5mm Machine Size 37.5*33*44.5mm
Nozzle
Diameter
0.4mm Machine
Weight
14kg
Printing
Resolution
0.1mm-0.2mm Machine
Color
Black
Printing
Speed
20~150mm/s Input Voltage 110v - 220V
Positional
Accuracy
Z axis 0.0025mm
Maximum
Power
120W
XY axis 0.011mm
Filtration
System
Three Layers of Mesh Filter
Consumable Parameters Software Parameters
Consumable
Type
PLA/PLA Pro Printing
Software
Cura WEEDO Version /
ReplicatorG WEEDO Version
Consumable
Diameter
1.75mm File Format STL/GCODE
Consumable
color
Optional for multi-colors Operating
System
Windows/Linux/MacOSX
Printing
Method
USB/SD Card

08
Installaon of Soware

09
Installaon of Soware
3.1. The Installaon of Cura WEEDO
Run the soware installaon package, Cura-WEEDO, in the installaon wizard
window, click “installaon”→“Next Step”→“Complete”. In the window of
selecon installaon path window, please use the program default route.
Note: Cura installaon path is the root directory of Disc C

10
Installaon of Soware
When it is first me to use Cura soware, go to the guide interface, click
“Next”, go into the computer model selecon interface, select WEEDO M2,
click “Next”, go to the ready interface, click “Finish”, the installaon is
completed.

Print the first model
11
Print the first model

12
Print the first model
4.1. Linked with Power Supply
Take out the power cord from the accessories box, plug the male connector to
the power socket and female connector to 24V wide contact of external power
supply, and plug the 24V external power supply circular thin connector to the
power supply input socket at the back of printer.

13
Print the first model
4.2. Assembly of Filament
Take out the tray and rack, put the spindle of material rack on the tray and put
all together to the material rack. Find out one end of filament from the
material tray and sent it to the feed pipe at the back board of printer, unl the
filament thread out from another end of material pipe.
Open the cover plate on theprinter; pull out the filament around 20cm from
the material pipe. Break straight the end of filament, right hand presses down
the handle of extruder, and le hand holds the filament and plug it into the
feed inlet, inseron depth is about 5cm.

14
Print the first model
Stuff the excess material filament back to the feeding pipe, and then place the
feeding pipe on the feeding hole.
4.3. Prinng Preparaon
Take out the SD memory card presented in accompany with printer, and plug it
to the card slot.

15
Print the first model
Press down the power buon at the rear panel, and start up the printer
power supply.
4.4. Prinng Model
On the operaon panel, choose “Print the files in the SD card”→”02▁
ThinwallCub.x3g”, press OK buon to start prinng.
SD Meun
>02_ThinwallCub.x3g
yz50.x3g
XTEST.x3g
XYtest.x3g
Extruder :020C
WEEDO M2
>Print from SD
Preheat
Utilities
Setting&Info
Extruder :020C

16
Print the first model
4.5. Removing Model
Aer model is completed with prinng, it uses the presented plasc scraper in
accompany with printer, to take it out along with the edge of model, or firstly
disassemble the prinng plaorm and take out model.

17
Cura Soware Detailed
Introducon
Cura Soware Detailed Introducon
Table of contents
Other WEEDO 3D Printer manuals