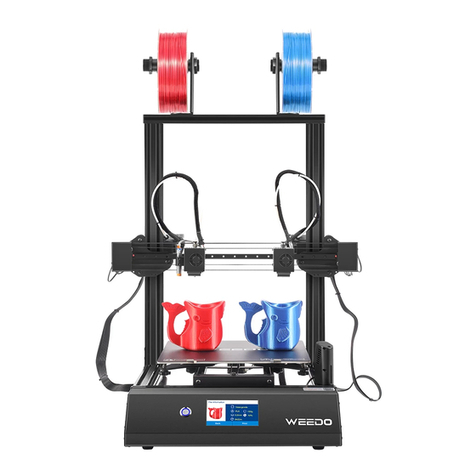
WEEDO X40 User manual

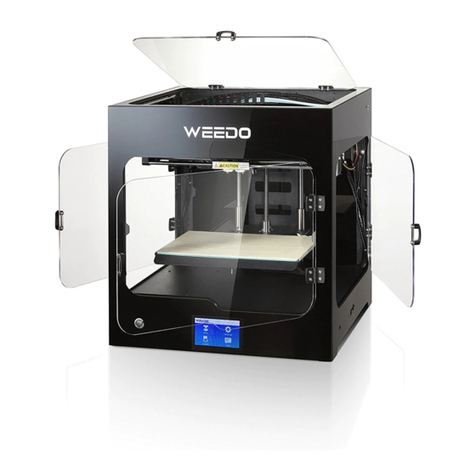
X40 3D Printer
User's Guide

I
Contents
1.SAFETY WARNINGS AND GUIDELINES ............................................................................. 1
2.INTRODUCTION ....................................................................................................................... 2
3.FEATURES ................................................................................................................................. 2
4.CUSTOMER SERVICE.............................................................................................................. 3
5.PACKAGE CONTENTS............................................................................................................. 4
6.PRODUCT OVERVIEW............................................................................................................. 5
6.1OverView................................................................................................................................... 5
7.INTERFACE SYSTEM............................................................................................................... 6
7.1 Interface Operation ............................................................................................................... 6
7.2 Main Interface....................................................................................................................... 6
7.3 Select Print File..................................................................................................................... 7
7.4 Printing Interface .................................................................................................................. 8
7.5 Setting Interface.................................................................................................................. 11
7.5.1WIFI Setting: ........................................................................................................ 12
7.5.2 Language.............................................................................................................. 13
7.5.3 Machine Info:....................................................................................................... 13
7.5.4 Auto Power Off.................................................................................................... 14
7.5.5 Runout Sensor...................................................................................................... 14
7.5.6 POST.................................................................................................................... 15
7.5.7 Power Save Mode................................................................................................ 15
7.5.8 Update:................................................................................................................. 15
7.5.9Parameters............................................................................................................. 16
7.6 Maintenance interface......................................................................................................... 16
7.6.1Filament Feed: ...................................................................................................... 17
7.6.2Filament Retract:................................................................................................... 18
7.6.3Preheat: ................................................................................................................. 19
7.6.4 Jog Mode:............................................................................................................. 19
7.6.5 Level Bed:............................................................................................................ 20
7.6.6 Z Offset:............................................................................................................... 21
7.6.7 Proximity Height:................................................................................................. 22

II
7.6.8 Nozzle Offset....................................................................................................... 22
7.8 Help Interface...................................................................................................................... 24
8.WIIBUILDER SLICING SOFTWARE .................................................................................... 25
8.1 Installation........................................................................................................................... 25
8.2 WiiBuilder Setup ................................................................................................................ 27
8.3 Speed Tab............................................................................................................................ 34
8.4 Infill Tab ............................................................................................................................. 36
8.5 Support Tab......................................................................................................................... 38
8.6 Build Plate Adhesion Tab................................................................................................... 39
8.7 Retraction Tab..................................................................................................................... 41
8.8 Material Tab........................................................................................................................ 41
8.9 Travel Tab........................................................................................................................... 42
8.10 Machine Tab ..................................................................................................................... 43
8.11 Line Width Tab................................................................................................................. 43
8.12 Dual Extrusion Tab........................................................................................................... 44
8.13 Warping Precaution Tab................................................................................................... 45
8.14 Seam Tab .......................................................................................................................... 45
8.15 Others Tab......................................................................................................................... 46
9.SPECIFICATIONS.................................................................................................................... 48
10.TECHNICAL SUPPORT ........................................................................................................ 49
11.SAFETY NOTICE................................................................................................................... 50

1
1.SAFETY WARNINGS AND GUIDELINES
Please read this entire manual before using this device, paying extra attention to these safety
warnings and guidelines. Please keep this manual in a safe place for future reference.
•Do not reach inside the printer during operation.
•Always allow the printer and extruded filament to cool before reaching inside.
•Take care to avoid touching hot parts, including heat blocks, extruder nozzle, build
platform, and extruded filament.
•Do not wear gloves when operating or repairing to avoid entanglement.
•Keep the printer and all accessories out of reach of children.
•Do not force or tear anything when unpacking and during setup. This may cause damage
to the printer and/or its accessories.
•Ensure that the printer is turned off and unplugged from its power source before making
repairs or performing service.
•Do not install this device on an unstable surface where it could fall and cause either
personal injury or damage to the device and/or other equipment.
•Do not subject the product to extreme force, shock, or fluctuations in temperature or
humidity.
•This device is intended for indoor use only.
•Do not expose this device to water or moisture of any kind. Do not place drinks or other
containers with moisture on or near the device. If moisture does get in or on the device,
immediately unplug it from the power outlet and allow it to fully dry before reapplying
power.
•Do not touch the device, the power cord, or any other connected cables with wet hands.
•Prior to operation, check the unit and power cord for physical damage. Do not use if
physical damage has occurred.
•Before plugging the unit into a power outlet, ensure that the outlet provides the same type
and level of power required by the device.
•This device uses a grounded power cord and requires a ground connection for safe
operation. Ensure that the power source has a proper ground connection. Do not modify
the plug or use a "cheater" plug to bypass the ground connection.
•Unplug this device from the power source when not in use.
•Take care to prevent damage to the power cord. Do not allow it to become crimped,
pinched, walked on, or become tangled with other cords. Ensure that the power cord does
not present a tripping hazard.
•Never unplug the unit by pulling on the power cord. Always grasp the connector head or
adapter body.

2
•Use only in a well-ventilated area. Do not use in close, confined spaces.
•Take care when using a scraper to remove a model. Never direct the scraper towards your
fingers or body.
•The printer is designed to operate with an ambient temperature ranging from +41°F
(+5°C) to +104°F (+40°C). Printing outside these limits may result in low quality prints.
•Use eye protection when cleaning or sanding the printed models to avoid getting small
particles in your eyes.
2.INTRODUCTION
Thank you for purchasing this X40 3D Printer! This printer uses the FFF (Fused Filament
Fabrication) method of printing. It features a metal frame, heated build platform. It can print
1.75mm ABS, PLA, metal fill, wood fill, and other filament types with melting points below
250°C. The machine with Independent Dual Extruders can print at a speed up to150mm/s and
300x300x400mm printing area. It can print from sliced g-code files stored on a micro SD™ card
or from our App. It supports auto leveling, automatic shut-down, with a 4.3-inch touch screen, a
removable and a heated build plate.
3.FEATURES
•Supports auto leveling
•Includes a heated, removable, build platform
•Can print using APP or from a sliced g-code file on a SD card
•Supports ABS, PLA, metal fill, wood fill, and other filament types with melting points
below 260°C
•300 x 300 x 400 mm print area
•Can print at speeds up to 80mm/sec.
•Includes WiiBuilder slicing software
•Includes 4GB TF card
•Half assembled
•Support duplicate printing and mirror printing

3
4.CUSTOMER SERVICE
The WEEDO Customer Service department is dedicated to ensuring that your ordering,
purchasing, and delivery experience is second to none. If you have any problem with your order,
please give us an opportunity to make it right. You can contact a WEEDO Customer Service
representative through the Live Chat link on our website www.weedo.ltd or via email at
salesservice@wiibooxtech.com. Check the website for support times and links. You can check
the products wiki website for more information:
http://www.weedo3dprinter.com/doku.php?id=content:x40

4
5.PACKAGE CONTENTS
Please take an inventory of the package contents to ensure you have all the items listed below. If
anything is missing or damaged, please contact WEEDO Customer Service for a replacement.
1x 3D Printer
2x 10m testing PLA filament
2x Filament holder
1x SD card
1xSD card reader
1x Metal scraper
1x USB cable
1x Set of Allen keys
1x Spanner
1x Glue
1x Power cord

5
6.PRODUCT OVERVIEW
6.1OverView
1. Start button
2. 4.3’’ touch screen
3. TF card port
4. USB port
5. Camera
6. T Type Fixed bracket
7. Nozzle brush
8. Right nozzle
9. Right X motor
10. Right Filament Holder
11. Left Filament Holder
12. Left Extruder
13. Limit Switch
14.Proximity Sensor
15. Platform

6
7.INTERFACE SYSTEM
7.1 Interface Operation
Touch the printer display with your Fingertips.
•Enter into the Main interface after Post.
•There is a question mark icon in the upper right corner of each interface, this is the help
button, you can touch the button, it will show you the functions of icons in the current
interface.
•In the Main interface there are four icons, you can touch different icons to get into sub-
interface.
•You can click the Back Button to return to the previous interface.
•You can click the Next Button to go to the next interface.
7.2 Main Interface
•Status Bar: Displays the printer information screen, include: Left Nozzle Temp, Right
Nozzle Temp, Bed temp, IP address.
•Print: Click Print Button and get into Printing File interface, display a list of TF Card
or WIFI Disk, choose the file position you want to print.
•Setting: Click the Setting Button get into sub-interface. There are WIFI Setting,
Language Setting, Machine Info, Auto Power Off, Runout Sensor, Post, Power Save
Mode, Update Parameters Buttons.
•Maintenance: Click the Maintenance get into sub-interface. There are Filament Feed,
Filament Retract, Preheat, Jog Mode, Level Bed, Z Offset, Proximity Height, Nozzle
Offset Motor Off Buttons.
•Help: Error Diagnosis, WIKI and Contact Us in Help Interface.

7
7.3 Select Print File
Click TF Card and get into TF Print File Interface, choose the Gcode File in the lists.
◆Return to the Main Interface by clicking Back icon. Click Next icon to see other files
◆Click the file you selected, you will see the file information in the (Pic7), the picture of
the file, File name, filament type, layer height, infill, printing time. You can select ‘print’
or choose Dual Mode, after your choose dual mode you can print with duplication and
mirror mode.
◆Dual Mode interface shows in the below picture.

8
◆Click the Back Icon to get into the previous interface(Pic6)
7.4 Printing Interface
•The help icon in the upper right corner can help you view a detailed description of the
current interface
•It shows File Name, Printing Speed, Nozzle Temp, Bed Temp, Printing Elapsed
Time, Printing Remain Time, Printing Percent. It can Quit, Pause, and Set the Print
process. File Name shows the currently printed file name, Speed shows the currently
print speed, Nozzle Temp shows the currently printing nozzle temperature, Bed
temperature shows the currently bed temperature. Elapsed time shows the time you have
printed. Remain time shows the printing time left, remaining time is an estimated time,
at the beginning of printing, the estimated time will be less accurate. As the printing
progresses, the remaining time after calculation will become more accurate. Print
progress bar shows the progress percentage of printing.
•Click Quit and cancel the current print process. Click Quit will pop up a prompt window
(Pic8) for operation confirmation to prevent accidental touch to cancel printing.

9
Pic8
•Click Pause and it will pop up a prompt window (Pic9) and then pause the current print
process. After pausing the print process, Filament operation can be used.
Pic9
•Click the Question Mark Icon in the upper right corner to display the current interface
prompt. (Pic10)
Pic10
•Click the Setting button, printing parameter (Filament Operation, Printing
Temperature, Printing Speed, Auto Power Off, Save and Shutdown) can be reset.
(Pic11 Pic12).
•
Pic11 Pic12

10
•Click the Filament Operation button, if printing is in progress, this function cannot be
used, and it can only be used after printing has been paused (Pic13).
Pic13
•Pause the printing process and then click the Filament Operation button(Pic14 Pic15).
When your filaments are running out and the model still needs a lot of filaments to
print, you can pause and replace the supplies. When you print some models, the
model you want different colors, you can also paise and then perform the
replacement of filaments
Pic14 Pic15
•Click the Temperature button to change the current printing temperature (Pic16). In the
printing progress the printing temperature and bed temperature can be reset.
Pic16
•Click the Speed button to change the current printing speed (Pic17). In the printing
progress the printing speed can be reset. Notice: if the speed is set to more than 2

11
times, the printing effect on the model surface will become worse. If you want to
print faster, set the speed in the slicing software.
Pic17
•In this interface you can set the Auto Power Off function (Pic18) on or off, if this
function is on, after each printing completed, the device will automatically shut down. If
this function is off, it will not shut down after printing finished.
•When you are printing a model, you suddenly have to go out and do something else, and
you are worried about the model printing. At this time, you can select the Save & Off
function (Pic18), which can save the current printing progress, and then automatically
shut down. Next time you turn on the machine, you can continue printing from the
previous print progress.
Pic18
7.5 Setting Interface
Pic19 Pic20

12
Pic21
•Wi-Fi Setting: Set the Wi-Fi for the printer, check the Wi-Fi version、IP address
•Language Setting: select different language.
•Machine Info: check the machine information, check firmware version, UI version
•Auto Power Off: Auto Power off function ON and OFF
•Runout Sensor: Runout Sensor function ON and OFF
•Post: POST function ON and OFF
•Power Save Mode: select the power save mode
•Update: update the latest firmware for the printer
•Parameters: check parameters, Save firmware parameters to TF card, Load firmware
parameters from TF card to printer.
7.5.1WIFI Setting:
Pic22
•Connect Wifi: Connect the printer to WIFI.
http://www.weedo3dprinter.com/doku.php?id=set_up_wifi_network:x40
Check this wiki file about how to connect the printer to WIFI

13
•Machine Info: Check the Information of the WIFI device
•Update: When there is a new version of WIFI firmware, Click update, it will begin
Firmware OTA update.
7.5.2 Language
Select the language you want to show on the interface.
7.5.3 Machine Info:
Pic23
•Device Name: Printer type

14
•Printed Time: The time print has printed, the first time you get the print the printed time
may not show zero, do not worry, all of our machine has tested before leaving the factory
•Firmware Version: the firmware version of the printer, the firmware version will change
after the new firmware is updated.
•UI Version: the UI version of the printer, the UI version will change after the new UI is
updated.
•Device Serial: unique serial number when the device was manufactured.
•WIFI Device: The WIFI module of this printer is WIFICAM
7.5.4 Auto Power Off
Auto Power Off: printer will automatically shutdown after printing finished. It can turn on or
turn off.
7.5.5 Runout Sensor
Runout Sensor: printer will paused if the filament runout. It can turn on or turn off.

15
7.5.6 POST
POST: printer will self-testing when the printer turns on. It can turn on or turn off.
7.5.7 Power Save Mode
Pic24
•Mode: Disable means the printer will always power on, if you select 1min and click OK,
do not perform any operation on the machine such as 1 minute, the machine will
automatically shut down to save power
7.5.8 Update:
If there is a new version of firmware published form WEEDO website or wiki website, you can
download it to TF card. The file type is:.wfm and name: flash.
Click update it will update firmware automatically.

16
7.5.9Parameters
This interface shows the Firmware parameters of the printer, Home Offset, Z-Probe Offset.
If you connect to the computer and do some parameters testing, please save the parameters to
TF card, and Load from TF card for the originally parameters if your changed parameters
gets wrong printing.
7.6 Maintenance interface
Pic25 Pic26

17
Pic27
•The help icon in the upper right corner can help you view a detailed description of the
current interface
•Filament Feed: Feed the filament to left and right nozzle.
•Filament Retract: Retract the filament of left and right nozzle.
•Preheat: Set the temperature and preheat the nozzle and bed
•Jog Mode: Move X Y Z axis and X Y Z go to home
•Level Bed:Adjust the flatness of the platform
•Z offset:Set the gap between nozzle and platform
•Proximity Height: Set the height of Proximity Switch
•Nozzle Offset: set the XY Offset and Z offset of two independent nozzles
•Motor Off: Unlock all the motor
•Click the Back icon to return to the main interface, Click the Previous icon to return to
the precious interface, Click the Next icon to enter the next interface.
7.6.1Filament Feed:
Click Filament Feed icon, get into filament feed interface. Click the Back icon to return to the
previous interface.
Other manuals for X40
2
Table of contents
Other WEEDO 3D Printer manuals