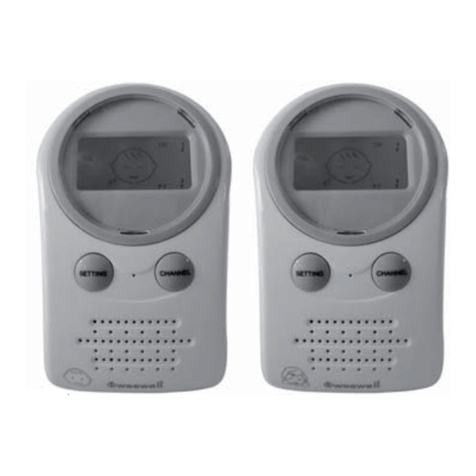
weewell WMA450 User manual

I
WMA450 User Manual
1
USER MANUAL
KULLANIM KILAVUZU
EN
TR
WMA450
DIGITAL BABY AUDIO MONITOR
WITH VIBRATION
DIJITAL TITRESIMLI BEBEK TELSIZI

IWMA450 User Manual
2
Contents
Important Safety İnstrucons................................................3
Cauons................................................................................5
Package Contents...................................................................6
Baby Unıt Descrıpon............................................................7
Parent Unıt Denıon............................................................9
Parent Unit..........................................................................24
Baby Unit.............................................................................27

I
WMA450 User Manual
3
Congratulaons
on purchasing your new Weewell product. Before using this product,
please read Important safety instrucons.
This manual has all the feature operaons and troubleshoong
necessary to install and operate your new product. Please review
this manual thoroughly to ensure proper installaon and operaon
of this innovave and feature rich Weewell product.
Important safety instrucons
When using your equipment, basic safety precauons should always
be followed to reduce the risk of re, electric shock and injury,
including the following:
1.Follow all warnings and instrucons marked on the product.
2.Adult setup is required.
3.This product is intended as an aid. It is not a substute for
responsible and proper adult supervision and should not be used
as such.
4.This product is not intended for use as a medical monitor.
5.Do not use this product near water. For example, do not use it next
to a bath tub, wash bowl, kitchen sink, laundry tub or swimming
pool, or in a wet basement or shower.
6.CAUTION: Use only the baery indicated in this manual. There
may be a risk of explosion if a wrong type of baery is used for the
parent unit. Do not dispose of baeries in a re.
7.Use only the adapters included with this product. Incorrect
adapter polarity or voltage can seriously damage the product.
8.Baby unit power adapter: 6V DC 500 mA
IWMA450 User Manual
4
Parent unit power adapter: 6V DC 500 mA
9.The power adapters are intended to be correctly oriented in a
vercal or oor mount posion. The prongs are not designed to hold
the plug in place if it is plugged into a ceiling, under-the-table or
cabinet outlet.
10.Unplug this product from the wall outlet before cleaning. Do not
use liquid or aerosol cleaners. Use a damp cloth for cleaning.
11.Unplug the power cords before replacing the baery.
12.Do not cut o the adapters to replace them with other plugs, as
this causes a hazardous situaon.
13.Do not allow anything to rest on the power cords. Do not install
this product where the cords may be walked on or crimped.
14.This product should be operated only from the type of power
source indicated on the marking label. If you are not sure of the type
of power supply in your home, consult your dealer or local power
company.
15.Do not overload wall outlets or use an extension cord.
16.Do not place this product on an unstable table, shelf, stand or
other unstable surfaces.
17.This product should not be placed in any area where proper
venlaon is not provided. Slots and openings in the back or boom
of this product are provided for venlaon. To protect them from
overheang, these openings must not be blocked by placing the
product on a so surface such as a bed, sofa or rug. This product
should never be placed near or over a radiator or heat register.
18.Never push objects of any kind into this product through the slots

I
WMA450 User Manual
5
because they may touch dangerous voltage points or create a short
circuit. Never spill liquid of any kind on the product.
19.To reduce the risk of electric shock, do not disassemble this
product, but take it to an authorized service facility. Opening or
removing parts of the product other than specied access doors
may expose you to dangerous voltages or other risks. Incorrect
reassembling can cause electric shock when the product is
subsequently used.
20.You should test the sound recepon every me you turn on the
units or move one of the components.
21.Periodically examine all components for damage.
22.Be aware of possible loss of privacy while using public airwaves.
Conversaons may be picked up by other nursery monitors, cordless
phones, scanners, etc.
24.Children should be supervised to ensure that they do not play
with the product.
25.The product is not intended for use by persons (including
children) with reduced physical, sensory or mental capabilies, or
lack of experience and knowledge, unless they have been given
supervision or instrucon concerning use of the appliance by a
person responsible for their safety.
SAVE THESE INSTRUCTIONS
Cauons
1.Use and store the product at a temperature between 0°C and
40°C.

IWMA450 User Manual
6
2.Do not expose the product to extreme cold, heat or direct sunlight.
Do not put the product close to a heang source.
3.The baery pack should not be exposed to excessive heat such as
bright sunshine or re.
4.Make sure the baby unit and the adapter cord are always out of
reach of the baby, at least 1 metre away from the baby or crib, to
avoid a possible strangulaon hazard.
5.Never place the baby unit inside the baby’s crib or playpen.
6.Never cover the baby unit or parent unit(s) with anything such as a
towel or a blanket.
7.Other electronic products may cause interference with your baby
monitor. Try installing your baby monitor as far away from these
electronic devices as possible: wireless routers, radios, cellular
telephones, intercoms, room monitors, televisions, personal
computers, kitchen appliances and cordless telephones.
PACKAGE CONTENTS
1 baby unit (transmier)
1 parent unit (receiver)
1 strap / support for parent unit (receiver)
1 audio cable
2 rechargeable NiMH, 2 x1.2V, 750mAh type AAA baeries (for the
receiver)
1 set of instrucons for use

I
WMA450 User Manual
7
BABY UNIT DESCRIPTION
1. Stand-by light
2. Integral speaker
3. Integral microphone
4. 2-colour LED (Green / Red): ON / TRANSMISSION / BATTERY
CONDITION indicator
Green xed: Operang and properly connected to the parent unit
Green ashing: Operang and loss of connecon to the parent unit
Red xed: Operang and baery low
5. ON / OFF switch
Press and hold down for 2 seconds to switch the appliance ON or
OFF
6. VOLUME switches
When the volume reaches its maximum or minimum level a beep is
emied. There is 10 levels for volume.
7. LULLABIES switch
8. STAND-BY LIGHT switch
9. TRANSMISSION switch
Press to make the parent unit send an alarm beep. This helps in
nding an appliance that has been mislaid.
10. Temperature and hygrometry sensor
11. Baery ap (2 AAA baeries)
12. Jack socket (audio cable supplied)

IWMA450 User Manual
8
13. Mains supply
ONLY TO BE USED WITH THE ADAPTOR SUPPLIED

I
WMA450 User Manual
9
PARENT UNIT DEFINITION
1. LCD screen
2. OK / MENU switch
3. RETURN switches
4. VOLUME switch
When the volume reaches its maximum or minimum, three beeps
are emied, there are 10 levels in all.
5. 2-colour LED (Green / Red): ON / TRANSMISSION / BATTERY
CONDITION indicator
Green xed: Operang and properly connected to the baby’s
transmier
Green ashing: Operang and loss of connecon to the baby’s
transmier
Red ashing: Baery charging
Red xed: Operang and baery low
6. Integral speaker
7. Integral microphone
8. ON / OFF switch
Press and hold down for 2 seconds to switch the appliance ON or
OFF
9. SPEECH switch
Hold the switch down to reply via the baby transmier speaker. The

IWMA450 User Manual
10
baby transmier remains silent for 1.5 seconds before starng to
transmit the parent’s voice
10. Strap / support for the parent unit
Can be posioned in 2 ways: high posion for hanging the parent
unit, low posion for placing the unit on a at surface
11. Baery ap (2 rechargeable type AAA baeries supplied)
12. Mains supply
ONLY TO BE USED WITH THE ADAPTOR SUPPLIED
1- Power sources
Parent unit
The receiver can either work with two rechargeable AAA baeries

I
WMA450 User Manual
11
(2 x 750mAh AAA NiMH baeries supplied) or with a mains
adapter (supplied). To operate on the baeries, open the baery
compartment, insert the 2 AAA baeries taking care about the
polaries and then close the compartment. Close the compartment
properly to ensure that the children do not swallow the baeries.
Warning: Non-rechargeable baeries should not be recharged.
Use baeries of the same type. Never mix used baeries and new
baeries.
NB: THERE IS A RISK OF EXPLOSION IF THE BATTERIES ARE REPLACED
BY THE WRONG TYPE. DISPOSE OF BATTERIES ACCORDING TO THE
INSTRUCTIONS.
To use with the adapter, insert the output jack from the mains
adapter into the DC socket on the parent unit. Plug the adapter into
a standard wall socket.
Baby “transmier” unit
The transmier can operate either with two AAA baeries (not
supplied) or with a mains adapter (supplied). To operate on the
baeries, open the baery compartment, insert the 2 AAA baeries
taking care about the polaries and then close the compartment.
Close the compartment properly to ensure that the children do not
swallow the baeries.
Warning: Non-rechargeable baeries should not be recharged.
Use baeries of the same type. Never mix used baeries and new
baeries. To use with the adapter, insert the output jack from the
mains adapter into the DC socket on the baby unit. Plug the adapter
into a standard wall socket.

IWMA450 User Manual
12
2- Starng and connecon between the 2 units
Parent unit
Press the key for two seconds to switch on the appliance. The
LED indicator will become green and then ash every 0.5 seconds
during connecon. The aerial icon is o. The indicator light stops
ashing once the connecon is established. The aerial İcon
lights. The indicator light starts ashing again if the connecon fails.
The aerial icon is o.
Baby unit
Press the key for two seconds to switch on the appliance. The
LED indicator will become green and then ash every 0.5 seconds
during connecon. The indicator light stops ashing once the
connecon is established. The indicator light starts ashing again if
the connecon fails.
3- Adjusng the volume
Parent unit
Press the or keys to increase or decrease the speaker
volume. There are 10 volume levels (VOL 01 to VOL 10, VOL 01 =
silent). The user can adjust the volume of the baby’s voice. The
or keys only adjust the volume when the main mode is
displayed.
Baby unit
Press the or keys to increase or decrease the speaker
volume. There are 10 volume levels (VOL 01 to VOL 10, VOL 01

I
WMA450 User Manual
13
= very low). The user can adjust the volume of the lullaby or the
sensivity of the interphone according to the parents voice volume
4- Baby unit funconalies
4.1 lullaby
The lullaby mode can only be used when the baby unit is switched
o.
INTERNAL lullabies: Press the key to enter the lullaby mode.
The baby unit will start reading lullaby 1 (9 lullabies). To switch to
the next lullaby, press the key. Press the key to exit from the
lullaby mode.
EXTERNAL LULLABIES: This baby alarm also enables lullabies or
music stored on an external MP3 player to be listened to. Connect
the baby unit to the external source via the audio cable supplied,
and press the buon for 2 seconds to acvate the playing. Then
use the controls on the external source to adjust the volume or
switch to the next track. Press the key for two seconds to exit
from the lullaby mode.
4.2 night light
Press the key for 2 seconds to light the night light. Press the
key for another 2 seconds to switch o the night light. When the
nightlight is switched on, you can reduce the brightness by one level
by pressing the key briey (3 levels of brightness). The nightlight
can also be used when the baby unit is switched o. When operang

IWMA450 User Manual
14
on baeries the nightlight switches o automacally aer 5 min, to
save energy.
4.3 search
Press the key to switch on an audible signal from the parent
unit and backlighng of this unit unl any key is pressed on the
parent unit. This funcon serves to nd the parent unit if it has
been mislaid. Press the key on the baby unit a second me to
suspend the search funcon. The search funcon duraon is limited
to 2 minutes.
5- Parent unit funconalies
5.1 VOX PREMIUM system
The VOX PREMIUM system enables the Parent unit to only switch
on if the baby cries. This avoids you having to listen to connuous
background noise when the baby is sleeping peacefully.
Funcon de-acvated: the parent unit monitors the baby
independently of the noise level in the bedroom.
Funcon acve: the parent unit will switch on if the baby cries or
makes a loud noise.
For adjustment, refer to part 6.2.5.
5.2 ECO Mode
If the parent unit moves closer to the baby unit, the transmission
power of the parent unit will be greatly reduced to save energy.
5.3 Speech
Hold the key down on the parent unit to talk to your baby.

I
WMA450 User Manual
15
6 Parent unit screen
6.1 Descripon of the display
Aerial Temperature
warning with
vibraon
Temperature
warning without
vibraon
Meal-me mer VOX Vibrator

IWMA450 User Manual
16
Baeries charged Baeries
half-charged
Baeries low
6.2 Browsing in the menu and return
Press the key to display the menu; then use the and
keys to browse in the menu. You will see the icons ash in turn.
Once posioned on the right icon press the key to conrm, and
thus adjust the opon as you wish. For the adjustment of opons,
refer to the following parts. Press the key to exit from the menu
and return to the previous level. If you don’t press any key for 5
seconds, the main display mode will be displayed and nothing will
be saved.
6.2.1 Adjusng the language sengs
• This enables you to change the language displayed on the screen.
• In any main display mode, press the key to display the menu.
Then use the and keys unl “LANG SET” is displayed on the

I
WMA450 User Manual
17
screen and ashes every 0.5 seconds. Now press the key to
adjust the language sengs. The language displayed is the default
language. Use the and keys to scroll the languages. When
the language is ashing on the screen press the key to conrm.
The language will change immediately. The system will exit from the
menu and access the main display mode.
6.2.2 Date-me OR temperature-humidity seng
• Once the parent unit is on, the screen will display the date-me
informaon.
The date will be displayed on the 10 character line in the form “DD-
MM-YY”.
24-12-2011
Press the key for 2 seconds to display the temperature and
humidity data. The temperature and humidity data will be updated
every minute with resoluons of 1°C and 1% respecvely. If the
temperature and humidity data is lost nothing will be displayed unl
the data is recovered.

IWMA450 User Manual
18
Press the key for 2 seconds to return to the me and date data.
• To adjust the clock, proceed as for the adjustment of the other
opons. Press the key to display the menu. Then use the
and keys unl “CLOCK SET” is displayed on the screen and
ashes every 0.5 seconds. Now press the key to adjust the
clock sengs. The date and me will be displayed. Next, the year
will be displayed and will ash every 0.5 seconds. Use the and
keys to change the complete year without using the digital
keypad. Press the key to conrm. Proceed in the same way to
set the month, the day, the hours and the minutes. The system will
exit from the menu to access the main display mode.
6.2.3 Temperature
• This enables you to acvate or de-acvate the temperature alarm.
• Health professionals recommend that the temperature in the
baby’s bedroom should be between 16°C and 20°C. The parent unit
is ed with an integral mechanism that triggers the alarm if the
room temperature is too low or too high. When the temperature
measured by our system is ≥ 25°C or ≤ 15°C, the temperature alarm
triggers.
• In any main display mode, press the key to display the menu.
Then use the and keys to scroll the icons unl the temperature alarm

I
WMA450 User Manual
19
with vibraon is displayed and ashes every 0.5 seconds. Now press
the key to adjust the temperature alarm sengs. Use the
and keys to scroll the ashing icons: “OFF”, “BEEP”, “VIBE” and
“BEEP&VIBE”. The temperature alarm can be set in 4 dierent ways:
OFF = alarm de-acvated, BEEP = emission of audible beeps; VIBE =
emission of vibraons and BEEP&VIBE = emission audible beeps and
accompanied by vibraons. Once posioned on the desired icon,
press the key to conrm the opon and return to the main
menu.
NB: When the temperature warning triggers the temperature
warning icon will ash every second. The ashing will stop as soon
as the temperature falls below the threshold set.
NB: When the temperature warning triggers the user can press the
key to switch it o temporarily. If the temperature of the baby
unit is not within the limits set the temperature warning will trigger
again aer 2 minutes.
6.2.4 The meal-me TIMER
• This enables you to adjust the meal-me mer.
• In any main display mode, press the key to display the menu.
Then use the and keys to scroll the icons unl the meal-
me mer icon is displayed and ashes every 0.5 seconds. Now
press the key to adjust the meal-me mer sengs. Use the

IWMA450 User Manual
20
and keys to scroll the ashing icons: “OFF”, “BEEP”, “VIBE”
and “BEEP&VIBE”. The mer alarm can be set in 4 dierent
ways: OFF = alarm de-acvated, BEEP = emission of audible beeps;
VIBE = emission of vibraons and BEEP&VIBE = emission audible
beeps and accompanied by vibraons. Once posioned on the
desired icon, press the key to conrm the opon.
1. If OFF is chosen: once the opon is selected, return to the main
menu.
2. If BEEP, VIBE or BEEP&VIBE are chosen: the meal-me mer icon
will connue to ash. The date and me will be displayed by default.
The current status of the system may be displayed if other me and
date sengs have been entered. The year will be displayed and will
ash every 0.5 seconds. Use the and keys to change the full
year. Press the key to conrm. Proceed in the same way to set
the month, the day, the hours and the minutes. The system will exit
from the menu to access the main display mode.
NB: When the meal-me alarm triggers, the meal-me alarm icon
will ash every second.
NB: When the meal-me alarm triggers, you can stop it by pressing
the key.
6.2.5 VOX PREMIUM
• This enables you to acvate or de-acvate the VOX (or voice
Table of contents
Languages:
Other weewell Baby Monitor manuals

weewell
weewell WMV850 User manual

weewell
weewell WMV630 User manual

weewell
weewell WMV911 Sphera User manual

weewell
weewell WMV815 User manual

weewell
weewell WMV870 Sphera Dual Watch User manual

weewell
weewell WMV855 User manual

weewell
weewell WMV820 User manual

weewell
weewell WMV870R User manual

weewell
weewell WMV812 User manual

weewell
weewell WMA370 User manual