manuals.online logo
Brands
  1. Home
  2. •
  3. Brands
  4. •
  5. weinor
  6. •
  7. Accessories
  8. •
  9. weinor Terrazza Pure Assembly instructions

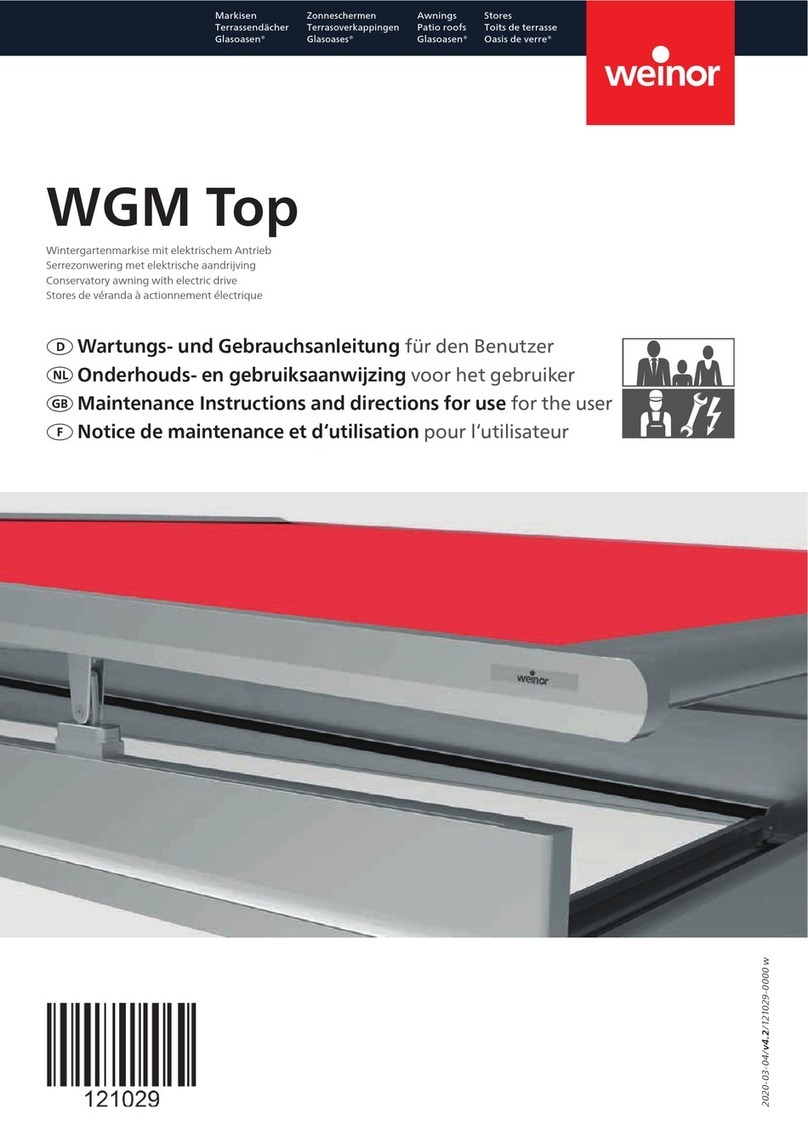
weinor Terrazza Pure Assembly instructions

2021-11-08/v14/127592-0000w
Awnings
Patio roofs
Glasoasen®
Markisen
Terrassendächer
Glasoasen®
Zonneschermen
Terrasoverkappingen
Glasoases
®
Stores
Toits de terrasse
Oasis de verre®
Online Montage-Video
Online MontageVideo
Online Installation video
Vidéo de montage en ligne
https://www.weinor.de/training-films/terrazza-pure
Terrazza Pure
Erweiterbares Terrassendach-System
Uitbreidbaar terrasoverkappingssysteem
Expandable patio roof system
Système de toiture de terrasse extensible
Montageanleitung nur für das Fachunternehmen
Montagehandleiding alleen voor het vakbedrijf
Instructions for assembly only for the specialist retailer
Instructions de montage seulement pour l‘entreprise spécialisée
+ + + + + + + + + + + + + + + + + + + + + + + + + + + + + + + + + + + + + + + + + + + + + + + + + + + + + + + + + + + + + + + + + + +
+ + + + + + + + + + + + + + + + + + + + + + + + + + + + + + + + + + + + + + + + + + + + + + + + + + + + + + + + + + + + + + + + + + +
AKTUALISIERUNG | UPDATE | ACTUALISATION
VERSION 14 | VERSIE 14 | 2021-11-08
Befolgen Sie dringend die neuen Montagehinweise!
ab Seite 27: neue Dachrinne und Dachträger montieren!
Volg de nieuwe installatie-instructies dringend op!
Vanaf pagina 27: Dakgoot en Dakdrager monteren!
Follow the new installation instructions urgently!
From page 27: Installation of guttering and it the roof support
Suivez d‘urgence les nouvelles instructions d‘installation !
À partir de la page 27 : Montage du chéneau et le support de toit !
2Technische Änderungen vorbehalten | Technische wijzigingen voorbehouden | We reserve the right to make technical changes | Sous réserve de modifications techniques
Montageschritte – Kurzübersicht
Montagestappen – Kort overzicht
Installation steps – Brief overview
Étapes de montage - Bref aperçu
12 x 8 x 5000
Vorlegeband
Voorlegtape
Glazing tape
Bande de garniture
LED
28
27
20
10
UKD
L (=UKD –30 mm)
21
14
D1
D2
D1=D2
13
Option/Optie
Option/Optie
Option/Optie
Option/Optie
16
Terrazza Pure | 127592-0000 w | v14 | 2021-11-08 | Montageanleitung | Montagehandleiding | Instructions for assembly | Instructions de montage
3
Technische Änderungen vorbehalten | Technische wijzigingen voorbehouden | We reserve the right to make technical changes | Sous réserve de modifications techniques
40
3200 mm
RGB
RGB
37
36
5
3x
33
Zubehör und Optionen
Toebehoren en opties
Accessories and options
Accessoires et options
42
Terrazza Pure | 127592-0000 w | v14 | 2021-11-08 | Montageanleitung | Montagehandleiding | Instructions for assembly | Instructions de montage
4Technische Änderungen vorbehalten | Technische wijzigingen voorbehouden | We reserve the right to make technical changes | Sous réserve de modifications techniques
6
7
8
2
1
13
3
5
4
10
9
12 x 8 x 5000
12
12
12
11
14
12
17
19
16
18
20
15
1Wandanschlussprofil
2Terrazza Pure (Anlage mit 2 Pfosten und 3 Glassegmenten)
3Glaselement
4Dachträger (Mitte)
5Dachträger (Außen)
6Dachrinne
7Pfosten
8Pfostenplatte mit Pfostenplattenabdeckung
9Kleinteile
10 Produktbegleitende Dokumente
Optionen und Zubehör:
11 Pfostenanschlussprofil
12 RGB Beleuchtung / Dekore
13 Wasserablauf im Pfosten
14 Aufdopplung und Rechteckprofile
15 Zugstab
16 weinor VertiTex II Vertikalbeschattung
17 weinor WGM Top Wintergarten Sonnenschutzmarkiese
18 weinor Seitenlement SUPER LITE w50-c
19 weinor Sottezza II Wintergarten Sonnenschutzmarkiese
20 Unterbauelemente weinor w17easy
Produktübersicht
Inhaltsverzeichnis
Montageschritte – Kurzübersicht 2
Produktübersicht | Inhaltverzeichnis 4
Allgemeines 5
Maße und Abstände 12
Wandanschlussprofil montieren 14
Montage der Pfosten 16
Dachrinne an Pfosten montieren 27
Dachträger montieren 28
Glaselemente einsetzen 30
Wandanschlüsse abdichten 36
Elektrische Anschlüsse 39
Zubehör und Optionen 41
RGB/LED-Module anschließen 42
Rechteckprofile montieren 43
Rahmenverbreiterung unter Dachträger Seite montieren 44
Zugstab montieren 46
Montage der weinor Glas-Schiebewand w17 easy 47
Montage der weinor Seitenelemente SUPER LITE w50-c 48
Montage der Wintergartenmarkise weinor Sottezza II 50
Montage der Wintergartenmarkise weinor WGM Top 52
Montage der Vertikal-Beschattung VertiTex II 54
Fehlerbeseitigung 56
Übergabe 58
Entsorgung 58
EG-Konformitätserklärung 59
Verwendete Symbole 60
- Werkzeugliste → weinor Downloadcenter (DLC)
- Explosionsansicht → weinor Downloadcenter (DLC)
Lesen Sie diese Anleitung, beachten Sie den Inhalt und die
Warnhinweise vor der Montage!
Terrazza Pure | 127592-0000 w | v14 | 2021-11-08 | Montageanleitung | Montagehandleiding | Instructions for assembly | Instructions de montage
5
Technische Änderungen vorbehalten | Technische wijzigingen voorbehouden | We reserve the right to make technical changes | Sous réserve de modifications techniques
Allgemeines
Bestimmungsgemäße Verwendung
Das weinor Terrassendachsystem Terrazza Pure ist eine Wind- und Regen-
schutzschutzanlage, die nur als solche eingesetzt werden darf.
Mit optionalen weinor Vertikalbeschattungen und/oder Wintergarten-
markisen ist Terrazza Pure auch als Sonnenschutzanlage einsetzbar. Eine
missbräuchliche Nutzung kann zu Gefährdungen, Beschädigungen oder
zum Absturz der Anlage führen und ist nicht zulässig. Alle mitgelieferten
Produktbestandteile (Pfosten, Dachträger, Dachrinne, Glasscheiben usw.)
müssen entsprechend der Festlegungen und Anweisungen vollständig und
in richtiger Reihenfolge montiert werden. Veränderungen, An-/Umbau-
ten dürfen nur mit schriftlicher Genehmigung von weinor vorgenommen
werden. Unzulässige Veränderungen an der Anlage führen zum Verlust der
Garantieansprüche.
Qualifikation
Diese Anleitung richtet sich an geschulte Monteure und setzt folgende
Qualifikationen und Kenntnisse in der Montagetechnik voraus:
- Arbeitsschutz, Betriebssicherheit und Unfallverhütungsvorschriften
- Handhabung von Leitern, Gerüsten, Werkzeugen und Maschinen
- Transport von langen, schweren Bauteilen und Glasscheiben
- Beurteilung der Bausubstanz und Einbringen von Befestigungsmitteln
- Montage, Inbetriebnahme und Betrieb des Produkts.
• Beauftragen Sie fachkundige Montageunternehmen, wenn Sie
nicht über diese Qualifikationen verfügen!
Sicherheitszeichen
Warnung! Stromschlaggefahr!
Gefahrenstufe III
Vorsicht! Personenschäden!
Gefahrenstufe II
Achtung! Produkt- und Sachschäden
Gefahrenstufe I
Sicherheitshinweise
Warnung! Stromschlaggefahr!
• Elektrische Festinstallation darf nur durch Elektrofachkraft gemäß VDE
100 erfolgen!
• Montagehinweise der mitgelieferten Elektrogeräte befolgen!
• Elektroanschlüsse während der Montage vom Stromnetz trennen!
• Elektrischer Festanschluss darf nur an Leistungsnetze mit allpoliger Trenn-
vorrichtung und mit mindestens 3 mm Kontaktöffnungsweite erfolgen!
• Anlage nur anschließen, wenn Angaben am Produkt hinsichtlich Span-
nung, Frequenz und Leistung mit der Stromquelle übereinstimmen!
Vorsicht! Personenschäden!
• Sicherheitshinweise befolgen, um Personenschäden abzuwenden!
• Montage- und Einstellanleitungen der Motor-, Schalter- und Steuerungs-
hersteller beachten (bei Option Sonnenschutz/Vertikalbeschattung!
• Absturtzgefahr der Dachkonstruktion bei nicht erfolgter Eindeckung.
Die Dacheindeckung ist aus statischen Gründen zwingend notwendig, um
Personen- und Sachschäden durch umstürzende Bauteile abzuwenden!
• Verpackungen, Folien und Kleinteile von Kindern fernhalten
(Erstickungsgefahr)!
• Stromzufuhr
bei Arbeiten im Fahrbereich der Anlage unterbrechen
(Steckerkupplung am Motor trennen oder kontrollierte Stromunter-
brechung von außen installieren)
!
• Sicherungen und a
utomatische Steuerung
ausschalten
, um Quetsch-
oder Absturzgefahren durch unkontrollierte Bewegungen der
Anlage abzuwenden!
• Bei Betrieb einer Markise durch mehrere Nutzer: Vorrangig schalten-
de Verriegelungsvorrichtung (kontrollierte Stromunterbrechung
von außen) betätigen, um jegliches Ein- und Ausfahren der Markise
auszuschließen!
Aufstiegshilfen:
• Aufstiegshilfen nicht an der Markise anlehnen oder befestigen!
• Aufstiegshilfen müssen einen festen Stand haben und genügend Halt
bieten!
• nur Aufstiegshilfen mit ausreichender Tragkraft verwenden!
Absturzsicherung:
• Geeignete Absturzsicherungen verwenden, um Absturzgefahren
insbesondere bei Arbeiten in größeren Höhen abzuwenden!
Montagekonsolen:
• Art der gelieferten Montagekonsolen auf Übereinstimmung mit der
Bestellung prüfen!
• Den tatsächlich vorgefundenen Befestigungsuntergrund auf Überein-
stimmung mit den Angaben der Bestellung prüfen! Bei sicherheitrele-
vanten Abweichungen ist eine Montage unzulässig!
Befestigungsmittel:
• Geeignete Montage- und Befestigungsmaterialien (Dübel, Kleber
etc.) entsprechend der bauseitigen Gegebenheiten und Traglasten
verwenden! Dabei die vom Hersteller angegebenen Dübelauszugs-
und Tragekräfte beachten und berücksichtigen! Beim Kleben und
Abdichten stets vorher alle Flächen reinigen. Siehe Herstellerangaben
des Dichtmittels!
Quetsch- und Scherbereiche:
• Bei Option Sonnenschutz- und Vertikalmarkisen: Zwischen beweg-
lichen Komponenten und den sich begegnenden Markisenteilen
(Ausfallprofil, Kasten, Gelenkarme, Profile, ) bestehen Quetsch- und
Scherbereiche, die Kleidungsstücke oder Körperteile erfassen und mit
einziehen können!
• Gefahr von schweren Verletzungen durch Quetsch- und Scherbe-
reiche bei der Montage des Daches, z. B. beim Einlegen der Glas-
scheiben! Montage nur mit geeigneter Absicherung (Montagehilfe/
zweiter Monteur) und nicht bei Regennässe (Abrutschgefahr der
Glasseiben) durchführen, um Verletzungsgefahren abzuwenden!
• Markisen bis 2,5 m Montagehöhe nur betätigen (betrifft Option
Vertikalbeschattung), wenn die Sicht auf bewegende Teile besteht!
Elektrische Steuerungen, Funkantriebe mit Rastschaltern, Rastschalter
usw. sind in diesem Fall unzulässig!
• Tastschalter in Sichtweite des Ausfallprofils in einer Höhe von 1,5 m
und von beweglichen Teilen entfernt anbringen (nationale Bestim-
mungen hinsichtlich behinderter Personen beachten)!
Achtung! Produkt-/Sachschäden!
• Transportgut sachgerecht und sicher befestigen!
• Verpackung vor Nässe schützen (aufgeweichte Verpackungen können
sich beim Transport lösen)!
• Bereits geöffnete Verpackungen wieder sachgerecht für den Weiter-
transport verschließen!
Montage Heizgerät Tempura :
• Bei der Montage einer Tempura müssen die Sicherheitsabstände aus
der Montageanleitung der Tempura berücksichtigt werden!
Hinweis! Geräuschbildung (Knacken) an der Anlage
bei Temperaturänderungen!
An der Anlage auftretende Geräusche, welche auch nach sachgemäßer Mon-
tage und/oder Wartung auftreten, sind unvermeidbar und meistens auf die
Dehnung der Bauteile durch Wärmeeinwirkung zurückzuführen.
• Achten Sie auf eine spannungsfreie Montage, wenn Sie die Einzelkom-
ponenten miteinander verschrauben, um eine spätere Geräuschbildung
insbesondere bei Temperatureinflüssen zu minimieren!
Terrazza Pure | 127592-0000 w | v14 | 2021-11-08 | Montageanleitung | Montagehandleiding | Instructions for assembly | Instructions de montage
6Technische Änderungen vorbehalten | Technische wijzigingen voorbehouden | We reserve the right to make technical changes | Sous réserve de modifications techniques
Productoverzicht
Inhoudsopgave
6
7
8
2
1
13
3
5
4
10
9
12 x 8 x 5000
12
12
12
11
14
12
17
19
16
18
20
15
1Wandaansluitingsprofiel
2Terrazza Pure (installatie met 2 staanders en 3 glassegmenten)
3Glaselement
4Dakdrager (midden)
5Dakdrager (buiten)
6Dakgoot
7Staanders
8Staanderplaat met staanderplaatafdekking
9Kleine onderdelen
10 Begeleidende documenten bij het product
Opties en toebehoren:
11 Staanderaansluitprofiel
12 RGB verlichting / decors
13 Waterafvoer in de staander
14 Verdubbeling en rechthoekprofielen
15 Trekstaaf
16 weinor VertiTex II verticale zonwering
17 weinor WGM TOP serrezonnescherm
18 weinor Zij-element SUPER LITE w50-c
19 weinor Sottezza II serrezonnescherm
20 Onderbouwelementen weinor w17easy
Montagestappen – Kort overzicht 2
Productoverzicht | Inhoudsopgave 6
Algemene informatie 7
Maten en afstanden 12
Montage van de wandconsole 14
Montage van de staanders 16
Dakgoot aan staanders monteren 27
Dakdrager monteren 28
Glaselementen plaatsen 30
Muuraansluitingen afdichten 36
Elektrische aansluitingen 39
Toebehoren en opties 41
RGB-/ledmodule aansluiten 42
Rechthoekverbinder monteren 43
Frameverbreding onder dakdrager zijkant monteren 44
Trekstaaf monteren 46
Montage van de weinor glazen schuifwand w17 easy 47
Montage van de weinor zij-elementen SUPER LITE w50-c 48
Montage van het serrezonnescherm weinor Sottezza II 50
Montage van het serrezonnescherm weinor WGM Top 52
Montage van de verticale zonwering VertiTex II 54
Fouten verhelpen 56
Oplevering 58
Verwijdering 58
EG-conformiteitsverklaring 59
Gebruikte symbolen 60
- Gereedschapslijst → weinor Downloadcenter (DLC)
- Opengewerkte tekening → weinor Downloadcenter (DLC)
Lees deze handleiding goed door, vóór de montage dient u
vertrouwd te zijn met de inhoud van deze handleiding en
de waarschuwingen!
Terrazza Pure | 127592-0000 w | v14 | 2021-11-08 | Montageanleitung | Montagehandleiding | Instructions for assembly | Instructions de montage
7
Technische Änderungen vorbehalten | Technische wijzigingen voorbehouden | We reserve the right to make technical changes | Sous réserve de modifications techniques
Algemeen
Reglementair gebruik
Het weinor terrasoverkappingssysteem Terrazza Pure is een installatie voor
bescherming tegen wind en regen, die uitsluitend als zodanig gebruikt
mag worden. Met optionele weinor verticale zonweringen en/of serrezon-
neschermen is Terrazza Pure ook te gebruiken als zonweringsinstallatie.
Misbruik kan gevaar, beschadiging of vallen van de installatie tot gevolg
hebben en is verboden. Alle meegeleverde productbestanddelen (staan-
ders, dakdragers, dakgoot, glazen ruiten enz.) moeten volledig en in juiste
volgorde worden gemonteerd volgens de voorschriften en instructies.
Wijzigingen, aanbouw of een verbouwing, mogen uitsluitend worden
uitgevoerd na schriftelijke toestemming van weinor. Door ontoelaatbare
veranderingen aan de installatie komt de eventuele aanspraak op garantie
te vervallen.
Kwalificatie
Deze handleiding is bedoeld voor geschoolde monteurs die over de volgen-
de kwalificaties en kennis op het gebied van montagetechniek beschikken:
- Voorschriften voor veiligheid op het werk, bedrijfsveiligheid en
ongevallenpreventie
- Gebruik van ladders, steigers, gereedschappen en machines
- Transport van lange, zware componenten en glazen ruiten
- Beoordeling van de bouwsubstantie en aanbrengen van bevestigingsmiddelen
- Montage, inbedrijfstelling en gebruik van het product.
• Geef een deskundig montagebedrijf opdracht voor de uitvoering
wanneer u niet over deze kwalificaties beschikt!
Veiligheidssymbolen
Waarschuwing! Elektrische schokken!
Gevarenklasse III
Voorzichtig! Persoonlijk letsel.
Gevarenklasse II
Attentie! Product- en materiële schade!
Gevarenklasse I
Veiligheidsinstructies
Waarschuwing! Gevaar voor elektrische schokken!
• Elektrische vaste installatie alleen laten uitvoeren door een elektrotechni-
cus conform VDE 100!
• Houd de montage-instructies van de meegeleverde elektrische appa-
raten aan!
• Maak de elektrische aansluiting los van het voedingsspanningsnet tijdens
de montage!
• Elektrische vaste aansluiting alleen aansluiten op voedingsnetten met schei-
dingsinrichting over alle polen en met minimaal 3mm contactopening!
• Installatie alleen aansluiten, wanneer de specificatie op het product voor
wat betreft spanning, frequentie en vermogen kloppen met die van de
stroombron!
Voorzichtig! Persoonlijk letsel!
• Veiligheidsinstructies aanhouden om persoonlijk letsel te voorkomen!
• Montage- en instelhandleidingen van de motor-, schakelaar- en bestu-
ringsfabrikant aanhouden (bij optie zonwering/verticale zonwering!
• Gevaar voor vallen van de dakconstructie bij niet-uitgevoerde dakbe-
dekking. De dakbedekking is om statische redenen absoluut noodz-
akelijk om persoonlijk letsel en materiële schade door omvallende
componenten te voorkomen!
• Verpakkingen, folie en kleine onderdelen buiten bereik van kinde-
ren houden (gevaar voor verstikking)!
• Bij werkzaamheden binnen het bewegingsgebied van de installatie de
voedingsspanning onderbreken (stekkerkoppeling op motor losmaken of
gecontroleerde spanningsonderbreking van buiten installeren)!
• Zekeringen en a
utomatische besturing
uitzetten
, om beknellings-
en valgevaar door ongecontroleerde bewegingen van de installatie
te voorkomen!
• Bij gebruik van het zonnescherm door meerdere gebruikers: met
voorrang schakelende vergrendelingsvoorziening (gecontroleerde
stroomonderbreking van buiten) bedienen, om elk in- en uitschui-
ven van het zonnescherm uit te sluiten!
Klimhulpmiddelen:
• Klimhulpmiddelen niet tegen het zonnescherm zetten of aan het
scherm bevestigen!
• Klimhulpmiddelen dienen stabiel te staan en voldoende houvast te
bieden!
• Gebruik alleen klimhulpmiddelen met voldoende draagvermogen!
Beveiliging tegen vallen:
• Gebruik geschikte beveiliging tegen vallen, om vooral bij het werken
op grotere hoogte het valgevaar af te wenden!
Montageconsoles:
• Controleer of het soort montageconsoles overeenkomt met hetgeen
op de bestelling staat!
• Controleer of de daadwerkelijk aanwezige bevestigingsondergrond
overeenkomt met de specificaties van de bestelling! Bij veiligheidsre-
levante afwijkingen is montage niet toegestaan!
Bevestigingsmiddelen:
• Gebruik geschikte montage- en bevestigingsmaterialen (pluggen, lijm
etc.) afgestemd op de bouwkundige omstandigheden en draag-
lasten! Neem daarbij de door de fabrikant aangegeven uittrek- en
draagkrachten van de pluggen in acht! Bij het lijmen en afdichten
altijd eerst de oppervlakken reinigen. Zie de aanwijzingen van de
fabrikant van het afdichtmiddel!
Gevaar voor beknelling en snijden:
• Bij optie zonneschermen en verticale zonweringen: Tussen bewegen-
de componenten en de bewegende zonneschermdelen (uitvalprofiel,
kast, scharnierarmen, profielen) bestaan beknellings- en snijzones, die
kleding of lichaamsdelen kunnen grijpen en intrekken!
• Gevaar voor ernstig letsel door beknellings- en snijzones bij de monta-
ge van het dak bijv. bij het aanbrengen van de glazen ruiten! Monta-
ge alleen met geschikte beveiliging (montagehulp/ tweede monteur)
en niet bij regenachtige weer uitvoeren (gevaar voor wegglijden van
de glazen ruiten) om letselgevaar te voorkomen!
• Zonneschermen tot 2,5m montagehoogte alleen bedienen (betreft
optie verticale zonwering), wanneer de bewegende delen ongehin-
derd in zicht zijn! Elektrische besturingen, draadloze aandrijvingen
met vergrendelbare schakelaars, vergrendelbare schakelaars enz. zijn
in dit geval niet toegestaan!
• De drukschakelaar in het zicht van het uitvalprofiel op een hoogte
van 1,5 meter en op afstand van bewegende delen aanbrengen (nati-
onale voorschriften over personen met een beperking in acht nemen)!
Attentie! Product- en materiële schade!
• De te transporteren goederen correct en veilig bevestigen!
• Bescherm de verpakking tegen vocht (zacht geworden verpakking
kan tijdens transport open gaan)!
• Al geopende verpakkingen weer goed voor het verdere transport
afsluiten!
Montage verwarming Tempura:
• Bij de montage van een Tempura moeten de veiligheidsafstanden uit
de montagehandleiding van de Tempura in acht worden genomen!
Aanwijzing bij geluiden (gekraak) aan het systeem
bij temperatuurschommelingen!
Als er ook na correcte montage en/of correct onderhoud nog geluiden te ho-
ren zijn bij het systeem, zijn deze onvermijdelijk en zijn deze meestal te wijten
aan het uitzetten van de componenten door inwerking van warmte.
• Let op een spanningsvrije montage bij het vastschroeven van de afzon-
derlijke componenten. Zo beperkt u latere geluiden, vooral bij tempera-
tuursinvloeden, tot een minimum!
Terrazza Pure | 127592-0000 w | v14 | 2021-11-08 | Montageanleitung | Montagehandleiding | Instructions for assembly | Instructions de montage
8Technische Änderungen vorbehalten | Technische wijzigingen voorbehouden | We reserve the right to make technical changes | Sous réserve de modifications techniques
Product overview
List of contents
6
7
8
2
1
13
3
5
4
10
9
12 x 8 x 5000
12
12
12
11
14
12
17
19
16
18
20
15
1Wall gap sealing profile
2Terrazza Pure (construction with 2 posts and 3 glass segments)
3Glass element
4Roof support (centre)
5Roof support (outside)
6Guttering
7Post
8Post plate with post plate cover
9Small parts
10 Documents accompanying the product
Options and accessories:
11 Post attachment profile
12 RGB lighting / decorations
13 Water drainage in post
14 Doubling and square profiles
15 Tension rod
16 weinor VertiTex II vertical awning
17 weinor WGM Top conservatory sunscreen awning
18 weinor side elements SUPER LITE w50-c
19 weinor Sottezza II conservatory sunscreen awning
20 weinor w17easy glazing elements
Installation steps – Brief overview 2
Product overview | List of contents 8
General 9
Dimensions and spacing 12
Mounting of the wall connection 14
Installing the posts 16
Installing the guttering to posts 27
Installing roof supports 28
Inserting the glass elements 30
Seal the wall connection 36
Electrical connections 39
Accessories and options 41
Connecting the RGB/LED modules 42
Installing the rectangular connectors 43
Installing the Frame widener under side roof support 44
Installing the tension rod 46
weinor w17 easy full-glass sliding door installation 47
weinor SUPER LITE w50-c side elements installation 48
weinor Sottezza II conservatory awning installation 50
weinor WGM Top conservatory awning installation 52
VertiTex II vertical awning installation 54
Rectifying faults 56
Handover 58
Disposal 58
EC Declaration of Conformity 59
Symbols used 60
- Tool list → weinor Downloadcenter (DLC)
- Exploded drawing → weinor Downloadcenter (DLC)
Please read these instructions and observe their contents
and warnings before assemble the equipment!
Terrazza Pure | 127592-0000 w | v14 | 2021-11-08 | Montageanleitung | Montagehandleiding | Instructions for assembly | Instructions de montage
9
Technische Änderungen vorbehalten | Technische wijzigingen voorbehouden | We reserve the right to make technical changes | Sous réserve de modifications techniquesTechnische Änderungen vorbehalten | Technische wijzigingen voorbehouden | We reserve the right to make technical changes | Sous réserve de modifications techniques
General
Intended use
The weinor Terrazza Pure patio roof system is a wind and rain protection
construction that may only be used as such. With the optional weinor
vertical awnings and/or conservatory awnings, Terrazza Pure can also be
used as a sunscreen installation. Misuse can lead to hazards, damage or to
collapse of the construction and is not permissible. All the supplied product
components (posts, roof support, guttering, glass panels etc.) must be
installed in full and in the correct order according to the documents and
instructions. Changes, additions may only be carried out with the written
permission of weinor. Prohibited changes to the construction will result in
voiding the guarantee claims.
Qualifications
These instructions are addressed to trained fitters and require qualification
and knowledge of installation techniques:
- Occupational safety at work, operating safety and accident prevention
regulations
- Handling of ladders, scaffolding, tools and machines,
- Transport of long, heavy components and glass panes,
- Estimation of the building structure and fitting the fixing materials,
- Installation, start-up and operation of the product.
• Employ a professional installation company if you do not possess
these qualifications!
Safety symbols
Warning! Risk of electric shock!
Danger level III
Careful! Personal injury!
Danger level II
Caution! Product and property damage!
Danger level I
Safety instructions
Warning! Risk of electric shock!
• Electrical fixed installation may only be carried out by electrically skilled
person according to VDE 100!
• Observe the installation instructions for the electrical devices included in
the delivery!
• Separate the electrical connections from the mains during the installa-
tion!
• Only connect electrical termination to mains system with all-pole discon-
necting device and with min. 3 mm contact opening width!
• Only connect the construction if indications on product relating to volta-
ge, frequency and output match those of the power source!
Caution! Personal injury!
• Follow safety instructions in order to prevent personal injury!
• Observe the instructions for installation and setting from the manu-
facturer of the drive, commutator and control (with sunscreen/vertical
awning option)!
• Risk of untrussed roof falling if not covered. For reasons of structural
safety, it is vital that the roof covering is fitted to the roof to prevent
personal injury and damage to property due to falling parts!
• Keep packaging, sheeting and small parts away from children
(choking hazard)!
• Disconnect current supply
when working within the movement
range of the construction
(disconnect connector coupling on driver
or install controlled power interruption from the outside)
!
• Switch off fuses and automatic control in order to prevent risk of crus-
hing or falling due to uncontrolled movements of the construction!
• If awnings are operated by several users: a priority locking device
must be activated (controlled interruption of the power supply from
outside), making it impossible to open or retract the awning at all!
Ladders:
• Do not lean ladders against the awning or fix them to the awning!
• Ladders must be on a firm base and provide adequate support!
• Only use ladders with adequate load-bearing capacity!
Anti-fall guards:
• Use appropriate anti-fall guards to prevent the danger of falling espe-
cially when working at considerable heights!
Mounting connections:
• Check that the type of mounting connections supplied are compliant
with the order!
• Check that the information provided in the order about the installati-
on surface tallies with the actual installation surface on site! Installati-
on is inadmissible in case of safety-relevant deviations!
Fixing material:
• Use suitable installation and fitting materials (plugs, glue etc.) ac-
cording to on site conditions and loads! In doing so, the extraction
and load forces specified by the manufacturer must be observed and
taken into account! Always clean the surfaces before adhesion and
sealing. See the sealant manufacturer‘s instructions!
Crushing and cutting zones:
• With the sunscreen and vertical awnings option: crushing and shea-
ring zones exist between movable components and moving awning
parts (projection profile, housing, folding arms, profiles) which could
catch and draw in clothing or body parts!
• Risk of serious injuries due to crushing and cutting zones when
installing the roof, e.g. when laying the glass panels! Only carry out
installation only with suitable safeguarding (installation assistance/se-
cond fitter) and not in the rain (risk of glass panels slipping) to prevent
any risk of injury!
• Only activate awnings up to 2.5 m installation height (concerns verti-
cal awning option), if the moving parts are within your line of vision!
Electrical controls, radio controls with latch switches, stand-alone
latch switches, etc. are not permissible in this case!
• The key switch must be fitted in the line of vision of the projection
profile, but far enough removed from the movable parts, at a height
of 1.5 metres (national regulations relating to disabled people must
be observed)!
Caution! Product and property damage!
• Secure cargo properly and safely!
• Protect the packaging from moisture (dampened packaging can come
loose during transport)!
• Seal open packaging for further transport!
Fitting the Tempura heating system :
• When fitting a Tempura, the safety distances in the Tempura instruc-
tions for assembly must be taken into account!
Note on the generation of noises (creaking) on the system
in the event of temperature changes!
Noises which occur on the system after proper assembly and/or
maintenance are unavoidable and are mostly due to the expansion of
components due to the effect of heat.
• Ensure stress-free assembly when screwing the individual compo-
nents together in order to minimise subsequent noise generation,
particularly in the event of temperature influences!
Terrazza Pure | 127592-0000 w | v14 | 2021-11-08 | Montageanleitung | Montagehandleiding | Instructions for assembly | Instructions de montage
10 Technische Änderungen vorbehalten | Technische wijzigingen voorbehouden | We reserve the right to make technical changes | Sous réserve de modifications techniques
Aperçu des produits
Table des matières
6
7
8
2
1
13
3
5
4
10
9
12 x 8 x 5000
12
12
12
11
14
12
17
19
16
18
20
15
1Raccord mural
2
Terrazza Pure (installation avec 2 montants et 3 segments en verre)
3Élément en verre
4Support de toit (centre)
5Support de toit (extérieur)
6Gouttière
7Montant
8Plaque de montant avec revêtement de plaque de montant
9Petites pièces
10 Documents joints au produit
Options et accessoires:
11 Profilé de raccord de montants
12 Éclairage RVB / décors
13 Évacuation des eaux dans les montants
14 Isolation supplémentaire et profilés rectangulaires
15 Tige de traction
16 Ombrage vertical Vertitex II
17 Store de protection solaire WGM Top pour véranda
18 Élément latéral SUPER LITE w50-c
19 Store de protection solaire Sottezza II pour véranda
20 Châssis weinor w17easy
Étapes de montage - Bref aperçu 2
Aperçu des produits | Table des matières 10
Généralités 11
Dimensions et distances 12
Montage de la console murale 14
Montage des montants 16
Monter le chéneau sur le montant 27
Monter le support de toit 28
Insérer les éléments en verre 30
Étancher la console murale 36
Raccords électriques 39
Accessoires et options 41
Raccorder les modules/RVB/LED 42
Monter les connecteurs rectangulaires 43
Poser élément d‘élargissement pour cadre en dessous du support côté
44
Monter la tige de traction 46
Montage de la paroi coulissante en verre weinor w17 easy 47
Montage des éléments latéraux weinor SUPER LITE w50-c 48
Montage du store de véranda Sottezza II de weinor 50
Montage du store de véranda WGM de weinor 52
Montage du système d'ombrage vertical VertiTex II 54
Dépannage 56
Remise des documents 58
Gestion des déchets 58
Déclaration de conformité CE 59
Symboles utilisés 60
-Liste d’outils → weinor Downloadcenter (DLC)
- Vue éclatée → weinor Downloadcenter (DLC)
Avant la montage du produit, veuillez lire cette notice et
en respecter le contenu et les mises en garde!
Terrazza Pure | 127592-0000 w | v14 | 2021-11-08 | Montageanleitung | Montagehandleiding | Instructions for assembly | Instructions de montage
11
Technische Änderungen vorbehalten | Technische wijzigingen voorbehouden | We reserve the right to make technical changes | Sous réserve de modifications techniques
Généralités
Utilisation conforme
Le système de toit de terrasse weinor Terrazza Pure est une installation de
protection contre la pluie et le vent qui ne doit être utilisée qu‘à cet effet.
Le Terrazza Pure peut également être utilisé comme une protection solaire
avec des dispositifs d‘ombrage et/ou des stores de véranda weinor en
option. Une utilisation non conforme est interdite car elle peut constituer un
danger et endommager ou faire chuter l‘installation. Tous les composants
du produit fournis (montant, support de toit, chéneau, vitres, etc.) doivent
être montés entièrement et dans le bon ordre conformément à ce qui a
été défini et aux instructions. Les modifications, l‘ajout d‘éléments ou les
transformations nécessitent l‘accord écrit de weinor. Toute modification non
autorisée de l‘installation entraîne la perte des droits à la garantie.
Qualification
Cette notice s’adresse aux monteurs qui ont été formés, et implique de
disposer des qualifications et connaissances en technique de montage
suivantes:
- Sécurité au travail, sécurité de fonctionnement et prescriptions en matière
de prévention des accidents,
- Manipulation d'échelles, d'échafaudages, d'outils et de machines,
- Transport d'éléments de construction et de vitrages longs et lourds,
- Évaluation du bâti et mise en place d'éléments de fixation,
- Montage, mise en service et fonctionnement du produit.
• Si vous ne disposez pas de ces qualifications, adressez-vous à des
entreprises de montage professionnelles!
Symboles de sécurité
Attention ! Risque d‘électrocution !
Niveau de danger III
Attention ! Blessures corporelles!
Niveau de danger II
Attention ! Dommages matériels !
Niveau de danger I
Instructions de sécurité
Avertissement! Risque d'électrocution!
• L'installation électrique fixe doit être réalisée exclusivement par une
personne qualifiée en électricité, conformément à VDE 100!
• Suivre les instructions de montage des appareils électriques fournis!
• Débrancher les raccordements électriques de l'alimentation réseau
pendant le montage!
• Brancher un raccordement électrique fixe uniquement sur des réseaux
pourvus d'un sectionneur multipolaire et avec une largeur d'ouverture
de contact d'au moins 3mm!
• Raccorder l'installation uniquement lorsque les indications du produit
en termes de tension, de fréquence et de puissance correspondent à
celles de la source d'alimentation électrique!
Prudence! Dommages aux personnes!
• Respecter les instructions de sécurité pour éviter des blessures
corporelles!
• Respecter les instructions de montage et de réglage du fabricant du
moteur, de l‘interrupteur et de la commande (pour l‘option protec-
tion solaire/système d‘ombrage vertical)!
• Risque de chute de la toiture si la couverture n‘est pas mise correcte-
ment. La couverture de toit s‘avère impérativement nécessaire pour
des raisons statiques afin d‘éviter tout dommage corporel et matériel
dû à la chute de composants!
• Garder les emballages, films et les petites pièces hors de portée des
enfants (risque d‘étouffement)!
• Couper l‘alimentation électrique avant de procéder à des travaux
dans la zone de mouvement de l‘installation (débrancher la fiche
de connexion du moteur ou installer un coupe-circuit à commande
externe)!
• Couper les fusibles et la commande automatique
afin d‘éviter de se
coincer les doigts ou de faire chuter le store en cas de mouvements
incontrôlés de l‘installation!
• Dans le cas où les stores sont utilisés par plusieurs personnes:
actionner un dispositif de verrouillage de commutation prioritaire
(coupure de courant contrôlée depuis l‘extérieur) afin d‘empêcher
alors tout mouvement de déploiement/ d‘escamotage du store !
Aides à la montée:
• Ne pas appuyer ou fixer d‘aides à la montée contre le store!
• Les aides à la montée doivent être stables et offrir un maintien suffisant!
• Utiliser uniquement des aides à la montée qui présentent une capaci-
té de charge suffisante!
Protection antichute:
• Utiliser des protections antichute adaptées afin d‘éviter les risques de
chute, en particulier en cas de travaux en hauteur!
Consoles de montage:
• Vérifier que le type de consoles de montage correspond à la commande!
• Vérifier que le support de fixation effectivement fourni correspond
aux indications de la commande! En cas de différences pouvant affec-
ter la sécurité, le montage est interdit!
Éléments de fixation:
• Matériel de montage et fixation adapté (chevilles, colle, etc.) selon
les conditions de construction sur place et les charges à supporter!
Observer et prendre en compte les forces portantes et pour extraire
les chevilles indiquées par le fabricant! Nettoyer toujours les surfaces
avant de coller ou d’étancher. Voir les indications du fabricant de
l’agent d’étanchéité !
Zones d‘écrasement et de cisaillement:
• Pour l‘option stores de protection solaire et verticaux: Entre les
composants mobiles et les parties du store qui leur font face (barre de
charge, boîtier, bras articulés, profilés), il y a des zones d‘écrasement
et de cisaillement où des pans de vêtements ou des parties du corps
peuvent se coincer et être attirées!
• Risque de blessures graves aux zones d‘écrasement et de pincement
lors du montage du toit, par ex. lors de la pose des vitres! Effectuer le
montage uniquement avec une protection appropriée (aide au mon-
tage/deuxième monteur) et s‘il ne pleut pas (sinon les vitres risquent
de glisser) pour éviter de se blesser!
• Les stores d‘une hauteur de montage allant jusqu‘à 2,5m (concerne
l‘option ombrage vertical) ne doivent être actionnés que si les pièces
mobiles sont visibles! Les commandes électriques, les moteurs radio
avec commutateur à crans, les commutateurs à crans, etc. ne sont pas
autorisés dans ce cas!
• Placer le bouton-poussoir dans le champ visuel du profilé de défection
à une hauteur de 1,5m et à distance des pièces mobiles (respecter les
dispositions relatives aux personnes handicapées)!
Attention! Dommages matériels/sur le produit!
• La marchandise transportée doit être fixée correctement et de mani-
ère sûre!
• Protéger l‘emballage de l‘humidité (des emballages détrempés peu-
vent se défaire pendant le transport)!
• Les emballages déjà ouverts doivent être correctement refermés pour
poursuivre le transport!
Remarque sur des bruits (craquement) provenant de
l’installation lors de changements de température !
Des bruits provenant de l’installation qui surviennent même après un mon-
tage et/ou une maintenance professionnels sont inévitables et dus, la plu-
part du temps, à l’allongement des composants sous l’effet de la chaleur.
• Faites attention à ce que le montage se fasse hors tension lorsque vous
vissez les différents composants ensemble afin de minimiser des bruits
ultérieurs, notamment sous l’effet des températures !
Terrazza Pure | 127592-0000 w | v14 | 2021-11-08 | Montageanleitung | Montagehandleiding | Instructions for assembly | Instructions de montage
12 Technische Änderungen vorbehalten | Technische wijzigingen voorbehouden | We reserve the right to make technical changes | Sous réserve de modifications techniques
B* (min. 2000 mm | max. 7000 mm
AM* 1 AM* 2 AM* 3
320
162
min. 5
115 115
60
74
Abstände und Maße
Afstanden en maten
Spacing and dimensions
Distances et dimensions
T
Tiefe
Diepte (diepte totaal)
Depth (total depth)
Profondeur (prof. totale)
UKD
Unterkante Dachrinne
Onderkant dakgoot
Bottom edge of guttering
Bord inférieur gouttière
UKW
Unterkante Wandanschluss
Onderkant wandaansluiting
Bottom edge of wall connection
Bord inférieur du raccord mural
AM
Achsmaß
Asmaat
Dist. between centre lines
Entraxe
TUE
Tiefe Überstand
Diepte overstek
Depth overhang
Saillie profonde
AUE
Min. Abstand zum Überstand
Min. afstand tot overstek
Min. spacing to overhang
Distance min. jusqu‘à la saillie
Terrazza Pure | 127592-0000 w | v14 | 2021-11-08 | Montageanleitung | Montagehandleiding | Instructions for assembly | Instructions de montage
13
Technische Änderungen vorbehalten | Technische wijzigingen voorbehouden | We reserve the right to make technical changes | Sous réserve de modifications techniques
Ansicht von der Seite
Aanzicht van de zijkant
View as seen from the side
Vue de côté
AUE
min. 100 mm
500 mm
500 mm
500 mm
UKW
TUE
AUE
AUE
UKD
T* (min. 1600 mm | max. 4000 mm)
TUE
≤ 100 mm
101 - 500 mm
501 - 1000 mm
> 1001 mm
115
3,2°
2,1°
T
1600 - 2599
2600 - 4000
UKW – UKD = 94,5
0 – 10 mm
0 + 10 mm
UKD
UKD
Wandanschlussprofil ( Ansicht von vorne)
Wandaansluitingsprofiel ( aanzicht van voren)
Wall gap sealing profile (view as seen from the front)
Profilé de raccord mural ( vue de l‘avant)
max. 10
UKW – UKD = 94,5 (-0 /+5)
Rotationslaser verwenden!
Gebruik van roterende laser
Use a rotary laser
Utiliser un laser rotatif
Ansicht von oben
Bovenaanzicht
View from above
Vue de dessus
Maximales Gefälle
Maximale hellingshoek
Maximum pitch
Inclinaison maximale
Terrazza Pure | 127592-0000 w | v14 | 2021-11-08 | Montageanleitung | Montagehandleiding | Instructions for assembly | Instructions de montage
14 Technische Änderungen vorbehalten | Technische wijzigingen voorbehouden | We reserve the right to make technical changes | Sous réserve de modifications techniques
74
UKW - 74
Wandanschlussprofil montieren
Montage van de wandaansluitingsprofiel
Mounting of the wall gap sealing profile
Montage de la raccord mural
Ansicht von oben
Bovenaanzicht
View from above
Vue de dessus
Ansicht von vorne
Aanzicht van voren
View as seen from the front
Vue de l‘avant
Erdung abklemmen
Klemmen van aarding lossen
Disconnect the earthing
Débrancher la mise à la terre
Vorsicht! Absturzgefahr der Anlage!
Die vorgegebene Montagereihenfolge berücksichtigen!
Bauseitige Gegebenheiten bewerten! Gefälle und schräge
Wände bauseits ausgleichen!
Geeignete Befestigungsmittel einsetzen (Beispiel: Schwer-
last-Befestigungen mit Injektionsmörtel)!
Zusätzliche Befestigungsbohrungen entsprechend der bauli-
chen Gegebenheiten am Wandanschluss bauseits ergänzen!
Beachten Sie die Herstellerangaben bezüglich der zulässi-
gen Biegung der Befestigungsmittel bei Distanzmontage!
Voorzichtig! Gevaar voor vallen van de installatie!
Neem de voorgeschreven volgorde van monteren in acht!
Maak een inschatting van de bouwzijdige omstandigheden!
Hellingen en schuine wanden ter plekke compenseren!
Geschikt bevestigingsmiddel plaatsen (example: bevesti-
gingsoplossingen voor de bevestiging van zware lasten met
injectiemortel)!
Extra boorgaten aan de wandaansluiting bouwzijdig aanbren-
gen overeenkomstig de omstandigheden ter plekke!
Neem de aanwijzingen van de fabrikant met betrekking
tot de toegestane buiging van de bevestigingsmiddelen bij de
montage op afstand in acht!
Caution! Risk of construction falling!
The specified installation order must be followed! Assess
the structural conditions on site!
Compensate for slopesand inclined walls on site!
Insert suitable fasteners (example: Chemical fixing solu-
tions for heavy-duty fixings with injection mortar)!
Also drill additional anchorage holes into the wall gap sealing
profile on-site, in accordance with the structural conditions!
Observe the manufacturer‘s instructions with regard to the
permissible bending of the fasteners during distance installa-
tion!
Prudence! Risque de chute de l‘installation !
Prendre absolument en compte l‘ordre de montage indi-
qué! Évaluer les conditions de construction sur place !
Égaliser l‘inclinaison et obliquité des murs sur place!
Utiliser des éléments de fixation adéquats
(example: Ancrage haute adhérence avec de la résine à injec-
ter) ! Des trous de fixation supplémentaires doivent être percés
sur place sur la console murale conformément aux conditions
de construction !
Respectez les consignes du fabricant en ce qui concerne la
flexion autorisée des fixations lors du montage à distance !
1
Terrazza Pure | 127592-0000 w | v14 | 2021-11-08 | Montageanleitung | Montagehandleiding | Instructions for assembly | Instructions de montage
15
Technische Änderungen vorbehalten | Technische wijzigingen voorbehouden | We reserve the right to make technical changes | Sous réserve de modifications techniques
max. 2 mm max. 0,5°
12 x 8 x 5000
Vorlegeband
Voorlegtape
Glazing tape
Bande de garniture
> 5000 (Option/Optie)
Zusammenstoßen der Vorlegebänder im
Bereich der noch zu montierenden Dachtäger!
Collision of the the glazing tapes in the area
of the roof supports still to be assembled!
Botsing van de voorlegtape in de omgeving
van de nog te monteren dakdragers!
Collision des bandes de garniture dans la
zone de support de toit restant à assembler !
Vorsicht! Absturzgefahr der Anlage! Wandanschlussprofil prüfen: Neigung maximal 0,5°!
Voorzichtig! Gevaar voor vallen van de installatie! Wandaansluitingsprofiel controleren: Hoek maximal 0,5°!
Caution! Risk of construction falling! Check the wall gap sealing profile: max. pitch 0,5°!
Prudence! Risque de chute de l‘installation ! Contrôler le profilé de raccord mural : inclinaison du store 0,5° maximum !
2
Hinweis! Das im Wandanschlussprofil werkseitig eingezogene, untere Vorlegeband kann produktionsbedingt unterbrochen
oder an den Enden zu kurz sein. Austausch oder Korrektur sind nicht erforderlich, da dieses nur als Abstandshalter für das
einzuklebende, obere Vorlegeband vorgesehen ist!
Let op! De onderste voorlegtape, die in de fabriek in het wandaansluitingsprofiel is getrokken, kan om redenen van produc-
tie onderbroken zijn of aan de uiteinden te kort zijn. Vervanging of correctie is niet noodzakelijk, omdat deze tape alleen
bedoeld is als afstandshouder voor de aan te brengen bovenste voorlegtape!
Note! The bottom glazing tape drawn into the wall connection profile at the factory may be interrupted or too short at
the ends for production reasons. Replacement or correction is not necessary, as this is only intended as a
spacer for the top glazing tape to be glued in place!
Remarque! La bande de garniture inférieure insérée à l’usine dans le profilé de
raccord mural peut être interrompue en fonction de la production ou être trop
courte aux extrémités. Un changement ou une correction n’est pas nécessaire, car
celle-ci est prévue uniquement comme support d’écartement pour la bande de
garniture supérieure à coller !
Terrazza Pure | 127592-0000 w | v14 | 2021-11-08 | Montageanleitung | Montagehandleiding | Instructions for assembly | Instructions de montage
16 Technische Änderungen vorbehalten | Technische wijzigingen voorbehouden | We reserve the right to make technical changes | Sous réserve de modifications techniques
ohne Linie
800
700 x 700
Option/OptieStandard
700 x 700
800
Option/Optie
Krinner
KSF R-Serie
Option/Optie
C25/30*
C25/30*
(A) (B)
(C) (D)
Montage der Pfosten
Montage staanders
Installation of post
Montage des montants
Pfostenmontage – Montageoptionen
Staandermontage – Montageopties
Post installation – Installation options
Montage des montants – options de montage
1
*C25/C30
Beton-Druckfestigkeit C25/30
Drukvastheid beton C25/30
Concrete compressive strength C25/30
Résistance à la pression du béton C25/30 !
Betonieren/festziehen der Pfosten erst nach
Montage und Ausrichtung der Anlage!
Betonneren/ vastdraaien van de staanders pas
na montage en uitlijning van de installatie!
Only concrete/fix the post once the construction
has been installed and aligned!
Bétonner/serrer les montants seulement après le
montage et l‘orientation de l‘installation terminés!
Terrazza Pure | 127592-0000 w | v14 | 2021-11-08 | Montageanleitung | Montagehandleiding | Instructions for assembly | Instructions de montage
17
Technische Änderungen vorbehalten | Technische wijzigingen voorbehouden | We reserve the right to make technical changes | Sous réserve de modifications techniques
Geeignete Befestigungsmittel einsetzen!
Geschikt bevestigingsmiddel plaatsen!
Insert suitable fasteners!
Utiliser des éléments de fixation adéquats !
Punktfundamente (Beton-Druckfestigkeit C25/30)
Puntfunderingen (drukvastheid beton C25/30)
Deep-seated foundations (concrete compressive strength C25/30)
Fondations ponctuelles (résistance à la pression du béton C25/30) !
Pfostenmontage auf bestehendem Terrassenboden (A) oder auf Betonboden/Punktfundamenten (Option B)
Staandermontage op de bestaande terrasvloer (A) of op puntfunderingen (optie B)
Post installation to existing patio floors (A) or on concrete/on deep-seated foundations (option B)
Montage des montants sur un sol de terrasse existant (A) ou sur béton / des ffondations ponctuelles (option B)
1 (A) (B)
Terrazza Pure | 127592-0000 w | v14 | 2021-11-08 | Montageanleitung | Montagehandleiding | Instructions for assembly | Instructions de montage
18 Technische Änderungen vorbehalten | Technische wijzigingen voorbehouden | We reserve the right to make technical changes | Sous réserve de modifications techniques
Option/Optie
Option/Optie
10 Nm
Korrosionsschutz
corrosiebescherming
corrosion protection
protection anticorrosion
min. 40
80
70 x 70
C25/30
Pfostenmontage in Köcherfundamenten (Option C)
Staandermontage in kokerfunderingen (optie C)
Post installation in bucket foundations (option C)
Montage des montants en fondations à encuvement ( option C )
Einschubprofil
Inschuifprofiel
Plug-in unit profile
Profilé encastrable
1 (C)
Terrazza Pure | 127592-0000 w | v14 | 2021-11-08 | Montageanleitung | Montagehandleiding | Instructions for assembly | Instructions de montage
19
Technische Änderungen vorbehalten | Technische wijzigingen voorbehouden | We reserve the right to make technical changes | Sous réserve de modifications techniques
Krinner
Service
M12
Pfostenmontage auf Schraubfundamenten (Option D)
Staandermontage op schroeffunderingen (optie D)
Post installation on foundation anchors (option D)
Montage des montants sur des fondations à vis ( option D )
1 (D)
Terrazza Pure | 127592-0000 w | v14 | 2021-11-08 | Montageanleitung | Montagehandleiding | Instructions for assembly | Instructions de montage
20 Technische Änderungen vorbehalten | Technische wijzigingen voorbehouden | We reserve the right to make technical changes | Sous réserve de modifications techniques
min. 700*
115
115
min. 700*
B – 115
57,5
B
(T) + 57,5
(T)
mm
Fundament-Plan/Fundamente vorbereiten (erforderlich bei Option Punktfundamet/Köcherfundament)
Funderingsschema/fundering voorbereiden (bij optie puntfundering vereist of bij kokerfundering)
Foundation plan/preparing to Foundation (necessary for deep-seated foundation option or bucket foundation)
Plan de fondation / préparation de la fondation (nécessaire pour l‘option fondations ponctuelles / fondation à encuvement)
3
BDachbreite
Dakbreedte
Roof width
Largeur de toit
TDachtiefe
Dakdiepte
Roof depth
Profondeur de toit
*Die Größe des Fundamentes wird bauseits entsprechend der baulichen Gegebenheiten und statischen Erfordernissen bestimmt.
*Het grootte van de fundering moet op de locatie vastgesteld worden op basis van de bouwkundige omstandigheden en statische vereisten.
*Choose the size of the foundation required on site based on the structural conditions and static requirements.
*Les dimensions de la fondation doivent être définis sur place en fonction des conditions de construction et des exigences statiques.
D1
D2
T
D1 = D2 ?
mm
ohne Linie
B
Pfostenposition ermitteln und markieren
Positie van de staanders vaststellen en markeren
Calculate and mark the position of the post
Établir la position des montants puis la marquer
2
T; B
Auftragsbestätigung
Opdrachtbevestiging
Confirmation of order
Confirmation de commande 
Terrazza Pure | 127592-0000 w | v14 | 2021-11-08 | Montageanleitung | Montagehandleiding | Instructions for assembly | Instructions de montage

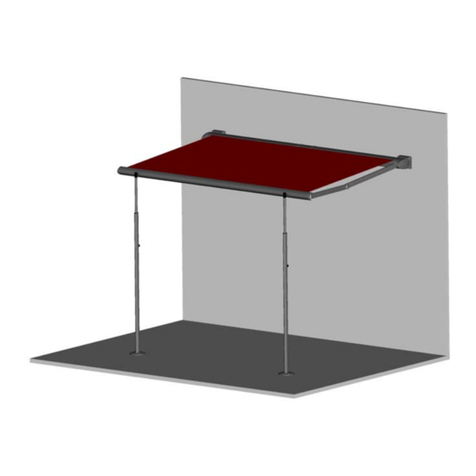
Other manuals for Terrazza Pure

2

Other weinor Accessories manuals

weinor Wind Support Manual

weinor

weinor Wind Support Manual

weinor PergoTex II Assembly instructions

weinor

weinor PergoTex II Assembly instructions

weinor Cassita User manual

weinor

weinor Cassita User manual

weinor Plaza Viva Manual

weinor

weinor Plaza Viva Manual

weinor N 2000 Manual

weinor

weinor N 2000 Manual

weinor N 2000 Manual

weinor

weinor N 2000 Manual

weinor WGM 1030 Service manual

weinor

weinor WGM 1030 Service manual

weinor Aruba Rund Manual

weinor

weinor Aruba Rund Manual

weinor Semina Life Manual

weinor

weinor Semina Life Manual

weinor WGM Top Manual

weinor

weinor WGM Top Manual

weinor Cassita II Manual

weinor

weinor Cassita II Manual

weinor Semina User manual

weinor

weinor Semina User manual

weinor VertiTex WeiTop Quick guide

weinor

weinor VertiTex WeiTop Quick guide

weinor Opal Design II LED Manual

weinor

weinor Opal Design II LED Manual

weinor Kubata Assembly instructions

weinor

weinor Kubata Assembly instructions

weinor I 2000 Manual

weinor

weinor I 2000 Manual

weinor Topas User manual

weinor

weinor Topas User manual

weinor Plaza Viva Assembly instructions

weinor

weinor Plaza Viva Assembly instructions

weinor BiSens SWR-230V User manual

weinor

weinor BiSens SWR-230V User manual

weinor Opal Design II LED Assembly instructions

weinor

weinor Opal Design II LED Assembly instructions

weinor Sottezza II Stretch Manual

weinor

weinor Sottezza II Stretch Manual

weinor Semina User manual

weinor

weinor Semina User manual

weinor Plaza Viva Manual

weinor

weinor Plaza Viva Manual

weinor WGM 1030 Manual

weinor

weinor WGM 1030 Manual

Popular Accessories manuals by other brands

CORA CS1030 user guide

CORA

CORA CS1030 user guide

3Doodler 2.0 manual

3Doodler

3Doodler 2.0 manual

Manitowoc 7623123 user manual

Manitowoc

Manitowoc 7623123 user manual

Hoyt Formula Series owner's manual

Hoyt

Hoyt Formula Series owner's manual

HoMedics Aroma ARMH-590 instruction manual

HoMedics

HoMedics Aroma ARMH-590 instruction manual

Audient iD14 manual

Audient

Audient iD14 manual

EML Kalyx-RG user manual

EML

EML Kalyx-RG user manual

ICARO paragliders XEMA 2 manual

ICARO paragliders

ICARO paragliders XEMA 2 manual

Omcan BD-CN-0007-HC instruction manual

Omcan

Omcan BD-CN-0007-HC instruction manual

Pfannenberg DTI 8000ES Operating and assembly instruction

Pfannenberg

Pfannenberg DTI 8000ES Operating and assembly instruction

EKO MF Series instruction manual

EKO

EKO MF Series instruction manual

IFM Electronic efector 410 JN2300 Device manual

IFM Electronic

IFM Electronic efector 410 JN2300 Device manual

AAON Orion ASM01824 Technical guide

AAON

AAON Orion ASM01824 Technical guide

Honeywell C7195A Product handbook

Honeywell

Honeywell C7195A Product handbook

LEGRAND 0 648 40 quick guide

LEGRAND

LEGRAND 0 648 40 quick guide

THOMSON 513134 V2 quick start guide

THOMSON

THOMSON 513134 V2 quick start guide

PCB Piezotronics 116B Installation and operating manual

PCB Piezotronics

PCB Piezotronics 116B Installation and operating manual

Siemens SITRANS WW300 operating instructions

Siemens

Siemens SITRANS WW300 operating instructions

manuals.online logo
manuals.online logoBrands
  • About & Mission
  • Contact us
  • Privacy Policy
  • Terms and Conditions

Copyright 2025 Manuals.Online. All Rights Reserved.