manuals.online logo
Brands
  1. Home
  2. •
  3. Brands
  4. •
  5. Wheatstone
  6. •
  7. Recording Equipment
  8. •
  9. Wheatstone GSX User manual

Wheatstone GSX User manual

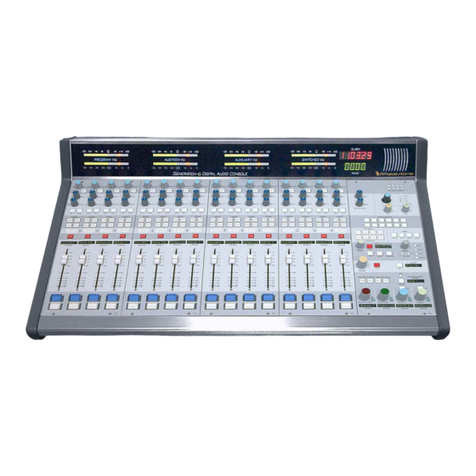
BOARD OPERATOR CONTROLS
MASTER PANEL CONTROLS:
CUE SPEAKER
CR MONITOR SOURCE SELECTOR
(PRESS TO TAKE)
CR & HP SOURCE HOT KEYS
TIMER
CR, HP & STUDIO INFO DISPLAYS
(MONITOR SOURCE & LEVEL)
HEADPHONE CONTROLS
(FOLLOW CR MON SOURCE, WHEN LIT)
(STEREO CUE OR SPLIT CUE, WHEN LIT)
USER-DEFINED BUTTONS*
CUE SPEAKER LEVEL
USER-DEFINED BUTTONS*
STUDIO MONITOR LEVEL
TALK TO STUDIO
PGM 1 METER PGM 2 METER SWITCHED METER EVENT TIMER
FADER CHANNELS (FOUR PER INPUT PANEL) PALM REST MASTER PANEL
ACCESSORY PANEL SLOT (OPTIONAL SS-8 PANEL SHOWN)
(GSX-12xx frames have one slot, GSX-24xx have three slots) OPERATOR
HEADPHONE
JACK
GSX SURFACE PARTS ID
FADER CHANNEL CONTROLS:
SOURCE SELECTOR
(PRESS TO TAKE)
USER-DEFINED BUTTONS*
(DEFAULT: SET & MODE)
BUS ASSIGNMENT
CHANNEL INFO DISPLAY
(SOURCE NAME,
MODE, SOURCE LOGIC &
MIC STATUS, CHANNEL FEATURES
or ALTERNATE SOURCE LIST)
TALKBACK
(TO BUS MINUS)
CUE
(PRE-FADER, PRE-ON LISTEN)
CHANNEL FADER KNOB
FADER UNITY GAIN MARKS
CHANNEL ON
CHANNEL OFF
Service & Support
600 Industrial Drive
New Bern, NC 28562 USA
+1 252638 7000
techsupport@wheatstone.com
www.wheatstone.com
1 of 3 rA
CONTROL
ROOM
LEVEL
HP
LEVEL
REQUIRES THE OPTIONAL “PANEL
LAYOUT” LICENSE (WS# 087993)
TO EDIT THE DEFAULT SETTINGS
(DEFAULT: SPARE BUTTONS 1- 8)
(DEFAULT: CUE CLEAR / HOME VIEW)
*
(START/STOP & RESET)
EVENT TAKE BUTTONS
STUDIO SOURCE SELECTOR
GSX DIGITAL AUDIO CONSOLE
2 of 3 rA
GSX Other Views, Common Information Display
GSX Monitor Other Views
GSX HDMI MONITOR
GSX Monitor Home View
EVENTS
AUX/MXM
X/Y
INPUT
DYNAMICS
EQ
AUTOMIX
PRESETS
The CUSTOM View (not shown) is blank, unless the Surface Setup app has
the optional Scripting license and one has built a custom view using the
ScreenBuilder scripting language (also used to create the other standard
Views). One example for a Custom View would be to set up codec connec-
tions complete with signal metering, but a myriad of control functions a
board operator might need to access can be added to the Custom View.
GSX DISPLAY
A 1080p HDMI monitor is used to display signal levels for the console buses, console status, and is how the board
operators access advanced console functions. Any 1080p HDMI monitor can be used, along with a USB mouse,
but a touchscreen monitor will make life easier for your board operators.
HOME VIEW
When the GSX boots up, the Home View, shown above, is displayed. But this View can be changed by a mouse
click, or a nger tap, on one of the ten “buttons” along the bottom of the display, from Custom to Home. These
select the Home and nine “other Views,” shown at le, which overlay a unique set of channel or console param-
eters or console functions for the board operator to check and/or adjust. Click or tap the Home button to return
to the default View shown above.
OTHER VIEWS
The Program, Audition, Auxiliary, and Oine meters and the Loudness Monitor are always shown. The rest of the
monitor gets overlaid with the selected View and the common information display which appears below each of
the other Views (shown below). To use the AutoMix and Custom Views require an optional Auto Mix and/or
Scripting license. The other Views are shown at le, from Events to AutoMix. Here’s a summary of each View:
The EVENTS View has the Console Event controls allowing Surface setups to be saved for later recall.
The AUX/MXM View has the master faders and level meters for the four Aux Sends and four Mix-Minus sends.
The Aux Sends have on/o controls while the Mix-Minus Sends have pre-fader and pre-on selector buttons.
The X/Y View has an XY Controller so signal cross-connections can be made between any visible system source
and destination by selecting a destination and a source, then clicking or tapping the Take button.
The INPUT View is used to view and adjust channel parameters, including format (mono, stereo, etc.), le/right
phase, panning, loading a channel preset, and setting how that channel feeds the Aux and Mix-Minus buses.
The DYNAMICS View allows Dynamics (Expansion and Compression) to be adjusted for the selected channel,
and to be independently turned on or o.
The EQ View is a four-band parametric EQ that can be applied to any channel or saved as a Preset.
The PRESETS View is used to manage saved Presets which can then be applied to any channel.
The AUTOMIX View, only available when the Surface Setup app has the optional Auto Mix license, has two pages.
The Main page (shown) is where sources are assigned to the four Automix groups for automatic level control of
a set of common sources, like studio microphones or audio from video playback decks. The second page: Assign
(not shown) allows the four Automix groups to be assigned to the console’s PGM, AUD, AUX, and OL buses.
GSX DIGITAL AUDIO CONSOLE
PS-1600, REAR PANEL
3 of 3 rA
MIX ENGINE BLADE, REAR PANEL
HDMI 1080p MONITOR
(CUSTOMER-SUPPLIED)
USB MOUSE / TOUCHSCREEN
(CUSTOMER-SUPPLIED)
SURFACE HOST PC
(TO WNIP SWITCH PORT)
LOCAL LOGIC I/O
(12 PORTS & GND, +5 VDC) IEC AC INPUT
90-240 VAC 50/60 Hz
MIX ENGINE BLADE
(TO WNIP SWITCH PORT)
GSX SURFACE WIRING
ETHERNET CABLE
DC CABLE
(FROM PSE-1600)
2ND DC JACK
(FROM PSE-1600)
ACCESSORY PANEL
POWER & SIGNAL
GSX CONNECTION SUMMARY
GSX CONNECTIONS
The GSX console has three main parts: Mix Engine Blade, GSX
Surface, and PS-1600 power supply. Their physical connections
are summarized in the above illustrations. A customer-supplied
1080p HDMI monitor (either a touchscreen or with a USB mouse)
are required to display the level meters and to allow board
operators access to the advanced GSX console features. Three
customer-supplied Ethernet cables (CAT5e or better) are
required to network the Mix Engine, the Surface Host PC, and
the Surface to access ports on a WheatNet-IP (WNIP) network
switch.
Rack mount the PS-1600 and Mix Engine near the Surface and
HDMI monitor so the interconnecting cables are not under
strain. The Mix Engine has front panel displays and controls so it
should be placed accordingly. The power supply has no user
controls. Connect the Surface Host PC, Mix Engine, and Surface
Ethernet jacks to three WNIP network switch ports.
Once the Surface and HDMI monitor and USB mouse are set in
place on the countertop, the HDMI and USB cables can be
plugged into the Surface Host jacks on the back of the Mix
Engine. To connect the Surface’s Ethernet and a DC cables, the
Surface’s Master Panel must be removed (four hex screws) to
access those jacks, as shown above, right. The Ethernet and DC
cables can enter the Surface from the rear or, for the cleanest
installation, come up thru a countertop hole drilled below the
cable access opening in the frame.
A 16-foot locking DC cable (supplied) connects the Surface’s DC
jack to one of the 16V DC jacks on the PS-1600 supply. Connect
a CAT5e cable from the Surface’s Ethernet jack to an access port
on a WNIP network switch. If a redundant PS-1600 supply is
used, connect its DC cable to the second DC jack.
Reinstall the Master Panel into the frame, unless you’re install-
ing one or more Accessory panels (SS4-GSX, SS8-GSX, and/or a
pother panel) into the Surface. In that case, connect short CAT5
cables from the Accessory panels to either, or both, Accessory
Panel RJ45 jacks, then fasten those panels into the chassis and
reinstall the Master panel. The panels’ Ethernet signals are
carried over the Surface’s Ethernet cable, and power is supplied
by the Surface, so no other external connections are required.
Once wiring is connected, the Mix Engine, HDMI monitor, and
PS-1600 supply can be connected to AC power. It takes roughly
90 seconds for the various parts to boot up and be ready for use.
The Mix Engine, at rst power up from the factory, comes up in
Setup Mode so that the System Size (typically 1-99 Blades), its
Blade ID (start with 1), the system sample rate (typ. 44.1), and its
I/O template (typ. stereo) can be set using the front panel
controls on the Mix Engine.
The Blade-3 User Manual, included on the USB thumb drive that
ships with the GSX, covers the Mix Engine setup procedure in
detail in its Setup and Conguration section.
GSX CONFIGURATION
The GSX Surface Setup and Navigator apps are also included on
the USB thumb drive, along with the GSX Installation Guide &
User Manual PDF le which covers their installation and usage.
The two apps are used to rst congure the Surface and other
system components (Blades, control panels, etc.) and then
manage system signal connections. The two Windows® apps are
installed on an “admin PC,” any modern PC with at least 1 GB of
RAM, a 1.8 GHz or faster CPU, and two NICs: one to network that
PC with your WNIP network, the other to your facility LAN for
remote access to Navigator and the Surface Setup apps.
The GSX’s default subnet is 192.168.87.0. If you’ll use that subnet,
set the admin PC to 192.168.87.21 and use an Ethernet cable
(CAT5e or better) to connect the PC to an access port on the
WNIP network switch.
The GSX Surface Setup app congures the Surface for a specic
application (on-air, production, newsroom, etc.) by setting
options using several tabs and page tabs. It’s initially used to
match the Surface to the Host PC in the Mix Engine. Once that’s
done, the app’s used to set which sources are visible on each
Surface source selector, assign monitor attributes, assign VDIP
(virtual DIP switches) attributes, add logic control capabilities to
audio sources, etc.
Navigator is a licensed app but a new GSX includes a 30-day
demo license so you can congure your GSX and other WNIP
devices. Navigator is rst used to edit the default signal names,
to set their formats, and to add channel logic control to audio
sources. Once the system is congured, Navigator is primarily
used to manually connect sources to destinations using an XY
Crosspoint Grid, or by using Salvos to setup shows, remotes, or
dayparts. Other app features include keeping track of system
operations in a Log tab and uploading new Blade soware using
the Version Manager tab. Details on using the GSX Surface Setup
and Navigator apps are in the GSX Installation Guide & User
Manual.
IEC AC INPUT
90-240 VAC 50/60 Hz
DC OUTPUT TO GSX SURFACE
(CONNECT TO ANY OUTPUT)
GSX DIGITAL AUDIO CONSOLE
Other manuals for GSX

1

Other Wheatstone Recording Equipment manuals

Wheatstone TV 1000 User manual

Wheatstone

Wheatstone TV 1000 User manual

Wheatstone E-5 User manual

Wheatstone

Wheatstone E-5 User manual

Wheatstone TV-80 User manual

Wheatstone

Wheatstone TV-80 User manual

Wheatstone G-5 User manual

Wheatstone

Wheatstone G-5 User manual

Wheatstone G-6 User manual

Wheatstone

Wheatstone G-6 User manual

Wheatstone D-8000 User manual

Wheatstone

Wheatstone D-8000 User manual

Wheatstone ARCUS User manual

Wheatstone

Wheatstone ARCUS User manual

Wheatstone ARCUS User manual

Wheatstone

Wheatstone ARCUS User manual

Wheatstone A-6000 User manual

Wheatstone

Wheatstone A-6000 User manual

Wheatstone D-5000 User manual

Wheatstone

Wheatstone D-5000 User manual

Wheatstone E-Series Guide

Wheatstone

Wheatstone E-Series Guide

Wheatstone TV-80 User manual

Wheatstone

Wheatstone TV-80 User manual

Wheatstone M-2 User manual

Wheatstone

Wheatstone M-2 User manual

Wheatstone GSX Troubleshooting guide

Wheatstone

Wheatstone GSX Troubleshooting guide

Wheatstone SP-8 User manual

Wheatstone

Wheatstone SP-8 User manual

Popular Recording Equipment manuals by other brands

CMC WIDI THRU6 BT user manual

CMC

CMC WIDI THRU6 BT user manual

esera automation ESERA-Station 200 user guide

esera automation

esera automation ESERA-Station 200 user guide

Belden Miranda NV8900 Series user guide

Belden

Belden Miranda NV8900 Series user guide

midiplus I61 owner's manual

midiplus

midiplus I61 owner's manual

AMX AXP-CPI16 Schematic diagram

AMX

AMX AXP-CPI16 Schematic diagram

KORNEFF PAWN SHOP COMP 2.0 user manual

KORNEFF

KORNEFF PAWN SHOP COMP 2.0 user manual

Thales Cinterion PLS63-W Hardware Interface Overview

Thales

Thales Cinterion PLS63-W Hardware Interface Overview

Harman AKG C411 Series User instructions

Harman

Harman AKG C411 Series User instructions

ATI Technologies 9105-NETOEM Technical Data, Installation, and Operation Manual

ATI Technologies

ATI Technologies 9105-NETOEM Technical Data, Installation, and Operation Manual

Bailey Infi 90 INPCI02 Instruction

Bailey

Bailey Infi 90 INPCI02 Instruction

Studio Technologies 5205 user guide

Studio Technologies

Studio Technologies 5205 user guide

Roland Boutique JX-03 owner's manual

Roland

Roland Boutique JX-03 owner's manual

Yamaha DCU5D owner's manual

Yamaha

Yamaha DCU5D owner's manual

Mitsubishi Electric DX-NT400E Installation and operation manual

Mitsubishi Electric

Mitsubishi Electric DX-NT400E Installation and operation manual

Comrex VH2 quick start guide

Comrex

Comrex VH2 quick start guide

Boss Audio Systems EQ600 introduction

Boss Audio Systems

Boss Audio Systems EQ600 introduction

Korg EASYSTART M50 installation guide

Korg

Korg EASYSTART M50 installation guide

Directed XpressKit DBALL installation guide

Directed

Directed XpressKit DBALL installation guide

manuals.online logo
manuals.online logoBrands
  • About & Mission
  • Contact us
  • Privacy Policy
  • Terms and Conditions

Copyright 2025 Manuals.Online. All Rights Reserved.