Whyte 905 User manual

GENERAL INSTRUCTION MANUAL
Edition 5


GENERAL INSTRUCTION MANUAL
Edition 5
This manual meets Safety Standard ISO 4210-2 requirements.
CONTENTS
Welcome 4
Before You Ride
Know Your Bike 5
Fitting 6
re-ride Check 7
Load Limits 8
Registration 9
When You Ride
Safety 10
On Road Riding 10
Off Road Riding 11
Adverse Weather Riding 12
After Dark Riding 12
Extreme or Competition 13
How Things Work
Wheel Removal and Refit 15
Brakes 21
Tyres & Inner Tubes 22
Transmission 24
edals 25
Suspension 26
After Your Ride
Care & Maintenance 28
After a Crash 33
Tools 34
Your Notes 35
Warranty 38

age 4 General Instruction Manual
WELCOME
Thanks for purchasing your Whyte bike. We hope you will enjoy all the benefits
its advanced design and engineering will bring to your riding experience.
This manual contains important safety, performance and service information.
Accompanying this is a second smaller manual which contains further infor-
mation that is specific to your particular model of Whyte bike. We strongly
recommend that you read both manuals thoroughly and also familiarise your-
self with your new bike, before you go on your first ride. Keep the manuals in
a safe place for future reference. They will guide you through the necessary
procedures involved in using and servicing your bike safely.
Important! If you hav purchas d a bik for on of your childr n, it is
ss ntial to tak th tim to mak sur th y also und rstand th
information contain d in this manual.
If you are in any doubt about your ability to correctly and safely service or re-
pair your bike, you should neither repair or ride it. Instead, arrange for your
local Whyte dealer to do the job safely and correctly.
lease also check that your Whyte dealer has handed over the new bike to you
completely assembled and set up to fit you.
A list of authorized Whyte dealers is available online at:
www.whyt bik s.co.uk
Also bundled with this manual are the respective manufacturers instructions
and manuals for the branded parts that go to make up the Whyte bike. In case
of a conflict between the instructions in this manual and information provided
by a component manufacturer, always follow the component manufacturer’s
instructions.
lease take time to study both this manual and all the other instruction manu-
als to ensure you have a continually safe and well set-up bike before every
ride, and to help you build up a relationship of knowledge between you and
your Whyte dealer.
It is important to understand the basics of riding a bicycle and also to exercise
common sense when doing so. Like many recreational, sporting or utility activi-
ties, cycling involves risk of injury and damage since it requires reaction to
varying dynamic situations. By choosing to ride a bicycle, you assume the
responsibility for that risk.
May we wish you happy and safe riding.
Whyte Design Team

age 5
General Instruction Manual
BEFORE YOU RIDE
Kno Your Bike
There are three types of bikes in the Whyte range. The
pictures help to identify the type of bicycle you own:
A mountain bike (MTB) has a "flat" handlebar and wide,
knobbly tyres. It may have front suspension, rear sus-
pension, or both. It has either 29”, 27.5” (650b) or 26"
nominal diameter wheels. See figure 1.
A city bike is a cross between a road bike and an MTB,
fitted with a "flat" handlebar and medium-width road
tires on 700c or 26” nominal wheel diameters. See fig-
ure 2.
A road bike or cyclo-cross bike is fitted with a "drop"
handlebar and small-width road tires on 700c wheel
diameters. See figure 3.
There are many different components in your Whyte
bike. They are identified in figure 4, so as to help you
elsewhere in this manual.
Fig. 1
Fig. 2
Fig. 3
Fig. 4 Saddle
Seat Tube
Seatpost
Seatpost Clamp
Seatstay
Rim
Cassette
Hub
Chainstay
Front
Derailleur
Chainring
Crank
Chain
Down
Tube
Headset
Top Tube
Brake
Caliper
Cables
Spoke
Brake
Disk
Tyre
Front Fork
Head Tube
Stem
Brake
Lever
Gear Lever
Grip Handlebars
Rear Derailleur
Axle or
Quick
Release
Skewer

age 6 General Instruction Manual
Fitting
Your Whyte dealer should have made sure you have the proper size of bicycle ad-
justed to suit you. If your bike is not the correct size or has not been adjusted cor-
rectly, please contact your dealer BEFORE you ride it. Used bikes cannot be subse-
quently exchanged.
Standover clearance. When straddling the bike
(see figure 5), this is the distance from your
crotch to the top-tube in the bicycle’s frame.
There should be at least 25mm (1”) clearance for
a road bike and 50mm to 75mm (2” to 3”) for a
mountain bike. For correct standover clearance
please consult your Whyte dealer.
Saddle position. Comfortable riding depends on
the position of the saddle. Ask your Whyte dealer
to set the saddle for your optimal riding position
and to show you how to make this adjustment.
As a reminder, here it is explained how to adjust
the saddle either up or down (see figure 6):
◊sit on the saddle.
◊place one heel on a pedal.
◊rotate the crank until the your heel is in the down
position.
If your leg is not completely straight, your saddle
height needs to be adjusted either up or down until it
is.
To adjust the saddle height:
◊loosen the seat post clamp.
◊raise or lower the seat post in the seat tube.
◊make sure the saddle is straight fore and aft.
◊re-tighten the seat post clamp to the recommended torque. Tightening torque
values are found in the supplementary manual covering your particular Whyte
bike model.
◊Once the saddle is at the correct height, make sure that the seat post does not
project from the frame beyond its “Minimum Insertion” or “Maximum Extension”
mark (figure 6, black arrow). These marks MUST be hidden in the seat tube.
WARNING: If your s at post is not ins rt d in th s at tub as
d scrib d abov , th s at post may br ak, which could caus
you to los control and fall.
The saddle may also be adjusted forwards or backwards. Or also re-angled so that
the nose of the saddle is either raised upwards or lowered downward. Consult your
Whyte dealer about how to carry out these adjustments correctly.
fig. 5
fig. 6

age 7
General Instruction Manual
Handlebar height and angle. Your bike is equipped with a
“threadless” stem (figure 7), which clamps on to the outside
of the steerer tube. Your Whyte dealer may be able to change
handlebar height by moving height adjustment spacers from
below the stem to above the stem, or vice versa. Otherwise,
you’ll have to get a stem of different length or rise. Consult
your Whyte dealer. Do not attempt to do this yourself, as it
requires special knowledge.
Control position adjustments. The angle of the brake and shift control levers and
their position on the handlebars can be changed. Ask your Whyte dealer to make
the adjustments for you. If you choose to make your own control lever angle
adjustment, be sure to re-tighten the clamp fasteners to the recommended torque
Tightening torque values are found in the supplementary manual covering your par-
ticular Whyte bike model.
Brake reach. Brake levers can sometimes be adjusted for reach. If you have small
hands or find it difficult to squeeze the brake levers, your Whyte dealer can either
adjust the reach or fit shorter reach brake levers.
WARNING: It is critical to hav corr ctly adjust d brak s, so
that full braking pow r can b appli d within th brak l v r
trav l. Oth rwis , lack of full braking pow r can r sult in loss
of control, which may r sult in s rious injury or d ath.
Pre-Ride Check
Routinely check the condition of your bicycle before every ride.
◊Make sure nothing is loose. Lift the front wheel off the ground by approximately
5cm (2 inches), then let it drop and bounce on the ground. Does anything sound,
feel or look loose? Then do a visual and tactile inspection of the whole bike. Can
you find any loose parts or accessories? If so, secure them.
◊Tyre pressure. Make sure tyres are correctly inflated (see also page 22). Check
by pushing the bike down onto the floor, while looking at how the tyre deflects.
Compare what you see with how it looks when the tyres are correctly inflated.
Adjust the air pressure if necessary.
◊Tyre condition. Spin each wheel slowly and look for cuts in the tread and
sidewall. Replace damaged tyres, do not ride them.
◊Wheels are true. Spin each wheel and check for side-to-side rim movement. If a
rim moves side to side even slightly take the bike to a Whyte dealer to have the
wheel trued.
WARNING: Wh ls must b tru for rim brak s to work
ff ctiv ly.
◊Wheel rims. Ensure the rims are clean and undamaged near the tyre bead. For
bikes with rim brakes, check that any rim wear indicator marking is clearly
visible at all around the wheel rim.
fig. 7

age 8 General Instruction Manual
WARNING: A rim w ar indicator provid s an indication that
th wh l rim has r ach d its maximum usabl lif . Riding a
wh l that is at th nd of its usabl lif can r sult in wh l
failur , which can caus you to loos control and fall.
◊Brake function. Squeeze the brake levers. Can you apply full braking force at
the levers without having them touch the handlebar? Try to move the bike for-
wards with the brake levers squeezed. Are the wheels locked? If not, then the
brakes are not working properly. Do not ride the bike until you have consulted
your Whyte dealer.
◊Wheels attachment. Ensure the front and rear wheels are correctly secured to
the fork and frame, respectively (See also page 15).
◊Secure seat post. If your seat post has an quick-release clamp fastener for easy
height adjustment, check that it is properly adjusted and in the locked position
(See also page 6).
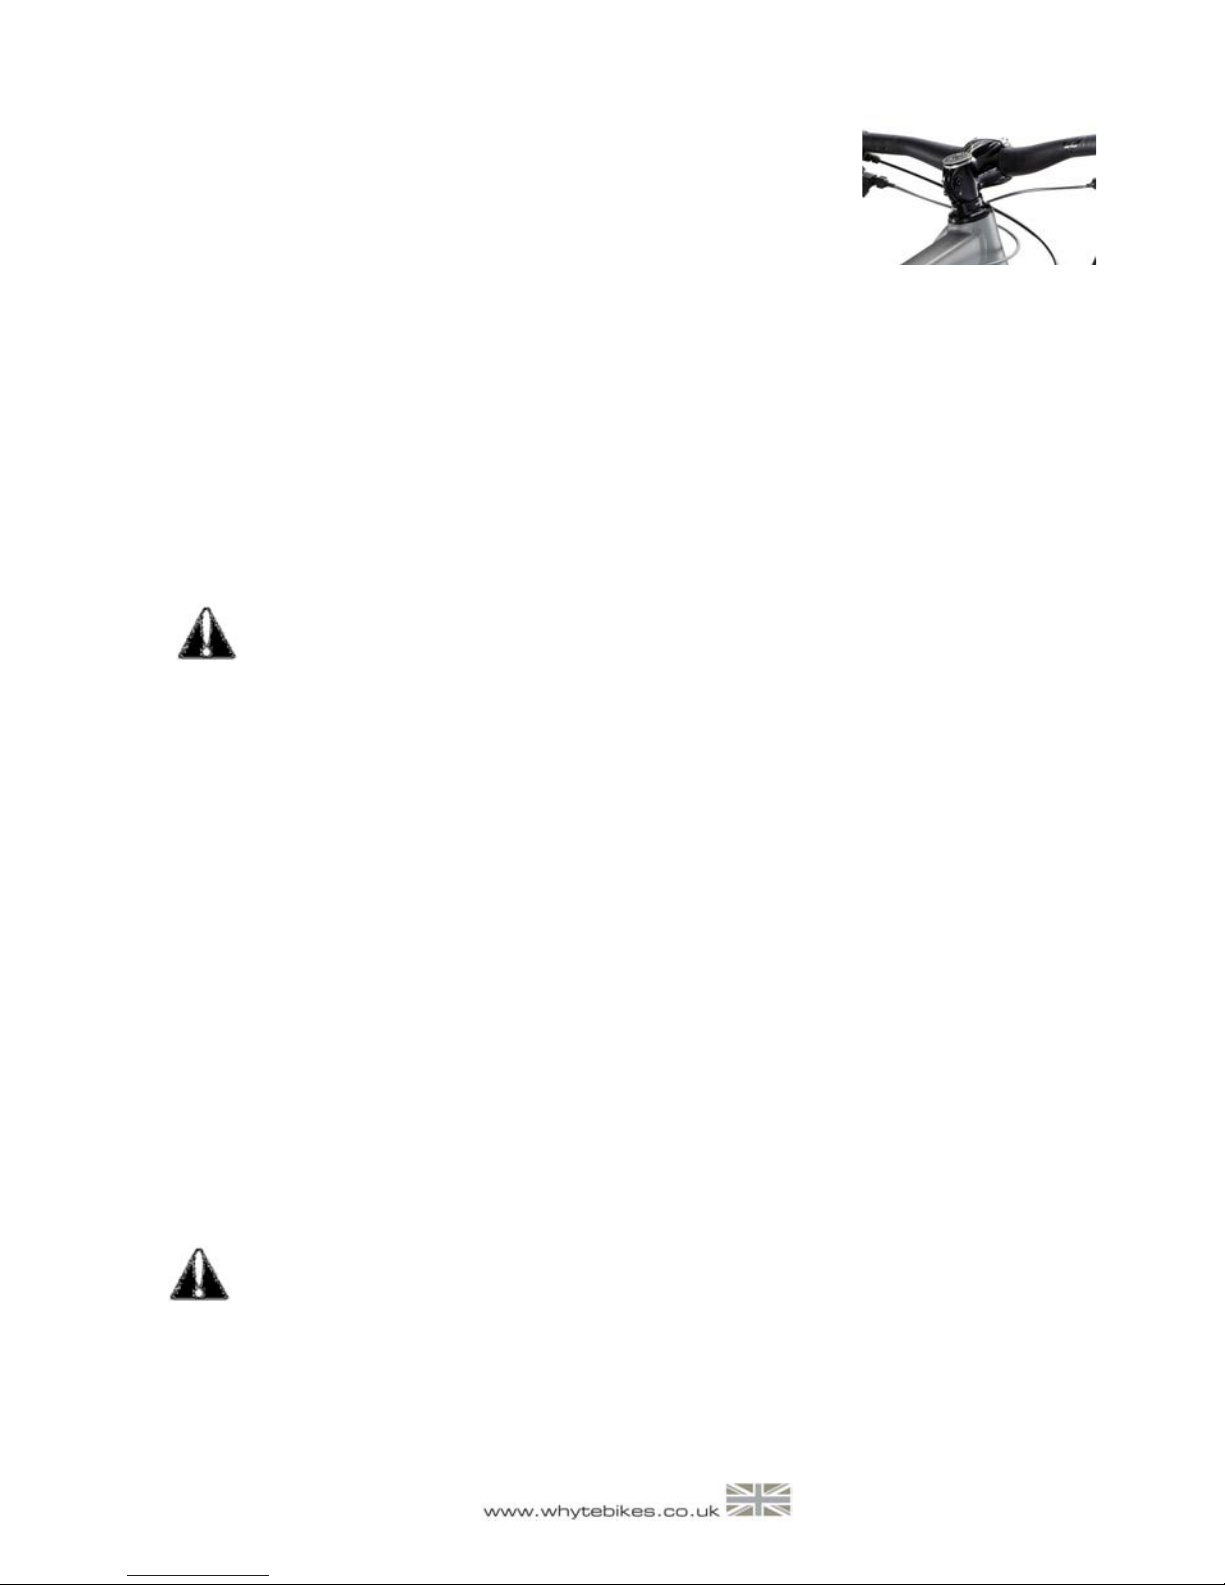
◊Handlebar and saddle alignment. Make sure the saddle and handlebar stem are
parallel to the bike’s center line and clamped tight enough so that you can’t
twist them out of alignment. If they are not, do not ride the bike until you have
consulted your Whyte dealer.
◊Handlebar grips are tight. Twist the handlebar grips to confirm they will not
move. Make sure there is a plug in each end of the handlebars.
WARNING: Loos or damag d st m, handl bars, grips or
xt nsions can caus you to los control and fall. Unplugg d
handl bars or xt nsions can cut you and caus s rious injury
in an oth rwis minor accid nt.
◊Condition of frame, handlebar and stem. Carefully inspect the frame, handlebars
and stem for signs of fatigue: scratches, cracks, dents, deformation, or
discoloration. If any part shows signs of damage or fatigue, replace the part
before riding the bicycle.
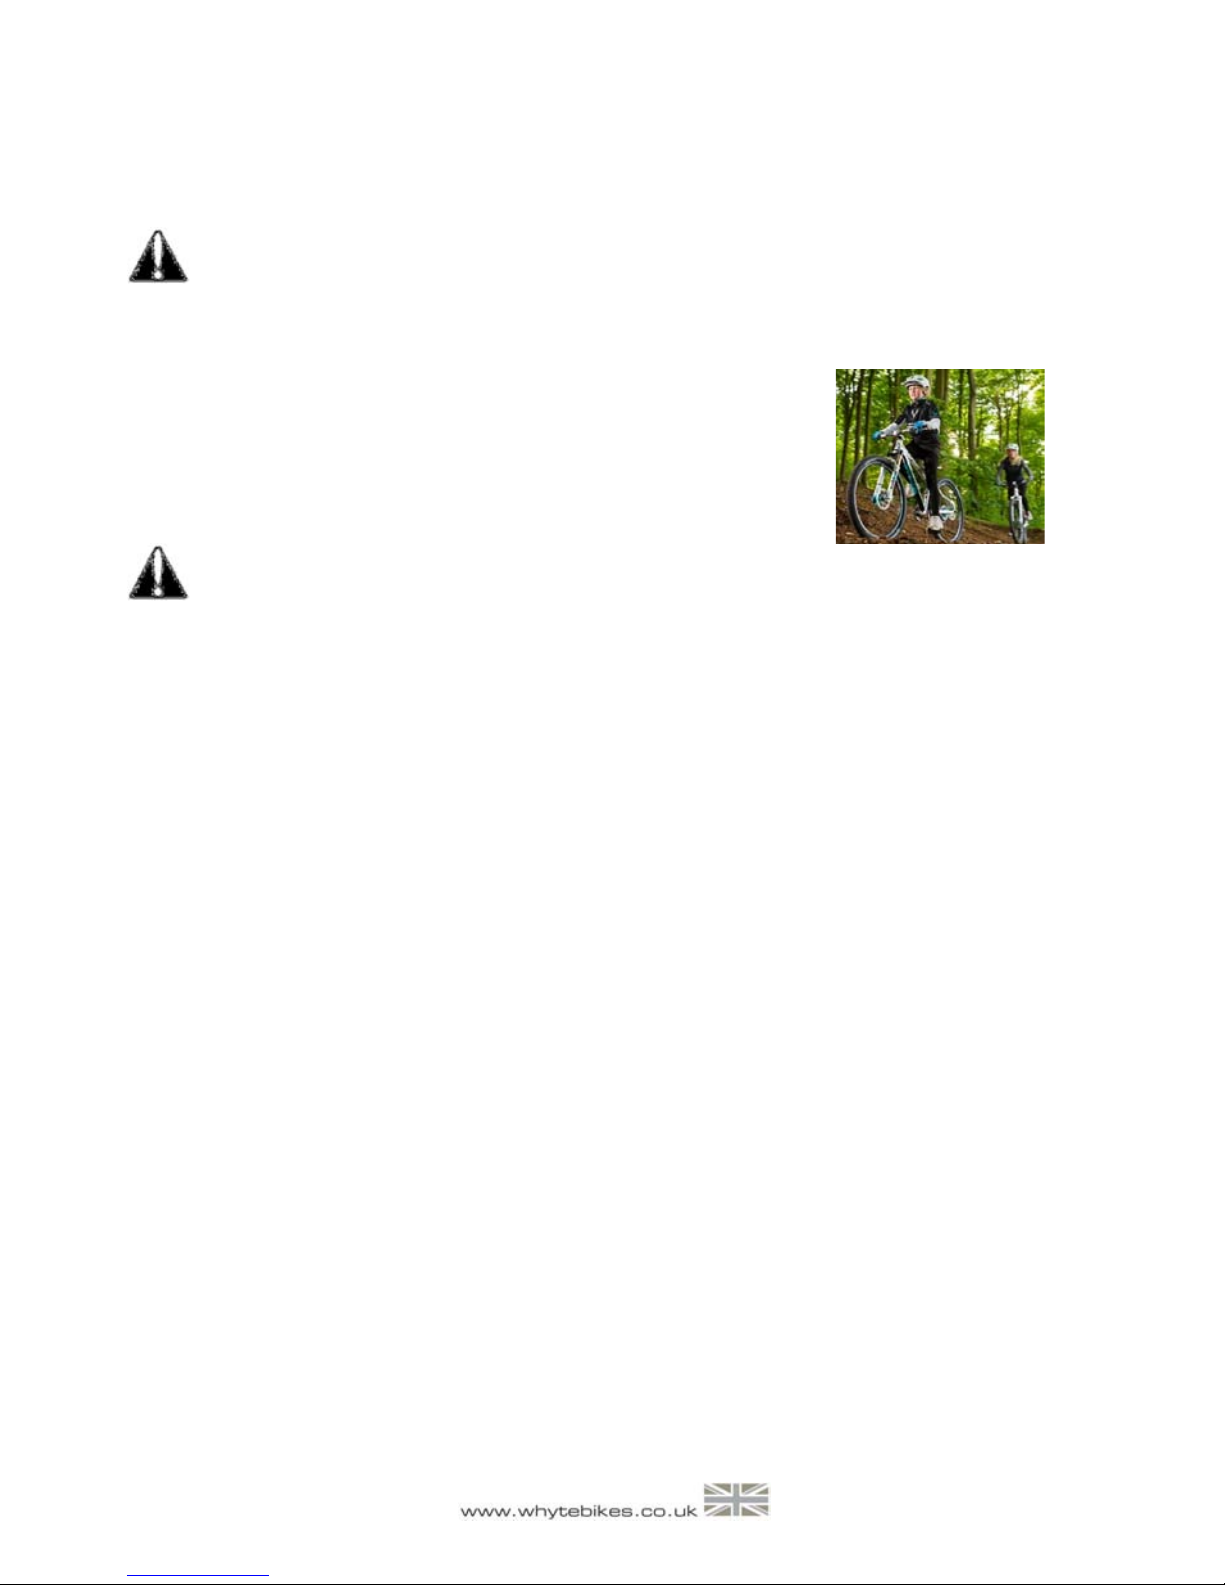
◊Suspension settings. Check that the suspension components are adjusted to suit
your riding style. Suspension should not be so compressed that there is no
further suspension movement remaining, as this could damage your bicycle and
make the bike difficult to ride (See page 27).
◊Condition of reflectors, lights and bell. For reflectors and lights to work effec-
tively, they must be clean. Check batteries are charged, if fitted in lights. Ring
the bell to make sure it works.
Load Limits
Whyt mountain bik s are intended for a maximum rider weight of 110 kgs, the
overall weight of bike incl. rider should not exceed 119-128kgs (depending on bike
weight).
Whyt road bik s are intended for a maximum rider weight of 110 kgs, the overall
weight of bike incl. rider should not exceed 117-120kgs (depending on bike weight).

age 9
General Instruction Manual
Registration
lease register your brand new Whyte bike to activate the extend-
ed frame warranty. Without registration, your Whyte frame is cov-
ered by a 2 year factory warranty, from date of purchase. If regis-
tered you will increase the frame warranty to 4 years. This can be
carried out on the Whyte Bikes website www.whytebikes.com

age 10 General Instruction Manual
WHEN YOU RIDE
Safety
WARNING: It is your r sponsibility to know and ob y all th
applicabl laws of th ar a wh r you rid . Obs rv r gula-
tions about lights, lic nsing of bicycl s, riding on footpaths,
laws r gulating off-road us , h lm t laws, child carri r laws
or sp cial bicycl traffic laws.
◊Always wear a cycling helmet (see fig.8) which meets the
latest certification standards and is appropriate for the type
of riding you do. Always follow the helmet manufacturer’s
instructions for fit, use and care of your helmet.
WARNING: Failur to w ar a h lm t wh n
riding may r sult in s rious injury or d ath.
◊Complete a recognised training course for cycling, such as those provided by the
Cyclists Touring Club. Internet reference http://www.ctc.org.uk/training
◊Make sure that the bike fits correctly. All controls must be reachable.
◊Ride a new bike for the first time slowly and away from hazards.
◊Always use lights at night, both front & rear, and have reflectors installed cor-
rectly.
◊Never ride with two people on a bicycle that’s designed for one, unless carrying a
child in a specially designed and properly installed child carrier or trailer.
◊Never hold onto another vehicle when riding.
◊Mount loads securely. Never carry packages that interfere with either brakes,
vision or which could become entangled in the moving parts of the bicycle.
◊If you intend to do stunts, wheelies, jumps or go racing with your bike, think
very carefully about your skill abilities before deciding to take the large risks that
go with this kind of riding.
◊Never ride with headphones. They mask traffic sounds and emergency vehicle
sirens, distract you from concentrating on what’s going on around you, and their
wires can tangle in the moving parts of the bicycle, causing you to lose control.
◊Never ride your bicycle while under the influence of alcohol or drugs or when
extremely tired.
◊Take extra care when riding in bad weather, when visibility is obscured, at dawn,
dusk or in the dark. Any of these conditions increases the risk of an accident.
On Road Riding
◊Obey all Rules of the Road and all local traffic laws.
◊You are sharing the road or the path with others — motorists, pedestrians and other
cyclists. Respect their rights.
◊Ride defensively. Always assume that others do not see you.
fig.8

age 11
General Instruction Manual
◊Look ahead, and be ready to avoid:
• Vehicles slowing or turning, entering the road or your lane ahead of you, or
coming up behind you.
• arked car doors opening.
• edestrians stepping out.
• Children or pets playing near the road.
• ot holes, sewer grating, manhole covers, railway lines, expansion joints, road
or cycle-path construction, debris and other obstructions that could cause you
to swerve into traffic, catch your wheel or cause you to have an accident.
• Any other hazards and distractions which can occur on a bicycle ride.
◊Ride in designated bike lanes, on designated bike paths or reasonably close to the
edge of the road, in the direction of traffic flow or as directed by local governing laws.
◊Stop at stop signs and traffic lights; slow down and look both ways at street
intersections. Remember that a bicycle always comes off worse in a collision with a
motor vehicle, so be prepared to yield even if you have the right of way.
◊Use approved hand signals for turning and stopping.
◊Don’t weave through traffic or make any moves that may surprise people with whom
you are sharing the road.
◊Observe and yield the right of way.
Off Road Riding
◊We recommend that children should only ride on rough terrain if they are
accompanied by an adult.
◊The variable conditions and hazards of off-road riding require close attention and
specific skills. Start slowly on easier terrain and build up your skills. If your bike has
suspension, the increased speed you may develop also increases your risk of losing
control and falling. Get to know how to handle your bike safely before trying increased
speed or more difficult terrain. Attend a riding skills course presented by a qualified
coach.
◊Wear safety gear appropriate to the kind of riding you intend to do. Consult your
Whyte dealer.
◊Don’t ride alone in remote areas. Even when riding with others, make sure that
someone knows where you’re going and when you expect to be back.
◊Always take along some kind of identification, so that people know who you are in
case of an incident; and take along some cash for food, a cool drink or an emergency
phone call.
◊Yield right of way to pedestrians and animals. Ride in a way that does not frighten or
endanger them, and give them enough room so that their unexpected moves don’t
endanger you.
◊Be prepared. If something goes wrong while you’re riding off-road, help may not be
close.
◊Before you attempt to jump, do stunt riding or race with your bike, read and
understand the “Extreme or competition riding” section on page 13.
◊Obey the local laws regulating where and how you can ride off-road, and respect
private property. You may be sharing the trail with others — hikers, equestrians, other
cyclists. Respect their rights.
◊Stay on the designated trail.
◊Don’t contribute to erosion by riding in mud or with unnecessary sliding.

age 12 General Instruction Manual
◊Don’t disturb the ecosystem by cutting your own trail or shortcut through
vegetation or streams.
◊It is your responsibility to minimize your impact on the environment. Leave
things as you found them; and always take out everything you took in.
Adverse Weather Riding
In wet conditions, the stopping power of your brakes (as well as the brakes of other
vehicles sharing the road) is dramatically reduced. Also your tyres cannot grip
nearly as well. So it is harder to control speed and easier to lose control. To make
sure that you can slow down and stop safely in wet conditions:
◊ride at a slower speed
◊apply your brakes earlier and more gradually than you would under normal, dry
conditions.
WARNING: W t w ath r r duc s traction, braking and
visibility, both for th cyclist and for oth r v hicl s sharing
th road. Th risk of an incid nt is gr atly incr as d in w t
conditions.
In windy conditions there is a risk that your direction and balance can be adversely
affected by strong cross-winds, ie: winds coming from the side.
WARNING: Tak gr at car wh n passing gaps b tw n
buildings or walls, for xampl . A sudd n incr as in cross-
wind str ngth could caus you to loos control and fall.
WARNING: In icy conditions riding any typ of bicycl is x-
tr m ly dang rous. Th only possibl way to obtain suffi-
ci nt grip is to fit sp cial tyr s with m tal studs. Th s may
b availabl from your Whyt d al r.
After Dark Riding
Riding a bicycle at dawn, dusk or night is significantly more dangerous, since then a
cyclist is very difficult for motorists and pedestrians to see. Cyclists who chose to
accept the increased risk of riding at dawn, dusk or night must take extra care when
riding. Safety equipment such as lights and bright reflective clothing helps to
reduce that risk. Consult your Whyte dealer about night riding safety equipment.
WARNING: R fl ctors ar not a substitut for r quir d lights.
Riding at dawn, at dusk, at night or at oth r tim s of poor
visibility without an ad quat bicycl lighting syst m and
without r fl ctors is dang rous and may r sult in s rious
injury or d ath.

age 13
General Instruction Manual
Bicycle reflectors are designed to pick up and reflect car lights and street lights in a
way that may help you to be seen and recognized as a moving cyclist.
CAUTION: Ch ck r fl ctors and th ir mounting brack ts
r gularly to mak sur that th y ar cl an, straight, unbrok n
and s cur ly mount d. Hav your Whyt d al r r plac
damag d r fl ctors and straight n or tight n any that ar
b nt or loos .
WARNING: Do not r mov th front or r ar r fl ctors or
r fl ctor brack ts from your bicycl . Th y ar an int gral part
of th bicycl ’s saf ty syst m. R moving th r fl ctors
r duc s your visibility to oth rs using th roadway. B ing
struck by oth r v hicl s may r sult in s rious injury or d ath.
If you choose to ride under conditions of poor visibility, check and be sure you
comply with all local laws about night riding. Take the following strongly
recommended additional precautions:
◊urchase and install battery or generator powered front and rear lights, which
meet all regulatory requirements and provide adequate uninterrupted visibility.
◊Wear light colored, reflective clothing and accessories, such as a reflective vest,
reflective arm and leg bands, reflective stripes on your helmet, flashing lights
attached to your body and/or your bicycle. Any reflective device or light source
that moves will help you get the attention of approaching motorists, pedestrians
and other traffic.
◊Make sure your clothing or anything you may be carrying on the bicycle does not
obstruct a reflector or light.
◊Make sure that your bicycle is equipped with correctly positioned and securely
mounted reflectors.
◊While riding at dawn, at dusk or at night:
◊Ride slowly.
◊Avoid dark areas and areas of heavy or fast-moving traffic.
◊Avoid road hazards.
◊If possible, ride on familiar routes.
◊If riding in traffic:
◊Ride predictably. Ride so that drivers can see you and predict your
movements.
◊Be alert. Ride defensively and expect the unexpected.
◊If you plan to ride in traffic often, ask your Whyte dealer about traffic safety
courses or read a good book on riding a bicycle safely, such as “Cyclecraft”,
written by John Franklin.
Extreme or competition riding
Whatever you call it - Freeride, North Shore, Do nhill, Jumping, Stunt Riding, Trials,
Racing or something else - if you engage in this sort of extreme, aggressive riding
at some point you will get hurt. You voluntarily assume a greatly increased risk of

age 14 General Instruction Manual
injury or death.
Not all bicycles are designed for these types of riding, and those that are may not
be suitable for all types of aggressive riding. Check with your Whyte dealer about the
suitability of your bicycle before engaging in extreme riding.
When riding fast down hill, you can reach speeds achieved by motorcycles, and
therefore face similar hazards and risks. Have your bicycle and equipment carefully
inspected by a qualified mechanic and be sure it is in excellent working order.
Consult with expert riders, site personnel and race officials on conditions and
equipment advisable at the site where you plan to ride. Wear appropriate safety
gear. It is your responsibility to have proper equipment and to be familiar with
course conditions.
WARNING: Many catalogu s, adv rtis m nts and articl s
about cycling show rid rs ngag d in xtr m riding. This
activity is highly dang rous. B awar that th action d pict d
has b n p rform d by prof ssionals with many y ars of
training and xp ri nc . Know your limits and always w ar an
approv d h lm t and oth r appropriat saf ty g ar. Ev n with
stat -of-th -art prot ctiv saf ty g ar, you could b s riously
injur d or kill d trying to imitat such xtr m riding action.
WARNING: Cycl s and cycl parts hav limit d str ngth and
int grity. Extr m riding can xc d thos limitations and
thus caus failur , which might r sult in s rious injury or
d ath.
We recommend against this type of riding because of the increased risks; but if you
do choose to take the risk, at least:
◊Take lessons from a qualified coach first
◊Start with basic learning exercises and gradually develop your skills before trying
more difficult or dangerous riding
◊Use only designated areas for stunts, jumping, racing or fast downhill riding
◊Wear a full face helmet, body armour and other safety gear
◊Recognize that the high stresses imposed on your bike by this kind of activity
may break or damage parts of the bicycle and void the warranty
◊Take your bicycle to your Whyte dealer if anything breaks or bends. Do not ride
your bicycle when any part is damaged.
◊If you ride downhill at speed, do stunt riding or ride in competition, know the
limits of your skill and experience. Ultimately, avoiding injury is your
responsibility.
Important! Pl as us th bik of your choic only for th
purpos it was mad for. For instanc a road racing bik can
not b us d to substitut a mountain bik in off road t rrain
or a tr kking bik can not b us d for downhill racing.

age 15
General Instruction Manual
HOW THINGS WORK
Wheel Removal and Refit
Wheels are removable for easier transportation or for repair of a tyre puncture. In
most cases, the wheel axles are inserted into slots, called “dropouts” in the fork and
frame, although some mountain bikes use what is called a “through axle” wheel
mounting system.
If you have a mountain bike equipped with through axle front
or rear wheels (figure 9), make sure that your Whyte dealer
has given you the manufacturer’s instructions, and follow those
when installing or removing a through axle wheel. If you don’t
know what a through axle is, ask your Whyte dealer.
Otherwise, wheels are secured with a hollow axle with a shaft
running through it which has an adjustable tension nut on one
end and an over-center cam on the other (figure 10). This is
commonly known as a “Quick Release” skewer.
Your bicycle may be equipped with a different securing method
for the front wheel than for the rear wheel.
WARNING: Riding with an improp rly s cur d wh l can allow
th wh l to wobbl or fall off th bicycl , which can caus
s rious injury or d ath.
Therefore, it is essential that you:
Ask your Whyte dealer to help you make sure you know how to install and remove
your wheels safely. Also ask for manufacturer’s instructions.
Understand and apply the correct technique for clamping your wheel in place.
Each time, before you ride the bike, check that the wheel is securely clamped.
The clamping action of a correctly secured wheel must emboss the surfaces of the
dropouts.
Front Wheel Secondary Retention Devices
All Whyte bicycles have front forks which utilize a secondary wheel retention device
to reduce the risk of the wheel disengaging from the fork if the wheel is incorrectly
secured. Secondary retention devices are not a substitute for correctly securing your
front wheel.
Secondary retention devices fall into two basic categories:
The clip-on type is a part which the manufacturer adds to the front wheel hub or
front fork.
The integral type is molded, cast or machined into the outer faces of the front fork
dropouts.
Ask your Whyte dealer to explain the particular secondary retention device on your
bike.
fig. 9
fig. 10

age 16 General Instruction Manual
WARNING: Do not r mov or disabl th s condary r t ntion
d vic . It s rv s as a back-up for a critical adjustm nt. If th
wh l is not s cur d corr ctly, th s condary r t ntion d vic
can r duc th risk of th wh l dis ngaging from th fork.
R moving or disabling th s condary r t ntion d vic may
also void th fork warranty. S condary r t ntion d vic s ar
not a substitut for corr ctly s curing your wh l. Failur to
prop rly s cur th wh l can caus th wh l to wobbl or
dis ngag , which could caus you to loos control and fall,
r sulting in s rious injury or d ath.
Wheels ith over-centre cam action systems.
An over-centre cam action clamps the bike’s wheel in
place. The cam can be seen to move from open to closed
in Figures 12, 13 & 11 (in that order).
Adjusting the over-centre cam action
mechanism.
The wheel hub is clamped in place by the force of the
over-center cam pushing against one dropout and
pulling the tension adjusting nut, by way of the skewer,
against the other dropout. The amount of clamping force
is controlled by the tension adjusting nut. Turning the
tension adjusting nut clockwise while keeping the cam
lever from rotating increases clamping force; turning it
counterclockwise while keeping the cam lever from
rotating reduces clamping force. Less than half a turn of
the tension adjusting nut can make the difference
between safe clamping force and unsafe clamping force.
WARNING: Th full forc of th cam action is n d d to clamp
th wh l s cur ly. Holding th nut with on hand and
turning th l v r lik a wing nut with th oth r hand until
v rything is as tight as you can g t it will not clamp a cam
action wh l saf ly in th dropouts.
Removing and Installing heels
WARNING: If your bik is quipp d with a hub brak or
int rnal g ar r ar hub, do not att mpt to r mov th wh l.
Th r moval and r -installation of th s parts r quir s sp cial
knowl dg . Consult your Whyt d al r. Incorr ct r moval or
ass mbly can r sult in brak or g ar failur , which can caus
you to los control and fall.
CAUTION: If your bik has a disc brak , x rcis car in
fig. 11
fig. 12

age 17
General Instruction Manual
touching th rotor or calip r. Disc rotors hav sharp dg s,
and also both rotor and calip r can g t v ry hot during us .
Removing a disk brake or rim brake Front Wheel
If your bike has rim brakes, disengage the brake’s quick-release mechanism to
increase the clearance between the tyre and the brake pads. Follow the manufactur-
er’s instructions or ask your Whyte dealer to make sure that you understand the
way the brake quick release works on your bike.
If your bike has a Fox or Shimano branded Through Axle retention device, careful-
lynote the current orientation of the cam lever, since it must be located in the same
orientation when refitted.
Move the cam lever at the end of the wheel axle from the locked or CLOSED position
(figure 11) to the O EN position (figure 12).
For a Through Axle retention device (figure 9), unscrew this in an anti-clockwise
direction using the cam lever. Once the threads have disengaged, pull it out com-
pletely. For a Quick Release Skewer retention device (figure 10) loosen the tension
adjusting nut enough to allow removing the wheel from the dropouts. Do not un-
screw the tension adjusting nut all the way off the skewer.
You may need to tap the top of the wheel with the palm of your hand to release the
wheel from the front fork.
Installing a disk brake or rim brake Front Wheel
CAUTION: If your bik is quipp d with a front disk brak , b
car ful not to damag th disk, calip r or brak pads wh n
r -ins rting th disk into th calip r. N v r activat a disk
brak ’s control l v r unl ss th disk is corr ctly ins rt d in
th calip r.
For a Quick Release Ske er retention device (figure 10):
Make sure the cam lever is in the O EN position (figure 12).
With the steering fork facing forward, insert the wheel between the fork blades so
that the axle seats firmly at the top of the fork dropouts. Note that the cam lever
should be located on the left side of the bicycle (rider facing forwards). Holding the
cam lever in the horizontal ADJUST position (half way between O EN & CLOSED)
(figure 13) with your right hand, tighten the tension adjusting nut with your left
hand until it is finger tight against the fork dropout.
While pushing the wheel firmly to the top of the slots in the fork dropouts, and at
the same time centering the wheel rim in the fork, move the cam lever upwards and
swing it into the CLOSED position (figure 11). The lever should now be parallel to
the fork blade and curved toward the wheel. To apply
enough clamping force, you should have to wrap your
fingers around the fork blade for leverage, and the lever
should leave a clear imprint in the palm of your hand.
NOTE: If the cam lever cannot be pushed all the way to
a position parallel to the fork blade, return the lever to
the O EN position (figure 12). Then turn the tension
adjusting nut counterclockwise one-quarter turn and try
tightening the lever again.
fig. 14

age 18 General Instruction Manual
WARNING: S cur ly clamping th wh l with a cam action
r t ntion d vic tak s consid rabl forc . If you can fully
clos th cam l v r without wrapping your fing rs around th
fork blad for l v rag , th l v r do s not l av a cl ar
imprint in th palm of your hand, and th s rrations on th
wh l fast n r do not mboss th surfac s of th dropouts,
th t nsion is insuffici nt. Op n th l v r; turn th t nsion
adjusting nut clockwis a quart r turn and try again.
If you disengaged the brake quick-release mechanism to remove the wheel, re-
engage it to restore correct brake pad-to-rim clearance. Follow the manufacturer’s
instructions or ask your Whyte dealer to make sure that you understand the way the
brake quick release works on your bike.
Spin the wheel to make sure that it is centered in the frame and clears the brake
pads; then squeeze the brake lever and make sure that the brakes are operating
correctly.
For a Through Axle retention device (figure 9):
With the steering fork facing forward, insert the wheel
between the fork blades so that the axle seats firmly at the
top of the fork dropouts. Note that the brake disk should be
located on the left side of the bicycle (rider facing forwards).
Insert the through axle (figure 9) from the right side (SRAM)
or left side (Fox / Shimano) until it engages in it’s thread.
Make sure the cam lever of the retention device is in the O EN
position (figure 14) and turn the cam lever clockwise until
hand tight. If Fox / Shimano then unwind until the cam lever
is opposite the location where it was previously unlocked
from.
Swing the cam lever into the CLOSED position (figure 15). To
apply enough clamping force, you should have to wrap your
fingers around the fork blade for leverage, and the lever
should leave a clear imprint in the palm of your hand.
NOTE: If the cam lever cannot be pushed all the way to a
position parallel to the fork blade, follow the manufacturer’s
instructions for adjustment or consult your Whyte dealer.
WARNING: S cur ly clamping th wh l with a cam action
r t ntion d vic tak s consid rabl forc . If you can fully
clos th cam l v r without wrapping your fing rs around th
fork blad for l v rag and th l v r do s not l av a cl ar
imprint in th palm of your hand, th t nsion is insuffici nt.
If you disengaged the brake quick-release mechanism to remove the wheel, re-
engage it to restore correct brake pad-to-rim clearance. Follow the manufacturer’s
instructions or ask your Whyte dealer to make sure that you understand the way the
brake quick release works on your bike.
Spin the wheel to make sure that it is centered in the frame and clears the brake
pads; then squeeze the brake lever and make sure that the brakes are operating
fig. 14
fig. 15

age 19
General Instruction Manual
correctly.
Removing a disk brake or rim brake Rear Wheel
If you have a multi-speed bike with a derailleur gear system: shift the rear
derailleur to high gear (the smallest, outermost rear sprocket). If you have an
internal gear rear hub, consult your Whyte dealer or the hub manufacturer’s
instructions before attempting to remove the rear wheel.
If your bike has a Fox or Shimano branded Through Axle retention device, carefully
note the current orientation of the cam lever, since it must be located in the same
orientation when refitted.
If your bike has rim brakes, disengage the brake’s quick-release mechanism to
increase the clearance between the wheel rim and the brake pads. Follow the manu-
facturer’s instructions or ask your Whyte dealer to make sure that you understand
the way the brake quick release works on your bike.
On a derailleur gear system, pull the derailleur body back with your right hand.
Move the cam lever at the end of the wheel axle from the locked or CLOSED position
(figure 10) to the O EN position (figure 11).
For a Through Axle retention device (figure 9), unscrew this in an anti-clockwise
direction using the cam lever. Once the threads have disengaged, pull it out com-
pletely. For a Quick Release Skewer retention device (figure 10), unlike the front
fork drop-outs, there is no secondary retention device at the rear drop-outs. Conse-
quently it is not necessary to undo the adjusting nut.
Lift the rear wheel off the ground a few inches and remove it from the rear
dropouts.
Installing a disk brake or rim brake Rear Wheel
CAUTION: If your bik is quipp d with a r ar disk brak , b
car ful not to damag th disk, calip r or brak pads wh n r -
ins rting th disk into th calip r. N v r activat a disk
brak ’s control l v r unl ss th disk is corr ctly ins rt d in
th calip r.
For a Quick Release Ske er retention device (figure 10):
Make sure the cam lever is in the O EN position (see figure 12). The lever should be
on the side of the wheel opposite the derailleur and freewheel sprockets.
On a derailleur bike, make sure that the rear derailleur is still in its outermost, high
gear, position; then pull the derailleur body back with your right hand. ut the chain
on top of the smallest freewheel sprocket.
On single-speed, remove the chain from the front sprocket, so that you have plenty
of slack in the chain. ut the chain on the rear wheel sprocket.
Then, insert the wheel into the frame dropouts and pull it all the way in to the
dropouts.
On a single speed or an internal gear hub, replace the chain on the chainring; pull
the wheel back in the dropouts so that it is straight in the frame and the chain has
about 6mm (1/4 inches) of up-and-down play.
With a cam action system, move the cam lever upwards and swing it into the
CLOSED position (figure 11). The lever should now be parallel to the seat stay or
chain stay and curved toward the wheel. To apply enough clamping force, you
should have to wrap your fingers around the seat stay or chainstay for leverage,

age 20 General Instruction Manual
and the lever should leave a clear imprint in the palm of your hand.
NOTE: If, on a traditional cam action system, the lever cannot be pushed all the
way to a position parallel to the seat stay or chain stay, return the lever to the O EN
position. Then turn the tension adjusting nut counterclockwise one-quarter turn and
try tightening the lever again.
WARNING: S cur ly clamping th wh l with a cam action
r t ntion d vic tak s consid rabl forc . If you can fully
clos th cam l v r without wrapping your fing rs around th
s at stay or chain stay for l v rag , th l v r do s not l av a
cl ar imprint in th palm of your hand, and th s rrations on
th wh l fast n r do not mboss th surfac s of th
dropouts, th t nsion is insuffici nt. Op n th l v r; turn th
t nsion adjusting nut clockwis a quart r turn; th n try again.
If you disengaged the brake quick-release mechanism to remove the wheel, re-
engage it to restore correct brake pad-to-rim clearance. Follow the manufacturer’s
instructions or ask your Whyte dealer to make sure that you understand the way the
brake quick release works on your bike.
Spin the wheel to make sure that it is centered in the frame and clears the brake
pads; then squeeze the brake lever and make sure that the brakes are operating
correctly.
For a Through Axle retention device (figure 9):
Make sure that the rear derailleur is still in its outermost, high gear, position; then
pull the derailleur body back with your right hand. ut the chain on top of the
smallest freewheel sprocket.
Then, insert the wheel into the frame dropouts and pull it all the way in to the
dropouts.
Insert the through axle (figure 9) from the left side until it engages in it’s thread.
Make sure the cam lever of the retention device is in the O EN position (figure 14)
and turn the cam lever clockwise until hand tight. If Fox / Shimano, then unwind
until the cam lever is opposite the location where it was unlocked from, whilst re-
moving the wheel.
Swing the cam lever into the CLOSED position (figure 15). To apply enough clamp-
ing force, you should have to wrap your fingers around the seat-stay or chain-stay
for leverage, and the lever should leave a clear imprint in the palm of your hand.
NOTE: If the cam lever cannot be pushed all the way to a position parallel to the
fork blade, follow the manufacturer’s instructions for adjustment or consult your
Whyte dealer.
WARNING: S cur ly clamping th wh l with a cam action
r t ntion d vic tak s consid rabl forc . If you can fully
clos th cam l v r without wrapping your fing rs around th
s at-stay or chain-stay for l v rag and th l v r do s not
l av a cl ar imprint in th palm of your hand, th t nsion is
insuffici nt.
If you disengaged the brake quick-release mechanism to remove the wheel, re-
Table of contents
Other Whyte Bicycle manuals

Whyte
Whyte 20C Team Manual

Whyte
Whyte 146 Manual

Whyte
Whyte G-150 Works SCR Manual

Whyte
Whyte e-MTB HardTail Series User manual

Whyte
Whyte G-160 Works Manual

Whyte
Whyte E-150 Assembly instructions

Whyte
Whyte 29 CS Manual

Whyte
Whyte C-7 Ridgeway Manual

Whyte
Whyte KYNAMIC User manual

Whyte
Whyte EC-7 coniston men's Manual