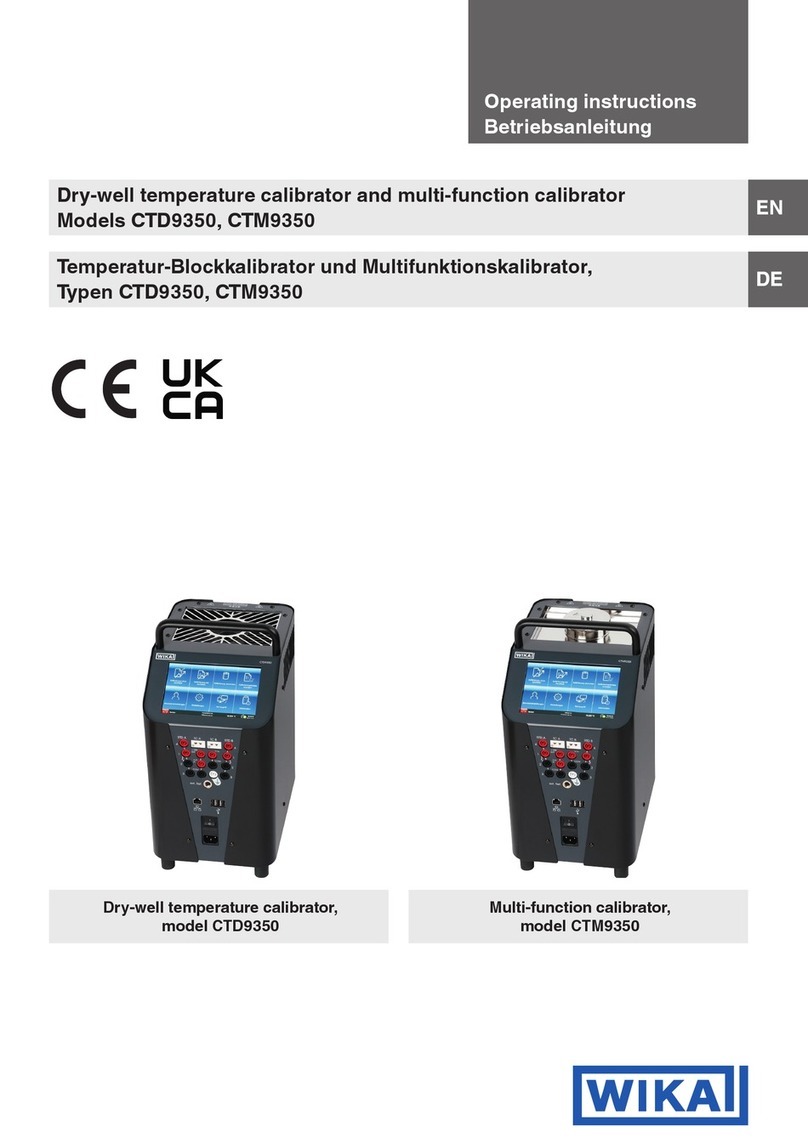
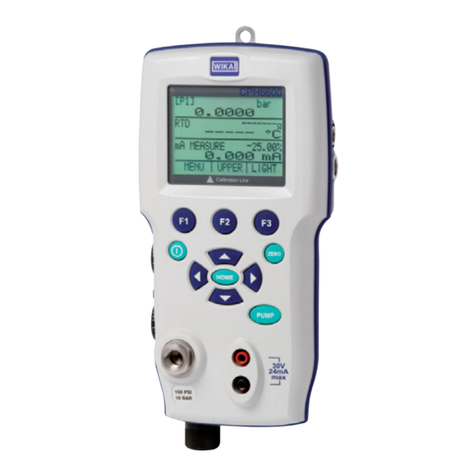
WIKA CEP1000 User manual

Operating instructions
Betriebsanleitung
Mode d‘emploi
Manual de instrucciones
Manuale d‘uso
GB
D
F
E
I
Precision loop calibrator, model CEP1000
Präziser Stromschleifenkalibrator, Typ CEP1000
Calibrateur de boucle de précision, type CEP1000
Calibrador preciso de bucles de corriente, modelo CEP1000
Calibratore di loop di precisione, modello CEP1000
Precision loop calibrator, model CEP1000

2
11570351.02 10/2010 GB/D/F/E/I
WIKA operating instructions, model CEP1000
GB
D
F
E
I
Operating instructions model CEP1000 Page 3 - 24
Betriebsanleitung Typ CEP1000 Seite 25 - 46
Mode d'emploi type CEP1000 Page 47 - 68
Manual de instrucciones modelo CEP1000
Página 69 - 90
Manuale d'uso modello CEP1000 Pagina 91 - 112
© WIKA Alexander Wiegand SE & Co. KG 2010
Prior to starting any work, read the operating instructions!
Keep for later use!
Vor Beginn aller Arbeiten Betriebsanleitung lesen!
Zum späteren Gebrauch aufbewahren!
Lire le mode d'emploi avant de commencer toute opération !
A conserver pour une utilisation ultérieure !
¡Leer el manual de instrucciones antes de comenzar cualquier trabajo!
¡Guardar el manual para una eventual consulta posterior!
Prima di iniziare ad utilizzare lo strumento, leggere il manuale d‘uso!
Conservare per future consultazioni!

3WIKA operating instructions, model CEP1000
11570351.02 10/2010 GB/D/F/E/I
GB
Contents
1. General information 4
2. Safety 5
2.1 Intended use 6
2.2 Personnel qualication 6
2.3 Special hazards 7
3. Specications 8
4. Design and function 9
4.1 Short description / Description 9
4.2 Scope of delivery 10
4.3 Front foil of the CEP1000 10
4.4 Battery selection 11
4.5 Input protection 11
5. Transport, packaging and storage 11
5.1 Transport 11
5.2 Packaging 11
5.3 Storage 11
6. Commissioning, operation 12
6.1 First steps 13
6.1.1 Battery saving function 13
6.1.2 HART™ resistance conguration 14
6.2 Basic operating modes 15
6.2.1 Milliampere source 15
6.2.2 Milliampere simulation 16
6.2.3 Milliampere measurement 17
6.2.4 Milliampere measurement with 24 V power supply 17
6.2.5 Voltage measurement 18
6.3 Advanced operating modes 19
6.3.1 Automatic step function/automatic ramp mode 19
6.3.2 Fault percentage function 19
6.3.3 Data acquisition for minimum and maximum 20
7. Maintenance, cleaning and service (recalibration) 21
7.1 Maintenance 21
7.2 Cleaning 21
7.3 Recalibration 21
8. Faults 22
9. Return and disposal 22
9.1 Return 22
9.2 Disposal 23
10. Accessories 23
Contents

4 WIKA operating instructions, model CEP1000
11570351.02 10/2010 GB/D/F/E/I
GB
1. General information
■
The loop calibrator described in the operating instructions has been manufactured
using state-of-the-art technology.
All components are subject to stringent quality and environmental criteria during
production. Our management systems are certied to ISO 9001 and ISO 14001.
■
These operating instructions contain important information on handling the instru-
ment. Working safely requires that all safety instructions and work instructions are
observed.
■
Observe the relevant local accident prevention regulations and general safety regula-
tions for the instrument's range of use.
■
The operating instructions are part of the instrument and must be kept in the immedi-
ate vicinity of the instrument and readily accessible to skilled personnel at any time.
■
Skilled personnel must have carefully read and understood the operating instruc-
tions, prior to beginning any work.
■
The manufacturer's liability is void in the case of any damage caused by using the
product contrary to its intended use, non-compliance with these operating instruc-
tions, assignment of insuciently qualied skilled personnel or unauthorised modi-
cations to the instrument.
■
The general terms and conditions, contained in the sales documentation, shall apply.
■
Subject to technical modications.
■
Factory calibrations/DKD/DAkkS calibrations are carried out in accordance with
international standards.
■
Further information:
- Internet address: www.wika.de / www.wika.com
- Relevant data sheet: CT 81.01
- Application consultant: Tel.: (+49) 9372/132-9986
Fax: (+49) 9372/132-217
E-Mail: [email protected]

5WIKA operating instructions, model CEP1000
11570351.02 10/2010 GB/D/F/E/I
GB
1. General information / 2. Safety
Explanation of symbols
WARNING!
... indicates a potentially dangerous situation that can result in serious
injury or death, if not avoided.
CAUTION!
... indicates a potentially dangerous situation that can result in light
injuries or damage to equipment or the environment, if not avoided.
Information
... points out useful tips, recommendations and information for ecient
and trouble-free operation.
DANGER!
...identies hazards caused by electric power. Should the safety instruc-
tions not be observed, there is a risk of serious or fatal injury.
2. Safety
WARNING!
Before installation, commissioning and operation, ensure that the
appropriate loop calibrator been selected in terms of measuring range,
design and specic measuring conditions.
Non-observance can result in serious injury and/or damage to equip-
ment.
Further important safety instructions can be found in the individual
chapters of these operating instructions.

6WIKA operating instructions, model CEP1000
11570351.02 10/2010 GB/D/F/E/I
GB
2. Safety
2.1 Intended use
The precision loop calibrator CEP1000 is designed for high-accuracy measuring and
simulation of current and voltage.
The instrument has been designed and built solely for the intended use described here,
and may only be used accordingly.
The technical specications contained in these operating instructions must be
observed. Should the instrument be improperly handled or operated outside of its
technical specications, it has to be taken out of service immediately and inspected by
an authorised WIKA service engineer.
Handle electronic precision measuring instruments with the required care (protect from
humidity, impacts, strong magnetic elds, static electricity and extreme temperatures,
do not insert any objects into the instrument or its openings). Plugs and sockets must be
protected from contamination.
If the instrument is transported from a cold into a warm environment, the formation of
condensation may result in the instrument malfunctioning. Before putting it back into
operation, wait for the instrument temperature and the room temperature to equalise.
The manufacturer shall not be liable for claims of any type based on operation contrary
to the intended use.
2.2 Personnel qualication
WARNING!
Risk of injury should qualication be insucient!
Improper handling can result in considerable injury and damage to
equipment.
■
The activities described in these operating instructions may only
be carried out by skilled personnel who have the qualications
described below.
■
Keep unqualied personnel away from hazardous areas.
Skilled personnel
Skilled personnel are understood to be personnel who, based on their technical training,
knowledge of measurement and control technology and on their experience and knowl-
edge of country-specic regulations, current standards and directives, are capable of
carrying out the work described and independently recognising potential hazards.
Special operating conditions require further appropriate knowledge, e.g. of aggressive
media.
7WIKA operating instructions, model CEP1000
11570351.02 10/2010 GB/D/F/E/I
GB
2. Safety
2.3 Special hazards
WARNING!
For hazardous media such as oxygen, acetylene, ammable or toxic
gases or liquids, and refrigeration plants, compressors, etc., in addition
to all standard regulations, the appropriate existing codes or regula-
tions must also be followed.
WARNING!
Protection from electrostatic discharge (ESD) required.
The proper use of grounded work surfaces and personal wrist straps is
required when working with exposed circuitry (printed circuit boards),
in order to prevent static discharge from damaging sensitive electronic
components.
To ensure safe working on the instrument, the operating company must
ensure that the operating personnel are regularly instructed in all topics
regarding work safety, rst aid and environmental protection and knows
the operating instructions and, in particular, the safety instructions
contained therein.
DANGER!
Danger of death caused by electric current!
Operation using a defective power supply unit (e.g. short circuit from
the mains voltage to the output voltage) can result in life-threatening
voltages at the instrument!

8 WIKA operating instructions, model CEP1000
11570351.02 10/2010 GB/D/F/E/I
GB
3. Specications
3. Specications
Specications
Input
Current range 0.000 … 24.000 mA
-25.00 … +125.00 %
Voltage range DC 0.000 … 28.000 V
Input protection Fuseless, up to AC 250 V
Output
Current range 0.000 … 24.000 mA
-25.00 … +125.00 %
Uncertainty ± 0.015 % of reading ± 2 µA
Resolution 1 µA, 1 mV
Drive capability
■
Without HART™-resistor 1200 Ω
■
With HART™-resistor 950 Ω
Loop supply voltage DC 24 V
Range select Decade; incremental to 0.001 mA steps
Special features Auto step/ramp, Auto “%-Error” function, built-in resistor
for HART™ communications
Permissible
■
Operating temperature -10 … +55 °C
■
Storage temperature -20 … +70 °C
Display 5 1/2-digit with character size 9 mm and %-announce-
ment
Range mA, V, %
Recording options MIN-/MAX-storage
Power supply DC 9 V battery
■
Battery life 12 hours (12 mA into 250 Ω continuous)
■
Low battery indicator displayed icon near the end of battery life
EMC / CE conformity 2004/108/EC, EN 61326 Emission (Group 1, Class B) and
Immunity (portable equipment)
Ingress protection IP 52
Calibration 3.1 calibration certicate per DIN EN 10204 (option: DKD/
DAkkS-calibration certicate)
Dimensions 144.7 x 80.0 x 36.3 mm
Weight approx. 340 g
For further specications see WIKA data sheet CT 81.01 and the order documentation.

9WIKA operating instructions, model CEP1000
11570351.02 10/2010 GB/D/F/E/I
GB
3. Specications / 4. Design and function
Dimensions in mm
Side viewFront view
4. Design and function
4.1 Short description / Description
The CEP1000 is a loop calibrator operating in the range of 4 ... 20 mA designed for
both troubleshooting and calibration of circuits without separate power supply.Very
high accuracy and diverse special functions make the instrument to a user-friendly and
highly exible calibration instrument.
The CEP1000 can be used as current reference standard for up to 24 mA, it can also be
used to simulate a 2-wire connection or to perform measurements in circuits with up to
24 mA without separate power supply.
By means of the calibrator it is possible to measure process signal voltages of up to 28 V
direct current with an accuracy of 0.015 % of the measurement value.

10 WIKA operating instructions, model CEP1000
11570351.02 10/2010 GB/D/F/E/I
GB
4. Design and function
1
2
3
4
5
6
7
8
9
10
11
Using the digital knob user interface as well as the decade output control the user
can set both large and incremental changes of the output signal conveniently. Multiple
unique functions such as the automatic step/ramp function allow easy application of the
CEP1000.
Besides the CEP1000 can supply a 2-wire transmitters with voltage and at the same
time measure the emerging current. All measurements are displayed in mA as well as in
percent of the measuring range.
4.2 Scope of delivery
■
Precision loop calibrator model CEP1000
■
Operating instructions
■
Neoprene case
■
Calibration certicate 3.1 per to DIN EN 10204
■
9 V battery
Cross-check scope of delivery with delivery note.
4.3 Front foil of the CEP1000
1) Mode indication
2) Step / ramp indication
3) On/O
4) Current loop key: Activation of
the 24 V power supply in the mA
measuring mode
5) %Error key: indicates the actual
vs. ideal error in %
6) Digital „knob“: output control
7) Simultaneous % display: 4 mA =
0.00 %, 20 mA = 100.00 %
8) Mode key
9) Auto key: Switching between
automatic step and ramp function
(slow or fast)
10) 25 %-key: manual activation of the
step function 4, 8, 12, 16, 20 mA
11) Cursor keys: arrow keys to select
the required decades
Figure 1

11WIKA operating instructions, model CEP1000
11570351.02 10/2010 GB/D/F/E/I
GB
4. Design and function / 5. Transport, packaging and storage
4.4 Battery selection
The CEP1000 is operated with a normal 9 V alkaline battery or optionally with a
rechargeable 9 V Ni-Cd battery. For the most application cases the alkaline battery with
9 V is sucient. However, for the intensive use the 9 V Ni-Cd battery is the better choice.
The Ni-Cd battery for 9 V available optionally with an output current of 12 mA and full
battery enables continuous operation for approx. 3 hours (the alkaline battery lasts
approximately 12 hours). The optionally available charging device charges the battery
over night (10 to 12 hours long) and powers the instrument in the stationary mode. At
the same time the conservation charging of the Ni-Cd battery is carried out.
WARNING!
Never connect the power supply unit/charging device if a 9 V alkaline
cell is inserted.
4.5 Input protection
The device has an input protection without a fuse for up to 250 V of direct or alternating
current for the period of time of up to 30 seconds.
5. Transport, packaging and storage
5.1 Transport
Check loop calibrator for any damage that may have been caused by transport.
Obvious damage must be reported immediately.
5.2 Packaging
Do not remove packaging until just before mounting.
Keep the packaging as it will provide optimum protection during transport (e.g. change
in installation site, sending for repair).
5.3 Storage
Permissible conditions at the place of storage:
■
Storage temperature: -20 ... +70 °C
■
Humidity: 0 ... 90 % relative humidity (no condensation)
Avoid exposure to the following factors:
■
Direct sunlight or proximity to hot objects
■
Mechanical vibration, mechanical shock (putting it down hard)
■
Soot, vapour, dust and corrosive gases
■
Potentially explosive environments, ammable atmospheres

12 WIKA operating instructions, model CEP1000
11570351.02 10/2010 GB/D/F/E/I
GB
5. Transport, packaging and storage / 6. Commissioning ...
Store the instrument in its original packaging in a location that fulls the conditions
listed above. If the original packaging is not available, pack and store the instrument as
described below:
1. Wrap the instrument in an antistatic plastic lm.
2. Place the instrument, along with shock-absorbent material, in the packaging.
3. If stored for a prolonged period of time (more than 30 days), place a bag, containing
a desiccant, inside the packaging.
WARNING!
Before storing the instrument (following operation), remove any residual
media.This is of particular importance if the medium is hazardous to
health, e.g. caustic, toxic, carcinogenic, radioactive, etc.
6. Commissioning, operation
DANGER!
To avoid electric shock and injuries:
■
Do not connect voltage higher than the nominal voltage. For the
supported voltage ranges refer to "3. Specications."
■
Observe all safety measures for the instruments.
■
Do not use the calibrator if it is damaged. Prior to use check the
housing of the calibrator. Check carefully if plastic parts are missing
and if there are any cracks. Pay special attention to insulation
around connections.
■
Select the proper function and correct measuring range.
■
The battery case must be closed and locked before the calibrator is
put into operation.
■
Disconnect the test leads from the calibrator prior to opening the
battery case.
■
Check the test leads for signs of damaged insulation or metal parts
with natural nish.
■
When using the probe keep the ngers away from the probe
contacts. Hold the probes behind the nger protection at the test
leads. Do not use the calibrator in case of malfunction.The instru-
ment protection can be impaired. In case of doubt the instrument
must be repaired.
■
Do not operate the instrument in the environment with explosive
gases, vapours or dusts.
■
Disconnect the capillary prior to switching to another measurement
or before using as a simulator.
■
Use only the specied spare parts for repairs of the calibrator.

13WIKA operating instructions, model CEP1000
11570351.02 10/2010 GB/D/F/E/I
GB
6. Commissioning, operation
■
To avoid faulty measurements that can lead to electric shock or
injuries, replace the battery immediately as soon as a dead battery
is indicated.
WARNING!
To avoid damages of the calibrator or devices during testing, use the
correct terminals, functions and measuring ranges for measurement or
simulation.
6.1. First steps
6.1.1 Battery saving function
To avoid discharge of the battery in case of unintended switching on of the CEP1000,
the battery saving function is activated ex works and set to 30 minutes.The battery
saving function turns o the CEP1000 automatically if no key is pressed within 30
minutes.
To change the turn-o time or deactivate it, the following steps must be carried out when
turning on:
1) Turn o the instrument.
2) Press the "AUTO" key.
3) Turn on the instrument again.
4) After turning on wait for 1 second and then release the "AUTO"key.
5) The set period of time appears on the display for the battery saving function
(between "O" and 30 minutes).
6) Set the required time using the knob (between "O" and 30 minutes).
7) Press the "AUTO"key again to save the value and switch the instrument back to
normal operation.The saved value is stored in the memory until it is changed by the
operator.

14 WIKA operating instructions, model CEP1000
11570351.02 10/2010 GB/D/F/E/I
GB
6. Commissioning, operation
CEP1000
LCD
6.1.2 HART™ resistance conguration
Due to internal 250 Ωresistance of the CEP1000 it is possible to use Rosemount 275
Communicator during calibration or installation of a HART™ transmitter.The internal
resistance replaces the resistance of 250 Ω required normally for the communicator
model 275.To activate this function if necessary, the internal jumper must be removed.
The instrument is supplied with an inserted jumper (see gure 2). To activate the resist-
ance, remove the jumper. The jumper can be either stored outside of the instrument or
just plugged onto a contact pin in the instrument, thus, the circuit is interrupted.
-J8 (HART™ JUMPER)
Remove the jumper to activate the HART™
resistance (250 Ω).
Figure 2
If the 250 Ωresistance is activated, it is possible to energise a
maximum load of 950 Ωinstead of 1200 Ω. In most cases this would not
cause any problems for the calibration of products incompatible with
HART™.

15WIKA operating instructions, model CEP1000
11570351.02 10/2010 GB/D/F/E/I
GB
6. Commissioning, operation
( + )
( - )
LOOPPWR
CEP 1000
MODE
%ERROR
AUTOMAX
25% MIN
Calibration Line
SOURCE
mA
6.2 Basic operating modes
The CEP1000 has 4 operating modes for the mA range and one operating mode for
voltage measurement. The following text and gures explain dierent operating modes.
6.2.1 Milliampere source
Figure 3 shows a typical application, for which the CEP1000 is used as a source of
current for the range from 4 ... 20 mA for the instrument to be tested.
1) Turn on the instrument. As a standard the operating mode source of current in the
mA range is set.
2) Connect the instrument to be calibrated.
For the instrument to function as a source of current, the circuit must be
closed. In case of an interrupted circuit the LCD display "OL" is blinking
and indicating an overload or an interruption of the circuit.
Instrument with an input
of 4 ... 20 mA
Max. load: 1200 Ω without HART™
950 Ω with HART™
Figure 3 - Current source for 4 ... 20 mA
4 ... 20 mA

16 WIKA operating instructions, model CEP1000
11570351.02 10/2010 GB/D/F/E/I
GB
6. Commissioning, operation
( + )
( - )
( + )
( - )
LOOPPWR
CEP 1000
MODE
%ERROR
AUTOMAX
25% MIN
Calibration Line
SIM
mA
3) The output signal can be adjusted to the set point by means of the knob. For this
purpose select the decade to be set using the arrow keys.
4) The output signal can also be increased incrementally in steps of 4 mA (25 %) using
the "25%" key.
5) The automatic step function and automatic ramp function allow automatic change of
the output signal.
For further information refer to the section "6.3.1 Automatic operation modes" of the
instruction.
6.2.2 Milliampere simulation
Figure 4 shows the way the CEP1000 is connected if it is supposed to function as a
2-wire transmitter with an external power supply. In this case the circuit is powered via
an external voltage source and the instrument just regulates the current in the circuit.
The regulating procedure of the output signal is the same as for the application as the
source of current in the milliampere range.
Figure 4: Simulation of a sensor with a current output for 4 ... 20 mA
Power supply DC 30 V
max.
The instrument is operated in the simulation mode as a
two-wire sensor.
Instrument with an input
of 4 ... 20 mA
4 ... 20 mA

17WIKA operating instructions, model CEP1000
11570351.02 10/2010 GB/D/F/E/I
GB
6. Commissioning, operation
( + )
( - )
LOOPPWR
CEP 1000
MODE
%ERROR
AUTO MAX
25% MIN
Calibration Line
MEASURE
mA
6.2.3 Milliampere measurement
Figure 5 shows the way the CEP1000 must be connected to carry out a measurement in
a circuit for 4 ... 20 mA. During this application the instrument just measures the current
in the circuit and displays it on the main display in
mA
. The lower (smaller) scale range
indicates the percentage of current for the measuring range 4 ... 20 mA.
6.2.4 Milliampere measurement with 24 V power supply
For this case gure 5 also shows the correct connection. However, in this case a 2-wire
transmitter is tested, it requires an external power supply for the output current. For this
application the instrument supplies the circuit with an operating voltage of 24 V and at
the same time measures the emerging current.To enable the function with separate
power supply, press the "LOOP PWR"key if the option milliampere measurement is
selected.
The measuring mode with separate power supply can be activated for
the option measuring in the milliampere range.
Instrument with an
output for 4 ... 20 mA
4 ... 20 mA
Maximum input signal: 24 mA
To measure the output signal of a two-wire sensor use
the option measurement with separate power supply.
Figure 5: Measurement in the range of 4 ... 20 mA

18 WIKA operating instructions, model CEP1000
11570351.02 10/2010 GB/D/F/E/I
GB
6. Commissioning, operation
( + )
( - )
LOOPPWR
CEP 1000
MODE
%ERROR
AUTO MAX
25% MIN
Calibration Line
MEASURE
V
6.2.5 Voltage measurement
Figure 6 shows the connection of CEP1000 required to measure direct voltage of up
to 28 V.To activate the voltage measurement, just press the "MODE"key to search the
individual functions until the voltage measurement is displayed.
The input impedance of the CEP1000 is higher than 1 MΩ in this mode.
Figure 6: Measurement in the range of DC 0 ... 28 V
instrument with an output
for 0 ... 28 V
Maximum input signal: DC 28 V

19WIKA operating instructions, model CEP1000
11570351.02 10/2010 GB/D/F/E/I
GB
6. Commissioning, operation
6.3 Advanced operating modes
6.3.1 Automatic step function/automatic ramp mode
The CEP1000 is capable of increasing the output current in the mA range in steps of
25 % automatically with intervals of 5 seconds.The output current in the mA range
can be increased linearly in form of the ramp function from 4 mA up to 20 mA and then
reduced again automatically to 4 mA.
To activate the automatic step/ramp function proceed as follows:
1) The automatic step/ramp function can be used for the application as milliampere
source as well as for the milliampere simulation. Switch the instrument into the corre-
sponding operating mode.
2) Connect the CEP1000 to the instrument to be tested.
3) For the automatic step function press the "AUTO"key once, for a slow ramp function
twice and for the quick ramp function three times. After every key stroke a small
conrmation window appears in the lower left corner of the LCD display, it indicates
which step function or ramp function has been selected.
4) As soon as the step function/ramp function has been activated, it is functioning
constantly until another key is pressed.
6.3.2 Fault percentage function
This unique function calculates the fault percentage of the measuring range (a measur-
ing range of 4 ... 20 mA gives a span of 16 mA). Using the function for calculation of fault
percentage the user can "Zero Out" the milliampere indication, thus, enabling indication
of deviation from the ideal value on the display as a fault percentage.
Procedure:
1) Connect the CEP1000 to the instrument to be tested.
2) Set a mode with milliampere output for the instrument (source or simulation).
3) Set the required output value.
4) If the instrument to be tested does not measure the exact value, press and hold
the "%ERROR" key and adjust the knob so that the instrument displays the correct
value. Press and keep holding the “%ERROR” key further on.
5) The indication in the percentage eld corresponds to the fault or deviation as a
percentage of the span.
6) After the "%ERROR" key has been released, the indication switches back to normal
operation.

20 WIKA operating instructions, model CEP1000
11570351.02 10/2010 GB/D/F/E/I
GB
6. Commissioning, operation
6.3.3 Data acquisition for minimum and maximum
If the CEP1000 is operated in a measuring mode (milliampere, milliampere with power
supply or voltage), the minimum and maximum values for the corresponding input mode
are monitored and stored permanently. To activate the data acquisition proceed as
follows:
1) Switch the CEP1000 to a measuring mode.
2) Connect the instrument to the instrument to be tested.
3) Press both keys (“MIN” and “MAX”) to clear the memory for the minimum and
maximum values.The “CLR” message is displayed on the LCD display, if the
memory has been deleted.
4) Acquire the minimum value and the maximum value using the instrument as long as
required.
If necessary, deactivate the battery saving function prior to calling the
data acquisition function to avoid premature switching o of the calibra-
tor.
5) The saved value can be accessed any time by pressing the "MIN" or "MAX" key.
6) When switching o the instrument or switching to another operating mode the
memory will be cleared. Back up the data before switching o.
Table of contents
Languages:
Other WIKA Test Equipment manuals
Popular Test Equipment manuals by other brands

ULTIMATE SPEED
ULTIMATE SPEED 296998 operating instructions

Apera Instruments
Apera Instruments LabSen 831 user manual

Vigor Equipment
Vigor Equipment V7548 operating instructions

Gossen MetraWatt
Gossen MetraWatt SECUTEST BASE operating instructions

National Instruments
National Instruments NI PXI-5124 Getting started guide

CryptOn
CryptOn EB30-2R operating instructions