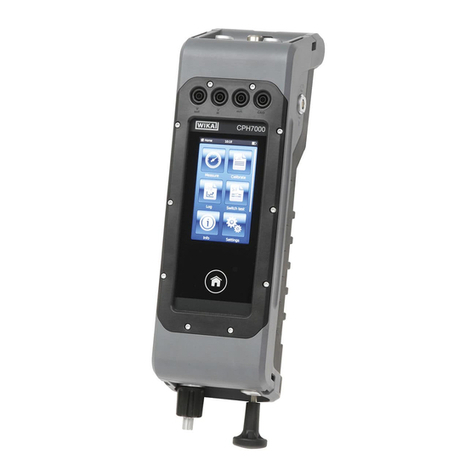
WIKA CPH7000 User manual

Calibration
WIKA data sheet CT 15.51
Page 1 of 15
WIKA data sheet CT 15.51 ∙03/2019
Data sheets showing similar products and accessories:
Test pumps, hydraulic; model CPP series; see data sheet CT 91.05
Test pump, pneumatic; model CPP30; see data sheet CT 91.06
Calibration software; WIKA-Cal; see data sheet CT 95.10
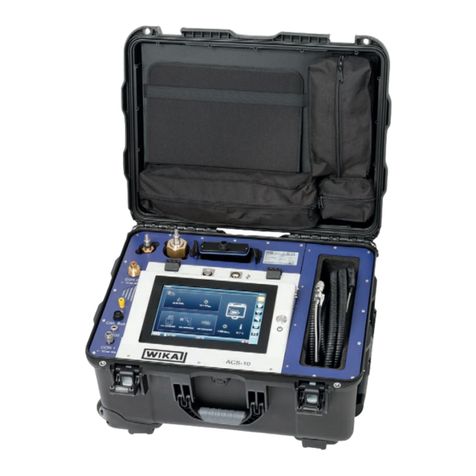
Portable process calibrator
Model CPH7000
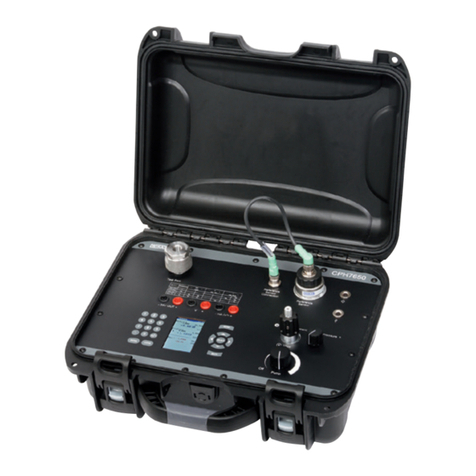
Portable process calibrator model CPH7000 with
optional hand pump
Description
General information
The model CPH7000 process calibrator is a precise, portable
calibrator for the calibration and checking of analogue
pressure measuring instruments, pressure transmitters and
process transmitters. Furthermore, pressure switches can
be checked and the switching point determined.With the
CPH7000, not only can transmitters be checked, but also
simulated and tested.
Design
The CPH7000 optionally features an integrated reference
pressure sensor and also a manual pressure generation, with
which pressures of -0.85 ... +25 bar (12.3 ... +360 psi) can be
generated. It is possible to simultaneously power an external
transmitter via the electrical module and to measure (or also
simulate) its output signal.
Functions
The calibrator oers the possibility to set calibration routines
quickly and easily, but also to run precongured calibration
routines and automatically save the measured values. Over
the WIKA-Wireless interface, the completed calibration
processes can be transmitted to a PC.This data can
subsequently be evaluated and archived using WIKA-Cal
software.Thus a completely paperless transmitter calibration
is possible with just the CPH7000.
Accuracy
The CPH7000 is compensated over a wide temperature
range of 10 ... 50 °C (50 ... 122 °F) and achieves an accuracy
of 0.025 % of span. In order to avoid intricate calculations,
the measured values can also be displayed directly in
customer-specic units.
for further approvals
see page 6 - 7
Applications
■Calibration service companies and service industry
■Measurement and control laboratories
■Quality assurance
■On-site calibration
Special features
■Manual pressure generation of -0.85 … +25 bar
(12.3 ... +360 psi)
■Accuracy: 0.025 % FS (incl. calibration certicate)
■Generation/measurement of 0 ... 30 mA and voltage
supply DC 24 V
■Data logger with high measuring rate and large memory
■A calibration assistant guides you through the calibration

WIKA data sheet CT 15.51 ∙ 03/2019 Page 2 of 15
Features
For pressures greater than 25 bar (362.6 psi), there are the
model CPT7000 external pressure sensors.
Thus pressure measurement and calibration is possible in
further pressure measuring ranges and accuracies.
An optional atmospheric module records and documents the
environmental parameters important for a calibration, such as
atmospheric pressure, air humidity and ambient temperature.
Complete service case
The process calibrator, developed specically for
maintenance and service operations, is delivered in a
portable case system and, depending on requirements, can
be equipped with, for example, model CPT7000 external
pressure sensors, a Pt100 temperature sensor or a portable
system with storage bag.
Software
The calibration software for the CPH7000 is WIKA-Cal.
WIKA-Cal, alongside PC-supported calibration and the
logger function, also oers the management of the calibration
and instrument data in an SQL database.The data transfer is
achieved completely wirelessly via WIKA-Wireless.
Certied accuracy
For the model CPH7000 process calibrator, the accuracy
is certied in a factory calibration certicate accompanying
the instrument. On request, we can provide a DKD/DAkkS
calibration certicate.
Specications
Digital process calibrator model CPH7000
Display
Display Touchscreen colour display
Display resolution up to 5 digits; selectable
Pressure units mbar, bar, psi, Pa, kPa, hPa, MPa, mmHg, cmHg, inHg, mmH2O, mH2O, inH2O (4 °C),
inH2O (20 °C), inH2O (60 °F), inHg (0 °C), inHg (60 °F), kg/cm², kp/cm², lbf/ft², kN/m², atm,
Torr, micron, g/l (20 °C), kg/m³ (20 °C) as well as two user-dened units
Settings
Applications (Apps) Measure, calibrate, logger, switch test
Measuring rate 50 values/s
Menu languages English, German, Spanish, French, Italian, Russian, Arabic, Chinese (settable)
Connections
External pressure sensor 1) max. 2, compatible with model CPT7000 reference pressure sensors
External ambient module 1) max. 1 ambient module 2)
External temperature probe 1) max. 1 temperature probe 2)
Manual pressure generation 1) -0.85 … +25 bar (-12.3 ... +360 psi)
Voltage supply
Power supply internal Lithium-Ion rechargeable battery (typical charging time: < 5 h)
Battery life typical 8 hours 3)
Permissible ambient conditions
Operating temperature -10 ... +50 °C (14 ... 122 °F)
Storage temperature -20 ... +60 °C (-4 ... +140 °F)
Air humidity at 35 °C (95 °F): max. 90 % r. h. (non-condensing)
at 40 °C (104 °F): max. 75 % r. h. (non-condensing)
at 50 °C (122 °F): max. 45 % r. h. (non-condensing)
Shock and vibration 15 g per EN 60068-2-6
Communication
Interface WIKA-Wireless 4)
1) Optional
2) Temperature probe and ambient module use the same connection.
Cannot be used at the same time.
3) Continuous operation (without backlighting, WIKA-Wireless deactivated and the electrical module gives no voltage/current).
4) Requires a PC with Bluetooth®2.1 interface
WIKA data sheet CT 15.51 ∙ 03/2019 Page 3 of 15
Digital process calibrator model CPH7000
Case
Material PC + ABS blend
Ingress protection IP54 category 2
Dimensions see technical drawing
Weight approx. 1.9 kg (4.19 lbs.) without internal pump and reference sensor
approx. 2.5 kg (5.51 lbs.) incl. internal pump and reference sensor
Internal sensor technology
Pressure 5)
Gauge pressure bar -1 ... +1 -1 ... 5 -1 ... 10 -1 ... 20 -1 ... 25
psi -14.5 ... +14.5 -14.5 ... +70 -14.5 ... +145 -14.5 ... +300 -14.5 ... +360
Absolute pressure bar abs. 0 ... 1 0 ... 1.6 0 ... 6 0 ... 10 0 ... 20 0 ... 25
psi abs. 0 ... 14.5 0 ... 23 0 ... 87 0 ... 145 0 ... 290 0 ... 360
Overpressure safety 3 times
Accuracy of the measuring chain 6) 0.025 % of span 7)
Resolution 5 digits
Pressure connection G ⅛ female thread (only with selected pneumatic unit)
Electrical safety:
Resistance to overvoltage Yes
Short-circuit resistant Yes
Reverse polarity protection Yes
Voltage-resistant Up to 60 V
Input impedance
Current measurement 20 Ω
Voltage measurement 1 MΩ
Current
Measuring input 0 … 30 mA
Measuring output 0 … 30 mA
Resolution 1 µA
Accuracy Measure: 0.01 % ±1 µA
Supply: 0,01 % ±2 µA 8)
Voltage
Measuring input DC 0 … 30 V
Measuring output DC 24 V
Resolution 1 mV
Accuracy 0.01 % or reading ±1 mV
Barometric reference 1) 9)
Measuring range 850 ... 1,100 mbar (12.3 ... 16 psi)
Accuracy ±1 mbar
1) Optional
5) The internal reference sensor is only available in combination with a pneumatic unit.
6) It is dened by the total measurement uncertainty, which is expressed with the coverage factor (k = 2) and includes the following factors: the intrinsic performance of the instrument, the
measurement uncertainty of the reference instrument, long-term stability, inuence of ambient conditions, drift and temperature eects over the compensated range during a periodic
zero point correction.
7) Calibrated at 23 °C (74 °F) and in vertical mounting position.
8) In the event of interference caused by high-frequency electromagnetic elds in a frequency range of 200 ... 300 MHz, an increased deviation of up to 0.1 % is expected for the current
output function.
9) The barometric reference can be used to switch pressure types, absolute <=> gauge. With gauge pressure sensors, the measuring range of the sensors must begin with -1 bar (-15 psi)
in order to carry out a complete absolute pressure emulation.

WIKA data sheet CT 15.51 ∙ 03/2019 Page 4 of 15
Power supply unit model FW7530
Input voltage AC 100 ... 240 V, 50 ... 60 Hz
Output voltage DC 12 V
Nominal Output current 2,500 mA
Permissible ambient conditions
Operating temperature 0 ... 40 °C (32 ... +104 °F); up to 90 % r. h. (non-condensing)
Storage temperature -40 ... +70 °C (-40 ... +158 °F)
Air humidity 20 ... 80 % r. h. (non-condensing)
Temperature probe Pt100 1)
Measuring range -50 ... +250 °C (-58 ... +482 °F)
Accuracy 1/10 DIN, class B ±0.1 °C
Probe length 200 mm (7.87 in)
Probe diameter 3 mm (0.12 in)
Cable length 1 m (3.28 ft)
Connection to CPH7000 max. 1 temperature probe 2)
User-dened RTD probe Input of the coecients of R0, A, B and C
Ambient module 1)
Measuring range
Air humidity 0 ... 100 % r. h.
Temperature -30 ... +125 °C (-22 ... +257 °F)
Accuracy
Air humidity ±5 % r. h.
Temperature ±0.2 K (0.36 °F)
Connection to CPH7000 max. 1 ambient module 2)
WIKA-Wireless 4)
Frequency range 2,400 ... 2,500 MHz
HF output power max. 2 dBm (+ 2 dBi)
Number of channels 79
Channel spacing 1 MHz
Bandwidth 80 MHz
Output power 4 dBm / 10 mW
1) Optional
2) Temperature probe and ambient module use the same connection.
Cannot be used at the same time.
4) Requires a PC with Bluetooth®2.1 interface
WIKA data sheet CT 15.51 ∙ 03/2019 Page 5 of 15
Reference pressure sensor model CPT7000
Pressure range
Gauge pressure bar -0.25 ... +0.25 -0.4 ... +0.4 -0.6 ... +0.6 -1 ... 0 -1 ... +0.6
-1 ... +1 -1 ... +1.5 -1 ... +2.5 -1 ... +3 -1 ... +5
-1 ... +9 -1 ... +10 -1 ... +15 -1 ... +24 -1 ... +25
-1 ... +39 -1 ... +40
0 ... 0.25 0 ... 0.4 0 ... 0.6 0 ... 1 0 ... 1.6
0 ... 2.5 0 ... 4 0 ... 6 0 ... 10 0 ... 16
0 ... 25 0 ... 40 0 ... 60 0 ... 100 0 ... 160
0 ... 250 0 ... 400 0 ... 600 0 ... 700 0 ... 1.000
0 ... 1,600 10) 0 ... 2,500 10) 0 ... 3,000 10) 0 ... 4,000 10) 0 ... 5,000 10)
0 ... 6,000 10) 0 ... 8,000 10) 0 ... 10,000 10)
psi -4 ... +5 -6 ... +6 -8 ... +8 -14.5 ... 0 -14.5 ... +8
-14.5 ... +14.5 -14.5 ... +23 -14.5 ... +36 -14.5 ... +44 -14.5 ... +70
-14.5 ... +130 -14.5 ... +145 -14.5 ... +220 -14.5 ... +350 -14.5 ... +360
-14.5 ... +565 -14.5 ... +580
0 ... 4 0 ... 6 0 ... 8 0 ... 14.5 0 ... 23
0 ... 36 0 ... 60 0 ... 90 0 ... 145 0 ... 230
0 ... 360 0 ... 580 0 ... 870 0 ... 1,450 0 ... 2,320
0 ... 3,630 0 ... 5,800 0 ... 8,700 0 ... 10,150 0 ... 14,500
0 ... 25,000 0 ... 40,000 0 ... 50,000 0 ... 60,000 0 ... 75,000
0 ... 85,000 0 ... 100,000 0 ... 150,000
Absolute pressure bar abs. 0 ... 0.25 0 ... 0.4 0 ... 0.6 0 ... 1 0 ... 1.6
0 ... 2.5 0 ... 4 0 ... 6 0 ... 10 0 ... 16
0 ... 25 0 ... 40
psi abs. 0 ... 4 0 ... 6 0 ... 8 0 ... 14.5 0 ... 23
0 ... 36 0 ... 60 0 ... 90 0 ... 145 0 ... 230
0 ... 360 0 ... 580
Overpressure safety 3 times; < 25 bar
2 times; > 25 bar ... ≤ 600 bar
1.5 times; > 600 bar ... ≤ 1,600 bar
1.3 times; > 1,600 bar
1.1 times; > 6,000 bar
3 times; < 360 psi
2 times; > 360 psi ... ≤ 8,700 psi
1.5 times; > 8,700 psi ... ≤ 25,000 psi
1.3 times; > 25,000 psi
1.1 times; > 85,000 bar
Process connection
Selectable versions ■G ⅜ B
■G ¼ B
■G ¼ female
■G ½ B
■G ½ male on G ¼ female
■G ½ B ush with O-ring of NBR
■G ½ B ush with O-ring of EPDM
■G 1 B ush with O-ring of NBR
■G 1 B ush with O-ring of EPDM
■¼ NPT
■½ NPT
■½ NPT male on ¼ NPT female
■½ NPT female
■M16 x 1.5 female with sealing cone
■M18 x 1.5 male on G ¼ female
■M20 x 1.5
■M20 x 1.5 female with sealing cone
■9/16-18 UNF female F250-C
■R ½ per ISO7 (DIN 2999)
Sensor data
Accuracy 6) 0.025 % of span 7)
Resolution 5 digits
Compensated range 10 ... 60 °C (50 ... 140 °F)
6) It is dened by the total measurement uncertainty, which is expressed with the coverage factor (k = 2) and includes the following factors: the intrinsic performance of the instrument, the
measurement uncertainty of the reference instrument, long-term stability, inuence of ambient conditions, drift and temperature eects over the compensated range during a periodic
zero point correction.
7) Calibrated at 23 °C (74 °F) and in vertical mounting position
10) > 1,000 ... < 4,000 bar (> 14,500 ... < 60,000 psi):: expanded accuracy of 0.15 % FS
≥ 4,000 bar (≥ 60,000 psi): expanded accuracy of 0.25 % FS

WIKA data sheet CT 15.51 ∙ 03/2019 Page 6 of 15
Reference pressure sensor model CPT7000
Material
Wetted parts Stainless steel (with measuring ranges ≤ 25 bar (≤ 360 psi) Elgiloy®in addition)
Internal transmission uid Synthetic oil (only for measuring ranges up to 25 bar (360 psi))
Reference conditions per IEC 61298-1
Atmospheric pressure 860 hPa < P < 1,060 hPa (12.5 psi < P < 15.4 psi)
Ambient temperature 18 °C < T < 28 °C, typ. 23 °C
Air humidity 35 % r. h. < T < 95 % r. h. , typ. 55 % r. h.
Position Hand-held lying face-up
Permissible ambient conditions
Medium temperature -20 ... +60 °C (-4 ... +140 °F) 11)
-20 ... +85 °C (-4 ... +185 °F)
Operating temperature -20 ... +60 °C (-4 ... +140 °F)
Storage temperature -20 ... +85 °C (-4 ... +185 °F)
Relative humidity 0 ... 95 % r. h. (non-condensing)
Temperature compensation 10 ... 60 °C (50 ... 140 °F)
Temperature coecient Zero point = 0.1 % / 10 K
Span = 0.1 % / 10 K
Case
Material Stainless steel
Connection to the CPH7000 Option: external operation via 1 m or 3 m (3.28 ft or 9.84 ft) connection cable (plug-and-play)
Ingress protection IP65 / IP67 when connected
Dimensions see technical drawing
Weight approx. 230 g (0.5 lbs.)
11) For oxygen versions, the medium temperature must not exceed 60 °C (140 °F).
Approvals
Logo Description Country
EU declaration of conformity for CPH7000
■EMC directive
EN 61326 emission (group 1, class B) and interference immunity (portable measuring
equipment)
■R&TTE directive
EN 300 328 harmonised frequency range 2,400 … 2,500 MHz is used; Bluetooth® Classic,
max. transmission power 10 mW.The instrument may be used without limitations in the EU and
also CH, NO and LI.
■Protection of health and safety
■RoHS directive
European Union
EU declaration of conformity for CPT7000
■EMC directive
EN 61326 emission (group 1, class B) and interference immunity (industrial application)
■Pressure equipment directive
PS > 200 bar, module A, pressure accessory
■RoHS directive
European Union
CSA 12)
Safety (e.g. electr. safety, overpressure, ...)
USA and Canada
EAC 12)
■EMC directive
■Low voltage directive
Eurasian Economic
Community
GOST 12)
Metrology, measurement technology
Russia
12) Optional

WIKA data sheet CT 15.51 ∙ 03/2019 Page 7 of 15
Logo Description Country
KazInMetr 12)
Metrology, measurement technology
Kazakhstan
-MTSCHS 12)
Permission for commissioning
Kazakhstan
Uzstandard 12)
Metrology, measurement technology
Uzbekistan
12) Optional
Certicates
Certicate
Calibration Standard: 3.1 calibration certicate per EN 10204
Option: DKD/DAkkS calibration certicate
Recommended recalibration interval 1 year (dependent on conditions of use)
Patents, property rights
Patents
Design Registered under USD 786.719S
Approvals and certicates, see website

WIKA data sheet CT 15.51 ∙ 03/2019 Page 8 of 15
Dimensions in mm (in)
Reference pressure sensor
model CPT7000
Digital process calibrator model CPH7000

WIKA data sheet CT 15.51 ∙ 03/2019 Page 9 of 15
Special operating modes
Operating mode: Measure
Features
■3 dierent measurements in one view
■30 pressure units + 2 programmable units
■Resolution: Up to 4 decimal places
■Graphical display via bargraph
■Optionally settable functions: Min/Max/Tare/Filter/Alarm
min/Alarm max/Mean value/Rate/Sensor temperature
Applications
■Measurement of operating/process pressures
■Comparative measurements with test items (power supply
and display for the test item through the CPH7000)
■Maximum and Minimum memory (e.g. for leak testing)
■Alarm function for safety testing
For further information see the operating instruction.
Application icons (app)
The home screen is very clearly subdivided into application-
oriented apps:
Measure:
Display of 3 dierent measurements
Logger:
Simultaneous recording of up to 3 signals
Info:
All instrument information available at a glance
Remote:
WIKA-Wireless radio transmission settings
Calibrate:
Setting of calibrations using calibration assistant
Switch test:
Testing of pressure switches (NC or NO)
Settings:
General instrument settings
Service:
All service data at a glance
Representation of possible
measuring channels
Selection of the type of
measurement or calibration

WIKA data sheet CT 15.51 ∙ 03/2019 Page 10 of 15
Vout Vin mA GND
+
-
Vout Vin mA GND
+s-
Features
■Calibration assistant
■Supply with pressure, current and voltage
■Calibration protocol is automatically saved
Applications
■On-site calibration of pressure sensor and pressure
measuring instruments (without PC)
■A calibration assistant guides you easily through the
calibration (following DKD/DAkkS).With this, the data
sets, including date and time, are recorded within the
CPH7000.
■Prior to calibration, the calibration routines can be set
directly on the instrument or uploaded via WIKA-Cal
software.
■Up to 100 calibrations can be stored
■Re-calibrations possible
PC software available
Communication with WIKA-Cal calibration software via
WIKA-Wireless
Operating mode: Calibrate
Features
■Pressure display on the closing and opening of the switch
■Automatic calculation of the hysteresis
Operating mode: Switch test
Switch test with external voltage
supply
Switch test with voltage supply
DC 24 V of the CPH7000
Menu screen of the
operating mode “Calibration”
Menu screen of the
operating mode “Switch test”
Representation of calibration
results as table
Representation of calibration
results as graph
Applications
■On-site functional check of pressure switches (without PC)
■Determination of the switch point accuracy and
repeatability
■Determination of the switch point hysteresis

WIKA data sheet CT 15.51 ∙ 03/2019 Page 11 of 15
Vout Vin mA GND
+ -
Test
item
Features
Manual or automatic current source function
Applications
The CPH7000 can be connected in place of a transmitter
within a current loop and used as a current source.
The transmitter output signals from 0 ... 24 mA can be
simulated through manual input or automatically using the
ramp and step functions.
Operating mode: Simulation of transmitter signals
Vout Vin mA GND
Test item
4 ... 20 mA
+
-
- +
Features
■Logging of max. 3 signals/measured value at the same
time
■Automatic or manual data acquisition
■Direct display as graph or table
■Logger protocols are automatically saved
Applications
■Logging of current, voltage, pressure and temperature
■The logger menu guides one, step by step, through the
logger process.The data sets, incl. date and time, are
automatically saved in the CPH7000.
■Before logging the data, routines can be set directly on the
instrument or uploaded via WIKA-Cal software.
■Re-logging possible
PC software available
Communication with WIKA-Cal calibration software via
WIKA-Wireless
Operating mode: Logger
Menu screen of the
operating mode „Logger“
Representation of logger
results as table
Representation of logger
results as graph

WIKA data sheet CT 15.51 ∙ 03/2019 Page 12 of 15
The WIKA-Cal calibration software is used for generating
calibration certicates or logger protocols for pressure
measuring instruments and is available as a demo version for
a cost-free download.
A template helps the user and guides him through the
creation process of a document.
In order to switch from the demo version to a full version of
the respective template, a USB key with the template has to
be purchased.
The pre-installed demo version automatically changes to
the selected full version when the USB key is inserted and
is available as long as the USB key is connected to the
computer.
■Creation of calibration certicates for mechanical and
electronic pressure measuring instruments
■A calibration assistant guides you through the calibration
■Automatic generation of the calibration steps
■Generation of 3.1 certicates per DIN EN 10204
■Creation of logger protocols
■User-friendly interface
■Languages: German, English, Italian and more due with
software updates
For further information see data sheet CT 95.10
WIKA-Cal calibration software
Easy and fast creation of a high-quality calibration certicate
Calibration certicates can be created with the Cal-Template and logger protocols can be created with the Log-Template.
Cal Demo
Generation of calibration certicates limited to 2 measuring points, with
automatic initiation of pressures via a pressure controller.
Calibration certificate
Kalibrierzeugnis
Certificate No. 00000122
Zeugnis-Nr.
Page 1 / 2
Seite
Demolaboratory
Demostreet 123
12345Demo city
Democountry
Tel.:01234/56789
Fax:01234/56789
E-Mail:[email protected]
www.demo.com
General
Allgemein
Device under test (DUT)
Kalibriergegenstand (KG)
Environmental conditions
Umgebungsbedingungen
Place of calibration
Ort der Kalibrierung
Measurement conditions
Messbedingungen
Calibration certificate
Kalibrierschein
Customer Demo customer
Kunde Demo street
DE-12345 Demo city
Customer order No.
Kundenbestellnummer
Order date
Bestelldatum
Date of calibration 01/02/2017
Datumder Kalibrierung
Operator DemoUser
Bearbeiter
Electrical gauge
ElektrischesDruckmessgerät
Model D-10
Typ
Serial number demo1234
Seriennummer
Scale range (0 ... 10) bar g
Anzeigebereich
Accuracy 0.05 % FS
Genauigkeit
Resolution (scale division) 0.0001bar
Auflösung(Skalenwert)
Measuring point No. demo tag
Messstellen-Nr
Temperature (20,0 ± 0,1) °C
Temperatur
Atmospheric pressure (1013,0± 0,1) hPa
AtmosphärischerLuftdruck
Rel. humidity (40± 1) %
Rel.Luftfeuchte
Demo place g = (9.80946 ± 0.01) m/s²
Musterort
Working standard (WS) Pressure controller
Gebrauchsnormal(GN) Druckcontroller
Model Demo CPC
Typ
Calibration mark Demo 12345
Kalibrierzeichen
Scale range (0... 10) bar g
Anzeigebereich
Accuracy 0.02 % FS
Genauigkeit
Calibration certificate
Kalibrierzeugnis
Certificate No. 00000122
Zeugnis-Nr.
Page 2 / 2
Seite
Demolaboratory
Demostreet 123
12345Demo city
Democountry
Tel.:01234/56789
Fax:01234/56789
E-Mail:[email protected]
www.demo.com
Measurement results
Messergebnisse
Statement of compliance
Konformitätsaussage
Reference value WS Reading DUT
ReferenzwertGN AblesungKG
bar bar
↑ ↓
0.00000 0.0000 0.0010
10.00000 10.0010 10.0020
Object keeps the specifications!
DerKalibriergegenstand hält die Herstellerspezifikationen ein!
Cal Light
Generation of calibration certicates with no limitations on measuring
points, without automatic initiation of pressures via a pressure
controller.
Log Demo
Creation of data logger test reports, limited to 5 measured values.
Log
Creation of data logger test reports without limiting the measured
values.

WIKA data sheet CT 15.51 ∙ 03/2019 Page 13 of 15
Accessories
Order code
Special features CPH-A-70-
Adapter set “Standard”
Consisting of:
■G ½ male to G ½, G ¼, ½ NPT or ¼ NPT female
■Sealing set
-G-
Adapter set for 4 mm hose connection
Consisting of:
■G ⅛ female to G ½, G ¼, ½ NPT or ¼ NPT female
■1 m hose
■5 hose coupling
■Sealing set
-F-
Adapter set with hose connection
Consisting of:
G ⅛ via hose to G ¼, G ½, ¼ NPT or ½ NPT female
-7-
Pressure connection set model Minimess 1620
incl. test item hose, length 1 m [3.28 ft]
-8-
Dirt trap set “Standard”
Consisting of:
■Dirt trap
■Sealing set
■Hose
■Hose connection G ⅛ via hose to G ¼, G ½, ¼ NPT or ½ NPT female
-L-
Dirt trap set with knurled nut
Consisting of:
■Dirt trap
■Knurled nut
■Sealing set
■Hose
■Hose connection G ⅛ via hose to G ¼, G ½, ¼ NPT or ½ NPT female
-M-
Sealing set
Consisting of:
■4 x G ½ USIT seals
■2 x G ¼ USIT seals
■Plastic box
-D-
Plastic case
For 1 x process calibrator model CPH7000 for storage and transport
-K-
Carrying system -U-
Belt and accessory bag -A-
Carrying system and accessory belt bag -W-

WIKA data sheet CT 15.51 ∙ 03/2019 Page 14 of 15
Order code
Special features CPH-A-70-
Test cable set
■3 x black
■3 x red
■Various adapters
-T-
Sensor connection cable
for reference pressure sensor model CPT7000; length 1 m [3.28 ft] -S-
for reference pressure sensor model CPT7000; length 3 m [9.84] -V-
Temperature probe Pt100
(uncalibrated)
-P-
Atmospheric module -E-
Power supply unit -N-
WIKA-Wireless USB Stick -B-
Ordering information for your request
1. Order code: CPH-A-70
2. Option:
⇓
[ ]

WIKA data sheet CT 15.51 ∙ 03/2019 Page 15 of 15
© 12/2016 WIKA Alexander Wiegand SE & Co. KG, all rights reserved.
The specications given in this document represent the state of engineering at the time of publishing.
We reserve the right to make modications to the specications and materials.
03/2019 EN
WIKA Alexander Wiegand SE & Co. KG
Alexander-Wiegand-Straße 30
63911 Klingenberg/Germany
Tel. +49 9372 132-0
Fax +49 9372 132-406
www.wika.de
Scope of delivery
■Process calibrator model CPH7000
■Power supply unit
■Operating instructions
■Service case with 2 connection cables (4 mm plugs)
■3.1 calibration certicate per DIN EN 10204
Options
■DKD/DAkkS calibration certicate
Service case with process calibrator and accessories
(completely equipped)
Process calibrator model CPH7000
Ordering information
CPH7000 / Version / Pressure generation / Unit / Pressure type / Measuring range / Accuracy / Type of certicate / Barometer /
Barometer calibration / Atmospheric module / Atmospheric module calibration / Temperature probe / Temperature probe
calibration / Electrical module calibration / Communication / Software / Pressure connection set / Carrying system / Transport
case / Further approvals / Additional ordering information
CPT7000 / Version / Unit / Pressure type / Measuring range / Process connection / Medium temperature / Wetted parts /
Special design for media / Accuracy / Type of certicate / Sensor cable / Further approvals / Additional ordering information
Other manuals for CPH7000
1
Table of contents
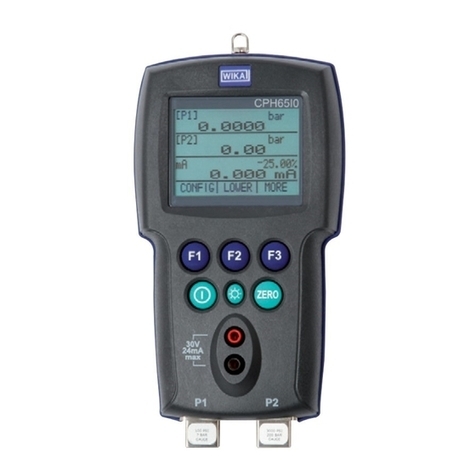
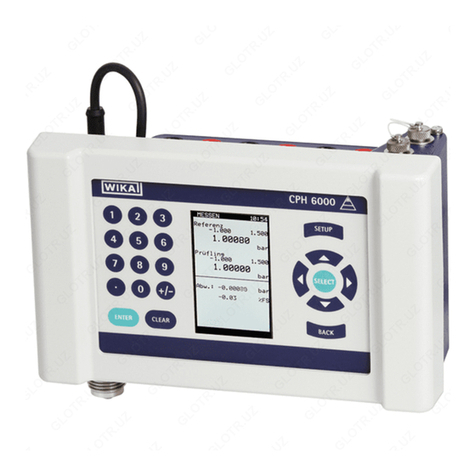
Other WIKA Test Equipment manuals

WIKA
WIKA CalibratorUnit CPU6000 Series User manual

WIKA
WIKA CPH6600 User manual

WIKA
WIKA PASCAL ET-P User manual

WIKA
WIKA ACS-10 User manual

WIKA
WIKA DELTA-comb DPGS40TA User manual

WIKA
WIKA CPH7000 User manual

WIKA
WIKA Mensor CPA8001 User manual

WIKA
WIKA mensor CPG2500 User manual

WIKA
WIKA BCS10 User manual

WIKA
WIKA Wally Box III User manual