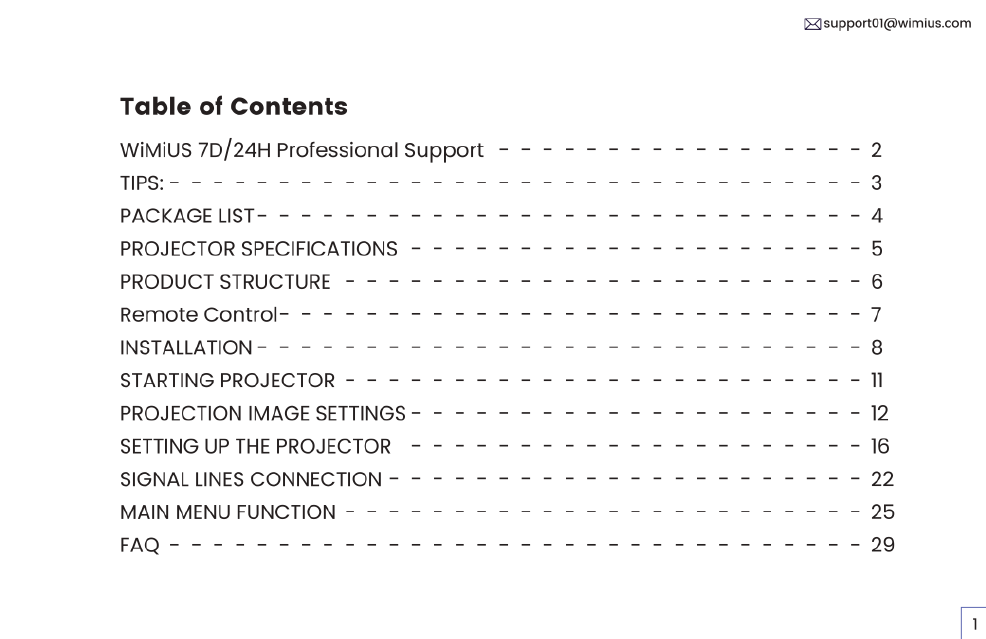
Wimius P64 User manual

WIMIUS
P64
PROJECTOR
USER
MANUAL

(3
Table
of
Contents
WiMiUS
7D/24H
Professional
Support
- -
=
=
=
=
=
=
= =
=
=
=
=
=
- -
2
L
3
PACKAGE
LIST=
=
=
=
=
=
=
=
=
=
=
=
=
===
m
o
—m
oo
4
PROJECTOR
SPECIFICATIONS
- -
=
= =
= = = =
= =
=
=
= =
=
=
- -
- -
5
PRODUCTSTRUCTURE
-
-
= = =
=
=
=
=
=
=
= =
=
= = -
=
=
-
-
-
- -
6
RemoteControl-
=
=
= =
=
=
=
=
= =
= =
=
= =
=
- -
- -
-
- - -
- -
7
INSTALLATION
=
=
= =
=
= = = =
= = =
= =
=
=
= =
=
—
=
= —
=
= -
- -
8
STARTING
PROJECTOR
-
-
=
=
=
=
=
=
=
=
=
=
=
=
=
=
==
=
==
=
_
-
n
PROJECTION
IMAGE
SETTINGS
-
=
= =
=
= =
=
=
= = =
=
= =
=
=
=
=
=
-
12
SETTING
UP
THE
PROJECTOR
=
= = = =
=
=
=
=
=
=
=
=
=
=
=
=
=
=
=
-
6
SIGNAL
LINES
CONNECTION
-
=
=
=
=
=
=
=
=
=
=
=
=
=
=
=
=
=
=
=
-
-
2
MAIN
MENU
FUNCTION
= =
= =
= =
=
=
=
=
=
=
=
=
=
=
=
=
=
=
=
=
—
-
25

[
WiMiUS
7D[24H
Professional
Support
Dear
customer,
Thank
you
very
much
for
supporting
WiMiUs!
Please
read
this
manual
thoroughly
before
using
the
projector.
If
you
have
any
issues,
email
your
country
code,
order
number
and
the
problem
%For
Exemple:
US+P64+No
Voice)
to
We
will
provide
a
fast
solution
within
24
hours.
Actually,
many
problems
can
be
easily
solved
by setting,
such
as no
signal,
no
sound,
Bluetooth
connection
failed,
WiFi
connection
failed,
dark
spots,
choppy
animation
etc.
We
promise
all
the
projectors
have
been
100%
carefully
checked
and
packaged
before
shipping.
If
you
have
any
questions,
could
you
please
contact
us
so
that
the
problem
can
be
solved.
And
give
us
an
opportunity
to
improve.
We
guarantee
we
will
provide
you
with
a
satisfactory
solution.
Thanks
for
your
understanding!
WiMiUS
Service
Team

[
TIPS:
1.Do
not
place
the
projector
in
too
warm
or
too
cold
a
room,
because
the
high
temperature
or
low
temperature
will
shorten
the
lifespan
of
the
device.
The
working
environment
would
be
5°C~35°C
better.
2lf
there
are
black
spots
on
the
projection
screen,
please
don't
worry,
please
contact
via
email,
and
we
can
send
you
a
video
about
how
to
remove
the
dust.
3.The
ventilation
is
equipped
for
the
projector
to
work
stably. Don't
cover
the
vent
with
cloth,
blanket
or
other
things.
Don't
insert
anything
into
the
slit
of
the
projector,
or
it
may
produce
a
short
circuit
or
an
electric
shock
to
your
device
and
cause
damage.
4.The
projector
shall
be
strictly
protected
from
strong
impact,
extrusion
and
vibration.
Do
not
try
to
move
and
on
strong
impact,
extrusion
and
vibration.
Do
not
try
to
move
and
the
internal
circuit
faults.
5.lens,
as
the
core
component
of
the
projector,
is
directly
related
to
the
picture
definition
and
effect.
The
excessive
dust
thereon
will
affect
image
quality.
The
dirty
lens
shall
be
wiped
with
a
soft
cotton
cloth
for
the
glass
lens
surface.
Hard
cloth
or
abrasives
shall
not
be
used.

[
PACKAGE
LIST
I
HDMI
Cable*1
O
Lens
Cap*l
3-in-1AV
Cable*
=
User
Manual*1
f
Power
Cable*1
Cleaning
Swab*1

[
PROJECTOR
SPECIFICATIONS
Model
No.:
P64
Display
Technology
LCD
Light
Source
LED
Native
Resolution
1920x1080P
Zoom
Function
50%-100%
installation
Type
;’ef’u”fé
';ec"e’”.“fqg
Desk.
Front/[xcoect
Ratio
16:
9/4:
3/Auto
Projection
Distance
1.5-6m
Power
Voltage
AC100-240V
Product
Size
197+227*163mm
Product
Weight
2.7kg
Keystone
Correction
Auto
+
Electric
Focus
Auto
+
Electric
Input
Interface
HDMI*2/USB*2/AV/3.5mm
audio
out
VideoFormat
H.264/H.265/MP4/
AVI/
WMV
[
MKV
[
FLV
Audio
Format
MP3/WAV/MAK
Image
Format
JPG/PNG/BMP/JPEG

[
PRODUCT
STRUCTURE
1Power
2.
Arrow
Keys
oK
s
3.
Confirm
4.
Back
1
2
3
4
5 6
5.
Manual
Focus
+
6.
Manual
Focus
-
7/8.
UsB
Ports
@ m
9/10.
HDMI
Ports
11.
AV
Ports
I I
I
I T T T
12.
3.5mm Headphone
jack
7
8
9
10
nozom
13.
Infrared
signal
receiving
window
14.
Anti-Dust
Mesh
(Regular
Cleaning
Recommended)

Remote
Control
Note:
[
Power
Home
.
Arrow
keys
Menu
Pause
the
tape
Volume
+
.
Volume
-
.
Mute
.
Setting
Confirmation
key
Back
Focus
+
.
Focus
-
Source
1.
Install
2
pieces
of
AAA
batteries
(not
included)
into
the
remote
before
using
it,
do
not
combine
new
batteries
with
old
ones
in
the
remote
control,
which
can
cause
operation
failure
due
to
insufficient
power
supply.
2.
When
using
the
remote
control,
please
make
sure
that
the
signal
transmitter
of
the
remote
control
aims
at
the
infrared
signal
of
the
projector.
3.
When
you
are
not
using
the
remote
control
for
a
long
period.
Please
take
out the
batteries
to
prevent
them
from
leakage.
.

[
INSTALLATION
Linstallation
Method
The
projector
can
be
hanged
on
the
ceiling
with
special
hanger
frame,
and
placed
on
the
stable
desk
to
project
the
image
according
to
the
operating
environment
and
requirements.
In
addition,
the
projector
can
be
installed
with
the
following
methods:
.L.7.
R
).}
1.
Front
projection
Ceiling
mount
2
Rear
projection
Ceiling
mount
s
A
=
A
3.
Front
projection
Desk
mount
4.Rear
projection
Desk
mount
Keep
the
projector
at
a
height
where
its
lens
is
axial
symmetry
to
the
screen.
If
this
is
not
possible, use
the
keystone
correction
function
to
adjust
the
projection
image.

[
2.Projection
Distance
and
Size
Aspect
Ratio:
16:9
Distance
Screen
Size
1.6m
49
2m
60"
2.5m
75"
3m
93
3.5m
109"
4m
125"
4.5m
141"
5m
157"
6m
300"
*The
image
size
depends
on
the
distance
between
projector
and
screen.
there
may
be 3%
measure
difference
among
above
listed
data.
*The
recommended
projection
distance
is
2.5-3m.
*Ambient
darkness
will
improve
the
clarity
of
the
projected
images.

[
3.Install
on
the
Ceiling
Keep
the
projector
vertical
and
towards
the
mid
of
the
projector
screen,
and
keep
the
projection
image
fiat
on
the
screen.
1.
To
adjust
the
tilt
base,
unscrew
the
support
rod
at
the
bottom
of
the
projector,
see
the
below
picture
2.
For
the
Ceiling
mount,
there
are
4
holes
at
the
bottom
of
the
projector
(M4*10mm).
Please
slowly
unscrew
the
4
black
rubbers,
and
then
you
can
find
the
holes
for
the
ceiling
mount,
see
the
below
picture.
NOTE:
The
hanging
bracket
or
ceiling
mount
stand
is
not
packaged.
Screw
holes
LI
fll—o—lfl
Bottom
support
bracket

[
STARTING
PROJECTOR
1)Remove
the
lens
cap,
connect
the
projector
to
the
power
through
the
power
supply
cable,
and
press
the
power
key
on
the
remote
or
projector,
it
starts
working.;
2)Use
the
Automatic
or
Electronic
keystone/
focus
function
of
the
projector
to
get
a
rectangle
and
clear
image:
3)
Adjust
the
focus
button'F+"
“F-"
on
the
projector
or
the
remote
to
get
the
best
image
performance;
(If
it
is
still
blurry,
please
try
to
adjust
the
projection
distance.
4)Connect
the
external
device
(Smartphone,
iPad,
Fire
Stick,
TV
box,
DVD
player,
PC,
etc.in
the
corresponding
interfaces
of
the
projector,
please
be
sure
to
select
the
corresponding
source.
If
you do
not
select
the
correct
source,
the
projector
will
not
be
able
to
detect
the
signal)
5)select
the
*
3
*
menu,enter
the
[
Language
Settings],
and
then
you
can
set
your
preferred
language.

[
PROJECTION
IMAGE
SETTINGS
1.Projection
Mode
select
the
|
Projection
Image
Settings
]
menu
-~
Select
the
[
Projection
Setting
Option
|
-~
Select
the
[Install
Mode],
Press
the
arrow
key
to
select
and
press
“OK’
to
confirm
the
projection
position.
Install
Mode
Wi
Setti

[
2.Manual
Keystone
Correction
2.1
Four-Point
Keystone
select
the
|
Projection
Image
Settings
|
menu
--
Select
the
[
FourPoint
Keystone
|
Option,
Just
click
“OK”
button
to
pick
the
point
you
want
to
adjust
at
first,
and
then
press
the
button
*
B
"
or
*
¥
"
to
set
the
value
(Horizontal
and
Vertical
O~100)
needed
as
shown
below.
Reset:
Press
"
=
",
and
the
image
will
restore
to
the
original
keystone
correction
settings.

[
r
[
————
-l
>
5%
Other
Settings
ke
At
3k
Rt
L
_I
2.2
Horizontal
and
Vertical
Keystone
Select
the
|
Projection
Image
Settings
|
menu
-~
Select
the
Horizontal
or
Vertical
Keystone
Option
to
adjust
the
screen
horizontally
or
vertically
£30°
with
the
arrow
keys
until
the
guides
are
adjusted
to
a
rectangle.
3.Auto
Keystone
Correction
and
Focus
Please
place
the
projector
horizontally
face
to
the
walll
first,
Select
the
[
Projection
Image
Settings
|
menu
-~
turn
on
the
[
Omnidirectional
Automatic
Correction
]
or
[
Auto
Focus
]
option,
then
it
will
automatically
focus
the
picture
based
on
the
projection
distance
from
the
screen and
adjust
the
picture
to
a
rectangle
when
you
change
the
projection
angle.
If
the
picture
is
blurry,
press
repeatedly
the
focus
button
"F+"
'F-"
on
the
remote
control
to
adjust
the
lens
focus,
tap
or
long-press
the
adjustment
button
until
the
picture
is
clear
(There
is
no
need
to
press
the
OK
button
after
the
screen
is
clear).

[
Note:
The
side
projection
angle
of
the
projector
should
not
exceed
20°,
otherwise
the
automatic
keystone
correction
function
may
not
work.
4.Zoom
Setting
Go
to
the
home
page
--
Select
the
[
&
]
menu
-~
Select
the
[
Projection
Image
Settings
|-~
Select
the
[
Zoom
|
option,
the
projection
screen
can
be
zoomed
50%~100%.
Press
the
button
"
« B
"
to
set
the
value
needed
as
shown
below.

B
SETTING
UP
THE
PROJECTOR
1.Select
The
Input
Signal
Source
Select
the
desired
input
signal
source
(HDMII/HDMI2/AV)
on
the
home
page,
or
you
can
press
the
“S”
button
on
the
remote
control
to
select
the
corresponding
signal
source,
For
USB
devices,
no
need
to
choose
the
signal
source.
The
machine
will
detect
them
automatically.
When
playing
a
video,
you
can
press
the
menu
button
"=",
then
set
the
aspect
ratio
of
the
image
and
other
playback
modes.
»
gy
|
Playlst
Mrocast

[
2.Connecting
with
Smartphones
and
iPad
Warming
Tips:
1.
The
fluency
of
screen
mirroring
with
a
wireless
connection
will
be
affected
by
the
network
environment.
A
bandwidth
of
100Mbit
or
more
is
recommended
when
using
screen
mirroring
2.
Make
sure
your
mobile
device
is
close
to
the
projector
when
using
@
wireless
connection.
A
distance
of
1
meter
is
recommended.
3.
Some
Android
devices
may
not
support
screen
mirroring
due
to
the
compatibility:
4.
Any
questions,
please
feel
free
to
email
WiMIUS
via
WiFi
Settings
Select
the
settings
icon
in
the
upper
right
corner
of
the
main
interface,
and
then
press
the
"OK”
key
on
the
remote
control
to
enter
the
settings
interface
and
select
"WiFi
Settings’.
2.1
For
10S
System
(Airplay)
Setting
with
Home
Wi-Fi
Attention: Your
device
and
the
projector
should
be
in
the
same
Home
WiFi.
1.Turn
on
the
WiFi
Setting
of
the
projector.
2.Choose
your
Home
WiFi
to
connect
and
enter
the
right
password,
then
click
"Done’to
Connect,
please
wait
3-5
seconds
to
establish
the
connection.
Once
connected,
it
will
remember
the
password
of
the
connected
WiFi.
3.Turn
on
the
WiFi
setting
of
your
i0S
mobile
device,
then
connect
it
to
the
same
Home
WiFi
as
the
projector.
4.Then
click
"Airplay”
as
the
Input
Source
of
your
projector.

[
5.5wipe
up
the
screen
of
your
iOS
mobile
device and
tap
“Screen
Mirroring”
to
search
for
the
projector,
then
select'
WiMiUS-P64
Projector
from
the
searching
results
to
connect.
6.5ucceed.
S
Make
sure
that
you
S
deios
s
connactod
fo
the
ssme
notwork
as
yorr
projecor,
S
Bluetooth
Settings
OtherSetings
|
Projecion
mage
Setings
Lonouri0S
2lookngfodeiss
3SelctBidKast
07t
s
T
e
o
e
vt
2.2
For
Android
System(Miracast)
To
activate
this
function,
your
android
device
must
support
Multi-Screen/Wireless
Display.
The
name
of
“Multi-Screen”
may
vary
depending
on
various
brands
of
Android
devices.
Setting
with
mobile
internet
1.Turn
on
the
projector,
and
select
*Miracast”
as
the
Input
Source.
2.Turn
on
the
"Multi-Screen/Wireless
Display”
of
your
Android
device.
3.Select
"WiMiUS-P64
Projector’from
the
search
results
to
connect.
18

=
4.Succeed.
Notes:
If
you
want
to
connect
it
to
your
home
wi
ust
repeat
the
steps
of
the
10S
system
and
select
Miracast.
1,00
your
Android
device.um
on
WLAN(notnecassary
to
connnect
0
sy
Wi
router)
2Launch
the
Mul-screenWirless
Display
/
Srean
Mtorng/
SmartView
unction
3
SelectPlease
wating
fromthe
searchingresut
st
WIMIUS-P64-Projctor
Table of contents
Other Wimius Projector manuals