WOOSIM WSP-P440 User manual

http://www.woosim.com
MODEL WSP-P440
(4inch Panel Printer)
Rev 4.2
All specifications are subjected to change without notice

P440 Rev. 4.2
http://www.woosim.com
2021-12-23
2
All specifications are subjected to change without notice
Copyright
WSP-P440 4inch Panel Printer Operator’s Manual.
Copyright ⓒ2021 by Woosim Systems Inc.
All rights reserved.
The information contained in this manual is the property of Woosim Systems Inc.
And may not be reproduced in whole or in part without the prior written permission of Woosim
System Inc.
Trademark
a registered trademark of Woosim Systems Inc.
All other trademark are the properties of their respective companies.
Caution
Some semiconductor devices are easily damaged by static electricity. You should turn the printer
“OFF”, before you connect or removed the cable on the rear side, in order to guard the printer
against the static electricity.
If the printer is damaged by the static electricity, you should turn the printer “OFF”
Notice
The contents of this manual are subject to change without notice.

P440 Rev. 4.2
http://www.woosim.com
2021-12-23
3
Introduction
The WSP-P440 is an extremely simple and functional panel printer.
It is the ideal solution for applications which require the immediate printing of data on a paper,
whether they be of an industrial, professional or laboratory nature.
Medical analyzer, Industrial instrument, Recorder, Geological analyzer, Underground analyzer, Chemical
analyzer, Metallic analyzer, etc.
The general features of WSP-P440 printer are as follows:
Very silent printing thru direct thermal printing method.
High speed(40mm/sec, MAX)
High resolution(203dpi : 8dots/mm).
UART(RS-232C or TTL) interface
Support text and graphic printing.
Easier paper loading by CLAMSHELL design.
Easier maintenance with self-diagnostics.
In field programming – Update Firmware, Download Fonts and Logos
Microsoft Windows/Windows CE, Linux, Android compatible
Flow control : Software (XON/XOFF)
※ Hardware flow control not supported in printer.
Agency Approvals

P440 Rev. 4.2
http://www.woosim.com
2021-12-23
4
Operating Precautions
Please follow the precautions below to enjoy and maintain the full performance of the
printer.
Using the Printer
● Be careful not to drop or bump the printer on a hard surface.
● Do not install the printer in direct sunlight or such areas.
Suitable environment for the use of the printer is as follows:
◆ Operating temperature :-10°C to 50°C
◆ Relative humidity : 30% to 85%
● Do not install the printer near devices that generate strong electromagnetic fields
such as a copy machine.
● Do not open the platen cover during printing .
● Do not remove or reinstall the communication cable during printing or transmission.
● Do not touch the connectors of the communication during printing.
● Switch the POWER OFF when not in use.
● Do not other solvent.
Thermal Paper Handling
● Store the thermal paper in a cool, dry and dark place.
● Do not rub the paper with hard object.
● Do not leave the paper with hard object.
● Do not allow plastic film, erasers, or adhesive tape to touch the paper for long periods.
● Do not stack the thermal paper with diazo copies immediately after copying or wet-type copies.
● Do not use chemical glue.
● Always use the clean thermal paper.

P440 Rev. 4.2
http://www.woosim.com
2021-12-23
5
CONTENTS
1. Outline ......................................................................................................................................................................... 6
1.1. Model classifications ............................................................................................................................................ 6
1.2. Product Part Number System ............................................................................................................................. 6
1.3. Specifications ......................................................................................................................................................... 7
2. Setting up the printer .............................................................................................................................................. 8
2.1. Printer & Accessories ........................................................................................................................................... 8
2.2. Printer Features ..................................................................................................................................................... 9
2.2.1. Part Name ........................................................................................................................................................ 9
2.2.2. Dimension ........................................................................................................................................................ 9
2.3. Panel Installation ................................................................................................................................................. 10
2.4. Replacing the paper roll .................................................................................................................................... 11
2.5. Setting operation mode .................................................................................................................................... 12
2.6. Power supply ....................................................................................................................................................... 13
3. Interface ..................................................................................................................................................................... 14
3.1. UART(RS-232C or TTL) ....................................................................................................................................... 14
4. Using the printer ..................................................................................................................................................... 15
4.1. Control panel ....................................................................................................................................................... 15
4.2. The self test ......................................................................................................................................................... 15
5. Consumable Parts ................................................................................................................................................... 16
5.1. Recommended paper......................................................................................................................................... 16
5.2 Printing position .................................................................................................................................................. 16
6. Revision History ...................................................................................................................................................... 17

P440 Rev. 4.2
http://www.woosim.com
2021-12-23
6
1
1.
.
O
Ou
ut
tl
li
in
ne
e
1.1. Model classifications
1.2. Product Part Number System
WSP–P440 ( ) ( )
Model name
Interface
A0 : UART
Power
None : DC7.5~8.5V
Model name / Interface Spec.
Example) 1. Porti-S40 Serial/Bluetooth Part No. ⇒ S40/A1
2. Porti-SC30 Bluetooth Only Part No. ⇒ SC30/Z1
Note) The above table is the interface format which is supported.
But some of the interfaces are not supported according to the product
and please contact us, if you have any questions regarding the interface.
S40
SC30
W25
.
.
.
Wired Wireless
A RS-232C 1 Bluetooth
B TTL 2 IrDA
C USB 0 None
D RS-485
E Parallel
Z None

P440 Rev. 4.2
http://www.woosim.com
2021-12-23
7
1.3. Specifications
Item Specification
Printing method Direct thermal line printing
Characters per line - Font A : 69cpl / Font B : 92cpl / Font C : 104cpl
- KOR, CHN, JPN : 34cpl
Character size - Font Size A: 12X24 / Font Size B : 9X24 / Font Size C : 8X16
- KOR : 24X24(16X24) / CHN, JPN : 24X24
Optional Characters Alphanumeric:95, Extended Graphics:128X31 pages, International:10,
Simplified/Traditional Chinese, Japanese, Korean
Resolution 203dpi, 8dots/mm
Print width 4-inch (104mm, 832dots)
Printing speed 40mm/sec (MAX)
Dimensions 143.0 x 77.7 x 49.1mm
Weight (w/o roll paper) 227g
Interface UART(RS-232C or TTL), USB (option)
Paper supplied Thermal roll paper (113mm wide - 38ø)
Barcode supplied
1-dimension : UPC-A, UPC-E, EAN-8, EAN-13, CODE-39, CODE-93,
CODE-128, ITF, CODABAR
2-dimension : PDF417, Micro PDF417, Truncated PDF417, QR-CODE,
DATA Matrix, Maxicode
Etc :GS1 databar
Driver Microsoft Windows, Linux
H/W spec MCU : RX-32bit, RAM : 128M bit, FLASH : 64M bit
Receive buffer size 1M bytes
Input Power
DC7.5~8.5V (MAX 9VDC), Standby 60mA and 3A or more
(Please apply the core of the following specifications to the DC Input line
for this product.)
** CORE : ZCAT2035-0930 (TDK Corporation)
Environment
conditions
Temperature -10°C ~50°C (operating)
-30°C ~ 70°C (storage)
Humidity 30% - 80% (operating)
10% - 90% (storage)
MCBF (Mean Cycle
Between failure)
Mechanical 37,000,000 lines
Head Approximately 50Km
< Table 1 >
P440 Rev. 4.2
http://www.woosim.com
2021-12-23
8
2
2.
.
S
Se
et
tt
ti
in
ng
g
u
up
p
t
th
he
e
p
pr
ri
in
nt
te
er
r
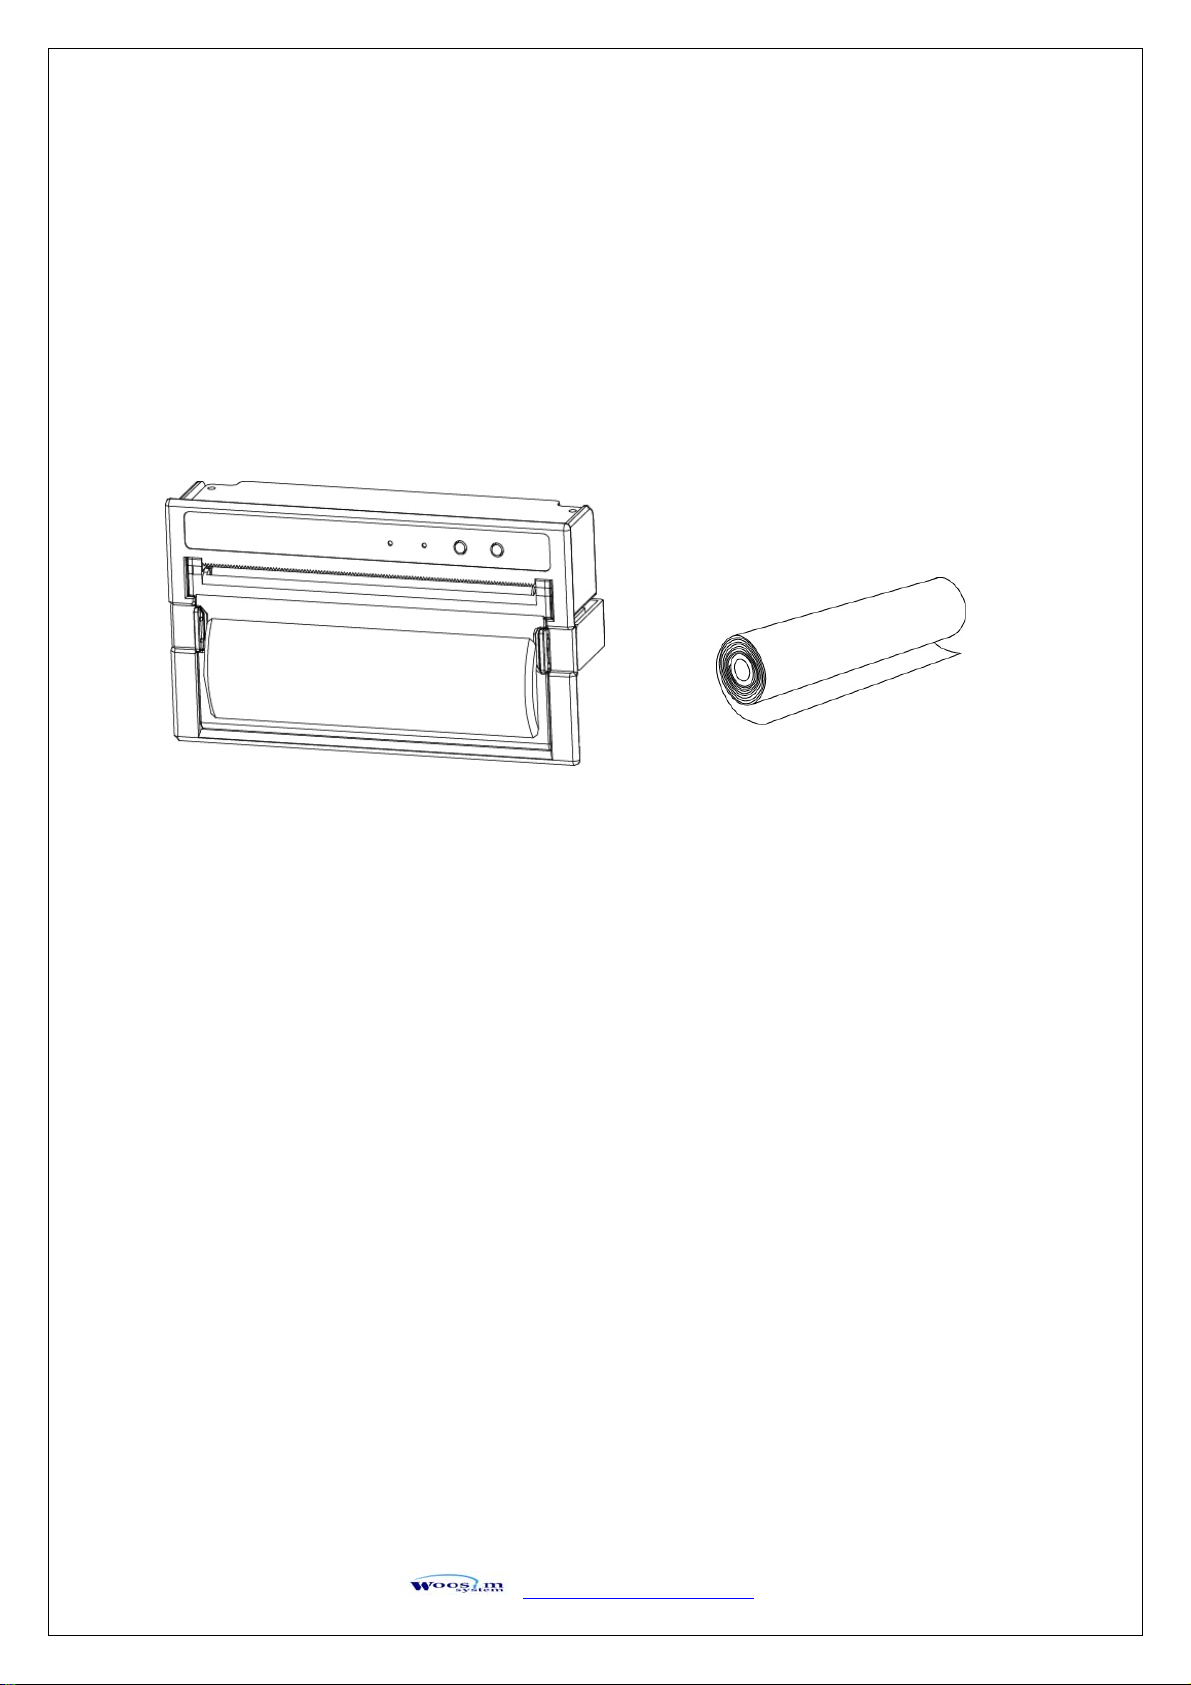
2.1. Printer & Accessories
When unpacking your printer box make sure it contains the printer and all accessories.
If any accessories are missing or damage, please contact your dealer for assistance.
WSP-P440
Thermal roll paper

P440 Rev. 4.2
http://www.woosim.com
2021-12-23
9
2.2. Printer Features
2
2.
.2
2.
.1
1.
.
P
Pa
ar
rt
t
N
Na
am
me
e
2
2.
.2
2.
.2
2.
.
D
Di
im
me
en
ns
si
io
on
n
[unit : mm]
P440 Rev. 4.2
http://www.woosim.com
2021-12-23
10
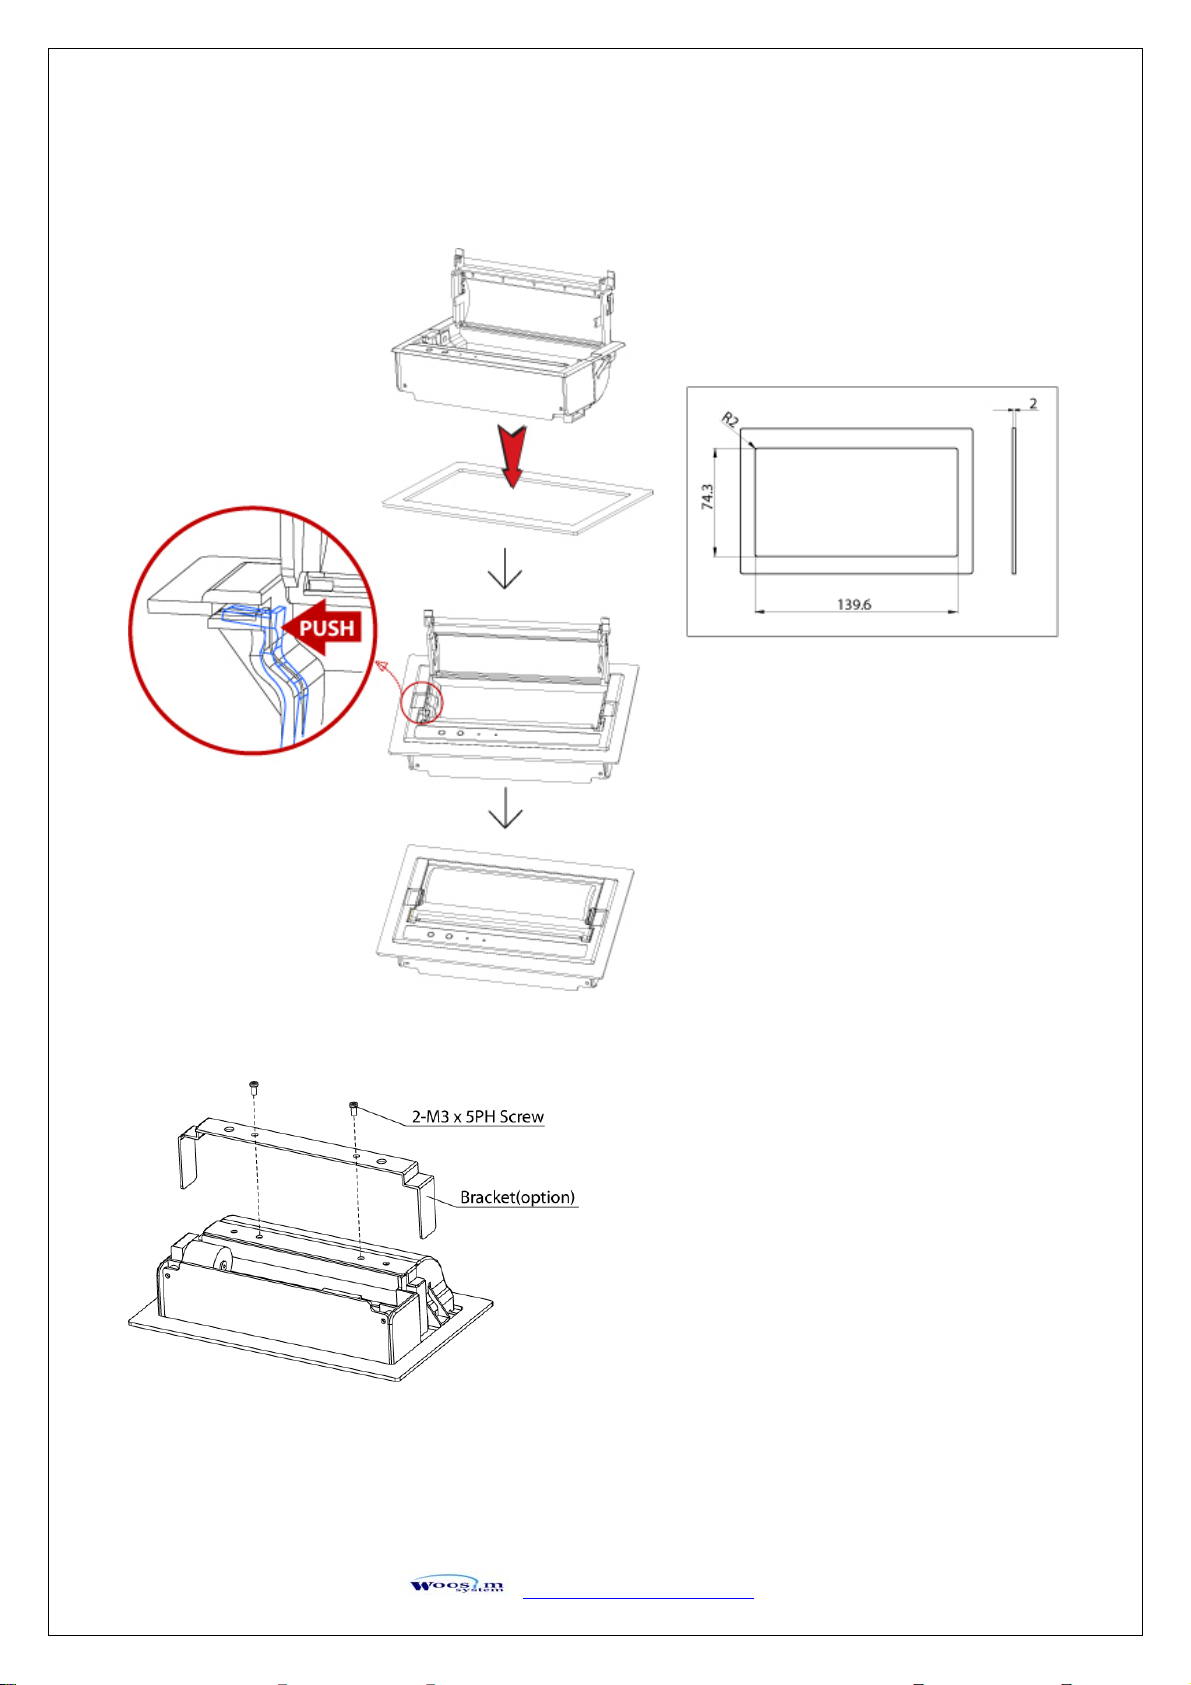
2.3. Panel Installation
Uses the bracket(option) and the printer
once more will be able to fix to the panel.
Table of contents
Other WOOSIM Printer manuals

WOOSIM
WOOSIM WSP-BT200 User manual

WOOSIM
WOOSIM WSP-DT381 User manual

WOOSIM
WOOSIM WSP-MC350 User manual

WOOSIM
WOOSIM PORTI-SWC40 User manual

WOOSIM
WOOSIM PORTI-PC40 User manual

WOOSIM
WOOSIM PORTI-WP40 User manual

WOOSIM
WOOSIM Porti-M100V User manual

WOOSIM
WOOSIM PORTI-W40 User manual

WOOSIM
WOOSIM WSP-T280 User manual

WOOSIM
WOOSIM PORTI-SP20 User manual

WOOSIM
WOOSIM WSP-i250 User manual

WOOSIM
WOOSIM PORTI-SM40 User manual

WOOSIM
WOOSIM WSP-i450 User manual

WOOSIM
WOOSIM WSP-i350 User manual

WOOSIM
WOOSIM WSP-i450 User manual

WOOSIM
WOOSIM WSP-R341 User manual

WOOSIM
WOOSIM PORTI-SWC40 User manual

WOOSIM
WOOSIM PORTI-PC40 User manual

WOOSIM
WOOSIM PORTI-SW40 User manual

WOOSIM
WOOSIM PORTI-W40 User manual


