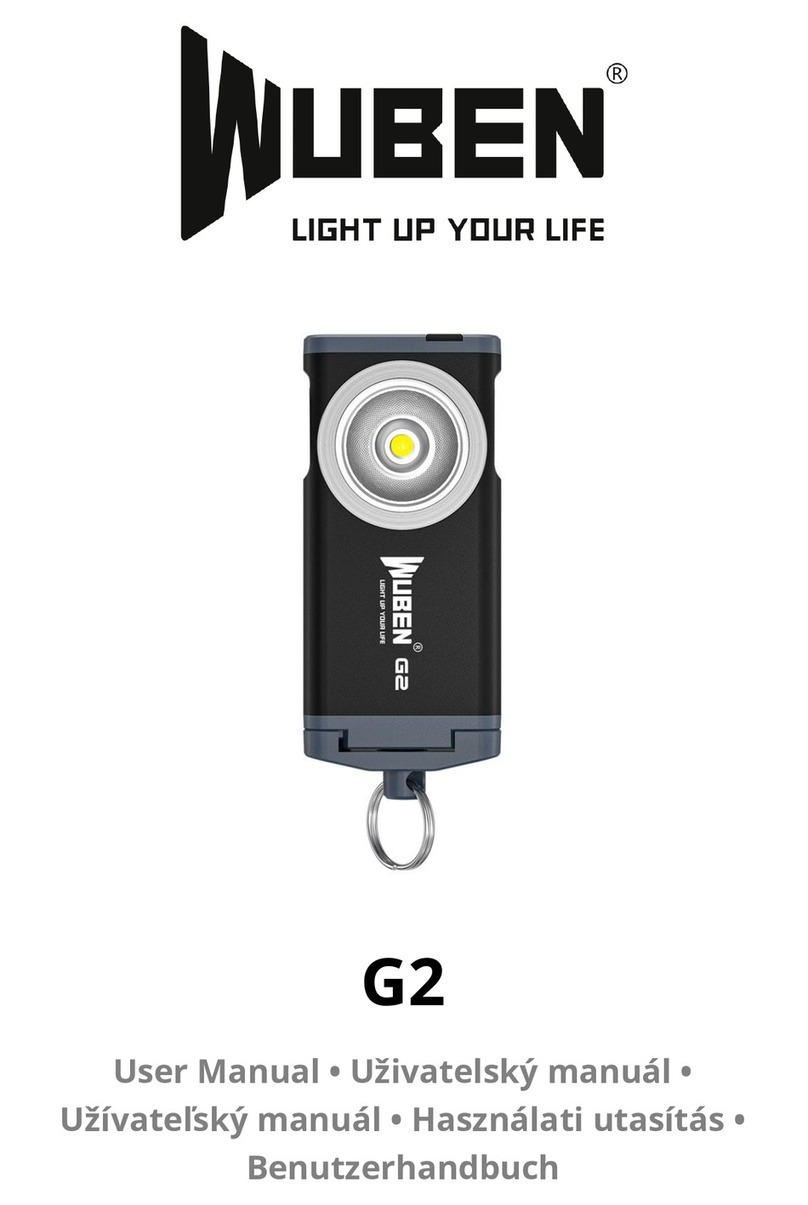
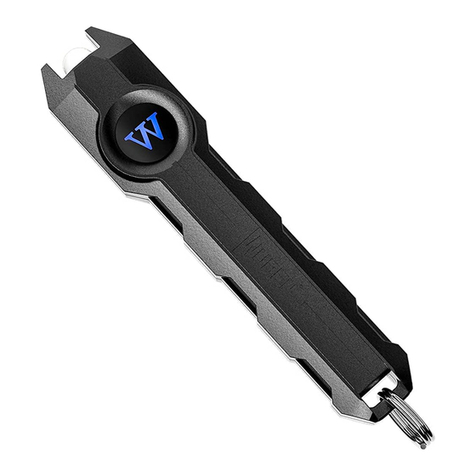
WUBEN Knight X-0 User manual

- 01 - - 02 - - 03 - - 04 - - 05 - - 06 - - 07 -
- 08 - - 09 - - 10 - - 11 - - 12 - - 13 - - 14 - - 15 - - 16 - - 17 -
- 18 - - 19 - - 20 - - 21 - - 22 - - 23 - - 24 - - 25 - - 26 - - 27 -
- 28 - - 29 - - 30 - - 31 - - 32 - - 33 - - 34 - - 35 - - 36 - - 37 -
- 38 - - 39 - - 40 - - 41 - - 42 - - 43 - - 44 - - 45 - - 46 - - 47 -
- 48 - - 49 - - 50 - - 51 - - 52 - - 53 - - 54 - - 55 - - 56 - - 57 -
- 58 - - 59 - - 60 - - 61 - - 62 - - 63 - - 64 - - 65 - - 66 - - 67 -
- 68 - - 69 - - 70 - - 71 - - 72 - - 73 - - 74 - - 75 - - 76 - - 77 -
- 78 - - 79 - - 80 - - 81 - - 82 - - 83 -
User Manual V1.1_220803
X-0
Knight

- 01 - - 02 - - 03 - - 04 - - 05 - - 06 - - 07 -
- 08 - - 09 - - 10 - - 11 - - 12 - - 13 - - 14 - - 15 - - 16 - - 17 -
- 18 - - 19 - - 20 - - 21 - - 22 - - 23 - - 24 - - 25 - - 26 - - 27 -
- 28 - - 29 - - 30 - - 31 - - 32 - - 33 - - 34 - - 35 - - 36 - - 37 -
- 38 - - 39 - - 40 - - 41 - - 42 - - 43 - - 44 - - 45 - - 46 - - 47 -
- 48 - - 49 - - 50 - - 51 - - 52 - - 53 - - 54 - - 55 - - 56 - - 57 -
- 58 - - 59 - - 60 - - 61 - - 62 - - 63 - - 64 - - 65 - - 66 - - 67 -
- 68 - - 69 - - 70 - - 71 - - 72 - - 73 - - 74 - - 75 - - 76 - - 77 -
- 78 - - 79 - - 80 - - 81 - - 82 - - 83 -
CONTENTS
Product Introduction
(EN) English
(CN) 简体中文
(DE) Deutsch
(FR) Français
(ES) Español
(IT) Italiano
(NL) Dutch
(SE) Swedish
(CZ) Čeština
(HU) Magya
(SK) Slovenčina
(KR) 한국어
(JP) 日本語
01
06
11
15
21
27
33
39
45
51
56
62
67
71
75
(AR) ﺔﯾﺑرﻌﻟا

- 01 - - 02 - - 03 - - 04 - - 05 - - 06 - - 07 -
- 08 - - 09 - - 10 - - 11 - - 12 - - 13 - - 14 - - 15 - - 16 - - 17 -
- 18 - - 19 - - 20 - - 21 - - 22 - - 23 - - 24 - - 25 - - 26 - - 27 -
- 28 - - 29 - - 30 - - 31 - - 32 - - 33 - - 34 - - 35 - - 36 - - 37 -
- 38 - - 39 - - 40 - - 41 - - 42 - - 43 - - 44 - - 45 - - 46 - - 47 -
- 48 - - 49 - - 50 - - 51 - - 52 - - 53 - - 54 - - 55 - - 56 - - 57 -
- 58 - - 59 - - 60 - - 61 - - 62 - - 63 - - 64 - - 65 - - 66 - - 67 -
- 68 - - 69 - - 70 - - 71 - - 72 - - 73 - - 74 - - 75 - - 76 - - 77 -
- 78 - - 79 - - 80 - - 81 - - 82 - - 83 -
Package List
Before using this product, please check whether the contents
of the package are complete.
Type-C charging cable × 1
ABJ1100N × 1
X-0 × 1
Spare O-ring × 2
User manual, Warranty card × 1
1 2
3
5
4

- 01 - - 02 - - 03 - - 04 - - 05 - - 06 - - 07 -
- 08 - - 09 - - 10 - - 11 - - 12 - - 13 - - 14 - - 15 - - 16 - - 17 -
- 18 - - 19 - - 20 - - 21 - - 22 - - 23 - - 24 - - 25 - - 26 - - 27 -
- 28 - - 29 - - 30 - - 31 - - 32 - - 33 - - 34 - - 35 - - 36 - - 37 -
- 38 - - 39 - - 40 - - 41 - - 42 - - 43 - - 44 - - 45 - - 46 - - 47 -
- 48 - - 49 - - 50 - - 51 - - 52 - - 53 - - 54 - - 55 - - 56 - - 57 -
- 58 - - 59 - - 60 - - 61 - - 62 - - 63 - - 64 - - 65 - - 66 - - 67 -
- 68 - - 69 - - 70 - - 71 - - 72 - - 73 - - 74 - - 75 - - 76 - - 77 -
- 78 - - 79 - - 80 - - 81 - - 82 - - 83 -
About Product
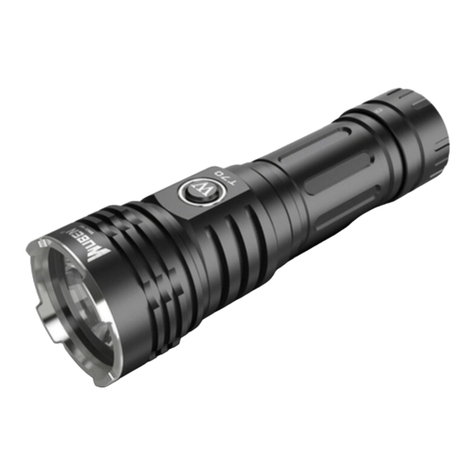
The X-0 is an EDC angled light. It comes with a 18350
lithium battery, the internal waterproof Type-c charging
port is designed, it allows users to freely adjust the
brightness levels.
Switch
Button
(Dust-proof cover)
Battery power
indicator Type-C charging port
Light head
Light tail (With magnet)

- 01 - - 02 - - 03 - - 04 - - 05 - - 06 - - 07 -
- 08 - - 09 - - 10 - - 11 - - 12 - - 13 - - 14 - - 15 - - 16 - - 17 -
- 18 - - 19 - - 20 - - 21 - - 22 - - 23 - - 24 - - 25 - - 26 - - 27 -
- 28 - - 29 - - 30 - - 31 - - 32 - - 33 - - 34 - - 35 - - 36 - - 37 -
- 38 - - 39 - - 40 - - 41 - - 42 - - 43 - - 44 - - 45 - - 46 - - 47 -
- 48 - - 49 - - 50 - - 51 - - 52 - - 53 - - 54 - - 55 - - 56 - - 57 -
- 58 - - 59 - - 60 - - 61 - - 62 - - 63 - - 64 - - 65 - - 66 - - 67 -
- 68 - - 69 - - 70 - - 71 - - 72 - - 73 - - 74 - - 75 - - 76 - - 77 -
- 78 - - 79 - - 80 - - 81 - - 82 - - 83 -
Operation
Strobe
HighMedLowMoon
Hold
Moon
× 1
Turbo
SOS
Strobe SOS
× 2
× 4
× 2 × 2
Hold
Please charge before first use!

- 01 - - 02 - - 03 - - 04 - - 05 - - 06 - - 07 -
- 08 - - 09 - - 10 - - 11 - - 12 - - 13 - - 14 - - 15 - - 16 - - 17 -
- 18 - - 19 - - 20 - - 21 - - 22 - - 23 - - 24 - - 25 - - 26 - - 27 -
- 28 - - 29 - - 30 - - 31 - - 32 - - 33 - - 34 - - 35 - - 36 - - 37 -
- 38 - - 39 - - 40 - - 41 - - 42 - - 43 - - 44 - - 45 - - 46 - - 47 -
- 48 - - 49 - - 50 - - 51 - - 52 - - 53 - - 54 - - 55 - - 56 - - 57 -
- 58 - - 59 - - 60 - - 61 - - 62 - - 63 - - 64 - - 65 - - 66 - - 67 -
- 68 - - 69 - - 70 - - 71 - - 72 - - 73 - - 74 - - 75 - - 76 - - 77 -
- 78 - - 79 - - 80 - - 81 - - 82 - - 83 -
5s
5s
5s
C ≥ 90%
90% > C ≥ 40%
40% > C ≥ 15%
15% > C ≥ 0%
Battery Capacity (C) Status Indication
Charging
Charging finished
Type-C
(5V/1A 1.5 Hours)
Charging/Discharging

- 01 - - 02 - - 03 - - 04 - - 05 - - 06 - - 07 -
- 08 - - 09 - - 10 - - 11 - - 12 - - 13 - - 14 - - 15 - - 16 - - 17 -
- 18 - - 19 - - 20 - - 21 - - 22 - - 23 - - 24 - - 25 - - 26 - - 27 -
- 28 - - 29 - - 30 - - 31 - - 32 - - 33 - - 34 - - 35 - - 36 - - 37 -
- 38 - - 39 - - 40 - - 41 - - 42 - - 43 - - 44 - - 45 - - 46 - - 47 -
- 48 - - 49 - - 50 - - 51 - - 52 - - 53 - - 54 - - 55 - - 56 - - 57 -
- 58 - - 59 - - 60 - - 61 - - 62 - - 63 - - 64 - - 65 - - 66 - - 67 -
- 68 - - 69 - - 70 - - 71 - - 72 - - 73 - - 74 - - 75 - - 76 - - 77 -
- 78 - - 79 - - 80 - - 81 - - 82 - - 83 -
Parameters
All data from experiments of WUBEN lab according to
ANSI/NEMA FL1 standard, may vary because of different
experiment equipment, experiment environment, or other
factors. Experiments are based on 1100mAh 18350 Li-ion battery.
/ /
min
1 + 2 2.5
Hours Hours
15
Hours
40
Hours
130
Hours
1000
Lumens
900
Lumens
50
Lumens
FL1
Standard High Med Low MoonTurbo
FL1
Standard Strobe SOS
1100 300
250
Lumens
Lumens
150
Lumens
50
Lumens
1
Lumen
900 300
Lumens
IP68 (2m underwater for 1h)
82g/ 2.89oz (with battery)
57mm x 24.5mm x 28mm|2.24in x 0.96in x 1.10in
(L x W x H)
1.5 Meters
OSRAM
P9
SAMSUNG
LH351D
OSRAM
P9
SAMSUNG
LH351D
OSRAM P9: 125 Meters| SAMSUNG LH351D: 103 Meters
OSRAM P9: 3920 Candelas| SAMSUNG LH351D: 2670 Candelas

E
N
- 01 - - 02 - - 03 - - 04 - - 05 - - 06 - - 07 -
- 08 - - 09 - - 10 - - 11 - - 12 - - 13 - - 14 - - 15 - - 16 - - 17 -
- 18 - - 19 - - 20 - - 21 - - 22 - - 23 - - 24 - - 25 - - 26 - - 27 -
- 28 - - 29 - - 30 - - 31 - - 32 - - 33 - - 34 - - 35 - - 36 - - 37 -
- 38 - - 39 - - 40 - - 41 - - 42 - - 43 - - 44 - - 45 - - 46 - - 47 -
- 48 - - 49 - - 50 - - 51 - - 52 - - 53 - - 54 - - 55 - - 56 - - 57 -
- 58 - - 59 - - 60 - - 61 - - 62 - - 63 - - 64 - - 65 - - 66 - - 67 -
- 68 - - 69 - - 70 - - 71 - - 72 - - 73 - - 74 - - 75 - - 76 - - 77 -
- 78 - - 79 - - 80 - - 81 - - 82 - - 83 -
Warnings
Please read user manual carefully before using the product.
Product will generate heat while working, please be
cautious with that to avoid any possible harm.
Please don’t shine into eyes directly to avoid harm to eyes.
Please keep the product away from children.
Please use WUBEN or WUBEN recommended batteries.
Please don’t disassemble the product or it will not be
covered by WUBEN warranty policy.
Please don't throw the product into fire.
This is not a diving product, please don't use it underwater
for a long time.
LED will generate heat while working, please keep the
main product away from other objects to avoid product
damage or other danger caused.
(EN) English
Operation
1
2
3
4
ON/OFF: Single click on the button to turn on the
flashlight, single click again to turn off. The flashlight has
memory function, will memorize default output
selections, but not flash and turbo modes.
Default Output Selections: When the flashlight is on,
long press the button to cycle through
Moon-Low-Med-High-Moon. It will lockout the brightness
once releasing the switch at any mode.
Instant Turbo: When the flashlight is on, double click the
button to activate Turbo.
Instant Low: When the flashlight is off, long press the
button to activate Moon.

- 01 - - 02 - - 03 - - 04 - - 05 - - 06 - - 07 -
- 08 - - 09 - - 10 - - 11 - - 12 - - 13 - - 14 - - 15 - - 16 - - 17 -
- 18 - - 19 - - 20 - - 21 - - 22 - - 23 - - 24 - - 25 - - 26 - - 27 -
- 28 - - 29 - - 30 - - 31 - - 32 - - 33 - - 34 - - 35 - - 36 - - 37 -
- 38 - - 39 - - 40 - - 41 - - 42 - - 43 - - 44 - - 45 - - 46 - - 47 -
- 48 - - 49 - - 50 - - 51 - - 52 - - 53 - - 54 - - 55 - - 56 - - 57 -
- 58 - - 59 - - 60 - - 61 - - 62 - - 63 - - 64 - - 65 - - 66 - - 67 -
- 68 - - 69 - - 70 - - 71 - - 72 - - 73 - - 74 - - 75 - - 76 - - 77 -
- 78 - - 79 - - 80 - - 81 - - 82 - - 83 -
5
6
Flash Modes: When the flashlight is off or at Turbo mode,
double click the button to activate Strobe. Double click
again to swap between SOS and Strobe. Single click to
exit or return to the mode before turning into Turbo.
Lock/Unlock: When the flashlight is off, 4 times click the
button, the main light will blink 3 times to indicate the
locking of the flashlight. The indicator will blink 3 times
when clicking the button. Four times click the button
again, Eco mode will be on to indicate unlock.
Before entering programming mode, first determine which
brightness level(out of four) you’d like to customize, click to
open X-0, long press to adjust X-0 to the level you’d like to
customize, quickly double-click the power button and hold
on. The brightness level loops within the corresponding
lumen range from the lowest to the highest brightness level,
(when reaching the upper range, the light flashes once and
starts looping from the highest to the lowest brightness
level), release the power button when the desired brightness
is reached, the flashlight will automatically memorize the
brightness level.
Mode Adjustment interval
Moon
Low
Med
High
1-15 lumens
15-50 lumens
50-150 lumens
150-300 lumens
Programming Mode:

E
N
- 01 - - 02 - - 03 - - 04 - - 05 - - 06 - - 07 -
- 08 - - 09 - - 10 - - 11 - - 12 - - 13 - - 14 - - 15 - - 16 - - 17 -
- 18 - - 19 - - 20 - - 21 - - 22 - - 23 - - 24 - - 25 - - 26 - - 27 -
- 28 - - 29 - - 30 - - 31 - - 32 - - 33 - - 34 - - 35 - - 36 - - 37 -
- 38 - - 39 - - 40 - - 41 - - 42 - - 43 - - 44 - - 45 - - 46 - - 47 -
- 48 - - 49 - - 50 - - 51 - - 52 - - 53 - - 54 - - 55 - - 56 - - 57 -
- 58 - - 59 - - 60 - - 61 - - 62 - - 63 - - 64 - - 65 - - 66 - - 67 -
- 68 - - 69 - - 70 - - 71 - - 72 - - 73 - - 74 - - 75 - - 76 - - 77 -
- 78 - - 79 - - 80 - - 81 - - 82 - - 83 -
When the flashlight is locked, single click the button--interval
0.5s--double click the button--interval 0.5S--triple click the
button, the flashlight is reset to Low mode, indicating that
button lock is released, and brightness is reset to default.
Reset:
Maintenance
The O-Ring may be damaged after a long time use, please
replace the O-Ring in time to ensure the waterproof level
of the product.
Please use WUBEN battery or WUBEN recommended
batteries.
When the product indicates low power, please charge or
replace the battery in time to avoid affecting the durability
of the battery.
Please use alcohol and rag to clean the conductive parts of
the product in time.
When not in use for a long time, please remove the
battery to prevent the battery from leaking or exploding.
Please store the product in a dry and ventilated place.
FAQs
Problems
Abnormal
flash or
failure to
turn on
Causes
Check if the switch is
turned on correctly Turn on the switch
Tighten the assembly
parts
Try the battery on
other products
Check if it is assembled
in place
Check if the battery is
no power
Solutions
Check if the switch is
locked Unlock the switch

- 01 - - 02 - - 03 - - 04 - - 05 - - 06 - - 07 -
- 08 - - 09 - - 10 - - 11 - - 12 - - 13 - - 14 - - 15 - - 16 - - 17 -
- 18 - - 19 - - 20 - - 21 - - 22 - - 23 - - 24 - - 25 - - 26 - - 27 -
- 28 - - 29 - - 30 - - 31 - - 32 - - 33 - - 34 - - 35 - - 36 - - 37 -
- 38 - - 39 - - 40 - - 41 - - 42 - - 43 - - 44 - - 45 - - 46 - - 47 -
- 48 - - 49 - - 50 - - 51 - - 52 - - 53 - - 54 - - 55 - - 56 - - 57 -
- 58 - - 59 - - 60 - - 61 - - 62 - - 63 - - 64 - - 65 - - 66 - - 67 -
- 68 - - 69 - - 70 - - 71 - - 72 - - 73 - - 74 - - 75 - - 76 - - 77 -
- 78 - - 79 - - 80 - - 81 - - 82 - - 83 -
If your problems are still not solved yet, please contact WUBEN
Headquarters for after-sales service.
Abnormal
noise
Pourout possible
foreign matter
Contact your seller
Check if foreign matter
falls in the tube
Part damage
1. Warranty Coverage
Warranty Policy
15 days replacement: Within 15 days from the date of
purchase, if the product has quality problems, customers
can request free replacement.
1 year warranty: Within 1 year from the date of purchase,
if the product (accessories excluded) has quality problems,
WUBEN will offer free repair for WUBEN registered
customers.
Battery warranty: WUBEN offers a 1-year warranty for the
rechargeable batteries but other included accessories are
not covered by the warranty.
Lifetime maintenance: From the date of purchase, if the
product has problem after 1 year, WUBEN will offer paid
repair for WUBEN registered customers.
If proof of purchase cannot be provided, it will be counted
on the date of manufacture.
If there is any dispute, the two parties will coordinate to
solve.
Remove the battery and
reassemble it correctly
Clean the surface
with alcohol
Check if the battery is
reversed
Check if the conductive
position is dirty

E
N
- 01 - - 02 - - 03 - - 04 - - 05 - - 06 - - 07 -
- 08 - - 09 - - 10 - - 11 - - 12 - - 13 - - 14 - - 15 - - 16 - - 17 -
- 18 - - 19 - - 20 - - 21 - - 22 - - 23 - - 24 - - 25 - - 26 - - 27 -
- 28 - - 29 - - 30 - - 31 - - 32 - - 33 - - 34 - - 35 - - 36 - - 37 -
- 38 - - 39 - - 40 - - 41 - - 42 - - 43 - - 44 - - 45 - - 46 - - 47 -
- 48 - - 49 - - 50 - - 51 - - 52 - - 53 - - 54 - - 55 - - 56 - - 57 -
- 58 - - 59 - - 60 - - 61 - - 62 - - 63 - - 64 - - 65 - - 66 - - 67 -
- 68 - - 69 - - 70 - - 71 - - 72 - - 73 - - 74 - - 75 - - 76 - - 77 -
- 78 - - 79 - - 80 - - 81 - - 82 - - 83 -
The final interpretation right is reserved by WUBEN.
Man-made damage.
Damage caused by not following the instructions.
Damage caused by improper use of the battery.
Abnormal wear and tear.
Damage caused by irresistible factors.
Gifts.
2. Beyond Warranty
SHENZHEN SHENGQI LIGHTING TECHNOLOGY CO., LTD.
Add: Floor 5, Building A, Zhenhan Industrial Park, No. 1 Zhenhan
Road, Jihua Street, Longgang District,
Shenzhen, Guangdong, China
E-mail: [email protected]
Web: www.wubenlight.com WUBEN website Facebook
The product complies EMC 2014/30/EU and RoHS 2011/65/EU as
amended 2015/863/EU directives.
The product can be disposed of in electric waste only.

- 01 - - 02 - - 03 - - 04 - - 05 - - 06 - - 07 -
- 08 - - 09 - - 10 - - 11 - - 12 - - 13 - - 14 - - 15 - - 16 - - 17 -
- 18 - - 19 - - 20 - - 21 - - 22 - - 23 - - 24 - - 25 - - 26 - - 27 -
- 28 - - 29 - - 30 - - 31 - - 32 - - 33 - - 34 - - 35 - - 36 - - 37 -
- 38 - - 39 - - 40 - - 41 - - 42 - - 43 - - 44 - - 45 - - 46 - - 47 -
- 48 - - 49 - - 50 - - 51 - - 52 - - 53 - - 54 - - 55 - - 56 - - 57 -
- 58 - - 59 - - 60 - - 61 - - 62 - - 63 - - 64 - - 65 - - 66 - - 67 -
- 68 - - 69 - - 70 - - 71 - - 72 - - 73 - - 74 - - 75 - - 76 - - 77 -
- 78 - - 79 - - 80 - - 81 - - 82 - - 83 -
(CN) 简体中文
警示说明
使用前,请认真阅读说明书。
本品在使用过程中会产生热量,请注意保护,以免对人体造成
伤害。
本品为高亮产品,请勿对人眼照射,以免造成伤害。
请将本品放到12岁以下儿童接触不到的地方。
请使用务本的电池或务本推荐的电池。
请勿私自拆卸与维修手电,私自拆卸后将不予保修产品。
请勿将产品投入火中。
本品为非潜水类产品,请勿长时间在水下使用。
由于产品在开启状态下,LED正面会产生较大热量,为避免引
起产品损坏或其他危险,请勿使透镜面接触或靠近其他物体。
操作方法
开机 / 关机:单击按键可点亮手电筒 , 再次单击关闭手电筒 .
手电筒具有照明亮度记忆功能,不会记忆闪烁模式和极亮模式。
档位调节 : 开机状态,长按按键可以循环切换手电筒的亮度:
月光 - 低 - 中 - 高 - 月光循环。在任何档位下松开开关,即可锁
定亮度。
快速极亮:开机状态,双击按键进入极亮档。
快速低亮:关机状态,长按按键进入月光档。
闪烁模式:关机 \ 极亮状态,双击按键进入爆闪模式,再次双击
可循环切换闪烁模式:SOS- 爆闪 -SOS,单击关闭 \ 回到进入
极亮前状态。
锁定 / 解锁手电筒:关机状态,四击按键,前灯闪三下,表示锁定,
按按键指示灯会闪三次提示,再次四击按键,节能档点亮,表示
锁定解除。
1
2
3
4
5
6

C
N
- 01 - - 02 - - 03 - - 04 - - 05 - - 06 - - 07 -
- 08 - - 09 - - 10 - - 11 - - 12 - - 13 - - 14 - - 15 - - 16 - - 17 -
- 18 - - 19 - - 20 - - 21 - - 22 - - 23 - - 24 - - 25 - - 26 - - 27 -
- 28 - - 29 - - 30 - - 31 - - 32 - - 33 - - 34 - - 35 - - 36 - - 37 -
- 38 - - 39 - - 40 - - 41 - - 42 - - 43 - - 44 - - 45 - - 46 - - 47 -
- 48 - - 49 - - 50 - - 51 - - 52 - - 53 - - 54 - - 55 - - 56 - - 57 -
- 58 - - 59 - - 60 - - 61 - - 62 - - 63 - - 64 - - 65 - - 66 - - 67 -
- 68 - - 69 - - 70 - - 71 - - 72 - - 73 - - 74 - - 75 - - 76 - - 77 -
- 78 - - 79 - - 80 - - 81 - - 82 - - 83 -
在进入编程模式之前,先确定想要自定义的档位是四个亮度档位
里哪一个,单击打开X-0,长按将X-0调节到你想自定义的档位,
快速双击的第二下按着开关不松手,亮度可在对应档位流明区间
从小到大循环变化(到达区间极点时,灯光闪烁一次并开始继续
从大到小循环),在想要设定的亮度达到时松开开关,即可记忆
当前亮度,至此便成功设置了该档位的亮度为当前亮度。
编程模式:
档位 调节区间
月光档
低档
中档
高档
1-15流明
15-50流明
50-150流明
150-300流明
锁定状态,单击按键--间隔0.5秒--双击按键--间隔0.5S--三击按
键,手电出厂设置最低亮开启,表示按键锁定解除,且恢复出厂
默认亮度。
恢复出厂设置:
保养方法
防水圈长期使用可能会产生破损,请及时更换防水圈,以确保
产品的防水性能。
请使用务本的电池或务本推荐的电池。
手电提示电量不足时,请及时充电或更换电池,以免影响产品
正常使用。
请用酒精与抹布及时清理手电的导电部位。
长期不使用此产品时,请取出电池,以防止电池漏液或其它因
素影响产品的正常使用。
请将手电置于通风干燥处存放。

- 01 - - 02 - - 03 - - 04 - - 05 - - 06 - - 07 -
- 08 - - 09 - - 10 - - 11 - - 12 - - 13 - - 14 - - 15 - - 16 - - 17 -
- 18 - - 19 - - 20 - - 21 - - 22 - - 23 - - 24 - - 25 - - 26 - - 27 -
- 28 - - 29 - - 30 - - 31 - - 32 - - 33 - - 34 - - 35 - - 36 - - 37 -
- 38 - - 39 - - 40 - - 41 - - 42 - - 43 - - 44 - - 45 - - 46 - - 47 -
- 48 - - 49 - - 50 - - 51 - - 52 - - 53 - - 54 - - 55 - - 56 - - 57 -
- 58 - - 59 - - 60 - - 61 - - 62 - - 63 - - 64 - - 65 - - 66 - - 67 -
- 68 - - 69 - - 70 - - 71 - - 72 - - 73 - - 74 - - 75 - - 76 - - 77 -
- 78 - - 79 - - 80 - - 81 - - 82 - - 83 -
常见问题处理方法
如上述方法还没有解决您的问题, 请联系当地经销商进行售后服务。
保修规则
1.保修范围
15天包换:自购买之日起,15天内如产品出现质量问题,可
选择更换同型号产品。
1年保修:自购买之日起,在务本官方网站注册登记产品的用
户,一年内如出现质量问题,务本将提供免费维修服务。
电池保修:充电电池保修期为1年,产品附加配件不在保修范
围内。
终身维修:自购买之日起,注册用户1年后如出现质量问题,
务本将提供有偿维修服务。
如无法提供购买证明时,将以出厂日期为准。
如有争议,双方协商处理。
检查手电筒是否锁定 解锁手电筒
问题描述
异闪或不亮
异 响
原 因
检查开关是否正确打开 打开开关
旋紧装配部件
用充电器检测电池
取下电池重新正确装配
用酒精擦拭导电位
倒出异物
请联系当地经销商
检查是否装配到位
检查电池是否有电
检查电池是否反装
导电位是否被弄脏
检查是否有异物掉入
零件损伤
解决方法

C
N
- 01 - - 02 - - 03 - - 04 - - 05 - - 06 - - 07 -
- 08 - - 09 - - 10 - - 11 - - 12 - - 13 - - 14 - - 15 - - 16 - - 17 -
- 18 - - 19 - - 20 - - 21 - - 22 - - 23 - - 24 - - 25 - - 26 - - 27 -
- 28 - - 29 - - 30 - - 31 - - 32 - - 33 - - 34 - - 35 - - 36 - - 37 -
- 38 - - 39 - - 40 - - 41 - - 42 - - 43 - - 44 - - 45 - - 46 - - 47 -
- 48 - - 49 - - 50 - - 51 - - 52 - - 53 - - 54 - - 55 - - 56 - - 57 -
- 58 - - 59 - - 60 - - 61 - - 62 - - 63 - - 64 - - 65 - - 66 - - 67 -
- 68 - - 69 - - 70 - - 71 - - 72 - - 73 - - 74 - - 75 - - 76 - - 77 -
- 78 - - 79 - - 80 - - 81 - - 82 - - 83 -
2.不予保修范围
人为破坏造成产品损坏的。
不按说明书操作使用造成损坏的。
电池使用不当、电池漏液造成损坏的。
非正常磨损的。
不可抗力因素造成损坏的。
赠品。
最终解释权归务本品牌所有。
务本官方网站 订阅号
本产品符合2015/863/EU修订后的EMC 2014/30/EU指令和RoHS 2011/65/EU
指令。
本产品只能作为电子电气废弃物处理。
经 销 商:深圳市盛祺照明科技有限公司
地 址:
广东省深圳市龙岗区吉华街道甘坑社区臻翰路1号臻翰工业区A栋5楼
网 址:www.wubenlight.com
电 话:+86-755-21010616
生产厂家:东莞市盛祺照明科技有限公司
厂家地址:广东省东莞市企石镇莲子湖路1号1号楼
执行标准:Q/441900SQZM
销售电话:0769-86661133

- 01 - - 02 - - 03 - - 04 - - 05 - - 06 - - 07 -
- 08 - - 09 - - 10 - - 11 - - 12 - - 13 - - 14 - - 15 - - 16 - - 17 -
- 18 - - 19 - - 20 - - 21 - - 22 - - 23 - - 24 - - 25 - - 26 - - 27 -
- 28 - - 29 - - 30 - - 31 - - 32 - - 33 - - 34 - - 35 - - 36 - - 37 -
- 38 - - 39 - - 40 - - 41 - - 42 - - 43 - - 44 - - 45 - - 46 - - 47 -
- 48 - - 49 - - 50 - - 51 - - 52 - - 53 - - 54 - - 55 - - 56 - - 57 -
- 58 - - 59 - - 60 - - 61 - - 62 - - 63 - - 64 - - 65 - - 66 - - 67 -
- 68 - - 69 - - 70 - - 71 - - 72 - - 73 - - 74 - - 75 - - 76 - - 77 -
- 78 - - 79 - - 80 - - 81 - - 82 - - 83 -
1
(DE) Deutsch
Warnhinweise
Bitte lesen Sie die Bedienungsanleitung sorgfältig durch,
bevor Sie das Produkt verwenden.
Das Produkt erzeugt im Betrieb Wärme. Seien Sie vorsichtig,
um mögliche menschliche Verletzungen zu vermeiden.
Es ist ein Produkt mit hoher Helligkeit. Bitte lassen Sie das
Produkt nicht direkt in die Augen strahlen, um Verletzungen
zu vermeiden.
Bitte halten Sie das Produkt von Kindern unter 12 Jahren
fern.
Bitte verwenden Sie die WUBEN-Batterie oder eine von
WUBEN empfohlenen Batterie.
Bitte demontieren oder reparieren Sie das Produkt nicht
selbst, da es sonst nicht unter die WUBEN-Garantie fällt.
Bitte werfen Sie das Produkt nicht ins Feuer.
Es ist kein Tauchprodukt, bitte verwenden Sie es nicht lange
unter Wasser.
Weil die Front der LED beim eingeschalteten Zustand des
Produkts groessere waerme erzeugt,um die Beschaedigun-
gen des Produkts oder sonstige Gefaehrdungen zu
vermeiden,bitte sollte die Oberflaeche der Linse keine
Kontakte mit anderen Gegenstaenden haben oder niche
nahe anderen Gegenstaenden sein.
Bedienungsanleitung
Ein/Ausschalten: Einmaliger Klick auf die Taste kann die
Taschenlampe beleuchtet werden;wenn die Taste
nochmals geklickt wird,wird die Taschenlampe
ausgeloschen.Die Taschenlampe hat die Erinnerungs-
funktion der Lichtstaerkung,aber kann die nicht den
Blinken-Modus und Modus der groessten Lichtstaerkung
erinnern.
Standardausgangsauswahl: Wenn die Taschenlampe
eingeschaltet ist, drücken Sie die Taste lang, um den
Kreislauf der Leuchtdichte “Mondlicht-Niedrig-Mit-
tig-Hoch-Mondlicht” umzuschalten. Lösen Sie in jedem
Ausgang den Schalter, dann wird die entsprechende
Leuchtdichte verriegelt.
Schnelle Turbo: Wenn die Taschenlampe eingeschaltet
ist, doppelklicken Sie auf die Taste, um den Turbo-Modus
zu aktivieren.
Sofortiger Öko-Modus: Wenn die Taschenlampe
ausgeschaltet ist, drücken Sie die Taste lang, um den
Mondlicht-Modus zu aktivieren.
Blitzmodus: Wenn die Taschlampe ausgeschaltet ist oder
im Turbomodus liegt, doppelklicken Sie auf die Taste, um
die Strobe zu aktivieren. Doppelklicken Sie wieder
einmal, um den Kreislauf der Blitz-Ausgänge:
„SOS-Strobe“ umzuschalten. Klicken Sie noch einmal, um
die Strobe zu deaktivieren oder zum Stand vor dem
Turbomodus zurückzukehren.
Verriegeln/Entriegeln der Taschenlampe: Wenn die
Taschenlampe ausgeschaltet ist, drücken Sie viermal die
Taste, dann leuchtet das vorne Licht dreimal, d.h. die
Taschenlampe ist verriegelt. Drücken Sie die Taste, dann
leuchtet das Anzeigelicht dreimal. Drücken Sie wieder
viermal die Taste, dann leucht der Öko-Ausgang, d.h. die
Taschenlampe ist entriegelt.

D
E
- 01 - - 02 - - 03 - - 04 - - 05 - - 06 - - 07 -
- 08 - - 09 - - 10 - - 11 - - 12 - - 13 - - 14 - - 15 - - 16 - - 17 -
- 18 - - 19 - - 20 - - 21 - - 22 - - 23 - - 24 - - 25 - - 26 - - 27 -
- 28 - - 29 - - 30 - - 31 - - 32 - - 33 - - 34 - - 35 - - 36 - - 37 -
- 38 - - 39 - - 40 - - 41 - - 42 - - 43 - - 44 - - 45 - - 46 - - 47 -
- 48 - - 49 - - 50 - - 51 - - 52 - - 53 - - 54 - - 55 - - 56 - - 57 -
- 58 - - 59 - - 60 - - 61 - - 62 - - 63 - - 64 - - 65 - - 66 - - 67 -
- 68 - - 69 - - 70 - - 71 - - 72 - - 73 - - 74 - - 75 - - 76 - - 77 -
- 78 - - 79 - - 80 - - 81 - - 82 - - 83 -
2
3
4
5
6
Ein/Ausschalten: Einmaliger Klick auf die Taste kann die
Taschenlampe beleuchtet werden;wenn die Taste
nochmals geklickt wird,wird die Taschenlampe
ausgeloschen.Die Taschenlampe hat die Erinnerungs-
funktion der Lichtstaerkung,aber kann die nicht den
Blinken-Modus und Modus der groessten Lichtstaerkung
erinnern.
Standardausgangsauswahl: Wenn die Taschenlampe
eingeschaltet ist, drücken Sie die Taste lang, um den
Kreislauf der Leuchtdichte “Mondlicht-Niedrig-Mit-
tig-Hoch-Mondlicht” umzuschalten. Lösen Sie in jedem
Ausgang den Schalter, dann wird die entsprechende
Leuchtdichte verriegelt.
Schnelle Turbo: Wenn die Taschenlampe eingeschaltet
ist, doppelklicken Sie auf die Taste, um den Turbo-Modus
zu aktivieren.
Sofortiger Öko-Modus: Wenn die Taschenlampe
ausgeschaltet ist, drücken Sie die Taste lang, um den
Mondlicht-Modus zu aktivieren.
Blitzmodus: Wenn die Taschlampe ausgeschaltet ist oder
im Turbomodus liegt, doppelklicken Sie auf die Taste, um
die Strobe zu aktivieren. Doppelklicken Sie wieder
einmal, um den Kreislauf der Blitz-Ausgänge:
„SOS-Strobe“ umzuschalten. Klicken Sie noch einmal, um
die Strobe zu deaktivieren oder zum Stand vor dem
Turbomodus zurückzukehren.
Verriegeln/Entriegeln der Taschenlampe: Wenn die
Taschenlampe ausgeschaltet ist, drücken Sie viermal die
Taste, dann leuchtet das vorne Licht dreimal, d.h. die
Taschenlampe ist verriegelt. Drücken Sie die Taste, dann
leuchtet das Anzeigelicht dreimal. Drücken Sie wieder
viermal die Taste, dann leucht der Öko-Ausgang, d.h. die
Taschenlampe ist entriegelt.

- 01 - - 02 - - 03 - - 04 - - 05 - - 06 - - 07 -
- 08 - - 09 - - 10 - - 11 - - 12 - - 13 - - 14 - - 15 - - 16 - - 17 -
- 18 - - 19 - - 20 - - 21 - - 22 - - 23 - - 24 - - 25 - - 26 - - 27 -
- 28 - - 29 - - 30 - - 31 - - 32 - - 33 - - 34 - - 35 - - 36 - - 37 -
- 38 - - 39 - - 40 - - 41 - - 42 - - 43 - - 44 - - 45 - - 46 - - 47 -
- 48 - - 49 - - 50 - - 51 - - 52 - - 53 - - 54 - - 55 - - 56 - - 57 -
- 58 - - 59 - - 60 - - 61 - - 62 - - 63 - - 64 - - 65 - - 66 - - 67 -
- 68 - - 69 - - 70 - - 71 - - 72 - - 73 - - 74 - - 75 - - 76 - - 77 -
- 78 - - 79 - - 80 - - 81 - - 82 - - 83 -
Ausgang Bereich der Leuctdichte
Mondlicht
Niedrig
Mittig
Hoch
1-15 Lumens
15-50 lumens
50-150 lumens
150-300 lumens
Programmiermodus:
Bevor Sie in den Programmiermodus wechseln, bestimmen
Sie zuerst, welche Helligkeitsstufe (von vier) Sie anpassen
möchten, klicken Sie, um X-0 zu öffnen, drücken Sie lange,
um X-0 auf die Stufe einzustellen, die Sie anpassen möchten,
und doppelklicken Sie schnell den Netzschalter und halten
Sie ihn gedrückt. Die Helligkeitsstufe schlingt innerhalb des
entsprechenden Lumenbereichs von der niedrigsten zur
höchsten Helligkeitsstufe, (bei Erreichen des oberen
Bereichs blinkt das Licht einmal und beginnt eine Schleife
von der höchsten zur niedrigsten Helligkeitsstufe), lassen Sie
den Netzschalter los, wenn die gewünschte Helligkeit
erreicht ist erreicht ist, speichert die Taschenlampe
automatisch die Helligkeitsstufe.
Wenn die Taschenlampe verriegelt ist, klicken Sie auf die
Taste -- in 0,5s -- doppelklicken Sie auf die Taste -- in 0,5S --
klicken Sie auf die Taste dreimal, die Taschenlampe wird auf
die niedrige Leuchtdichte zurückgesetzt, d.h, die Taste wird
entriegelt, und die Leuchtdichte wird auf die Voreinstellung
zurückgesetzt.
Rückstellung:
Table of contents
Languages:
Other WUBEN Flashlight manuals