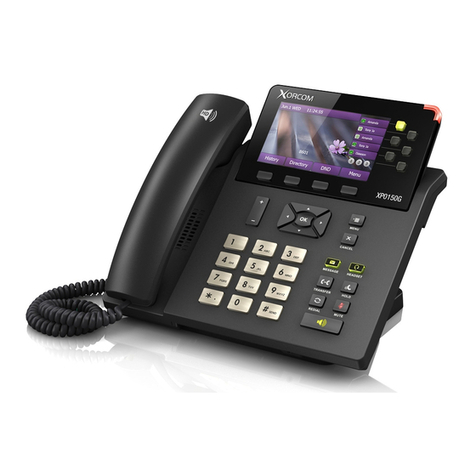
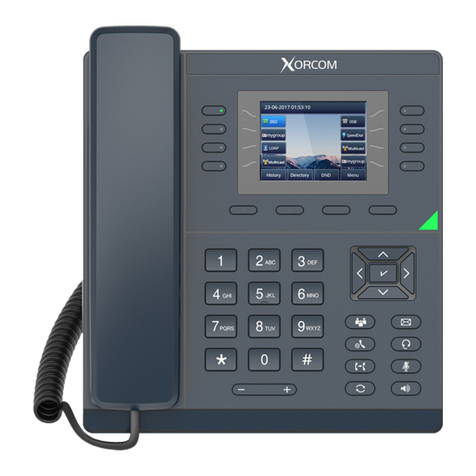
Xorcom XP0150G User manual

Xorcom XP0150G
Gigabit Color IP Phone
User Guide

User Guide Xorcom XP0150G IP Phone
ii
About This Guide
Thank you for choosing this Gigabit Color IP Phone which is especially designed for
power users in the office environment. This unit provides business telephony features
such as Call Hold, Call Transfer, Busy Lamp Field, Shared Line, Hot Desking and
Conference over an IP network.
This guide provides everything you need to quickly use your new phone. Be sure to
verify with your system administrator that your network is prepared for configuring your
IP phone. As well, be sure to read the Packing List and Regulatory Notices sections in
this guide before you set up and use the Xorcom XP0150G IP phone.
If this is your first time using the Xorcom XP0150G IP phone, we recommend that you first
refer to the Quick Installation Guide and Quick Reference Guide.
In This Guide
This guide is based on firmware version 70.The topics provided in this guide include:
Chapter 1 Overview
Chapter 2 Getting Started
Chapter 3 Customizing Your Phone
Chapter 4 Basic Call Features
Chapter 5 Advanced Phone Features

About This Guide
iii
Declaration of Conformity
This phone is in conformity with the essential requirements and other relevant provisions of
the CE, FCC.
CE Mark Warning
This device is marked with the CE mark in compliance with EC Directives 2006/95/EC and 2004/108/EC.
Part 15 FCC Rules
This device is compliant with Part 15 of the FCC Rules. Operation is subject to the following two conditions:
1. This device may not cause harmful interference.
2. This device must accept any interference received, including interference that may cause undesired
operation.
Class B Digital Device or Peripheral
Note: This device is tested and complies with the limits for a Class B digital device, pursuant to Part 15 of the
FCC Rules. These limits are designed to provide reasonable protection against harmful interference in a
residential installation. This equipment generates, uses, and can radiate radio frequency energy and, if not
installed and used in accordance with the instructions, may cause harmful interference to radio
communications. However, there is no guarantee that interference will not occur in a particular installation.
If this equipment does cause harmful interference to radio or television reception, which can be
determined by turning the equipment off and on, the user is encouraged to try to correct the interference
by one or more of the following measures:
1. Reorient or relocate the receiving antenna.
2. Increase the separation between the equipment and receiver.
3. Connect the equipment into an outlet on a circuit different from that to which the receiver is connected.
4. Consult the dealer or an experience radio/TV technician for help.
WEEE Warning
To avoid the potential effects on the environment and human health as a result of the
presence of hazardous substances in electrical and electronic equipment, end users of
electrical and electronic equipment should understand the meaning of the crossed-out
wheeled bin symbol. Do not dispose of WEEE as unsorted municipal waste and have to
collect such WEEE separately.

User Guide Xorcom XP0150G IP Phone
iv
Table of Contents
About This Guide......................................................................... ii
In This Guide ................................................................................................................................ ii
Table of Contents ....................................................................... iv
Overview...................................................................................... 1
Hardware Component Instructions ........................................................................................1
Icon Instructions..........................................................................................................................3
LED Instructions ...........................................................................................................................5
User Interfaces ............................................................................................................................6
Phone User Interface .............................................................................................................6
Web User Interface.................................................................................................................6
Documentation..........................................................................................................................9
Getting Started .......................................................................... 11
Packing List................................................................................................................................11
Phone Installation.....................................................................................................................13
Phone Initialization ...................................................................................................................15
Phone Status .............................................................................................................................16
Basic Network Settings ............................................................................................................17
Registration................................................................................................................................18
Idle Screen.................................................................................................................................18
Customizing Your Phone .......................................................... 21
General Settings .......................................................................................................................21
Wallpaper...............................................................................................................................21
Screensaver ...........................................................................................................................22
Theme .....................................................................................................................................23
Backlight.................................................................................................................................24
Contrast..................................................................................................................................24
Language...............................................................................................................................25
Time and Date ......................................................................................................................26
Administrator Password .......................................................................................................28
Key as Send ...........................................................................................................................29
Keypad Lock .........................................................................................................................29
Audio Settings ...........................................................................................................................33

Table of Contents
v
Volume ...................................................................................................................................33
Ring Tones ..............................................................................................................................33
Contact Management...........................................................................................................34
Local Directory ......................................................................................................................35
Blacklist ...................................................................................................................................40
Remote Phonebook.............................................................................................................41
BroadSoft Phonebook .........................................................................................................42
Call History Management ......................................................................................................44
BroadSoft Call Log ...................................................................................................................45
System Customizations............................................................................................................48
Headset Use...........................................................................................................................48
DSS Keys..................................................................................................................................48
Account Management.......................................................................................................59
Dial Plan..................................................................................................................................60
Emergency Number.............................................................................................................64
Live Dialpad...........................................................................................................................64
Hotline.....................................................................................................................................65
Basic Call Features.................................................................... 67
Placing Calls..............................................................................................................................67
Answering Calls ........................................................................................................................69
Ending Calls...............................................................................................................................70
Redialing Numbers...................................................................................................................71
Auto Answer..............................................................................................................................71
Auto Redial................................................................................................................................72
Call Completion .......................................................................................................................73
Call Return .................................................................................................................................75
Call Mute ...................................................................................................................................75
Call Hold/Resume ....................................................................................................................76
Do Not Disturb (DND) ..............................................................................................................77
Call Forward..............................................................................................................................78
Call Transfer...............................................................................................................................80
Call Waiting...............................................................................................................................81
Conference...............................................................................................................................82
Local Conference ................................................................................................................82
Network Conference ...........................................................................................................83
Call Park.....................................................................................................................................84
Call Pickup.................................................................................................................................85
Anonymous Call .......................................................................................................................89
Anonymous Call Rejection.....................................................................................................90
Advanced Phone Features ...................................................... 91
Busy Lamp Field (BLF) ..............................................................................................................91
User Guide Xorcom XP0150G IP Phone
vi
BLF List.........................................................................................................................................94
Shared Line................................................................................................................................95
Call Recording..........................................................................................................................96
Hot Desking ...............................................................................................................................98
Intercom ................................................................................................................................. 100
Outgoing Intercom Calls.................................................................................................. 100
Incoming Intercom Calls .................................................................................................. 101
Automatic Call Distribution (ACD)..................................................................................... 102
Messages ................................................................................................................................ 104
Short Message Service (SMS)........................................................................................... 104
Voice Mail ........................................................................................................................... 106
Message Waiting Indicator (MWI).................................................................................. 108
Troubleshooting....................................................................... 111
Regulatory Notices ................................................................. 115
Service Agreements ............................................................................................................. 115
Limitations of Liability............................................................................................................ 115
Safety Instructions ................................................................................................................. 115
Appendix A - Time Zones ....................................................... 117
Index ........................................................................................ 119

Overview
1
Overview
This chapter provides the overview of the Xorcom XP0150G IP phone. The topics
include:
Hardware Component Instructions
Icon Instructions
LED Instructions
User Interfaces
Documentation
If you require additional information or assistance with your new phone, contact your
system administrator.
Hardware Component Instructions
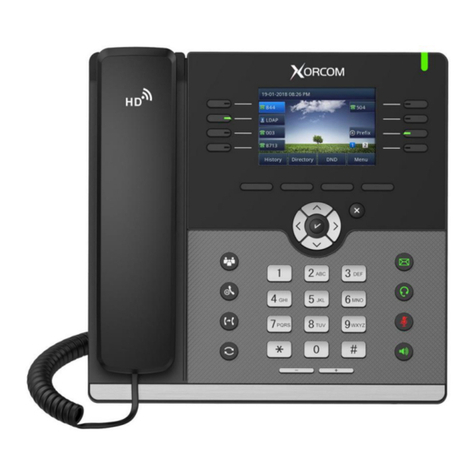
The main hardware components of the Xorcom XP0150G IP phone are the LCD screen
and the keypad.
XP0150G

User Guide Xorcom XP0150G IP Phone
2
Hardware component instructions of the Xorcom XP0150G IP phone are:
Item
Description
①
LCD Screen
Shows information about calls, messages, soft keys, time,
date and other relevant data:
• Call information—caller ID, call duration
• Icons (for example, )
• Missed call text or second incoming caller information
• Prompt text (for example, "Saving files! Please wait…")
• Time and date
②
Power Indicator LED
Indicates phone power status.
③
Line Keys
Use these keys to activate up to six accounts and assign
various features. The key LED will light up when the
assigned feature is enabled.
④
MENU Key
Enters the main menu of phone.
CANCEL Key
Cancels actions or rejects an incoming call.
⑤
MESSAGE Key
Indicates and accesses voice messages.
⑥
HEADSET Key
Toggles and indicates the headset mode.
⑦
TRANSFER Key
Transfers a call to another party.
HOLD Key
Places a call on hold or resumes a held call.
REDIAL Key
Redials a previously dialed number.
⑧
MUTE Key
Toggles and indicates the Mute feature on or off.
⑨
Speakerphone Key
Toggles and indicates the hands-free speakerphone
mode.
⑩
Keypad
Provides the digits, letters, and special characters in
context-sensitive applications.
⑪
Volume Key
Adjusts the volume of the handset, headset, speaker,
and ringer.
⑫
Scroll through the displayed information.
Confirms actions or answers an incoming call.
⑬
Soft Keys
Labels automatically to identity their context-sensitive
features.

Overview
3
Icon Instructions
Icons appear on the phone LCD screen are described in the following table:
Icons
Description
Network is unavailable
Registered successfully
Registered fail
Registering
Hands-free speakerphone mode
Handset mode
Headset mode
Multi-lingual lowercase letters input mode
Multi-lingual uppercase letters input mode
Alphanumeric input mode
Numeric input mode
Voice Mail
Text Message
Auto Answer
Do Not Disturb
Call Forward
Call Hold
Call Mute
Ringer volume is 0

User Guide Xorcom XP0150G IP Phone
4
Icons
Description
Keypad Lock
Missed Calls
Received Calls
Dialed Calls
Missed Calls
Recording box is full
A call cannot be recorded
Recording starts successfully
Recording cannot be started
Recording cannot be stopped
Open VPN
Conference
The default contact photo
The current page of the line keys.
The non-current page of the line keys.
1
2
3

Overview
5
LED Instructions
Power Indicator LED
LED Status
Description
Solid red
The phone is initializing.
Fast flashing red
The phone is ringing.
Slow flashing red
The phone receives a text message or voice mail.
Off
The phone is powered on.
The phone is powered off.
The phone is idle.
Line key LED
LED Status
Description
Solid green
The line is seized.
The line is in conversation.
Fast flashing green
The line receives an incoming call, the phone is ringing.
Slow flashing green
The call is placed on hold.
Off
The line is inactive.
Line key LED (configured as BLF key)
LED Status
Description
Solid red
The monitored user is busy.
Fast flashing red
The monitored user receives an incoming call.
Off
The monitored user is idle.
The monitored user does not exist.
Line key LED (configured as shared line key)
LED Status
Description
Solid red
The shared line is seized.
Some party receives the ringback.
The shared line is in conversation.
Fast flashing green
The shared line receives an incoming call.
Slow flashing red
The shared line conversation is placed on public hold.
The shared line conversation is placed on private hold.
Slow flashing orange
For multi-party call, all the parties place the shared line
conversation on hold.
Off
All the parties are idle.

User Guide Xorcom XP0150G IP Phone
6
User Interfaces
There are two ways to customize specific configurations on your Xorcom XP0150G IP
phone:
Using the user interface on the IP phone.
Using the user interface in an internet browser window from your PC.
The hardware components keypad and LCD screen constitute the phone user
interface, which allows the user to execute all call operation tasks and basic
configuration changes directly on the phone. In addition, you can use the web user
interface to access all configuration settings. In many instances, it is possible to use both
the phone user interface and the web user interface to operate the phone and
change settings. However, in some instances, it is only possible to use the phone or the
web user interface.
Phone User Interface
You can customize your phone by pressing the Menu soft key to access the phone user
interface. The "Advanced Settings" options are administrator level features only, the
default password is admin (case-sensitive). For more information on customizing your
phone using the available options from the phone user interface, refer to Customizing
Your Phone on page 21.
Web User Interface
In addition to the phone user interface, you can also customize your phone via web
user interface. In order to access the web user interface, you need to know the IP
address of your new phone. To obtain the IP address, press the OK key on the phone.
Enter the IP address (e.g. http://192.168.0.10 or 192.168.0.10) in the address bar of web
browser on your PC. The default user name is admin (case-sensitive) and the password
is admin (case-sensitive).
The options you can use to customize the IP phone via phone user interface and/or via
web user interface are listed in the following table:
Options
Phone User Interface
Web User Interface
Status
--IP
--MAC
--Firmware
--Network
--Phone
--Accounts
√
√

Overview
7
Options
Phone User Interface
Web User Interface
Basic Call Features
--Auto Answer
--Auto Redial
--Call Completion
--Call Forward
--Call Waiting
--Call Park
--Call Pickup
--Call Return
--Call Waiting
--Conference
--Anonymous Call
--Anonymous Call Rejection
--DND
√
√
√
√
√
√
√
√
√
√
√
√
√
Basic Phone Settings
--Language
--Time & Date
--Administrator Password
--Ring Tones
--Contrast
--Backlight
--Wallpaper
--Screensaver
--Theme
--Call Waiting
--Keypad Lock
--Phone Volume
--Call History Management
--BroadSoft Call Log
--Contact Management
--Local Directory
--Blacklist
--Remote Phonebook
--BroadSoft Phonebook
--Dial Plan
--DSS Keys
--Key as Send
--Hotline
--Live Dialpad
--Emergency
√
√
√
√
√
√
√
√
√
√
√
√
√
√
√
√
√
√
√
√
√

User Guide Xorcom XP0150G IP Phone
8
Options
Phone User Interface
Web User Interface
Advanced Phone Features
--BLF
--BLF List
--Shared Line
--Intercom
--Call Recording
--Hot Desking
--ACD
--Messages
√
√
√
√
√
√
√
SIP Account
--User Options
--Register Status
--Activation
--Label
--Display Name
--Register Name
--User Name
--Password
--SIP Server
--Server Option
--Registrar Port
--Outbound Status
--Outbound Proxy
--Backup Outbound Proxy
--NAT Traversal
--STUN Status
--STUN Server
√
√
√
√
√
√
√
√
√
√
√
√
√
√
Note
The table above lists most of the feature options. Please refer to the relevant sections for
more information.

Overview
9
Documentation
The following table shows documentation available for the Xorcom XP0150G IP phone.
Name
Contents
Where found
Format/ Language
Quick Installation
Guide
Basic set up of the
phone
In the
package
PDF/English
Quick Reference
Guide
Basic call features
and phone
customizations
In the
package
PDF/English
User Guide
Phone/Web user
interface settings
Basic call features
and advanced
phone features
CD attached
in the package
PDF/English

User Guide Xorcom XP0150G IP Phone
10

Getting Started
11
Getting Started
This chapter provides basic installation instructions and information for obtaining the
best performance with the Xorcom XP0150G IP phone. The topics include:
Packing List
Phone Installation
Phone Initialization
Phone Status
Basic Network Settings
Registration
Idle Screen
If you require additional information or assistance with your new phone, contact your
system administrator.
Packing List
The following components are included in your Xorcom XP0150G IP phone package:
Xorcom XP0150G IP phone
Phone Stand
XP0150G

User Guide Xorcom XP0150G IP Phone
12
Power Adapter
Handset & Handset Cord
Ethernet Cable
Quick Installation Guide & Quick Reference Guide
Check the list before installation. If you find anything missing, contact your system
administrator.
Power Adapter (Optional)

Getting Started
13
Phone Installation
If your phone is already installed, proceed to Phone Initialization on page 15.
This section introduces how to install the phone with the components in the packing list:
Attach the Stand
Connect the Handset and optional Headset
Connect the Network and Power
1) Attach the Stand:
a. Deskmount Method:
b. Wallmount Method:

User Guide Xorcom XP0150G IP Phone
14
2) Connect the Handset and optional Headset:
Note
3) Connect the Network and Power:
You have two options for power and network connections. Your system administrator
will advise you which one to use.
AC power
Power over Ethernet (PoE)
AC Power
To connect the AC power:
1. Connect the DC plug on the power adapter to the DC5V port on the phone and
connect the other end of the power adapter into an electrical power outlet.
A headset is not provided in the packing list. Contact your system administrator for more
information.
Other manuals for XP0150G
2
Table of contents
Other Xorcom IP Phone manuals

Xorcom
Xorcom XP0020 User manual

Xorcom
Xorcom UC926 User manual

Xorcom
Xorcom UC924 User manual

Xorcom
Xorcom XP0100 User manual

Xorcom
Xorcom UC902S User manual

Xorcom
Xorcom UC912G User manual

Xorcom
Xorcom CXR1000 User manual

Xorcom
Xorcom UC505U User manual

Xorcom
Xorcom XP0120P Manual

Xorcom
Xorcom XP0100 Original operating instructions
Popular IP Phone manuals by other brands

Polycom
Polycom Polycom SoundPoint IP 430 Quick tip

Alcatel-Lucent
Alcatel-Lucent OpenTouch troubleshooting guide

Nortel
Nortel 1210 user guide

Mitel
Mitel MiVoice 6940 Quick reference guide

Panasonic
Panasonic KXDT346 - DIGITAL PROPRIETARY TELEPHONE Specifications

Alcatel-Lucent
Alcatel-Lucent 4028 quick start guide