manuals.online logo
Brands
  1. Home
  2. •
  3. Brands
  4. •
  5. Yealink
  6. •
  7. IP Phone
  8. •
  9. Yealink SIP-T41S Instruction manual

Yealink SIP-T41S Instruction manual

1Quick User Guide—Yealink SIP-T41S and T42S
Quick User Guide for 8x8 Virtual Oce
This guide provides information you need to begin using
your phone quickly.
Phone Views
There are three main views available:
• Menu View: For the Menu view, press the Menu
softkey.
• Calls View: The Calls view shows on the screen
when your phone has a call.
• Lines View (default): You can see the Lines view on
the idle screen. The idle screen displays the current
account, the time and date, and four softkeys.
Menu View
The Menu view lets you access the Status, Features,
Settings, Message, History, and Directory screens.
You can use the right, left, up, and down arrow keys to
highlight the menus, then press the Enter softkey to
access phone functions.
Lines View
The Lines view displays your phone line(s), monitored
lines (if BLF keys are available), the time and date, and
softkeys in the softkey area.
If your phone is idle, you can press the line key to access
the dialer.
Calls View
• If your phone has calls, the screen indicates the
number of calls you have, and their status as active
or held.
• If a phone line has a call (active or held), the icon
is shown next to the line.
• If a phone line has one or more held calls, the screen
shows the icon.
About Calls
Only one call can be active at a time.
You can use the handset, speakerphone, or headset for
calls. During a call, you can change modes by picking up
the handset, or by pressing or .
Placing Calls
There are three ways to place calls:
• Pick up the handset.
• With the handset on-hook, press .
• With the headset connected, press to activate
headset mode.
Enter the desired number, and then press the Send
softkey to dial out.
You can also dial from the Lines view: Press the phone
line key, enter the phone number, and press the Send
softkey.
Answering Calls
Using the handset:
Pick up the handset.
Using the speakerphone:
Press .
Using the headset:
Press .
Ending Calls
Using the handset:
• Press the End Call softkey.
• Hang up the handset.
Yealink SIP-T41S and T42S
Enterprise IP Phones | Quick User Guide
2Quick User Guide—Yealink SIP-T41S and T42S
Using the speakerphone:
• Press the End Call softkey.
• Press if you began the call on speakerphone.
Otherwise, only switches between the
speakerphone and the handset.
Using the headset:
Press the End Call softkey.
Holding Calls
To place a call on hold:
Press the Hold softkey during a live call.
To resume a call:
If there is only one call on hold, press the Resume
softkey.
If there is more than one call on hold:
1. Press or to select the desired call.
2. Press the Resume softkey.
Parking Calls
1. To park a live call, press the Park softkey.
2. Listen to the message which identifies the
extension the call is parked on.
3. Notify the intended recipient(s).
To pick up the parked call, the recipient dials the
extension that the call was parked on.
Transferring Calls
You can transfer a call in the following ways:
Attended Transfer (Warm Transfer)
1. Press the Transfer softkey to place a call on hold.
2. Enter the number you want to transfer to, then
press OK.
3. Press the Transfer softkey after the second party
answers.
Blind Transfer
Do one of the following:
1. Press the Transfer softkey to hold on a call.
2. Enter the number you want to transfer to.
3. Press the Transfer softkey.
OR
1. Press the BXfer softkey during a live call.
2. Enter the extension number that you want to
transfer to.
3. Press OK.
Semi-Attended Transfer
1. Press the Transfer softkey during a call.
2. Enter the number you want to transfer to, then
press OK.
3. Press the Transfer softkey when you hear the
confirming ring.
Transferring Live Calls to Voicemail
1. Press the xfrVM softkey during a live call.
2. Dial the extension number, and press #.
Forwarding Calls
8x8 recommends using call forwarding in the Virtual
Oce desktop app instead of phone-based call
forwarding. This way, your call forwarding instructions
are stored online instead of on your phone. If you set
your call forwarding rules on your phone, they will not be
in eect if your phone’s Internet connection fails.
To enable online call forwarding (Virtual Oce):
1. Log in to the Virtual Oce desktop app.
2. In the More tab, go to Settings.
3. Depending on your subscription, go to:
• Account Settings > Call forwarding rules.
• Account Settings > Call Forwarding > My Rules.
4. Click + Add new rule or update your existing call
forwarding rules, and save.
You can return to the Virtual Oce desktop app at any
time to update your call forwarding rules.
To enable call forwarding (phone-based):
1. Press the Menu softkey when the phone is idle.
2. Go to Features > Call Forward.
3. Select the desired forwarding type:
Always Forward: forwarded unconditionally.
Busy Forward: forwarded when the phone is busy.
No Answer Forward: forwarded if not answered
after a period of time.
4. Press or to enable or disable call forwarding.
For call forwarding on no answer, you can also press
or to select the desired ring time to wait
before forwarding from the After Ring Time field.
5. Enter the number you want to forward to. For
example, 555 or voicemail.
6. Press the Save softkey to accept the changes.
3Quick User Guide—Yealink SIP-T41S and T42S
Placing Intercom Calls
To place an intercom call when the target phone is idle:
1. Press the Intercom softkey when the phone is idle.
2. Enter the number you wish to intercom to, and then
press OK. The called destination plays a tone and
automatically answers the call via speakerphone.
3. To end the intercom call, press the End Call softkey.
LCR - Last Call Return
Press the LCR softkey when the phone is idle, or after
you pick up the handset.
Placing Conference Calls
To set up a local conference:
1. Press the Conf softkey during a live call. The call is
placed on hold.
2. Enter the number of the second party, and then
press the Send softkey.
3. Press the Conf softkey again when the second
party answers. All parties are now joined in the
conference.
During the local conference call, you can do the
following:
• Press the Hold softkey to place the conference on
hold.
• Press the Split softkey to split the conference call
into two individual calls on hold.
• Press the Manage softkey, and then press or
to select the desired party. Then:
– Press the Far Mute softkey to forbid the party from
speaking. The muted party can hear everyone, but
no one can hear the muted party.
– Press the Remove softkey to remove the party
from the conference call.
– Press the New Call softkey to place a new call.
– Press the Back softkey to return to the previous
screen.
• Press to mute the conference call.
• Press the End Call softkey to drop the conference
call.
To set up a conference bridge:
If you are the first person who wishes to create a
conference:
1. Press the Conf softkey when the phone is idle. You
can also pick up the handset first, then select Conf
to place the call on your handset.
2. Follow the IVR to create a conference. Note down
the conference ID for future use.
If you wish to join an existing conference:
1. Press the Conf softkey when the phone is idle. You
can also pick up the handset first, then select Conf
to place the call on your handset.
2. Follow the IVR to enter the conference ID. You are
now joined in the conference.
Viewing Recent Calls
While viewing recent calls, you can manage caller and
callee entries in your call history.
1. Press the History softkey when the phone is idle,
and press or to scroll through the list.
2. Select an entry from the list. You can do the
following:
• Press the Send softkey to call the entry.
• Press the Delete softkey to delete the entry from
the list.
• If you press the Option softkey, you can:
– Select Detail to view entry details.
– Select Add to Contact to add the entry to the
local directory.
– Select Add to Blacklist to add the entry to the
blacklist.
– Select Delete All to delete all entries from the list.
Managing the Contact Directory
To access your directory:
1. Press the Dir softkey when the phone is idle.
2. Select the desired contact group.
3. Press the Enter softkey.
To add a contact:
1. Go to your directory.
2. Press the Add softkey to add a contact.
3. Enter the contact’s information.
4. Press the Add softkey to accept the change.
4Quick User Guide—Yealink SIP-T41S and T42S
To edit a contact:
1. Go to your directory.
2. Press or to select the desired entry.
3. Press the Option softkey.
4. Select Detail, and edit the contact information.
5. Press the Save softkey to accept the change.
To delete a contact:
1. Go to your directory.
2. Press or to select the desired entry.
3. Press the Option softkey.
4. Select Delete.
5. Press the OK softkey at the deletion prompt.
Listening to Voicemail
If you have new voice messages, a notification on the
idle screen indicates that one or more voice messages
are waiting.
To listen to voice messages:
1. Press or the Connect softkey.
2. Follow the IVR to listen your voice messages.
Muting the Microphone
• Press to mute the microphone during a call.
• Press again to un-mute the call.
Using Do Not Disturb (DND)
Press the DND softkey when the phone is idle. The
icon on the status bar indicates that DND is enabled.
Adjusting Volume
• Press during a call to adjust the
receiver volume of the handset/speakerphone/
headset.
• Press when the phone is idle to adjust
the ringer volume.
Accessing Call Queues (If Enabled)
1. Press the CQueue softkey when the phone is idle.
2. Follow the IVR to log in to or out of the call queue.
Updating Ringtones
1. Press the Menu softkey when the phone is idle.
2. Go to Settings > Basic Settings >Sound >Ring
Tones.
3. Press or to select Common AES or the
desired account, and then press the Enter softkey.
4. Press or to select the desired ringtone.
5. Press the Save softkey to accept the change.
Recording Calls (If Enabled)
1. Press the Rec softkey during a call. A message
announces that call recording has started.
2. Press the Rec softkey again to stop recording. A
message announces that call recording has ended.
Speed Dial
To configure speed dial via line key:
1. Long-press the desired line key when the phone is
idle.
2. Press or to select the desired party.
3. Enter the contact details and Favorite Index.
4. Press the Add softkey to save the contact.
5. The contact is now configured for speed dial.
To configure speed dial via contact directory:
1. Press the Dir softkey.
2. Press the Add softkey to add a contact.
3. Press or to select the desired party.
4. Enter the contact details and Favorite Index.
5. Press the Add softkey to save the contact.
6. The contact is now configured for speed dial.
Using Barge-Monitor-Whisper (If Enabled)
Monitor
1. Dial *22 or *BA before lifting the handset.
2. Press Send or Call.
3. At the prompt, enter the extension you want to
monitor. You may be prompted for an access code.
4. Enter the access code to begin monitoring.
Important: Dial *22 before lifting the handset.
Whisper
1. To whisper to the agent that you are already
monitoring, dial *9 or *W.
2. To exit the whisper, mute the supervisor’s audio,
and revert to silent monitor mode, dial *6 or *M.
Barge
1. To barge into and join the call that you are already
monitoring, dial *5 or *J.
2. To exit the barge and revert to silent monitor mode,
dial *6 or *M.
Barge Direct
To barge directly into a call without monitoring first, dial
*23, then dial the desired extension number. You are
now immediately in a 3-way conference call with the
active call.
5Quick User Guide—Yealink SIP-T41S and T42S © 2019. The 8x8 logo is a registered trademark of 8x8, Inc.
www.8x8.com
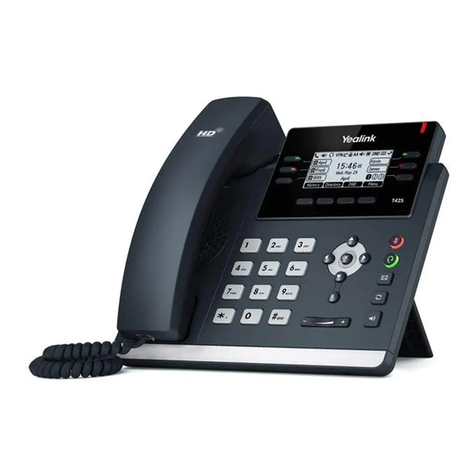
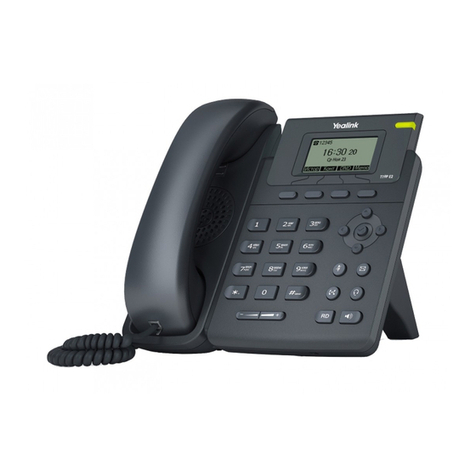
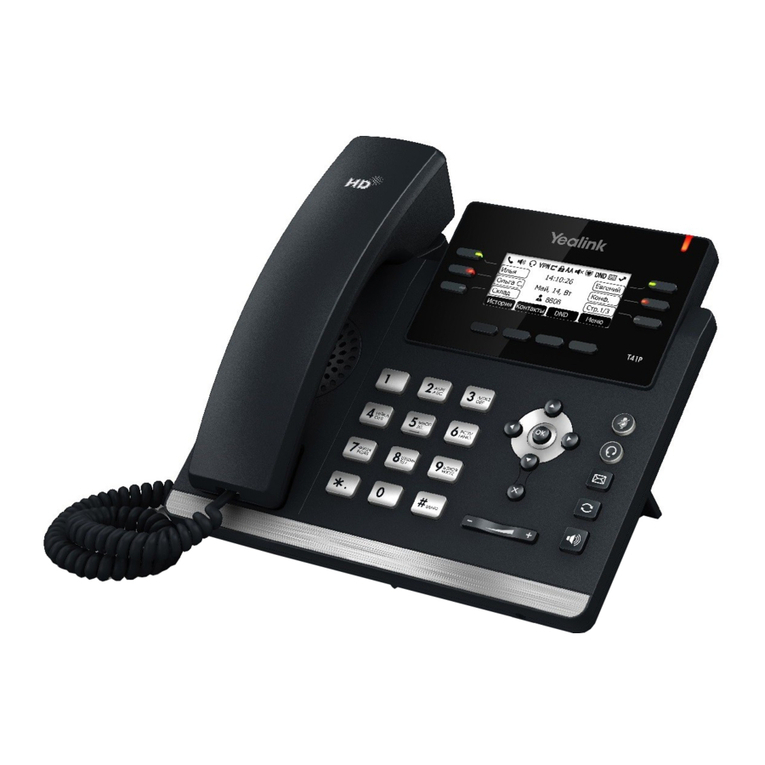
Item Description
1 LCD screen
Shows information about calls, messages, softkeys, time, date,
and other relevant data:
• Default account
• Call information (caller ID, call duration)
• Icons (for example, )
• Missed call text or second incoming caller information
• Prompt text (for example, “Saving config file!”)
• Time and date
2Power indicator
LED
Indicates call status, message status, and phone system status:
• Incoming call: rapid flashing
• Received voicemail or text message: slow flashing
3 Line keys Use these keys to activate up to six accounts and assign
various features.
4
(Mute key) Toggles and indicates the mute feature.
(Headset key) Toggles and indicates headset mode.
(Message key) Accesses voicemails.
(Redial key) Redials a previously-dialed number.
5 Speakerphone key Toggles and indicates the hands-free (speakerphone) mode.
6 Volume key Adjusts the volume of the handset, headset, speaker, or ringer.
7 Keypad Provides the digits, letters, and special characters in context-
sensitive applications.
8
Scroll through the displayed information.
Confirms actions or answers incoming calls.
Cancels actions or rejects incoming calls.
9 Softkeys Label automatically to identify their context sensitive features.
10 Speaker Provides hands-free (speakerphone) audio output.
11 Reversible tab
Secures the handset in the handset cradle when the IP phone
is mounted vertically. For more information on adjusting
the reversible tab, refer to the Yealink Wall Mount Quick
Installation Guide for Yealink IP Phones.
12 Hookswitch
• When the handset is picked up from the handset cradle, the
hookswitch bounces and the phone connects to the line.
• When the handset is placed in the handset cradle, the
phone disconnects from the line.

Other manuals for SIP-T41S

6

This manual suits for next models

1

Other Yealink IP Phone manuals

Yealink Yealink SIP-T46G User manual

Yealink

Yealink Yealink SIP-T46G User manual

Yealink SIP-T46S User manual

Yealink

Yealink SIP-T46S User manual

Yealink Yealink SIP-T28P User manual

Yealink

Yealink Yealink SIP-T28P User manual

Yealink Telkom W52P User manual

Yealink

Yealink Telkom W52P User manual

Yealink T26 User manual

Yealink

Yealink T26 User manual

Yealink SIP-T54W User manual

Yealink

Yealink SIP-T54W User manual

Yealink MP54 User manual

Yealink

Yealink MP54 User manual

Yealink SIP-T57W User manual

Yealink

Yealink SIP-T57W User manual

Yealink SIP-T43U User manual

Yealink

Yealink SIP-T43U User manual

Yealink SIP-T2XP User manual

Yealink

Yealink SIP-T2XP User manual

Yealink T48 User manual

Yealink

Yealink T48 User manual

Yealink T58A Teams User manual

Yealink

Yealink T58A Teams User manual

Yealink SIP-T32G User manual

Yealink

Yealink SIP-T32G User manual

Yealink VP530 Operating instructions

Yealink

Yealink VP530 Operating instructions

Yealink Yealink SIP-T20P User manual

Yealink

Yealink Yealink SIP-T20P User manual

Yealink SIP-T2XP User manual

Yealink

Yealink SIP-T2XP User manual

Yealink SIP-T48S Instruction manual

Yealink

Yealink SIP-T48S Instruction manual

Yealink T54W Instruction manual

Yealink

Yealink T54W Instruction manual

Yealink T20P User manual

Yealink

Yealink T20P User manual

Yealink T54W User manual

Yealink

Yealink T54W User manual

Yealink T20P User manual

Yealink

Yealink T20P User manual

Yealink W73H User manual

Yealink

Yealink W73H User manual

Yealink Telkom W52P User manual

Yealink

Yealink Telkom W52P User manual

Yealink T5 Series Service manual

Yealink

Yealink T5 Series Service manual

Popular IP Phone manuals by other brands

Cisco 6961 - Unified IP Phone Standard VoIP Guide to using

Cisco

Cisco 6961 - Unified IP Phone Standard VoIP Guide to using

Gigaset C590 ip manual

Gigaset

Gigaset C590 ip manual

Polycom VVX 4 Series manual

Polycom

Polycom VVX 4 Series manual

D-Link DPH-150S Quick installation guide

D-Link

D-Link DPH-150S Quick installation guide

Polycom SoundStation IP 6000 Quick user guide

Polycom

Polycom SoundStation IP 6000 Quick user guide

Aastra 53i IP Phone installation guide

Aastra

Aastra 53i IP Phone installation guide

Cisco Webex 840 Troubleshooting

Cisco

Cisco Webex 840 Troubleshooting

Polycom SoundPoint IP 550 Quick reference guide

Polycom

Polycom SoundPoint IP 550 Quick reference guide

Allworx 9292E Phone guide

Allworx

Allworx 9292E Phone guide

Avaya IP Office 1416 Quick reference guide

Avaya

Avaya IP Office 1416 Quick reference guide

Grandstream Networks Grandstream GXP-1200 quick start guide

Grandstream Networks

Grandstream Networks Grandstream GXP-1200 quick start guide

POPP Cummunicatios SPA 500S user guide

POPP Cummunicatios

POPP Cummunicatios SPA 500S user guide

Avaya 9601 quick reference

Avaya

Avaya 9601 quick reference

Cortelco C60 user manual

Cortelco

Cortelco C60 user manual

Avaya J169 Using instructions

Avaya

Avaya J169 Using instructions

Telekonnectors Galaxy 1000 PLUS Quick installation guide

Telekonnectors

Telekonnectors Galaxy 1000 PLUS Quick installation guide

Genesys AudioCodes 420HD user guide

Genesys

Genesys AudioCodes 420HD user guide

Fanvil X7 user manual

Fanvil

Fanvil X7 user manual

manuals.online logo
manuals.online logoBrands
  • About & Mission
  • Contact us
  • Privacy Policy
  • Terms and Conditions

Copyright 2025 Manuals.Online. All Rights Reserved.