manuals.online logo
Brands
  1. Home
  2. •
  3. Brands
  4. •
  5. Yealink
  6. •
  7. Telephone
  8. •
  9. Yealink T42G User manual

Yealink T42G User manual

Other manuals for T42G

11

Other Yealink Telephone manuals

Yealink CAM50 User manual

Yealink

Yealink CAM50 User manual

Yealink SIP-T58W User manual

Yealink

Yealink SIP-T58W User manual

Yealink W60P Telesystem User manual

Yealink

Yealink W60P Telesystem User manual
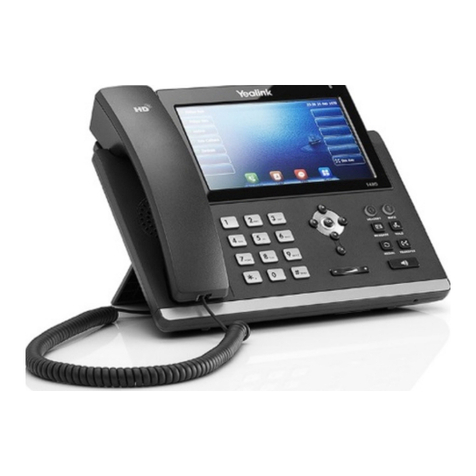
Yealink T23 User manual

Yealink

Yealink T23 User manual

Yealink W73P User manual

Yealink

Yealink W73P User manual

Yealink SIP-T41S User manual

Yealink

Yealink SIP-T41S User manual

Yealink T Series User instructions

Yealink

Yealink T Series User instructions

Yealink T33G User manual

Yealink

Yealink T33G User manual

Yealink Telkom W52P User manual

Yealink

Yealink Telkom W52P User manual

Yealink T46S Skype for Business User manual

Yealink

Yealink T46S Skype for Business User manual

Yealink T27 Series User manual

Yealink

Yealink T27 Series User manual

Yealink SIP-T46S User manual

Yealink

Yealink SIP-T46S User manual
Yealink T58A-Skype for Business User manual

Yealink

Yealink T58A-Skype for Business User manual

Yealink T42 User manual

Yealink

Yealink T42 User manual

Yealink CP965 User manual

Yealink

Yealink CP965 User manual

Yealink T57W User manual

Yealink

Yealink T57W User manual

Yealink EXP40 Instruction manual

Yealink

Yealink EXP40 Instruction manual

Yealink SIP-T53W User manual

Yealink

Yealink SIP-T53W User manual

Yealink T46G Skype For Business Edition User guide

Yealink

Yealink T46G Skype For Business Edition User guide

Yealink VP530 User manual

Yealink

Yealink VP530 User manual

Yealink T67-LTE User manual

Yealink

Yealink T67-LTE User manual

Yealink T21 User manual

Yealink

Yealink T21 User manual

Yealink SIP-T48U User manual

Yealink

Yealink SIP-T48U User manual

Yealink Yealink SIP-T48G User manual

Yealink

Yealink Yealink SIP-T48G User manual

Popular Telephone manuals by other brands

Philips BaseLine Pro manual

Philips

Philips BaseLine Pro manual

V-tech i6772 user guide

V-tech

V-tech i6772 user guide

BT FREELANCE XD 5100 quick start guide

BT

BT FREELANCE XD 5100 quick start guide

Uniden 1360 user guide

Uniden

Uniden 1360 user guide

Fanvil D800 user manual

Fanvil

Fanvil D800 user manual

Avaya IP500 user guide

Avaya

Avaya IP500 user guide

NEC Univerge SV9100 installation manual

NEC

NEC Univerge SV9100 installation manual

Amanda MiniSOHO Installation and programming manual

Amanda

Amanda MiniSOHO Installation and programming manual

Hitachi SelecSet 900 Series user guide

Hitachi

Hitachi SelecSet 900 Series user guide

mPTech HAMMER BS21 quick start guide

mPTech

mPTech HAMMER BS21 quick start guide

NEC 2000IVX user guide

NEC

NEC 2000IVX user guide

ooma Phone Genie quick start guide

ooma

ooma Phone Genie quick start guide

Siemens Gigaset S450 user guide

Siemens

Siemens Gigaset S450 user guide

Clarity RC100 operating instructions

Clarity

Clarity RC100 operating instructions

GE 2-9480 user guide

GE

GE 2-9480 user guide

Geemarc PHOTOPHONE 155 user guide

Geemarc

Geemarc PHOTOPHONE 155 user guide

Interquartz Gemini IQ333 operating instructions

Interquartz

Interquartz Gemini IQ333 operating instructions

SSS Siedle HT 840-0 operating instructions

SSS Siedle

SSS Siedle HT 840-0 operating instructions

manuals.online logo
manuals.online logoBrands
  • About & Mission
  • Contact us
  • Privacy Policy
  • Terms and Conditions

Copyright 2025 Manuals.Online. All Rights Reserved.

Head Office:
Level 1 21 Shierlaw Ave Canterbury 3126, Victoria, Australia
1300 0 JINGL
1300 0 54645
www.jingl.com.au
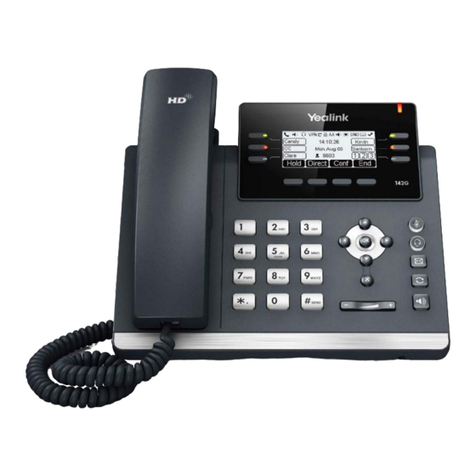
Yealink T42G
Head Office:
Level 1 21 Shierlaw Ave Canterbury 3126, Victoria, Australia
1300 0 JINGL
1300 0 54645
www.jingl.com.au
Configuring Yealink T42G
1. View and record the unique MAC address of the base station which can be found at
the rear of the base station. (Alternatively via the Handset)
Network Settings
You can configure the base station to obtain network settings in one of the following ways:
DHCP: By default, the phone attempts to contact a DHCP server in your network to obtain the valid
network settings, e.g., IP address, subnet mask, gateway address and DNS address
STATIC: If the phone cannot contact a DHCP server for any reason, you need to configure the IP
address, subnet mask, gateway address, primary DNS address and secondary DNS address for the
phone manually.
Head Office:
Level 1 21 Shierlaw Ave Canterbury 3126, Victoria, Australia
1300 0 JINGL
1300 0 54645
www.jingl.com.au
For the purpose of this document we will accept that DHCP is functional and network settings are
automatically assigned
For further details refer to Yealink Documentation
http://www.yealink.com/DocumentDownload.aspx?Cateld=142&flag=142
2. Using the Handset obtain and record the IP Address. You will require the IP Address in
order to login to Phone Admin Web Menu to configure Auto Provisioning of Phone.
On the Handset Press the Menu button; Item1. Status Will appear, press the enter
button again
Handset screen will present IP address and MAC address
Head Office:
Level 1 21 Shierlaw Ave Canterbury 3126, Victoria, Australia
1300 0 JINGL
1300 0 54645
www.jingl.com.au
3. Logon to the Jingl web portal, using specific customer domain URL
https://’customer’.jingl.com.au
Enter your User Name and Password
Presented with Dashboard
Head Office:
Level 1 21 Shierlaw Ave Canterbury 3126, Victoria, Australia
1300 0 JINGL
1300 0 54645
www.jingl.com.au
4. Select and click the settings menu
5. Click on “Add new”
In general tab, choose and enter extension number and a display name
Head Office:
Level 1 21 Shierlaw Ave Canterbury 3126, Victoria, Australia
1300 0 JINGL
1300 0 54645
www.jingl.com.au
6. Select and expand Provisioning tab. Enter the MAC address of the phone
7. Select and expand Hardware Type. Select the phone model
Head Office:
Level 1 21 Shierlaw Ave Canterbury 3126, Victoria, Australia
1300 0 JINGL
1300 0 54645
www.jingl.com.au
Click Add to finish your extension configuration.
8. Use a compatible browser and login to Phone Web Admin Menu using previous
recorded phone IP address. Log in with default Username: admin and default
Password: admin. Then click Confirm
Head Office:
Level 1 21 Shierlaw Ave Canterbury 3126, Victoria, Australia
1300 0 JINGL
1300 0 54645
www.jingl.com.au
9. Select Settings, Then Select Auto Provision
Head Office:
Level 1 21 Shierlaw Ave Canterbury 3126, Victoria, Australia
1300 0 JINGL
1300 0 54645
www.jingl.com.au
10. In the ‘Server URL’ Tab – Type:
“http://tftp.jingl.com.au”
Select Confirm to save Provisioning Server details
Then Select and click ‘Autoprovision Now’ Tab
Head Office:
Level 1 21 Shierlaw Ave Canterbury 3126, Victoria, Australia
1300 0 JINGL
1300 0 54645
www.jingl.com.au
11. Click OK to acknowledge to autoprovision
12. Phone will automatically restart for the new settings to take place
Will download and configure all settings from the provisioning server as well as any
necessary firmware files.