ZAPTEC Pro User manual

ZAPTEC Pro
USER MANUAL
MANUEL D’UTILISATION
BEDIENUNGSANLEITUNG
MANUALE D’USO
GEBRUIKERSHANDLEIDING


3
EN
Congratulationsonyourpurchase
ofa ZAPTECPro!
A Norwegian charging system. The system is
compatible with all power grids and with all types of
rechargeable vehicles.*
ZAPTEC Pro enables you to charge your vehicle safely,
VLPSO\DQGHIvFLHQWO\7KHFKDUJLQJVWDWLRQGLVWULEXWHVWKH
available charging current between a number of charging
VWDWLRQV
Use your ZAPTEC Pro with a charging pass or through our
=$37(&DSSWRDSSURYHXVHUVLQWKHLQVWDOODWLRQ7KLVZLOO
provide you with an overview of your charging history via
RXUFORXGEDVHGVHUYLFH=$37(&3RUWDO
When you purchase ZAPTEC Pro, you have purchased a
charging station which regularly receives software
updates from our cloud-based service to ensure that your
FKDUJHULVDOZD\VXSGDWHG
* Provided that the vehicle supports the type of power grid
concerned.
7KLVXVHUPDQXDOLVLQWHQGHGIRUXVHUVRIWKHFKDUJLQJVWDWLRQRQO\)RULQIRUPDWLRQRQKRZWR
FRQvJXUHDQGVHWXSWKHFKDUJHUVHHRXULQVWDOODWLRQPDQXDO<RXZLOOvQGWKHODWHVWYHUVLRQRIWKLV
LQVWDOODWLRQPDQXDODW]DSWHFFRPVXSSRUW
7KHYHUVLRQQXPEHUIRUWKLVXVHUPDQXDOLVVKRZQRQWKHODVWSDJH
i

4
Table of Contents
Safety Instructions 5
7HFKQLFDO6SHFLvFDWLRQV
ZAPTEC Pro 8
Status Indicators on the Charging Station 8
Cable type for ZAPTEC Pro 9
How to Start Charging 9
How to Start Charging with Authentication 9
How to Stop Charging 10
Connecting a Charging Pass to your User 10
How to Monitor the Charging Station (ZAPTEC Portal) 10
Adding Users to the Installation 10
Locking the Charging Cable for the Charging Stations 11
Set Lighting Strength for the Status Indicator 11
Reading Error Codes 11
Troubleshooting 12
&KHFNLQJWKH)XVHVLQWKH&KDUJLQJ6WDWLRQ
Storage and Maintenance 14
Warranty 15
Support and Repairs 15

5
EN
Safety Instructions
WARNING!
Before using or maintaining this product, it is important to
read the following safety instructions. If you fail to follow and
invalidate the warranty and Zaptec Charger AS will not be liable
for any claims for compensation.
!Read these instructions carefully and examine the equipment
to familiarise yourself with the product prior to use.
!This equipment may only be installed, repaired and main-
!All applicable local, regional and national regulations must
be followed when installing, repairing and maintaining this
equipment.
!Do not use this product if it is damaged. See the section
Support and Repairs for further information.
!Do not use an extension lead on the charging cable.
!Do not touch the plugs or insert foreign objects into them.
!Do not insert measuring pins, wires or anything else into the
quick-release connector on the charging station. Contact
your electrician for testing.

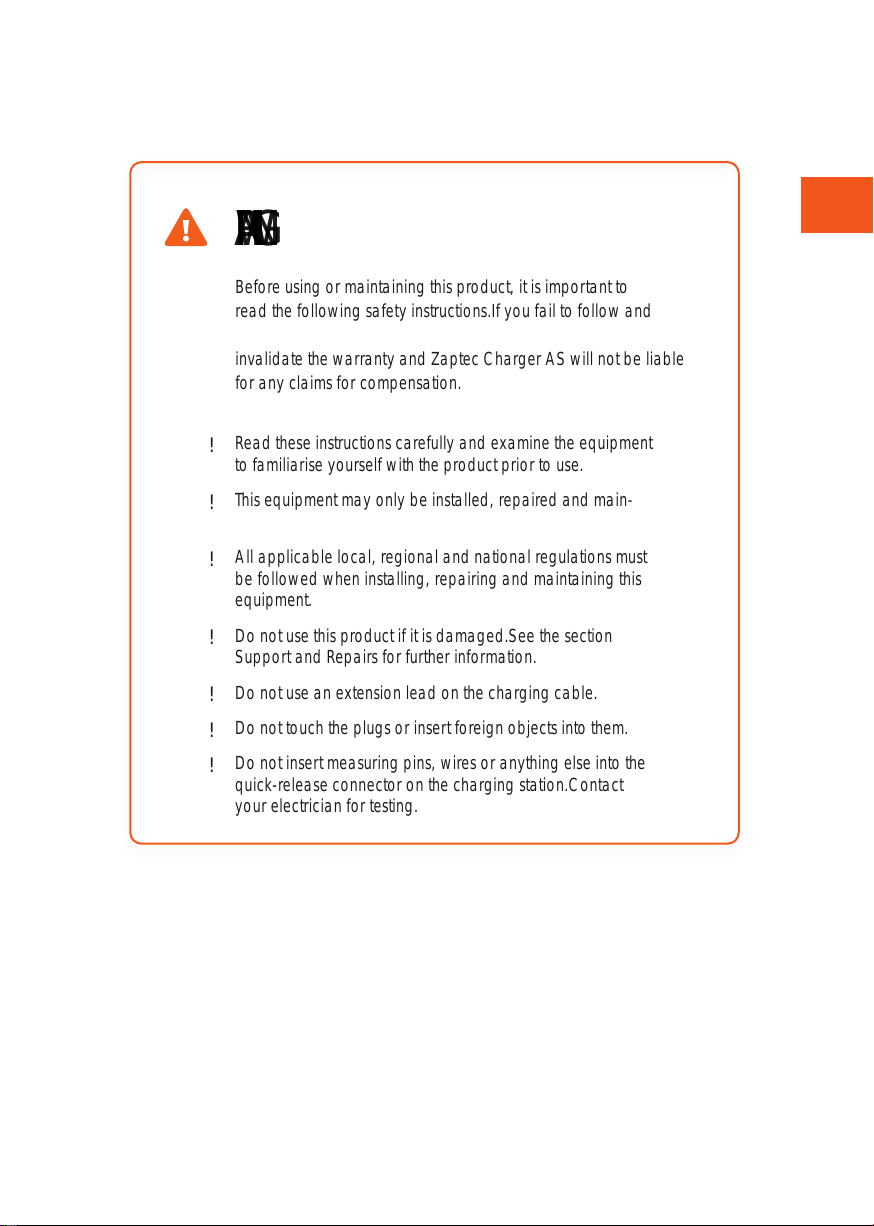
ZAPTEC Pro is an alternating current wall
or column-mounted charging station in
DFFRUGDQFHZLWK,(&(96(PRGH
Dimensions and weight
H: 392 mm W: 258 mm D: 112 mm
:HLJKWDSSUR[NJLQFOXGLQJEDFNSODWH
Installation circuit
0D[$VHULDOIXVHRQLQVWDOODWLRQFLUFXLW
IRUFKDUJLQJVWDWLRQV
Backplate connection box
&DEOHFURVVVHFWLRQPP
2
&DEOHGLDPHWHUPP2
Installation network, Voltages
TN, IT and TT
9$&s
9$&s
Max. current and charging output
N:DW$SKDVH
N:DW$SKDVHDSSOLFDEOHWR71
networks only)
5W at standby
Fuses
Built-in 3 x 40A fuses type C
Charging point
(&7\SH)HPDOHZLWK
integrated self-closing cover
Earth fault protection
Built-in type B RCD
Calibration and a self-test are carried out
EHIRUHWKHVWDUWRIHYHU\FKDUJLQJF\FOH5&’
can be automatically reset by disconnecting
IURPWKHFKDUJLQJFRQQHFWRU
Integrated Power Meter
0,’WHVWHGDQGFDOLEUDWHG(1
Theft protection
The front cover of the ZAPTEC Pro can only be
RSHQHGXVLQJDVSHFLDOWRRO7KHFKDUJLQJFDEOH
can be locked permanently to the charging
VWDWLRQ
Load balancing
Together with other ZAPTEC Pro charging
stations, available power in the installation
will be distributed automatically between the
GHYLFHVDQGSKDVHV
Phase balancing
The charging station will dynamically select any
single phase or 3-phase in a system with other
ZAPTEC Pro charging stations, depending on
WKHDYDLODEOHSRZHU
Communicationsinterfaceandcloud
connection/network
4GLTE-M1(subscriptionrequired)
:L)L*+],(((EJQFKDQQHOV
3RZHUOLQH3/&+RPH3OXJ*UHHQ3+<p
0ELWV
Identification and configuration
%OXHWRRWK/RZ(QHUJ\%/(
5),’1)&UHDGHU0LIDUH&ODVVLF7\SH$
PLC for vehicle interface for future services as
GHvQHGE\,62
Standards and approvals
CE compliance in accordance with the Radio
Equipment Directive
(8DQG52+6’LUHFWLYH
(8DQGFRPSOLDQFHZLWK,(&789
6’DQG,(&
Temperature range
r&WRr&
Degree of protection
IP54, indoor and outdoor use
IK10 impact protection
8/9%wDPPDELOLW\UDWLQJ
89UHVLVWDQW
Electrical protection
3URWHFWLRQFODVV,,N9$&DQG
N9LPSXOVHLQVXODWLRQ
2YHUYROWDJHFDWHJRU\,,,N9
Integration services
Third-party integration alternatives
(API, Webhooks)
Technical Specifications

7
EN
2&33-
Message subscription
$LVDYDLODEOHEXWPD\EHUHVWULFWHGE\
the condition of the vehicle’s battery and
WHPSHUDWXUHLQFUHDVHVDWWKHFKDUJLQJVWDWLRQ

8
ZAPTEC Pro
Status Indicators on the Charging Station
The status of the charging station is shown by the status indicator (Z) using the following colours:
Status indicator (Z)
5),’VRQH
Electrical outlet
,(&0RGH7\SH
Self-closing protective cover
2SHQWKHIURQWFRYHUKHUH
SmartKey
SmartKey Column
Colour Continuous )ODVKLQJ
GREEN Clear
Charging complete $XWKHQWLFDWLRQ2.
BLUE Connected to a vehicle and
ready to charge Charging
RED Error (see the Troubleshooting
section for further details) Authentication failed (see the Troubleshooting
section for further details)
YELLOW System starting up
Awaiting authentication
Awaiting ZAPTEC Portal
9HKLFOHDGGHGWRTXHXH
PURPLE )LUPZDUHXSGDWLQJ

9
EN
Cable
ZAPTEC Pro needs a Type 2 charging point in order for you to be able to charge
How to Start Charging
&KHFNWKDWWKHVWDWXVLQGLFDWRU=LVLOOXPLQDWHGJUHHQ
5HPRYHWKHSURWHFWLYHFRYHUWRJDLQDFFHVVWRWKHHOHFWULFDORXWOHW
$WWDFKWKHFKDUJLQJFRQQHFWRUWRWKH=$37(&3UR
$WWDFKWKHFKDUJLQJFRQQHFWRUWR\RXUYHKLFOH
7KHVWDWXVLQGLFDWRUZLOOwDVKEOXHRQFHFKDUJLQJKDVVWDUWHG
Charging current may vary depending on the capacity of the installation and the number of
DFWLYHFKDUJLQJVWDWLRQV
i
How to Start Charging with Authentication
&KDUJLQJZLWKDXWKHQWLFDWLRQUHTXLUHV\RXWRKDYHUHJLVWHUHGDXVHUSURvOHYLD=$37(&3RUWDO
DQGIRU\RXUXVHUSURvOHWRKDYHKDGDFFHVVJUDQWHGWRWKHPYLD=$37(&3RUWDOWRWKHFKDUJLQJ
VWDWLRQIDFLOLW\7KHFKDUJLQJSDVVLVOLQNHGWR\RXUXVHU
)RUGHWDLOVRQKRZWRVHWWKLVXSVHHWKHVHFWLRQ&RQQHFWLQJD&KDUJLQJ3DVVWR<RXU8VHU
7KHUHFRPPHQGHGDXWKHQWLFDWLRQPHWKRGLVWRXVHDFKDUJLQJSDVV
Start charging with an authentication RFID tag/charging card:
)ROORZVWHSVLQ+RZWR6WDUW&KDUJLQJ
7KHVWDWXVLQGLFDWRU=ZLOOQRZwDVK\HOORZWRLQGLFDWHWKDWLWLVDZDLWLQJDXWKHQWLFDWLRQ
+ROGWKHFKDUJLQJSDVVXSWRWKH5),’]RQHVHHWKHLOOXVWUDWLRQLQWKHVHFWLRQ=$37(&3UR
7KHVWDWXVLQGLFDWRUZLOOwDVKJUHHQRQFHDXWKHQWLFDWLRQLVDSSURYHG
7KHVWDWXVLQGLFDWRUZLOOwDVKEOXHRQFHFKDUJLQJKDVVWDUWHG
If the status indicator is flashing red, see the Troubleshooting section for further details.
Start charging with authentication for automatic payment solution/operator

10
1. 7KHXVHUPXVWEHFUHDWHGDFWLYDWHGIRUWKHSD\PHQWVROXWLRQRSHUDWRUFRQFHUQHG
2. )ROORZWKHLQVWUXFWLRQVIURPWKHDSSOLFDEOHSD\PHQWVROXWLRQRSHUDWRUIRUDXWKHQWLFDWLRQDQGWR
VWDUWFKDUJLQJ
How to Stop Charging
1. 7RLQWHUUXSWWKHFKDUJLQJSURFHVV6WRSFKDUJLQJDVUHFRPPHQGHGLQ\RXUFDUVXVHUPDQXDO
2 ’LVFRQQHFWWKHFKDUJLQJFRQQHFWRUIURPWKHYHKLFOH
3. ’LVFRQQHFWWKHFKDUJLQJFRQQHFWRUIURPWKHFKDUJLQJVWDWLRQ
4. 3ODFHWKHSURWHFWLYHFRYHURYHUWKHFKDUJLQJSRLQWWROLPLWH[SRVXUHWRGXVWDQGUDLQ
Connecting a Charging Pass to your User
=$37(&3URVXSSRUWVWKHPRVWFRPPRQO\XVHGFKDUJLQJSDVVHV0LIDUH&ODVVLF,I\RXKDYHD
visually readable code, this can be added via ZAPTEC Portal or by scanning the charging pass
XVLQJWKHFKDUJLQJVWDWLRQDVGHVFULEHGEHORZ<RXUXVHUSURvOHPXVWKDYHDFFHVVWRWKHLQVWDOODWLRQ
\RXZLVKWRXVH7KLVPXVWEHGRQHE\DGPLQLQVWDOODWLRQRZQHULQ=$37(&3RUWDO
1. ’RZQORDGWKH=$37(&DSSIURP$SS6WRUH*RRJOH3OD\
2. 5HJLVWHUDVDXVHUDQGORJLQWRWKH=$37(&DSS
3. *RWRWKHPHQXVHOHFWXVHUSURvOHDQGDGGDQHZFKDUJLQJFDUG7KHQIROORZWKHLQVWUXFWLRQVLQ
WKH=$37(&DSS
How to Monitor the Charging Station (ZAPTEC Portal)
<RXFDQORJLQYLD=$37(&3RUWDOWRVHHDOO\RXUFKDUJLQJVWDWLRQVDQGDOOWKHFKDUJLQJVWDWLRQVWKDW
\RXDUHUHJLVWHUHGWRXVH,I\RXDUHWKHRZQHURIDQLQVWDOODWLRQ\RXFDQPRQLWRUDOOXVHDQG\RX
FDQXVHWKLVLQIRUPDWLRQWRVKDUHWKHHOHFWULFLW\FRVWIDLUO\7KHLQVWDOODWLRQRURZQHURIWKHLQVWDOODWLRQ
PXVWDGG\RXDVDXVHURIWKHLQVWDOODWLRQLQRUGHUIRU\RXWREHDEOHWRVHHWKHLQIRUPDWLRQ
/RJLQRUUHJLVWHUDVDQHZXVHUDWKWWSVSRUWDO]DSWHFFRP
Adding Users to the Installation
7KHLQVWDOODWLRQRZQHUFDQDGGXVHUVRIWKHV\VWHPE\JRLQJWRDFFHVV+HUHQHZXVHUVFDQEH
DGGHGLQYLWHGRUUHPRYHGIURPWKHV\VWHP7KLVDVVXPHVWKDWDXWKHQWLFDWLRQXVHUFRQWUROKDVEHHQ
DFWLYDWHGRQWKHLQVWDOODWLRQ

11
EN
Locking the Charging Cable for the Charging Station
7KHFKDUJLQJFDEOHFDQEHORFNHGSHUPDQHQWO\WRWKHFKDUJLQJVWDWLRQ7KLVIHDWXUHLVDFWLYDWHGYLD
WKH=$37(&DSS
1. /RJLQWRWKH=$37(&DSSFDQEHGRZQORDGHGIURP$SS6WRUH*RRJOH3OD\
2 *RWRVHWWLQJVDQGVHOHFWWKHGHVLUHGFKDUJLQJVWDWLRQ
3. Enter the PIN code for the charging station concerned and activate Lock cable for this charging
VWDWLRQ
This function is currently only available in the Android version of the ZAPTEC app.
Set Lighting Strength for the Status Indicator
•/RJLQWRWKH=$37(&DSS
•&OLFNRQWKHFRJLQWKHWRSULJKWKDQGFRUQHURIWKHDSSKRPHSDJH
•6HOHFWWKHFKDUJLQJVWDWLRQWKDW\RXZLVKWRDPHQGWKHVHWWLQJVIRU
•Enter the PIN code for the charging station
•The lighting strength can be adjusted by using the slider under ‘Lighting strength for status
LQGLFDWRU
Reading Error Codes
•/RJLQWRWKH=$37(&DSS
•&OLFNRQWKHFRJLQWKHWRSULJKWKDQGFRUQHURIWKHDSSKRPHSDJH
•6HOHFWWKHFKDUJLQJVWDWLRQWKDW\RXZDQWWRYLHZWKHHUURUFRGHIRU
•2QFHWKHDSSKDVFRQQHFWHGWRWKHFKDUJLQJVWDWLRQDUHGvHOGZLOOEHGLVSOD\HGZKHQWKH
FKDUJHUKDVDFWLYHHUURUFRGHV&OLFNRQWKLVvHOGWRVKRZWKHGHWDLOVRIWKHDFWLYHHUURUFRGHV

12
Troubleshooting
:DUQLQJVHUURUPHVVDJHVDUHGLVSOD\HGLQWKH=$37(&3RUWDO=$37(&$SS
Problem Solution
Cannot log on to the ZAPTEC
Portal 5HVHWSDVVZRUGE\FOLFNLQJRQ)RUJRWWHQ3DVVZRUG
Cannot create installation via
the ZAPTEC Portal &RQWDFW=$37(&6XSSRUWWRJDLQDFFHVVWRFUHDWHLQVWDOODWLRQV
Charging station is not online,
4G installation •0DNHVXUHWKDWWKHFKDUJLQJVWDWLRQLVQRWFRYHUHGE\DQ\WKLQJ
•7HVWWKHFRYHUDJHDWWKHLQVWDOODWLRQVLWHXVLQJ\RXURZQPRELOH
A mobile with a Telenor SIM has to be used for accurate
PHDVXUHPHQW
The charging station is not
online,
PLC installation
•&KHFNWKHQHWZRUNVHWXSRQWKHURXWHURUPRGHP
•Check that the internet is working by connecting the computer
GLUHFWO\WRWKHURXWHURUPRGHP
•1RWFRQvJXUHG
•Check that the PLC module has been installed in accordance with
the circuit diagram and on the same L1 and N as the charging
station(s)
The charging station is not
online,
:L)LLQVWDOODWLRQ
•&KHFNWKHQHWZRUNVHWXSRQWKHURXWHURUPRGHP
•Check that the internet is working by connecting the computer
GLUHFWO\WRWKHURXWHURUPRGHP
•’LVFRQQHFWRWKHUGHYLFHVZKLFKDUHFRQQHFWHGWR:L)LZKLFKFDQ
delay broadband speed
•&KHFNWKDWWKH66,’DQGWKHSDVVZRUGIRUWKH:L)LDUHFRUUHFW
•0DNHVXUH*+]LVDFWLYDWHGVRWKDW=$37(&3URREWDLQVD
QHWZRUNFRQQHFWLRQ6HH,QVWDOODWLRQUHTXLUHPHQWVSDJH
•(QWHUWKH66,’DQGSDVVZRUGPDQXDOO\E\VHOHFWLQJ2WKHULQWKH
QHWZRUNOLVW
Charging does not start &KHFNWKDWWKHXVHUSURvOHKDVDFFHVVWRFKDUJHRQWKHFKDUJLQJ
station
No power being supplied to
charging station •)ROORZWKHLQVWUXFWLRQVLQWKHVHFWLRQ&KHFNLQJWKH)XVHVLQWKH
Charging Station’
•Check the main fuse in the installation

13
EN
Serial number
HJ=35
,IWKHFKDUJLQJVWDWLRQKDVEHHQGLVFRQQHFWHGIURPWKHSRZHUQHWZRUNLWZLOOWDNHPLQXWHV
EHIRUHWKHFKDUJLQJVWDWLRQVWDUWVXSDJDLQ
i
Problem Solution
Cannot log on to the ZAPTEC
Portal 5HVHWSDVVZRUGE\FOLFNLQJRQ)RUJRWWHQ3DVVZRUG
Cannot create installation via
the ZAPTEC Portal &RQWDFW=$37(&6XSSRUWWRJDLQDFFHVVWRFUHDWHLQVWDOODWLRQV
Charging station is not online,
4G installation •0DNHVXUHWKDWWKHFKDUJLQJVWDWLRQLVQRWFRYHUHGE\DQ\WKLQJ
•7HVWWKHFRYHUDJHDWWKHLQVWDOODWLRQVLWHXVLQJ\RXURZQPRELOH
A mobile with a Telenor SIM has to be used for accurate
PHDVXUHPHQW
The charging station is not
online,
PLC installation
•&KHFNWKHQHWZRUNVHWXSRQWKHURXWHURUPRGHP
•Check that the internet is working by connecting the computer
GLUHFWO\WRWKHURXWHURUPRGHP
•1RWFRQvJXUHG
•Check that the PLC module has been installed in accordance with
the circuit diagram and on the same L1 and N as the charging
station(s)
The charging station is not
online,
:L)LLQVWDOODWLRQ
•&KHFNWKHQHWZRUNVHWXSRQWKHURXWHURUPRGHP
•Check that the internet is working by connecting the computer
GLUHFWO\WRWKHURXWHURUPRGHP
•’LVFRQQHFWRWKHUGHYLFHVZKLFKDUHFRQQHFWHGWR:L)LZKLFKFDQ
delay broadband speed
•&KHFNWKDWWKH66,’DQGWKHSDVVZRUGIRUWKH:L)LDUHFRUUHFW
•0DNHVXUH*+]LVDFWLYDWHGVRWKDW=$37(&3URREWDLQVD
QHWZRUNFRQQHFWLRQ6HH,QVWDOODWLRQUHTXLUHPHQWVSDJH
•(QWHUWKH66,’DQGSDVVZRUGPDQXDOO\E\VHOHFWLQJ2WKHULQWKH
QHWZRUNOLVW
Charging does not start &KHFNWKDWWKHXVHUSURvOHKDVDFFHVVWRFKDUJHRQWKHFKDUJLQJ
station
No power being supplied to
charging station •)ROORZWKHLQVWUXFWLRQVLQWKHVHFWLRQ&KHFNLQJWKH)XVHVLQWKH
Charging Station’
•Check the main fuse in the installation
Colour Meaning
NO LIGHT Charging station has not been activated in the ZAPTEC Portal, no power from the
SRZHUFLUFXLWLQFRUUHFWFRQQHFWLRQRUSURGXFWIDXOW&KHFNWKHVHULDOSURWHFWLRQLQ
WKHGLVWULEXWLRQFDELQHW
PURPLE 1RWXSGDWHGGXULQJFKDUJLQJ
GREEN •Check that the charging cable has been inserted into the charging station
FRUUHFWO\
•&KHFNWKDWWKHYHKLFOHKDVEHHQFRQvJXUHGWRVWDUWFKDUJLQJLPPHGLDWHO\
BLUE •&RPPXQLFDWLRQLVWDNLQJSODFHEHWZHHQWKHFKDUJLQJVWDWLRQDQGWKHYHKLFOH
•&KHFNZKHWKHUWKHYHKLFOHLVFRQvJXUHGWRVWDUWFKDUJLQJLPPHGLDWHO\
RED Flashing red light
•$XWKHQWLFDWLRQIDLOHG&KHFNWKDWWKH5),’WDJFKDUJLQJFDUGLVFRQQHFWHGWR
\RXUXVHUSURvOH
•$XWKHQWLFDWLRQIDLOHG&KHFNLQWKH=$37(&3RUWDOWKDW\RXUXVHUKDVDFFHVVWR
FKDUJHRQWKHFKDUJLQJVWDWLRQDQGRULQVWDOODWLRQFRQFHUQHG
Steady red light
•’LVFRQQHFWWKHFKDUJLQJFDEOH,IWKHVWDWXVLQGLFDWRULOOXPLQDWHVJUHHQ\RXFDQ
FRQQHFWWKHFKDUJLQJFDEOHDJDLQ,IFKDUJLQJGRHVQRWVWDUWDQGWKHLQGLFDWRU
illuminates red again, there may be a charging fault on the charging cable or
YHKLFOH
•If the status indicator lamp does not turn green after the charging cable has been
disconnected, you must check the fuses as described in the chapter ‘Checking
WKHIXVHVLQWKHFKDUJLQJVWDWLRQ
•$XWKHQWLFDWLRQIDLOHG&KHFNWKDWWKH5),’WDJFKDUJLQJFDUGLVFRQQHFWHGWR
\RXUXVHUSURvOH

14
Checking the Fuses in the Charging Station
1. Remove the front cover using the special tool (SmartKey) supplied with the charging station, and
WDNHRIIWKHIURQWFRYHU
2. &KHFNWKDWWKHIXVHVLQWKHIXVHZLQGRZKDYHQRWWULSSHGWKH\VKRXOGDOOIDFHXSZDUGV
3. ,IDQ\RIWKHIXVHVKDYHWULSSHGUHPRYHWKHIXVHFRYHUDQGwLSWKHIXVHVXSDJDLQ)LWWKHIXVH
FRYHUDVLQVWHSDQGDWWDFKWKHIURQWFRYHUDJDLQ
* If the charging station is mounted on a ZAPTEC Column, use SmartKey Column (supplied with the charging
column) to open the charging station.
1 2 3
Storage and Maintenance
7KHSURGXFWPXVWEHNHSWLQDGU\URRPZLWKDVWDEOHWHPSHUDWXUH7KHSURWHFWLYHFRYHUVKRXOG
DOZD\VEHRQLIWKHSURGXFWLVQRWLQXVH
The following periodic maintenance is recommended:
•:LSHGRZQWKHFKDUJLQJVWDWLRQZLWKDGDPSFORWK
•&KHFNWKDWWKHFKDUJLQJFRQQHFWRULVIUHHRIDOOIRUHLJQPDWHULDOV
•&KHFNWKDWWKHFKDUJLQJVWDWLRQKDVQRH[WHUQDOSK\VLFDOGDPDJH
,QWKHFDVHRISXEOLFO\DFFHVVLEOHLQVWDOODWLRQVDQDQQXDOLQVSHFWLRQPXVWEHFDUULHGRXWE\TXDOLvHG
SHUVRQQHOLQDFFRUGDQFHZLWK1RUZHJLDQOHJLVODWLRQDQGUHJXODWLRQV5HI1(.

15
EN
Warranty
We guarantee that the device is free from material faults and complies with applicable consumer
protection laws and regulations in the country in which the product was purchased or the consumer
UHVLGHV)XUWKHULQIRUPDWLRQDERXW\RXUULJKWVXQGHUFRQVXPHUOHJLVODWLRQDUHVHWRXWDW]DSWHFFRP
SULYDF\
Support and Repairs
,I\RXGLVFRYHUDQLVVXHSOHDVHUHDGWKH7URXEOHVKRRWLQJVHFWLRQSULRUWRFRQWDFWLQJ\RXUGLVWULEXWRU
LQVWDOOHU
Zaptec Charger AS collects data from the product via the network. More information on our
privacy guidelines can be found at zaptec.com/privacy.
i


17
FR
Nous vous remercions
d’avoir fait l’acquisition
d’un ZAPTEC Pro.
Un système de recharge norvégien. Ce
système est compatible avec tous les réseaux
électriques et avec tous les types de véhicules
rechargeables.*
ZAPTEC Pro vous permet de recharger votre véhicule
HQWRXWHV«FXULW«VLPSOHPHQWHWHIvFDFHPHQW/D
borne de recharge répartit le courant de charge
disponible entre un certain nombre de bornes de
UHFKDUJH
Utilisez votre ZAPTEC Pro avec une carte de recharge
ou via notre application ZAPTEC pour autoriser les
XWLOLVDWHXUVGDQVOLQVWDOODWLRQ9RXVREWLHQGUH]DLQVL
un aperçu de votre historique de facturation via notre
VHUYLFHVXUOHFORXGSRUWDLO=$37(&
Lorsque vous faites l’acquisition de ZAPTEC Pro,
vous achetez une borne de recharge qui reçoit
régulièrement des mises à jour logicielles
GHQRWUHVHUYLFHVXUOHFORXGDvQGHYRXVJDUDQWLUTXH
YRWUHERUQHGHUHFKDUJHHVWWRXMRXUV¢MRXU
* À condition que le véhicule soit compatible avec le type
de réseau électrique concerné.
&HPDQXHOGXWLOLVDWLRQHVWGHVWLQ«H[FOXVLYHPHQWDX[XWLOLVDWHXUVGHODERUQHGHUHFKDUJH3RXUHQ
VDYRLUSOXVVXUODSURF«GXUHGHFRQvJXUDWLRQHWGLQVWDOODWLRQGHODERUQHGHUHFKDUJHQRXVYRXV
LQYLWRQV¢FRQVXOWHUQRWUHPDQXHOGLQVWDOODWLRQ/DYHUVLRQODSOXVU«FHQWHGHFHPDQXHOGLQVWDOODWLRQ
est disponible sur zaptec.com/support.
/HQXP«URGHYHUVLRQGHFHPDQXHOGXWLOLVDWLRQHVWLQGLTX«¢ODGHUQL“UHSDJH
i

18
Table des matières
Consignes de sécurité 19
Caractéristiques techniques 20
ZAPTEC Pro 22
Indicateurs d’état sur la borne de recharge 22
Type de câble pour le ZAPTEC Pro 23
Comment démarrer la recharge 23
&RPPHQWG«PDUUHUODUHFKDUJHDYHFODXWKHQWLvFDWLRQ
Comment arrêter la recharge 24
$VVRFLDWLRQGXQHFDUWHGHUHFKDUJH¢YRWUHSURvOGXWLOLVDWHXU
Comment superviser la borne de recharge (Portail ZAPTEC) 24
Ajout d’utilisateurs à l’installation 25
9HUURXLOODJHGXF⁄EOHGHUHFKDUJHSRXUOHVERUQHVGHUHFKDUJH
Réglage de la luminosité de l’indicateur d’état 25
Lecture des codes d’erreur 25
’«SDQQDJH
Contrôle des fusibles dans la borne de recharge 28
Stockage et entretien 28
Garantie 29
Assistance et réparations 29

19
FR
Consignes de sécurité
AVERTISSEMENT !
Avant d’utiliser ou de procéder à l’entretien de ce produit, il est
impératif de prendre connaissance des consignes de sécurité
suivantes. La non-observation et la non-mise en œuvre de toutes
les prescriptions et procédures annule toute garantie et libère la
société Zaptec Charger AS de toute responsabilité et de toute
réclamation.
!Nous vous invitons à lire attentivement et dans leur intégralité
familiariser avec ce produit avant de l’utiliser.
!L’installation, la réparation et l’entretien de cet équipement ne
!Toutes les règlementations locales, régionales et nationales
applicables doivent être respectées pour l’installation, la
réparation et l’entretien de cet équipement.
!N’utilisez pas ce produit s’il présente des dommages.
Reportez-vous à la section Assistance et Réparations pour
obtenir plus d’informations.
!Il ne faut pas utiliser de rallonge pour le câble de recharge.
!étrangers.
!
Veuillez contacter votre électricien pour effectuer les tests.

20
ZAPTEC Pro est une borne de recharge murale
ou sur colonne à courant alternatif, conforme à
ODQRUPH&(,(96(PRGH
Dimensions et poids
H : 392 mm, L : 258 mm, P : 112 mm
Poids : environ 5 kg (plaque arrière comprise)
Installation / Circuit
3URWHFWLRQGHODSODTXHDUUL“UHPD[LPXP
$VXUOHFLUFXLWGLQVWDOODWLRQSRXUERUQHVGH
UHFKDUJH
Raccordement de la plaque arrière
Section de câble 2,5-10 mm²
Diamètre de câble 10-20 mm2
Réseau d’installation
TN, IT et TT
Tensions
9$&s
9$&s
Puissance de charge maximale
7,36 kW* à 32A monophasé
22 kW à 32A triphasé
5 W en stand-by
Protection contre les surcharges et les
courts-circuits
Disjoncteur de protection de ligne 3 x 40 A
type C intégré
Prise de charge
&(,W\SHIHPHOOHDYHF
REWXUDWHXUDXWREORTXDQWLQW«JU«
Prise de type 2 avec couvercle à
fermeture automatique
Protection contre les défauts à la terre
’LVMRQFWHXUGLII«UHQWLHOLQW«JU«5&’W\SH%
Le calibrage et l’auto-test sont effectués
DYDQWFKDTXHF\FOHGHFKDUJH/HGLVMRQFWHXU
différentiel est automatiquement réinitialisé
ORUVTXHOHF⁄EOHGHFKDUJHHVWG«EUDQFK«
Démarrage progressif
Limite le courant de démarrage au début de la
UHFKDUJH
Compteur électronique intégré
0,’WHVW«HWFDOLEU«
Protection antivol
Le capot avant du ZAPTEC Pro ne peut être
RXYHUWTXDYHFXQRXWLOVS«FLDO/HF⁄EOHGH
recharge peut être verrouillé en permanence sur
ODERUQHGHUHFKDUJH
Équilibre de phase
En fonction de la capacité de charge du
véhicule (1, 2 ou 3 phases), l’équilibrage de
phase garantit que les trois phases de la ligne
d’alimentation commune sont chargées de
PDQL“UHRSWLPDOHHWV\P«WULTXH
Gestion de la charge
La gestion intelligente des bornes de recharge
connectées garantit que la capacité disponible
dans le bâtiment et pour l’infrastructure de
recharge peut être utilisée de manière optimale
HWTXHOLQVWDOODWLRQQHVWSDVVXUFKDUJ«H
Interface de communication, connexion au
réseau et au cloud
*/7(0ODERQQHPHQWYLD1RYD9ROWSHXW
‹WUHDFWLY«DXSU“VGXQIRXUQLVVHXUv[H
:/$1*+],(((EJQFDQDX[
1-11)
Courant porteur (CPL) - HomePlug Green
3+<p0ESV
Identification et configuration
%OXHWRRWKEDVVH«QHUJLH%/(
/HFWHXU5),’1)&
,62&3/SRXUOHVIXWXUVVHUYLFHV
d’interface avec les véhicules)
Normes et approbations
Conformité à la directive CE sur l’équipement
radio
’LUHFWLYH8(HW52+6
8(HWFRQIRUP«PHQW¢&(,7896’
HW&(,
Plage de température
r&¢r&
Caractéristiques techniques
Other manuals for Pro
6
This manual suits for next models
1
Table of contents
Languages:
Other ZAPTEC Automobile Accessories manuals

ZAPTEC
ZAPTEC Go User manual

ZAPTEC
ZAPTEC ZapCharger Portable C1 User manual

ZAPTEC
ZAPTEC Pro User manual

ZAPTEC
ZAPTEC Go User manual

ZAPTEC
ZAPTEC Go User manual

ZAPTEC
ZAPTEC Pro User manual

ZAPTEC
ZAPTEC Pro User manual

ZAPTEC
ZAPTEC Column Standard User manual

ZAPTEC
ZAPTEC Go User manual

ZAPTEC
ZAPTEC Go User manual